Angel food cake, with its ethereal lightness and delicate sweetness, truly lives up to its name. Legend has it that this cloud-like confection was deemed “food of the angels” for its heavenly texture. While its origins may be debated – perhaps some birthday-celebrating angels did borrow the recipe from Earth! – one thing remains undisputed: the key to achieving that signature airy perfection lies in the right baking tool – the Angel Food Cake Pan.
But what exactly makes an angel food cake pan so special, and why can’t you just use any cake pan? Let’s delve into the essential features of this baking must-have and unlock the secrets to baking angel food cake that’s truly divine.
The Anatomy of an Angel Food Cake Pan: Design for Deliciousness
Unlike your standard cake pans, an angel food cake pan is designed with specific characteristics that are crucial for the unique texture of angel food cake. These pans typically feature:
- Tube Pan Design: The most distinctive feature is the central tube. This hollow core allows heat to circulate evenly during baking, ensuring the cake cooks uniformly from the inside out. This even heat distribution is vital for the cake to rise properly and achieve its signature light and airy crumb.
- Ungreased Sides: This is perhaps the most counter-intuitive aspect for many bakers, but absolutely essential. Angel food cake batter relies on clinging to the sides of the pan to climb and rise to its maximum height. Grease would prevent the batter from adhering, resulting in a flat, dense cake.
- Removable Bottom (Optional but Recommended): Many angel food cake pans come with a removable bottom. This feature is incredibly helpful for inverting the cake to cool upside down – a critical step to prevent it from collapsing – and for easy cake removal without damaging its delicate structure.
- Aluminum Construction: Typically made of lightweight aluminum, these pans promote even heating and cooling, contributing to the cake’s consistent texture.
Why You Need a Dedicated Angel Food Cake Pan
While you might be tempted to substitute with a bundt pan or another type of tube pan, using a dedicated angel food cake pan truly makes a difference. Here’s why:
- Optimal Rise: The straight, ungreased sides of an angel food cake pan are specifically engineered to provide the necessary traction for the delicate egg white batter to climb and achieve its maximum volume during baking.
- Light and Airy Texture: The central tube ensures even heat distribution, preventing dense spots and promoting the signature light and airy texture that defines angel food cake.
- Preventing Collapse: The design facilitates inverting the cake for cooling, which is crucial. Cooling upside down allows gravity to work in your favor, preventing the delicate cake from sinking or collapsing as it cools.
Beyond the Traditional: Exploring Angel Food Cake Pan Variations
While the classic tube pan is the standard, you can find variations of the angel food cake pan to suit different baking needs and preferences:
- Sizes: Angel food cake pans come in various sizes, typically ranging from 9 to 10 inches in diameter. Choose a size that matches your recipe and desired serving size.
- Materials: While aluminum is traditional, you can also find angel food cake pans made of non-stick materials. However, for true purists, ungreased aluminum is still preferred for optimal rise.
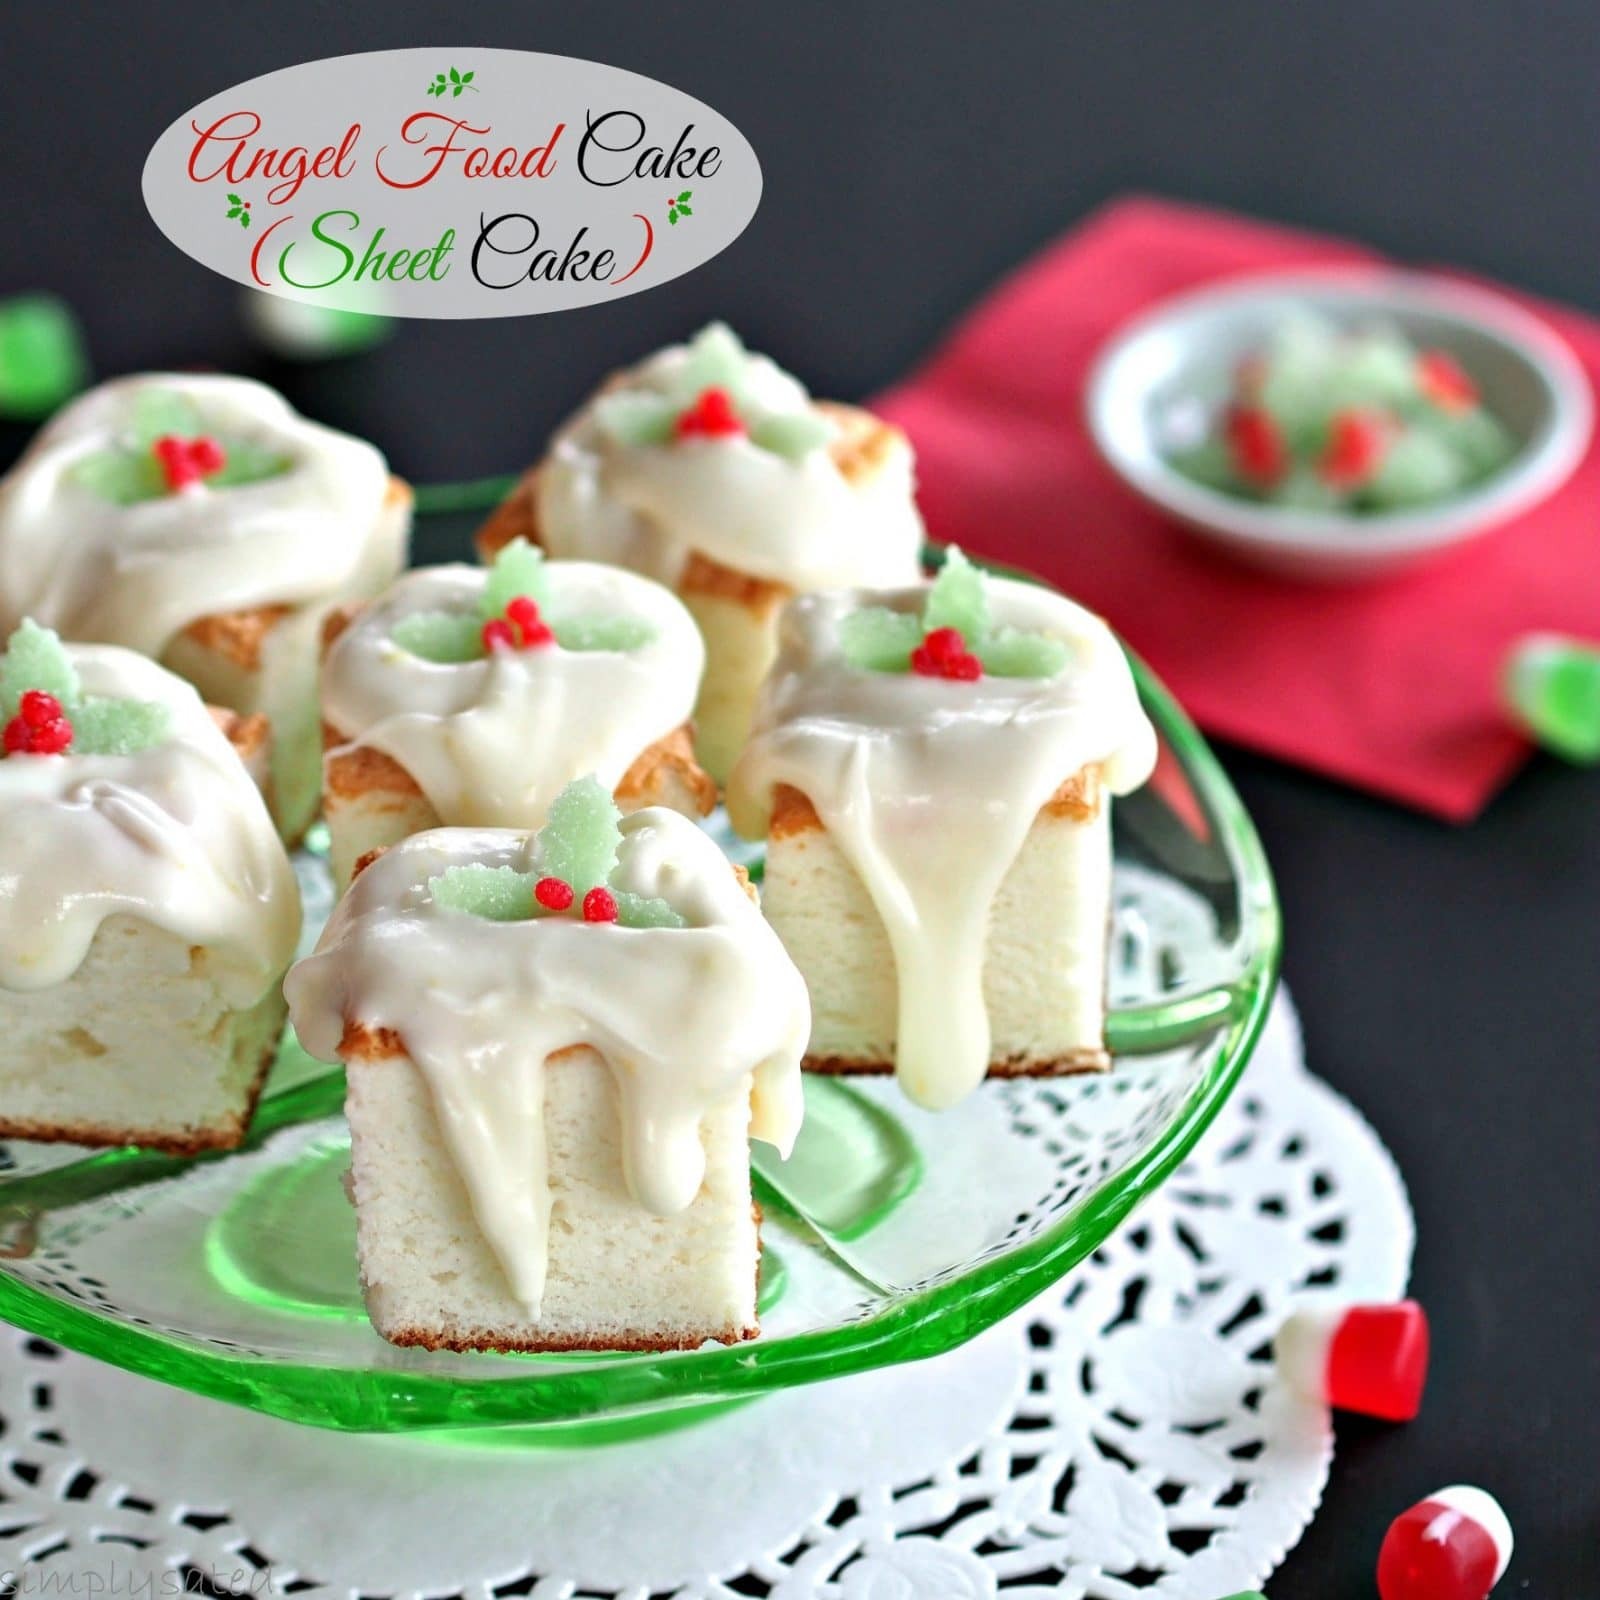
- Sheet Cake Pans for Angel Food Cake: For a twist on the classic, you can even adapt angel food cake for a sheet cake pan, as demonstrated in this recipe. While it may be slightly denser than a traditional tube-baked version, it still captures the essence of angel food cake and is perfect for serving a crowd.
Tips for Baking Angel Food Cake with Your Pan
Mastering the angel food cake pan is easy with these helpful tips:
- No Grease Zone: Resist the urge to grease the pan! A properly prepared angel food cake pan is ungreased.
- Cooling Upside Down is Key: Immediately after baking, invert the pan onto a wire rack or bottle neck. Let it cool completely upside down for at least an hour. This prevents the cake from falling.
- Releasing the Cake: Once cooled, run a thin knife or spatula along the sides of the pan to release the cake. If using a pan with a removable bottom, gently push the bottom up to release the cake.
- Serving Suggestions: Angel food cake is delightful on its own or paired with fresh berries, whipped cream, fruit glazes like lemon, or even a decadent cream cheese frosting as shown in the recipe below.
Indulge in Heavenly Flavors: Angel Food Sheet Cake Recipe
Ready to put your angel food cake pan (or sheet pan!) to good use? Try this delightful Angel Food Sheet Cake recipe with a luscious Lemon-Cream Cheese Frosting:
(Link to recipe instructions below – keep recipe instructions as in original post)
This recipe, adapted from a Southern Living Magazine classic, offers a slightly richer take on traditional angel food cake, perfect for celebrations or simply a sweet treat. Top it with the bright and tangy Lemon-Cream Cheese Frosting and perhaps some festive Holly Cupcake Decorations for an extra touch of whimsy!
Conclusion: Elevate Your Baking with the Right Pan
The angel food cake pan is more than just a baking dish; it’s an essential tool for achieving the light, airy perfection of angel food cake. Its unique design features, from the central tube to the ungreased sides, work in harmony to create a truly heavenly dessert. Whether you opt for a classic tube pan or explore sheet cake variations, investing in a quality angel food cake pan will undoubtedly elevate your baking and allow you to create angelic delights in your own kitchen. So, dust off your pan, gather your ingredients, and prepare to bake a cake that’s truly fit for angels!
(Recipe Section – as in original article, starting from “Angel Food Cake (Sheet Cake)” title)
Angel Food Cake (Sheet Cake)
Angel Food Cake in sheet cake form topped with Lemon-Cream Cheese Frosting – Original recipe by Southern Living: http://www.myrecipes.com/recipe/heavenly-angel-food-cake.
Course Cake, Dessert
Prep Time 15 minutes
Cook Time 30 minutes
Total Time 45 minutes
Servings 16 -20
Author Susie Gall
Ingredients
- For the Cake:
- 2 1/2 cups sugar
- 1 1/2 cups all-purpose flour
- 1/4 teaspoon salt
- 2 1/2 cups egg whites 12-16 (use fresh egg whites only)
- 1 teaspoon cream of tartar
- 1 teaspoon vanilla extract
- 1 teaspoon fresh lemon juice
-
- For the Lemon-Cream Cheese Frosting:
- 1 1/2 8-oz. packages cream cheese, softened
- 1/4 cup butter softened
- 1/4 cup fresh lemon juice
- 1 16-oz. package powdered sugar
- 2 teaspoons lemon zest
-
- For the Holly Cupcake Decorations:
- http://www.simplysated.com/holly-cupcake-decorations/
Instructions
- For the Cake:
- Preheat oven to 375F. Position the oven rack 1/3 from the bottom of the oven.
- Line a 13 x 9-inch pan with aluminum foil – allowing 2” overlap over the sides of the pan. Do NOT grease the pan or the foil.
- Sift together sugar, flour & salt. Set aside.
- With an electric mixer, beat egg white & cream of tartar on high until stiff peaks form.
- Slowly, fold in the sugar/flour mixture, 1/3 cup at a time. Do not overmix – fold only until just blended after each addition.
- Carefully, fold in vanilla and lemon juice.
- Gently spoon batter into prepared pan. Note – batter will reach to the top or almost to the top of the pan.
- Place the pan in the preheated 375F oven.
- Bake 30-35 minutes or until a toothpick inserted in the middle comes out clean.
- Remove the cake from the oven and turn over and onto a very lightly floured (clean) cloth or onto a wire cooling rack that has been sprayed with cooking oil.
- Let the cake cool with the pan in place until completely cooled – approximately 1 hour.
- Once cake has cooled, remove the pan and peel off the foil.
- Spread Lemon-Cream Cheese Frosting over the entire cake or cut the cake into pieces then frost.
- Garnish with Holly Cupcake Decorations.
- *See Notes for baking in other pans.
-
- For the Lemon-Cream Cheese Frosting:
- Using a stand-mixer, beat cream cheese & butter at medium speed until creamy and light.
- Add lemon juice and beat just until blended.
- Gradually add powdered sugar on low speed just until blended then stir in lemon zest.
Recipe Notes
This cake can be baked in an ungreased angel food cake pan – 30-35 minutes.or…in 3 ungreased 9-inch round pans – 15-18 minutes or until a toothpick inserted in the middle comes out clean.
[
