Can You Dye Clothes With Food Coloring? Yes, you can absolutely dye clothes with food coloring, offering a fun and accessible way to add color to your fabrics. FOODS.EDU.VN is here to guide you through the process, ensuring vibrant and lasting results. Discover how to transform your wardrobe with simple techniques, explore different color combinations, and learn the best practices for using food coloring as a fabric dye, creating unique, colorful garments with ease while also exploring techniques like garment dyeing and tie dye.
1. Understanding the Basics of Dyeing with Food Coloring
Dyeing fabric with food coloring is a surprisingly effective method for adding a pop of color to your clothes and textiles. It’s an accessible and relatively inexpensive way to experiment with color without the commitment of professional dyes. However, it’s essential to understand the nuances of this technique to achieve the best results.
1.1. What Types of Fabric Work Best?
Food coloring works best on protein-based fibers such as:
- Wool: Wool absorbs food coloring exceptionally well, resulting in vibrant and long-lasting colors.
- Silk: Silk is another excellent choice, offering a beautiful sheen and taking up color readily.
- Cashmere: Similar to wool, cashmere provides a luxurious base for food coloring dyes.
- Nylon: A synthetic fiber that can also be effectively dyed with food coloring, offering a range of possibilities.
Cellulose fibers like cotton, linen, and rayon can be dyed with food coloring, but the results may not be as vibrant or long-lasting. These fabrics require a mordant (a substance that helps the dye bind to the fabric) for better color absorption. According to a study by the University of Leeds, pretreating cotton with a cationic mordant can significantly improve the uptake of acid dyes, which share similar properties with food coloring.
1.2. Types of Food Coloring to Use
When it comes to food coloring, you have several options:
- Liquid Food Coloring: This is the most common and readily available type, found in most supermarkets. However, it tends to be less concentrated, so you may need to use more to achieve your desired color intensity.
- Gel Food Coloring: Gel food coloring is more concentrated than liquid, so a little goes a long way. It’s available in a wide range of colors and is ideal for achieving vibrant, saturated hues. Wilton’s food coloring gel is a popular choice, known for its high quality and color intensity.
- Powdered Food Coloring: Powdered food coloring is the most concentrated form, offering the most intense colors. It needs to be dissolved in water before use and can be a bit trickier to work with than liquid or gel.
1.3. Essential Supplies for Dyeing
Before you begin, gather the following supplies:
- Food Coloring: Choose your desired colors and types.
- White Vinegar: This acts as a mordant, helping the dye bind to the fabric and preventing it from washing out.
- Water: For diluting the food coloring and soaking the fabric.
- Pots and Pans: Stainless steel or enamel pots are best to avoid any reactions with the dye.
- Rubber Gloves: Protect your hands from staining.
- Spoon or Tongs: For stirring and handling the fabric.
- Heat Source: A stovetop or microwave can be used for heating the dye bath.
- Plastic Sheet or Drop Cloth: To protect your work surface.
- Containers for Mixing: For preparing the dye solutions.
1.4. Safety Precautions
While food coloring is generally safe, it’s essential to take certain precautions:
- Wear Gloves: Always wear rubber gloves to prevent staining your hands.
- Protect Your Work Surface: Cover your work area with a plastic sheet or drop cloth to avoid staining.
- Ventilation: Work in a well-ventilated area to avoid inhaling any fumes.
- Avoid Contact with Eyes: If food coloring comes into contact with your eyes, rinse immediately with water.
- Keep Out of Reach of Children: Store food coloring and dyeing supplies out of reach of children.
2. Step-by-Step Guide to Dyeing Clothes with Food Coloring
Now that you have a basic understanding of dyeing with food coloring, let’s dive into the step-by-step process.
2.1. Preparing the Fabric
Proper preparation is crucial for achieving even and vibrant color. Follow these steps:
- Wash the Fabric: Wash the fabric thoroughly to remove any dirt, oils, or finishes that may interfere with dye absorption.
- Soak in Vinegar Solution: In a large container, mix water with white vinegar. A good ratio is ¼ cup (60ml) of vinegar per 100g of fabric. Submerge the fabric in the solution, ensuring it’s fully saturated. Let it soak for at least 30 minutes, or up to a few hours. The vinegar helps to open up the fibers, allowing the dye to penetrate more effectively.
- Wring Out Excess Liquid: After soaking, gently wring out the excess vinegar solution from the fabric. Be careful not to twist or stretch the fabric excessively, as this can distort its shape.
2.2. Mixing the Dye Solution
The key to achieving your desired color lies in properly mixing the dye solution. Here’s how:
- Heat Water: Heat water in a kettle or microwave until it’s hot but not boiling.
- Prepare Dye Baths: In separate containers, add a small amount of hot water (about 1 cup) to each container. Add the food coloring to the hot water, starting with a small amount and gradually adding more until you achieve your desired color intensity. Remember, you can always add more color, but you can’t take it away.
- Mix Thoroughly: Stir the dye solution thoroughly until the food coloring is completely dissolved and evenly distributed. This will ensure a consistent color throughout the dyeing process.
- Strain the Dye (Optional): If you’re using powdered food coloring, you may want to strain the dye solution through a fine-mesh sieve to remove any undissolved particles. This will help prevent spotting or unevenness in the final result.
2.3. Dyeing the Fabric
With the fabric prepped and the dye solution ready, it’s time to start dyeing!
- Fill a Pot with Water: Fill a stainless steel or enamel pot with enough water to fully submerge the fabric.
- Add Vinegar: Add a few tablespoons of white vinegar to the water. This will help to further set the color and prevent bleeding.
- Pour in the Dye Solution: Pour the dye solution into the pot, stirring gently to distribute it evenly.
- Add the Fabric: Carefully add the fabric to the pot, making sure it’s fully submerged in the dye bath. Use a spoon or tongs to gently push the fabric down if necessary.
- Heat the Dye Bath: Place the pot on the stovetop and heat the dye bath over medium heat. Bring it to a gentle simmer, but avoid boiling, as this can damage the fabric and cause the dye to set unevenly.
- Simmer the Fabric: Simmer the fabric in the dye bath for about 20-30 minutes, or until it reaches your desired color intensity. Stir the fabric occasionally to ensure even dyeing.
- Check the Color: After 20-30 minutes, remove a small portion of the fabric from the dye bath and rinse it under cold water. This will give you a better idea of the final color. If it’s not dark enough, return the fabric to the dye bath and continue simmering for another 10-15 minutes.
- Remove from Heat: Once the fabric has reached your desired color, remove the pot from the heat and let it cool slightly.
2.4. Rinsing and Washing
Proper rinsing and washing are essential for removing excess dye and setting the color.
- Cool the Fabric: Allow the fabric to cool completely in the dye bath before handling it. This will help prevent the color from bleeding or running.
- Rinse Under Cold Water: Once the fabric is cool, remove it from the dye bath and rinse it under cold water until the water runs clear. This may take several minutes, so be patient.
- Wash Separately: Wash the dyed fabric separately from other clothes in cold water with a mild detergent. This will help to prevent any remaining dye from transferring to other items.
- Dry the Fabric: Tumble dry the fabric on low heat or hang it to dry. Avoid drying it in direct sunlight, as this can cause the color to fade.
2.5. Tips for Vibrant and Lasting Color
To ensure your dyed clothes stay vibrant and beautiful, keep these tips in mind:
- Use High-Quality Food Coloring: Invest in high-quality food coloring for the best results. Gel food coloring is generally more concentrated and produces more vibrant colors than liquid food coloring.
- Add Enough Vinegar: Vinegar is crucial for helping the dye bind to the fabric. Be sure to add enough vinegar to both the soaking solution and the dye bath.
- Don’t Overcrowd the Pot: Make sure the fabric has enough room to move freely in the dye bath. Overcrowding the pot can result in uneven dyeing.
- Stir Regularly: Stir the fabric regularly during the dyeing process to ensure even color distribution.
- Wash in Cold Water: Always wash dyed clothes in cold water to prevent the color from fading.
- Avoid Harsh Detergents: Use a mild detergent specifically designed for delicate fabrics to avoid stripping the color.
- Dry on Low Heat: Tumble dry on low heat or hang to dry to prevent fading.
- Consider Color Fastness: Understand that food coloring may not be as colorfast as professional dyes. Some fading may occur over time, especially with repeated washing.
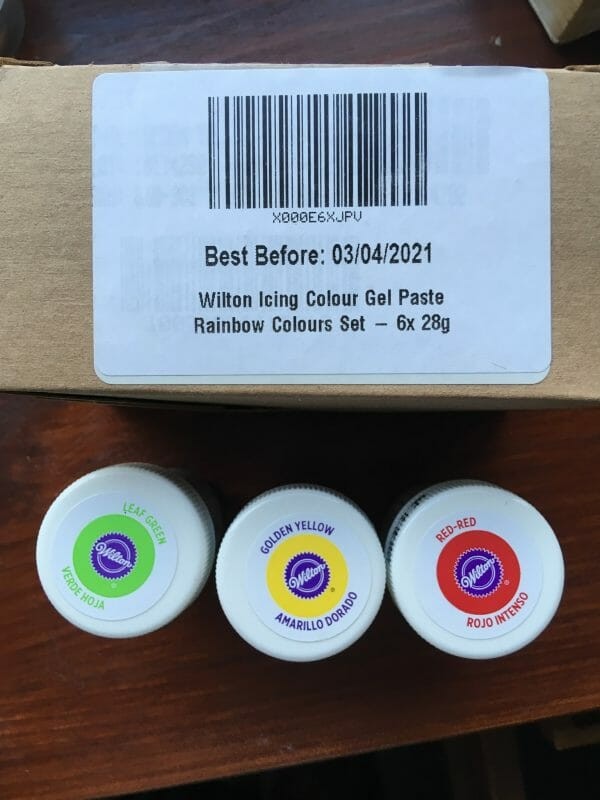 Wool and silk dyeing with golden yellow food coloring
3. Creative Dyeing Techniques with Food Coloring
Beyond basic dyeing, food coloring opens the door to a world of creative techniques. Let’s explore some exciting options:
3.1. Tie-Dyeing
Tie-dyeing with food coloring is a fun and easy way to create unique, vibrant patterns. Here’s how to do it:
- Prepare the Fabric: Wash and soak the fabric in a vinegar solution as described in Section 2.1.
- Twist and Bind: Twist, fold, and bind the fabric using rubber bands or string. The more tightly you bind the fabric, the more white space you’ll have in your design.
- Apply the Dye: Using a squeeze bottle or syringe, apply different colors of food coloring to the bound fabric. Get creative with your color combinations and placement.
- Let it Sit: Place the dyed fabric in a plastic bag or container and let it sit for several hours, or overnight, to allow the colors to fully penetrate the fabric.
- Rinse and Wash: Rinse and wash the fabric as described in Section 2.4.
- Unbind and Reveal: Once the fabric is dry, unbind it to reveal your tie-dyed masterpiece.
3.2. Dip-Dyeing (Ombré)
Dip-dyeing, also known as ombré dyeing, creates a gradient effect with color gradually fading from dark to light. Here’s how to achieve this stylish look:
- Prepare the Fabric: Wash and soak the fabric in a vinegar solution as described in Section 2.1.
- Prepare the Dye Bath: Prepare a dye bath with your desired color, following the instructions in Section 2.2.
- Dip the Fabric: Dip the bottom portion of the fabric into the dye bath, immersing it to your desired depth.
- Hold for a Few Minutes: Hold the fabric in the dye bath for a few minutes, allowing the color to absorb.
- Raise Gradually: Slowly raise the fabric out of the dye bath, a little bit at a time, holding it at each level for a few seconds. This will create a gradual fading effect.
- Rinse and Wash: Rinse and wash the fabric as described in Section 2.4.
3.3. Space Dyeing
Space dyeing is a technique that involves applying dye in a non-uniform manner, creating a variegated effect. This method is particularly well-suited for yarns and can add depth and texture to your projects.
- Prepare the Yarn: Soak the yarn in a solution of water and clear vinegar for a few hours, as outlined in Section 2.1.
- Squeeze Out Excess Liquid: Gently squeeze the liquid from the yarn to prepare it for dyeing.
- Lay the Yarn: Lay the yarn onto a plastic sheet or a similar non-porous surface to protect your work area.
- Apply the Dye: Using a cocktail stick or a syringe, apply the dye directly onto the yarn. Be mindful that some colors may mix, potentially creating new shades where they overlap. For instance, placing yellow next to blue might result in green hues.
- Steam the Yarn: Place the yarn in a steamer and steam it for approximately 20 minutes. Moving the yarn around slightly can encourage the colors to merge, creating a more blended effect.
- Cool and Rinse: Remove the yarn from the steamer and allow it to cool. Once cooled, rinse it thoroughly as described in Section 2.4.
3.4. Painting with Food Coloring
For intricate designs and personalized touches, consider painting directly onto the fabric with food coloring.
- Prepare the Fabric: Wash and iron the fabric to create a smooth surface.
- Mix the Paint: In small containers, mix food coloring with a small amount of water to create a paint-like consistency. You can also add a drop or two of white vinegar to help set the color.
- Paint Your Design: Using a paintbrush, carefully paint your design onto the fabric.
- Let it Dry: Allow the paint to dry completely.
- Heat Set: Once the paint is dry, heat-set the design by ironing it on low heat with a pressing cloth.
- Wash Gently: Hand-wash the fabric gently in cold water with a mild detergent.
4. Troubleshooting Common Dyeing Problems
Even with careful preparation, dyeing can sometimes present challenges. Here are some common problems and how to solve them:
4.1. Uneven Color
- Cause: Uneven color can result from several factors, including insufficient stirring, overcrowding the pot, or inadequate fabric preparation.
- Solution: Ensure the fabric has enough room to move freely in the dye bath, stir it regularly, and make sure it’s fully submerged. Proper soaking in a vinegar solution is also crucial for even color absorption.
4.2. Fading Color
- Cause: Fading color is often due to improper color setting or washing the fabric in hot water.
- Solution: Use enough vinegar in the dye bath to help set the color, and always wash dyed clothes in cold water with a mild detergent. Avoid drying them in direct sunlight.
4.3. Bleeding Color
- Cause: Bleeding color occurs when excess dye is not properly rinsed out of the fabric.
- Solution: Rinse the fabric thoroughly under cold water until the water runs clear. Wash the dyed fabric separately from other clothes to prevent any remaining dye from transferring.
4.4. Unexpected Color
- Cause: Unexpected colors can result from mixing colors that react in unpredictable ways.
- Solution: Test your color combinations on a small swatch of fabric before dyeing your entire garment. Refer to a color wheel for guidance on color mixing.
5. Exploring the Science Behind Dyeing with Food Coloring
The art of dyeing with food coloring isn’t just about aesthetics; it also involves some fascinating chemistry. Understanding the science behind the process can help you achieve better results and troubleshoot potential problems.
5.1. The Role of Mordants
A mordant is a substance used to set dyes on fabrics by forming a coordination complex with the dye, which then attaches to the fabric. In the case of food coloring, white vinegar acts as a mordant. The acetic acid in vinegar helps to:
- Prepare the Fabric: Vinegar helps to swell the fibers of the fabric, allowing the dye molecules to penetrate more easily.
- Promote Dye Adhesion: It aids in the formation of chemical bonds between the dye molecules and the fabric fibers.
- Prevent Color Bleeding: By creating a stronger bond between the dye and the fabric, vinegar helps to prevent the color from washing out during rinsing and washing.
5.2. Protein Fibers vs. Cellulose Fibers
The type of fiber plays a significant role in how well it absorbs food coloring. Protein fibers like wool, silk, and cashmere have an affinity for acid dyes, which share similar properties with food coloring. These fibers have chemical groups that can form strong bonds with the dye molecules, resulting in vibrant and long-lasting color.
Cellulose fibers like cotton, linen, and rayon, on the other hand, are less receptive to acid dyes. They lack the chemical groups necessary for strong bonding, so the dye tends to wash out more easily. To improve dye uptake on cellulose fibers, a cationic mordant is often used.
5.3. Colorfastness and Lightfastness
Colorfastness refers to the resistance of a dye to fading or running when exposed to washing, rubbing, or other factors. Lightfastness refers to the resistance of a dye to fading when exposed to light.
Food coloring is generally not as colorfast or lightfast as professional dyes. This means that dyed fabrics may fade over time, especially with repeated washing or exposure to sunlight. To minimize fading, it’s important to use high-quality food coloring, set the color properly with vinegar, and wash the fabric in cold water with a mild detergent.
6. Advanced Techniques and Tips for Dyeing
For those looking to take their dyeing skills to the next level, here are some advanced techniques and tips:
6.1. Color Mixing and Blending
Experiment with color mixing to create custom shades and unique effects. Use a color wheel as a guide, and always test your color combinations on a small swatch of fabric before dyeing your entire garment.
- Primary Colors: Red, yellow, and blue are the primary colors. You can mix these colors to create a wide range of secondary and tertiary colors.
- Secondary Colors: Green, orange, and purple are the secondary colors. They are created by mixing two primary colors together (e.g., red + blue = purple).
- Tertiary Colors: These colors are created by mixing a primary color with a neighboring secondary color (e.g., red + orange = red-orange).
6.2. Using Resist Techniques
Resist techniques involve blocking certain areas of the fabric from the dye, creating intricate patterns and designs. Some popular resist techniques include:
- Batik: This technique involves applying wax to the fabric to create a resist, then dyeing the fabric. The wax is later removed to reveal the design.
- Shibori: This Japanese technique involves folding, twisting, and binding the fabric to create a resist. The fabric is then dyed, and the bindings are removed to reveal the pattern.
- Screen Printing: This technique involves using a stencil to apply dye to the fabric, creating a precise and repeatable design.
6.3. Overdyeing
Overdyeing involves dyeing a fabric that has already been dyed, creating a layered and complex color effect. This technique can be used to:
- Correct Mistakes: If you’re unhappy with the color of a dyed garment, you can overdye it to achieve your desired shade.
- Create Depth and Dimension: Overdyeing can add depth and dimension to your designs by creating subtle variations in color.
- Transform Existing Garments: You can use overdyeing to give old or faded garments a new lease on life.
6.4. Eco-Friendly Dyeing Practices
To minimize the environmental impact of your dyeing projects, consider these eco-friendly practices:
- Use Natural Food Coloring: Opt for food coloring made with natural ingredients, such as vegetable dyes.
- Reduce Water Usage: Use the minimum amount of water necessary for your dyeing projects.
- Dispose of Dye Waste Responsibly: Do not pour dye waste down the drain. Instead, dispose of it properly according to local regulations.
- Upcycle and Repurpose: Give new life to old clothes and fabrics by dyeing them instead of throwing them away.
7. Case Studies and Examples of Successful Food Coloring Dyeing
To further illustrate the possibilities of dyeing with food coloring, let’s look at some inspiring case studies and examples:
7.1. DIY Tie-Dyed T-Shirts
A group of students used food coloring to create tie-dyed T-shirts for a school fundraiser. They experimented with different color combinations and binding techniques, resulting in a collection of unique and vibrant shirts that were a hit with students and parents alike.
7.2. Upcycled Denim Jacket
A fashion designer transformed a plain denim jacket into a one-of-a-kind piece by dyeing it with food coloring. She used a combination of dip-dyeing and painting techniques to create a stunning ombré effect with intricate floral designs.
7.3. Hand-Dyed Wool Yarn
A fiber artist used food coloring to dye wool yarn for a knitting project. She created a custom color palette by mixing different shades of food coloring, resulting in a beautiful and harmonious yarn that added depth and texture to her knitted creation.
8. Expert Opinions and Research on Dyeing with Food Coloring
While dyeing with food coloring is a popular DIY technique, it’s important to consider expert opinions and research to gain a deeper understanding of its effectiveness and limitations.
8.1. Textile Experts
Textile experts generally agree that food coloring can be a fun and accessible way to dye fabrics, especially for small-scale projects and beginners. However, they also caution that food coloring is not as colorfast or lightfast as professional dyes, and some fading may occur over time.
8.2. Scientific Studies
While there is limited scientific research specifically on dyeing with food coloring, studies on acid dyes (which share similar properties with food coloring) provide valuable insights. These studies have shown that:
- Mordants Improve Dye Uptake: Mordants like vinegar can significantly improve the uptake of acid dyes on both protein and cellulose fibers.
- Fiber Type Affects Dyeing: Protein fibers generally exhibit better dye uptake than cellulose fibers due to their chemical structure.
- Dye Concentration Matters: Higher dye concentrations result in more intense and saturated colors.
9. FAQ About Dyeing Clothes With Food Coloring
9.1. Can you use food coloring to dye clothes?
Yes, you can dye clothes with food coloring, especially those made of protein fibers like wool and silk. While not as permanent as professional dyes, it’s a fun and easy way to add color to your fabrics.
9.2. What kind of food coloring is best for dyeing clothes?
Gel food coloring is generally the best option as it’s more concentrated than liquid varieties, providing richer and more vibrant colors.
9.3. Will food coloring wash out of clothes?
Food coloring can fade over time, especially if not properly set. Using vinegar as a mordant and washing in cold water can help prolong the color’s vibrancy.
9.4. Is it safe to dye clothes with food coloring?
Yes, food coloring is generally safe to use on clothing, but it’s important to wear gloves and protect your work surface to avoid staining.
9.5. How long does food coloring last on clothes?
With proper care, food coloring can last for a reasonable amount of time, but it may not be as permanent as professional dyes. Expect some fading over multiple washes.
9.6. Can you dye synthetic fabrics with food coloring?
While food coloring works best on natural fibers, some synthetic fabrics like nylon can also be dyed with food coloring. Results may vary, so testing on a small area is recommended.
9.7. What is a mordant and why is it important?
A mordant is a substance that helps the dye bind to the fabric. Vinegar is commonly used as a mordant with food coloring, improving colorfastness and preventing bleeding.
9.8. How do you set the color when dyeing with food coloring?
To set the color, soak the fabric in a vinegar solution before dyeing, and add vinegar to the dye bath. Heat-setting with an iron after dyeing can also help.
9.9. Can you mix food coloring to create custom colors?
Yes, you can mix food coloring to create a wide range of custom colors. Experiment with different combinations to achieve your desired shades.
9.10. What are some creative dyeing techniques using food coloring?
Creative techniques include tie-dyeing, dip-dyeing (ombré), space dyeing, and painting directly onto the fabric.
10. Further Resources and Learning Opportunities at FOODS.EDU.VN
Eager to delve deeper into the world of food coloring and textile dyeing? FOODS.EDU.VN offers a wealth of resources to expand your knowledge and skills.
At FOODS.EDU.VN, we understand the challenges of finding reliable and easy-to-follow recipes and information. That’s why we’re committed to providing you with detailed, accessible content. Whether you’re looking for detailed recipes, in-depth guides on cooking techniques, or tips on ingredient selection, FOODS.EDU.VN has you covered.
Ready to learn more and create amazing dishes? Visit FOODS.EDU.VN today and unlock a world of culinary possibilities.
For any questions or further assistance, feel free to contact us:
- Address: 1946 Campus Dr, Hyde Park, NY 12538, United States
- WhatsApp: +1 845-452-9600
- Website: foods.edu.vn