Navigating airport security can be stressful, especially when you’re wondering, Can You Bring Food Through Airline Security? At foods.edu.vn, we simplify the rules and regulations, providing you with clear and concise information about bringing food items on your flight, ensuring a smooth and hassle-free travel experience. Whether you’re carrying snacks, special dietary foods, or baby formula, understanding the TSA guidelines is essential for a seamless journey.
1. What Food Can You Take Through Airport Security?
You might be wondering, what food can you take through airport security? The good news is that the TSA (Transportation Security Administration) generally allows most food items, but there are some restrictions, especially regarding liquids and gels. Solids are usually fine, but it’s essential to know the specific rules to avoid any hiccups during screening.
1.1. General Guidelines for Bringing Food Through Airport Security
Bringing food through airport security involves understanding a few key guidelines. According to the TSA, solid food items are generally permitted in both carry-on and checked baggage. However, liquid or gel-like foods are subject to the 3.4-ounce rule for carry-ons. Here’s a breakdown:
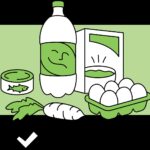
- Solid Foods: Generally allowed in both carry-on and checked baggage. Examples include sandwiches, fruits, vegetables, nuts, and snacks.
- Liquids and Gels: Subject to the 3.4-ounce (100 ml) rule for carry-ons. Larger quantities should be placed in checked baggage. Examples include yogurt, sauces, soups, and jams.
Knowing these basics can help you pack efficiently and avoid delays at security checkpoints.
1.2. TSA Food Rules: What to Know Before You Go
Understanding TSA food rules is crucial for a smooth airport experience. The TSA has specific regulations regarding what types of food are allowed in carry-on and checked baggage. Here’s a detailed look at the key points:
- Solid Foods: Solid food items are generally permitted in both carry-on and checked baggage.
- Liquid Restrictions: Liquids, gels, aerosols, creams, and pastes must adhere to the 3-1-1 rule:
- Containers must be 3.4 ounces (100 milliliters) or smaller.
- All containers must fit into one quart-sized, clear plastic zip-top bag.
- Each traveler is limited to one zip-top bag.
- Exceptions: There are exceptions for medically necessary liquids, baby formula, and breast milk. These items are allowed in reasonable quantities exceeding 3.4 ounces but must be declared to a TSA officer for separate screening.
- Screening Procedures: TSA officers may need to test liquids for explosives or concealed prohibited items. This may involve opening the containers.
- Special Considerations:
- Perishable Items: If you’re traveling with perishable items, consider using ice packs or gel packs to keep them fresh. These are allowed but may be subject to additional screening if they are partially frozen or slushy.
- Gift Foods: If you’re carrying food items as gifts, it’s advisable to leave them unwrapped so TSA officers can easily inspect them if necessary.
By understanding these TSA food rules, you can pack your food items correctly and avoid potential delays or confiscation at the security checkpoint. For more detailed information and updates, visit the official TSA website.
1.3. Specific Food Items and Their TSA Status
To clarify further, let’s look at specific food items and their TSA status. This will help you pack with confidence and avoid any surprises at the security checkpoint.
| Food Item | Carry-On | Checked Baggage | Notes |
|---|---|---|---|
| Sandwiches | Allowed | Allowed | Ensure they are wrapped properly to prevent spillage. |
| Fruits & Vegetables | Allowed | Allowed | Whole, uncut fruits and vegetables are generally fine. |
| Nuts & Snacks | Allowed | Allowed | Easy to carry and generally acceptable. |
| Yogurt | Subject to the 3.4-ounce rule if in liquid form | Allowed | Larger containers must be placed in checked baggage. |
| Soups | Subject to the 3.4-ounce rule | Allowed | Larger quantities must be in checked baggage. |
| Jams & Jellies | Subject to the 3.4-ounce rule | Allowed | Ensure they are properly sealed to prevent leaks. |
| Cheese | Solid cheese is allowed; creamy or spreadable cheese is subject to the 3.4-ounce rule | Allowed | Check the consistency of the cheese before packing. |
| Cakes & Pies | Allowed | Allowed | May be subject to additional screening. |
| Baby Food | Exempt from the 3.4-ounce rule in reasonable quantities. Must be declared to a TSA officer. | Allowed | Includes formula, breast milk, and pureed foods. |
| Seafood | Allowed, but consider the potential odor | Allowed, but pack carefully to prevent leaks | Use airtight containers and consider packing with ice packs. |
| Meat | Allowed | Allowed | Ensure it is properly packaged, especially if raw. |
| Alcohol | Alcohol under 140 proof is allowed in checked baggage. Alcohol over 140 proof is prohibited. In carry-on, alcohol is subject to the 3.4-ounce rule. | Allowed with restrictions | Check specific regulations for the quantity and proof allowed. |


1.4. Can You Take Food Through Airport Security: A Quick Checklist
Before you head to the airport, use this quick checklist to ensure you’re compliant with TSA regulations:
- Solid vs. Liquid: Identify whether your food is solid or liquid. Solids are generally allowed, while liquids are subject to the 3.4-ounce rule.
- 3-1-1 Rule: If you’re carrying liquids, ensure each container is 3.4 ounces (100 ml) or less and fits in a quart-sized bag.
- Declare Exemptions: If you have medically necessary liquids or baby food, declare them to the TSA officer.
- Proper Packaging: Pack food items in a way that prevents leaks or spills.
- Check TSA Guidelines: Always check the TSA website for the most up-to-date information.
This checklist will help you streamline your security screening process, preventing unnecessary delays and ensuring your food items make it to your destination.
2. Specific Food Restrictions and Guidelines
While many foods are allowed, some have specific restrictions. Let’s delve into the guidelines for particular categories to help you navigate airport security with ease.
2.1. Traveling with Snacks: What’s Allowed?
Traveling with snacks can make your journey more enjoyable, but it’s important to know what’s allowed through airport security. Here’s a breakdown of common snack items and their TSA status:
- Allowed Snacks:
- Nuts and Seeds: These are generally permitted in both carry-on and checked baggage.
- Chips and Crackers: Easy to pack and typically allowed without restrictions.
- Granola Bars: Convenient and acceptable for air travel.
- Dried Fruits: A healthy and TSA-friendly option.
- Cookies and Candies: Allowed in both carry-on and checked baggage.
- Considerations:
- Homemade Snacks: If you’re bringing homemade snacks, ensure they are properly wrapped to prevent spills or odors.
- Snacks with Liquids: Be cautious with snacks containing liquids or gels, such as yogurt tubes or fruit cups, as they are subject to the 3.4-ounce rule.
- Packaging: Consider the packaging to avoid attracting attention. Clear, resealable bags are ideal.
- Tips for Stress-Free Snacking:
- Pack Smart: Choose snacks that are easy to eat and won’t create a mess.
- Stay Informed: Check the TSA website for any updates or specific restrictions.
By following these guidelines, you can travel with your favorite snacks and avoid any issues at the security checkpoint.
2.2. Can You Bring Homemade Food on a Plane?
Yes, you can bring homemade food on a plane, but there are a few considerations. The TSA generally allows homemade food items in both carry-on and checked baggage, but the same rules apply as with commercially prepared foods.
- Solid Foods: Homemade sandwiches, baked goods, and other solid foods are typically allowed. Ensure they are wrapped securely to prevent spills or odors.
- Liquids and Gels: Homemade sauces, soups, and jams are subject to the 3.4-ounce rule for carry-ons. If you’re bringing larger quantities, pack them in your checked baggage.
- Packaging: Proper packaging is essential for homemade food. Use airtight containers or resealable bags to keep your food fresh and prevent leaks.
- Security Screening: Be prepared for TSA officers to inspect your homemade food. They may need to open containers to check the contents.
- Tips for Traveling with Homemade Food:
- Label Clearly: Label your food items, especially if they are in unmarked containers.
- Pack Smart: Choose foods that travel well and won’t spoil easily.
- Check Regulations: Always check the TSA website for any specific restrictions or updates.
With these tips, you can enjoy your homemade meals and snacks while flying, making your travel experience more comfortable and personalized.
2.3. Taking Baby Food and Formula Through Security
Traveling with infants requires special attention to their dietary needs. The TSA has specific guidelines for baby food and formula, allowing reasonable quantities to be brought through security.
- Exemptions: Baby food, formula, and breast milk are exempt from the 3.4-ounce rule. You can bring larger quantities needed for your child.
- Notification: Inform the TSA officer at the beginning of the screening process that you are carrying baby food, formula, or breast milk.
- Screening: These items will be screened separately from your other belongings. TSA officers may need to test the liquids for explosives or concealed prohibited items.
- Recommendations:
- Clear Containers: Although not required, it is recommended to transport formula and breast milk in clear, translucent bottles rather than plastic bags or pouches.
- Ice Packs: Ice packs, freezer packs, and gel packs used to cool formula and breast milk are also allowed in carry-ons.
- Important Notes:
- Your child does not need to be present or traveling with you to bring breast milk, formula, and related supplies.
- TSA X-ray machines do not adversely affect food or medicines. However, if you do not want these items to be X-rayed or opened, inform the TSA officer. Additional screening procedures may be required.
By understanding these guidelines, you can ensure a smooth travel experience when bringing baby food and formula through airport security, providing peace of mind for both you and your little one.
2.4. Can You Take Alcohol Through Airport Security?
Navigating the rules for carrying alcohol through airport security can be tricky. Here’s a breakdown of what you need to know to ensure a smooth travel experience.
- Carry-On Baggage:
- Liquor: According to the TSA, you can bring alcohol in your carry-on baggage if it is in containers of 3.4 ounces (100 ml) or less, and all containers fit into a single, quart-sized, clear plastic zip-top bag.
- Duty-Free Alcohol: If you purchase alcohol from a duty-free shop after passing through security, you can carry it on board as long as it is properly sealed in a tamper-evident bag.
- Checked Baggage:
- Restrictions: The FAA (Federal Aviation Administration) has specific rules for transporting alcohol in checked baggage:
- Alcoholic beverages with more than 24% but not more than 70% alcohol by volume are limited to 5 liters (1.3 gallons) per passenger and must be in unopened retail packaging.
- Alcoholic beverages with 24% alcohol or less are not subject to quantity limits.
- Alcoholic beverages with more than 70% alcohol (140 proof) are prohibited in both carry-on and checked baggage.
- Restrictions: The FAA (Federal Aviation Administration) has specific rules for transporting alcohol in checked baggage:
- General Guidelines:
- Ensure that all bottles are securely sealed to prevent leaks.
- Pack alcohol in a way that prevents breakage, such as wrapping bottles in clothing or using protective cases.
- Check with your airline for any specific regulations they may have regarding the transportation of alcohol.
- Legal Considerations:
- Passengers must be of legal drinking age in their destination country to import alcohol.
- Some countries have restrictions on the amount of alcohol that can be imported duty-free.
Understanding these rules will help you pack your alcoholic beverages correctly and avoid any issues at airport security. Always check the latest guidelines from the TSA and FAA before you travel.
3. Tips for a Smooth Security Screening with Food
Navigating airport security with food doesn’t have to be stressful. Here are some practical tips to help you breeze through the screening process.
3.1. Pack Smart: Best Practices for Food Storage
Packing food properly can significantly ease your airport security experience. Here are some best practices for food storage:
- Use Clear Containers: Whenever possible, use clear containers to store your food items. This allows TSA officers to easily see the contents without needing to open them.
- Wrap Food Securely: Wrap sandwiches, baked goods, and other solid foods tightly in plastic wrap or aluminum foil to prevent spills and odors.
- Airtight Containers: For liquids and semi-liquids like sauces, yogurts, and dips, use airtight containers to avoid leaks. Ensure the containers are durable and can withstand pressure changes during the flight.
- Separate Food Items: Keep food items separate from other belongings in your carry-on bag. This makes it easier to remove them for inspection if required.
- Label Everything: Label your food items, especially if they are homemade or in unmarked containers. This helps TSA officers quickly identify the contents.
- Consider Reusable Bags: Use reusable, resealable bags for snacks and other small items. They are eco-friendly and convenient.
- Avoid Overpacking: Don’t overpack your carry-on with food. A crowded bag can make it difficult to locate items and may lead to additional screening.
- Ice Packs and Coolers: If you’re traveling with perishable items, use ice packs or gel packs to keep them fresh. Ensure these are frozen solid when you go through security.
By following these packing tips, you can streamline the security screening process and ensure your food arrives in good condition.
3.2. Preparing for TSA Inspection: What to Expect
Knowing what to expect during a TSA inspection can reduce anxiety and help you prepare effectively. Here’s a breakdown of the process:
- Remove Food Items: Be prepared to remove food items from your carry-on bag and place them in a separate bin for screening.
- Declare Liquids: Inform the TSA officer if you are carrying liquids, gels, or aerosols that exceed the 3.4-ounce limit, such as medically necessary liquids or baby food.
- Be Cooperative: Cooperate with TSA officers and follow their instructions. They are there to ensure everyone’s safety.
- Answer Questions: Be ready to answer questions about the food items you are carrying. Honesty and clarity can expedite the process.
- Stay Calm: If your food items are flagged for additional screening, remain calm and patient. TSA officers are simply following protocol.
- Avoid Jokes: Refrain from making jokes about the contents of your bag or security procedures. This can lead to unnecessary delays or complications.
- Check Regulations: Before you travel, check the TSA website for any updates or specific restrictions on food items.
- Pack Smart: Pack your food items in an accessible location, making it easy to remove them for inspection.
3.3. Navigating Liquid Restrictions: The 3-1-1 Rule Explained
The 3-1-1 rule is a key component of TSA regulations for liquids, gels, and aerosols in carry-on baggage. Understanding this rule can help you pack efficiently and avoid delays.
- What is the 3-1-1 Rule?
- 3.4 ounces (100 milliliters): Each liquid item must be in a container that is 3.4 ounces (100 milliliters) or smaller.
- 1 quart-sized bag: All containers must fit into one quart-sized, clear plastic zip-top bag.
- 1 bag per passenger: Each traveler is limited to one zip-top bag.
- How to Comply:
- Use Travel-Sized Containers: Purchase travel-sized containers for your liquids, gels, and aerosols.
- Pack Smart: Place all travel-sized containers in a clear, quart-sized zip-top bag.
- Remove the Bag: Remove the bag from your carry-on and place it in a separate bin for screening.
- Exceptions to the Rule:
- Medically Necessary Liquids: Medications, baby formula, and breast milk are exempt from the 3-1-1 rule. However, you must declare these items to a TSA officer.
- Duty-Free Purchases: Liquids purchased at duty-free shops after passing through security are allowed, provided they are sealed in a tamper-evident bag.
- Tips for Packing Liquids:
- Check Container Sizes: Ensure that all containers are clearly marked with their volume.
- Avoid Overfilling: Do not overfill containers, as they may leak due to pressure changes during the flight.
- Use Leak-Proof Containers: Opt for containers with secure, leak-proof lids.
By following the 3-1-1 rule and packing your liquids properly, you can breeze through airport security and avoid any complications.
3.4. Dealing with Perishable Foods: Keeping It Fresh
Traveling with perishable foods requires careful planning to ensure they stay fresh and safe to eat. Here are some tips for keeping perishable foods fresh during your journey:
- Use Ice Packs: Pack perishable foods with ice packs or gel packs to keep them cold. Ensure the ice packs are frozen solid when you go through security.
- Insulated Containers: Use insulated containers or coolers to maintain a consistent temperature for your food.
- Choose Non-Perishable Alternatives: Consider packing non-perishable alternatives for some meals or snacks to reduce the risk of spoilage.
- Freeze Food: If possible, freeze perishable foods before you travel. This can help them stay fresh longer.
- Pack at the Last Minute: Pack perishable foods as close to your departure time as possible to minimize the time they spend at room temperature.
- Avoid Direct Sunlight: Keep your food out of direct sunlight to prevent it from warming up.
- Consider Dry Ice: If you need to keep food extremely cold, consider using dry ice. However, check with your airline for specific regulations on transporting dry ice.
- Eat Sooner Rather Than Later: Plan to eat perishable foods sooner rather than later to ensure they are consumed while still fresh.
By following these tips, you can travel with perishable foods and enjoy them safely at your destination.
4. Special Considerations for International Travel
When traveling internationally, additional rules and regulations come into play regarding food items. Here’s what you need to know to ensure a smooth journey.
4.1. Customs Regulations: What You Need to Declare
Customs regulations vary by country, and it’s essential to understand what you need to declare when bringing food items across international borders.
- Declaration Forms: Fill out the customs declaration form accurately. Declare all food items you are carrying, even if you think they might be allowed.
- Allowed vs. Prohibited Items: Familiarize yourself with the customs regulations of your destination country. Some countries have strict rules about importing certain foods, such as meat, dairy, and fresh produce.
- Penalties for Non-Compliance: Failure to declare food items or attempting to bring prohibited items can result in fines, confiscation of the items, or even legal penalties.
- Websites and Resources: Check the customs website of your destination country for detailed information on food import regulations.
By understanding and adhering to customs regulations, you can avoid potential issues and ensure a hassle-free entry into your destination country.
4.2. Traveling with Food from Home: International Guidelines
Bringing food from home when traveling internationally can provide comfort and convenience. However, it’s crucial to be aware of international guidelines to avoid any problems.
- Research Destination Regulations: Before you travel, research the specific food import regulations of your destination country. Some countries have strict rules about bringing in certain types of food.
- Packaged and Labeled Foods: Opt for commercially packaged and labeled foods. These are generally easier to clear through customs than homemade or unpackaged items.
- Avoid Perishable Items: It’s best to avoid bringing perishable items, as they may spoil during the journey or be prohibited by customs regulations.
- Declare All Food Items: Declare all food items on your customs form, even if you think they are allowed. It’s better to be upfront and honest.
- Keep Receipts: Keep receipts for any food items you purchased, as this can help verify their origin and composition.
- Understand Restrictions on Meat and Dairy: Many countries have restrictions on importing meat and dairy products due to concerns about disease transmission.
By following these guidelines, you can travel with food from home while minimizing the risk of issues with customs officials.
4.3. Bringing Food Into the US: What to Know
Bringing food into the United States involves adhering to specific regulations set by U.S. Customs and Border Protection (CBP) and the U.S. Department of Agriculture (USDA). Here’s what you need to know:
- Declaration Requirement: All food items must be declared on your customs form. Failure to do so can result in penalties.
- Permitted Foods: Many foods are allowed, but some are restricted or prohibited. Generally, baked goods, candies, chocolate, and canned goods are permissible.
- Restricted Foods:
- Meat and Poultry: Restrictions vary depending on the country of origin due to concerns about animal diseases.
- Fruits and Vegetables: Certain fruits and vegetables may be prohibited due to the risk of pests and diseases.
- Dairy Products: Restrictions apply to dairy products based on the country of origin.
- USDA Website: Check the USDA website for the latest information on permitted and prohibited food items.
- Packaging and Labeling: Packaged and labeled foods are easier to clear through customs than homemade or unpackaged items.
- Inspection: Be prepared for CBP officers to inspect your food items. They may open packages to examine the contents.
- Penalties for Non-Compliance: Failure to declare food items or attempting to bring prohibited items can result in fines and confiscation of the items.
By understanding these regulations, you can ensure a smooth entry into the United States with your food items.
4.4. Country-Specific Regulations: A Brief Overview
Customs regulations for food items vary widely from country to country. Here’s a brief overview of regulations in some key destinations:
- Canada:
- Declaration: All food items must be declared.
- Restrictions: Restrictions apply to meat, dairy, and fresh produce. Check the Canadian Food Inspection Agency (CFIA) website for details.
- European Union (EU):
- Restrictions: Strict rules on importing meat, dairy, and plant products from non-EU countries.
- Personal Consumption: Small quantities of certain foods may be allowed for personal consumption.
- Australia:
- Declaration: All food items must be declared.
- Restrictions: Very strict regulations on importing food due to biosecurity concerns. Check the Australian Department of Agriculture and Water Resources website.
- Japan:
- Restrictions: Restrictions apply to meat, fruits, and vegetables. Check the Ministry of Agriculture, Forestry and Fisheries website.
- China:
- Restrictions: Regulations vary and can be complex. Check with the Chinese customs authorities for specific rules.
It’s essential to research the specific regulations of your destination country before you travel. This will help you avoid any issues with customs officials and ensure a smooth entry into the country.
5. Common Mistakes to Avoid
Even seasoned travelers can make mistakes when bringing food through airport security. Here are some common pitfalls to avoid.
5.1. Not Declaring Food Items at Customs
One of the most common mistakes travelers make is failing to declare food items at customs. This can lead to significant penalties, including fines and confiscation of the items.
- Always Declare: Even if you think a food item is allowed, always declare it on your customs form.
- Honesty is Key: Be honest and accurate when filling out the customs form. Provide a complete list of all food items you are carrying.
- Avoid Assumptions: Don’t assume that a food item is allowed just because you brought it on a previous trip. Regulations can change.
- When in Doubt, Ask: If you are unsure whether a food item needs to be declared, ask a customs officer for clarification.
- Check the Regulations: Before you travel, check the customs regulations of your destination country to understand what needs to be declared.
5.2. Ignoring Liquid Restrictions
Ignoring liquid restrictions is another common mistake that can cause delays and frustration at airport security. Remember the 3-1-1 rule for carry-on baggage:
- 3.4 Ounces or Less: Ensure all liquids, gels, and aerosols are in containers that are 3.4 ounces (100 milliliters) or smaller.
- One Quart-Sized Bag: Place all containers in a single, quart-sized, clear plastic zip-top bag.
- One Bag Per Passenger: Each traveler is limited to one zip-top bag.
- Exceptions: Be aware of exceptions for medically necessary liquids and baby food, but remember to declare these items to a TSA officer.
- Check Before You Pack: Before you pack, double-check the size of your liquid containers to ensure they comply with the 3-1-1 rule.
5.3. Improper Packaging of Food
Improper packaging can lead to leaks, spills, and odors, causing inconvenience and potential issues at airport security.
- Use Airtight Containers: For liquids and semi-liquids, use airtight containers to prevent leaks.
- Wrap Food Securely: Wrap sandwiches, baked goods, and other solid foods tightly in plastic wrap or aluminum foil.
- Consider Vacuum Sealing: For perishable items, consider vacuum sealing to extend their freshness and prevent odors.
- Avoid Glass Containers: If possible, avoid using glass containers, as they are more likely to break.
- Pack in an Accessible Location: Pack your food items in an accessible location so you can easily remove them for inspection.
5.4. Assuming All Countries Have the Same Rules
Assuming that all countries have the same rules regarding food imports is a dangerous mistake. Customs regulations vary widely from country to country.
- Research Destination Regulations: Before you travel, research the specific food import regulations of your destination country.
- Check Official Websites: Check the official customs website of your destination country for detailed information.
- Be Aware of Restrictions: Be aware of restrictions on meat, dairy, fruits, and vegetables, as these are commonly regulated.
- When in Doubt, Leave It Out: If you are unsure whether a food item is allowed, it’s best to leave it at home to avoid potential issues.
By avoiding these common mistakes, you can ensure a smoother and more pleasant travel experience with your food items.
6. Addressing Dietary Needs and Restrictions
Traveling with dietary needs or restrictions requires careful planning and preparation. Here’s how to navigate airport security and ensure you have access to the food you need.
6.1. Traveling with Allergies: What to Pack
Traveling with allergies requires careful planning to ensure your safety and well-being. Here’s what to pack to manage your allergies effectively:
- Safe Snacks: Pack a supply of safe snacks that you know are free from allergens.
- Medications: Bring all necessary medications, such as antihistamines and epinephrine auto-injectors (e.g., EpiPen), in their original packaging.
- Medical Documentation: Carry a letter from your doctor outlining your allergies and the medications you need.
- Allergy Alert Cards: Use allergy alert cards to communicate your allergies to airline staff and other travelers.
- Wet Wipes: Pack wet wipes to clean surfaces and remove potential allergens.
6.2. Gluten-Free Travel: Tips for Eating on the Go
Gluten-free travel requires careful planning to ensure you have access to safe and suitable food options. Here are some tips for eating gluten-free on the go:
- Research Options: Before you travel, research gluten-free dining options at the airport and your destination.
- Pack Gluten-Free Snacks: Bring a supply of gluten-free snacks, such as nuts, seeds, fruits, and gluten-free granola bars.
- Read Labels Carefully: Always read food labels carefully to ensure products are gluten-free.
- Communicate Your Needs: Clearly communicate your dietary needs to airline staff and restaurant servers.
- Consider Gluten-Free Meal Delivery Services: Some companies offer gluten-free meal delivery services to airports or hotels.
6.3. Vegetarian and Vegan Options: Planning Your Meals
Planning your meals as a vegetarian or vegan traveler can be straightforward with a bit of preparation. Here’s how to ensure you have suitable options:
- Pack Plant-Based Snacks: Pack a variety of plant-based snacks, such as fruits, vegetables, nuts, seeds, and energy bars.
- Research Dining Options: Research vegetarian and vegan dining options at the airport and your destination.
- Consider DIY Meals: Pack ingredients for simple DIY meals, such as oatmeal or trail mix.
- Communicate Your Preferences: Clearly communicate your dietary preferences to airline staff and restaurant servers.
- Explore Local Markets: Visit local markets to find fresh produce and plant-based ingredients.
6.4. Medically Necessary Foods: Documentation and Guidelines
When traveling with medically necessary foods, it’s essential to have the proper documentation and understand the guidelines.
- Medical Documentation: Carry a letter from your doctor explaining the need for the specific food items.
- Declare Food Items: Declare all medically necessary food items to TSA officers.
- Keep Medications Separate: Keep medications separate from other belongings and ensure they are easily accessible.
- Check Regulations: Check the TSA website for specific guidelines on traveling with medically necessary foods.
By following these tips, you can travel comfortably and safely while managing your dietary needs and restrictions.
7. Real-Life Scenarios and Solutions
To further illustrate how to navigate airport security with food, let’s explore some real-life scenarios and practical solutions.
7.1. Scenario 1: Traveling with Homemade Soup
Scenario: You want to bring your delicious homemade soup to your destination but are unsure about the liquid restrictions.
Solution:
- Carry-On: If you want to bring the soup in your carry-on, ensure it is in a container that is 3.4 ounces (100 milliliters) or smaller. Place the container in a quart-sized, clear plastic zip-top bag.
- Checked Baggage: Alternatively, pack the soup in a larger container in your checked baggage. Ensure it is securely sealed to prevent leaks.
- Declare: If you are traveling internationally, declare the soup on your customs form.
7.2. Scenario 2: Bringing a Cake as a Gift
Scenario: You’re bringing a cake as a gift and want to ensure it arrives in perfect condition.
Solution:
- Carry-On: You can bring the cake in your carry-on, but be prepared for TSA officers to inspect it. Consider leaving the cake unwrapped so it can be easily examined.
- Packaging: Use a sturdy cake box to protect the cake from damage.
- Checked Baggage: If you prefer, you can pack the cake in your checked baggage, but ensure it is well-protected to prevent it from being crushed.
7.3. Scenario 3: Managing a Child’s Food Allergies on a Flight
Scenario: You’re traveling with a child who has severe food allergies and need to ensure their safety on the flight.
Solution:
- Pack Safe Snacks: Pack a supply of safe snacks that you know are free from allergens.
- Medical Documentation: Carry a letter from your child’s doctor outlining their allergies and the medications they need.
- Communicate with the Airline: Contact the airline in advance to inform them of your child’s allergies and request accommodations.
- Allergy Alert Cards: Use allergy alert cards to communicate your child’s allergies to airline staff and other passengers.
7.4. Scenario 4: Transporting Seafood Internationally
Scenario: You want to transport fresh seafood from one country to another.
Solution:
- Check Regulations: Check the customs regulations of both the departure and destination countries regarding seafood imports.
- Proper Packaging: Pack the seafood in airtight containers with ice packs to keep it fresh.
- Declare: Declare the seafood on your customs form.
- Consider Restrictions: Be aware that some countries may have restrictions on importing certain types of seafood due to conservation concerns.
By understanding these scenarios and solutions, you can confidently navigate airport security and travel with your food items without unnecessary stress.
8. Staying Informed: Resources and Updates
Staying informed about the latest TSA and customs regulations is crucial for a smooth travel experience. Here are some valuable resources and updates to keep you in the know.
8.1. Official TSA Website and Resources
The official TSA website (www.tsa.gov) is your go-to resource for the most up-to-date information on airport security regulations.
- What Can I Bring? Use the “What Can I Bring?” tool to search for specific food items and determine whether they are allowed in carry-on or checked baggage.
- Travel Tips: Explore the travel tips section for advice on navigating airport security with various items, including food.
- Updates and Alerts: Stay informed about any changes to TSA regulations by checking the website regularly.