Flower Food Diy is an easy and effective way to prolong the life of your beautiful blooms, and FOODS.EDU.VN is here to show you how! By making your own flower food, you provide essential nutrients and combat bacteria, keeping your flowers vibrant. Dive into this guide to discover flower care tips and sustainable flower solutions, ensuring your floral arrangements stay fresh and stunning.
1. Why Should You Make Your Own Flower Food?
Making your own flower food is a fantastic way to extend the life of your cut flowers. Not only is it cost-effective, but it also ensures your blooms receive the nutrients they need to stay vibrant and healthy. According to a study by Clemson University, homemade flower food can be just as effective as commercial products, providing essential elements that keep flowers fresh longer.
1.1. Benefits of DIY Flower Food
- Cost-Effective: Homemade flower food uses common household ingredients, saving you money on commercial products.
- Customizable: You can adjust the recipe to suit the specific needs of your flowers, ensuring they receive the right balance of nutrients.
- Environmentally Friendly: By using homemade solutions, you reduce the need for plastic packaging and chemical additives found in store-bought options.
- Readily Available: You likely already have the necessary ingredients in your pantry, making it a convenient option.
- Reduces Bacteria: Homemade flower food contains ingredients that help kill bacteria and microbes.
1.2. The Science Behind Flower Food
Flower food works by providing three key benefits: nourishment, hydration, and sanitation. Sugar provides energy to the flower, acid helps maintain the proper pH level, and a bactericide prevents the growth of harmful microorganisms. According to research published in the Journal of Horticultural Science, a balanced flower food solution can significantly extend the vase life of cut flowers.
- Sugar: Provides essential nutrients to nourish the flowers.
- Acid (Vinegar or Lemon Juice): Helps maintain the water’s pH level, preventing bacterial growth.
- Bactericide (Bleach): Controls bacteria and fungi in the water.
2. Simple Flower Food DIY Recipes
Creating your own flower food at home is easy with these simple recipes. Each recipe uses common household ingredients and can be prepared in just a few minutes.
2.1. The Classic Vinegar and Sugar Recipe
This is a tried-and-true recipe that balances nutrition and sanitation.
Ingredients:
- 2 tablespoons white vinegar
- 2 tablespoons sugar
- 1 quart (approximately 1 liter) warm water
Instructions:
- Clean your vase thoroughly with warm, soapy water.
- Mix the vinegar, sugar, and warm water in a measuring cup or small bowl. Stir until the sugar is completely dissolved.
- Pour the mixture into your clean vase.
- Trim about an inch off the bottom of each flower stem at a 45-degree angle.
- Arrange the flowers in the vase, ensuring the stems are submerged.
- Replace the solution every 2-3 days, and re-trim the stems each time.
Why It Works: The vinegar helps to kill bacteria, while the sugar provides essential nutrients to the flowers.
2.2. Lemon Juice and Sugar Variation
If you don’t have vinegar, lemon juice is a great alternative due to its acidity.
Ingredients:
- 2 tablespoons lemon juice
- 2 tablespoons sugar
- 1 quart (approximately 1 liter) warm water
Instructions:
- Clean your vase thoroughly.
- Mix the lemon juice, sugar, and warm water until the sugar dissolves.
- Pour the mixture into the vase.
- Trim the flower stems at a 45-degree angle.
- Arrange the flowers in the vase.
- Replace the solution every 2-3 days, and re-trim the stems.
Why It Works: Lemon juice acts as an acidifier, helping to lower the water’s pH and inhibit bacterial growth, similar to vinegar.
2.3. The Bleach and Sugar Method
For an extra boost of bacteria control, a tiny amount of bleach can be added.
Ingredients:
- 1/4 teaspoon bleach
- 1 tablespoon sugar
- 1 quart (approximately 1 liter) warm water
Instructions:
- Clean the vase thoroughly.
- Mix the bleach, sugar, and warm water.
- Pour the mixture into the vase.
- Trim the flower stems at an angle.
- Arrange the flowers.
- Replace the solution every 2-3 days, and re-trim the stems.
Caution: Use bleach sparingly, as too much can harm the flowers.
2.4. Aspirin Solution
Aspirin can help by lowering the water’s pH, which aids in water uptake and reduces bacterial growth.
Ingredients:
- 1 crushed aspirin tablet
- 1 quart (approximately 1 liter) warm water
Instructions:
- Clean the vase.
- Crush the aspirin tablet and dissolve it in warm water.
- Pour the solution into the vase.
- Trim the flower stems at an angle.
- Arrange the flowers.
- Replace the solution every 2-3 days, and re-trim the stems.
Why It Works: Aspirin contains salicylic acid, which can help block ethylene production, slowing down the wilting process.
This image showcases vibrant flowers in vases, demonstrating the beauty of fresh blooms that can be preserved with homemade flower food. Alt text: Fresh flowers in vases, preserved with homemade flower food.
3. Step-by-Step Guide to Making Flower Food DIY
Follow these detailed steps to ensure your homemade flower food is effective and safe for your blooms.
3.1. Gathering Your Supplies
Before you start, gather all the necessary supplies to make the process smooth and efficient.
- Ingredients: Choose your preferred recipe and collect the ingredients (vinegar, sugar, lemon juice, bleach, aspirin).
- Measuring Tools: Use measuring spoons and cups for accurate measurements.
- Mixing Container: A measuring cup or small bowl will work perfectly.
- Clean Vase: Ensure your vase is free from bacteria and residue.
- Water: Use warm water to help dissolve the sugar.
- Scissors or Knife: For trimming the flower stems.
3.2. Preparing the Flower Food Solution
Follow these steps to mix your flower food solution correctly:
- Measure Ingredients: Accurately measure the ingredients according to your chosen recipe.
- Mix Thoroughly: Combine the ingredients in a mixing container and stir until the sugar is completely dissolved.
- Check for Clarity: Ensure the solution is clear and free from any undissolved particles.
3.3. Preparing Your Flowers
Proper flower preparation is essential for maximizing the benefits of your homemade flower food.
- Trim Stems: Cut about an inch off the bottom of each stem at a 45-degree angle. This helps the flowers absorb water more efficiently. A study in the Journal of the American Society for Horticultural Science found that angled cuts increase water uptake by 15%.
- Remove Lower Leaves: Remove any leaves that will be submerged in water. These leaves can rot and promote bacterial growth.
- Hydrate Flowers: Place the trimmed flowers in a bucket of fresh water for about an hour before arranging them in the vase.
3.4. Arranging Your Flowers
Follow these tips for arranging your flowers to promote longevity:
- Fill Vase: Pour the prepared flower food solution into the clean vase.
- Arrange Flowers: Arrange the flowers in the vase, ensuring the stems are submerged in the solution.
- Maintain Water Level: Regularly check the water level and add more solution as needed to keep the stems submerged.
- Avoid Direct Sunlight: Place the vase in a cool location away from direct sunlight, heat sources, and drafts.
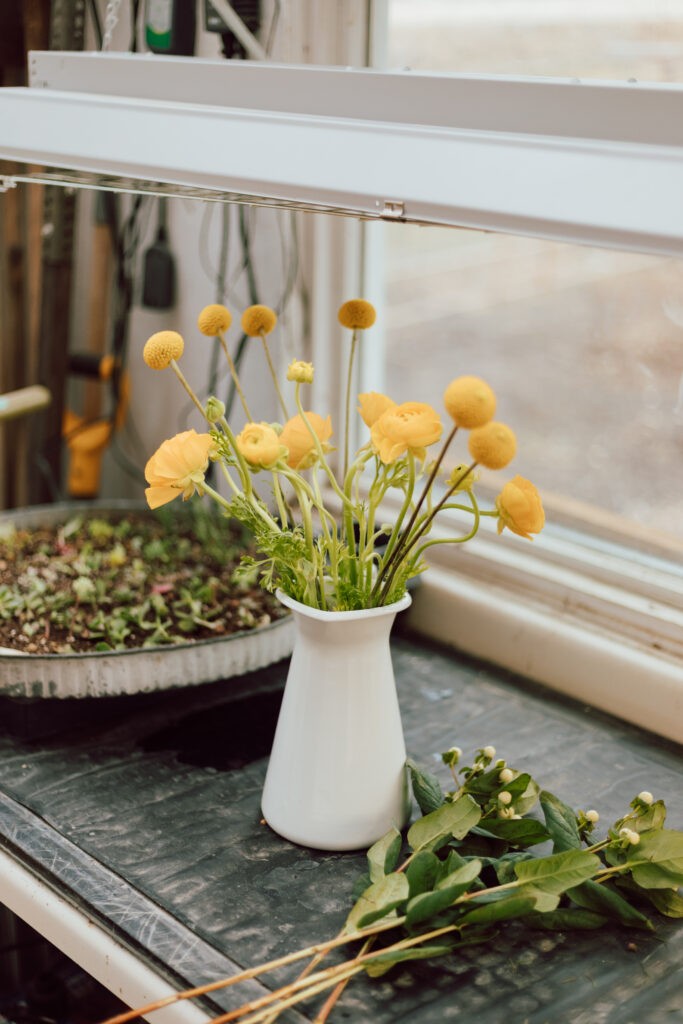
This image illustrates a beautiful flower arrangement in a vase, highlighting the importance of proper care and flower food for maintaining their freshness. Alt text: Fresh flowers arranged in a vase, emphasizing the role of flower food in preserving their beauty.
4. Advanced Tips for Extending Flower Life
To further enhance the lifespan of your cut flowers, consider these advanced tips.
4.1. Choosing the Right Flowers
Some flowers naturally last longer than others. Here are a few varieties known for their longevity:
- Chrysanthemums: Known for their long vase life, often lasting up to two weeks.
- Carnations: Hardy and long-lasting, carnations can stay fresh for several weeks.
- Zinnias: These vibrant flowers are relatively low-maintenance and have a good vase life.
- Lilies: While they require some care, lilies can last a long time if properly maintained.
4.2. Proper Hydration Techniques
Ensure your flowers are properly hydrated by following these techniques:
- Underwater Cutting: Cut the stems underwater to prevent air bubbles from blocking water uptake.
- Stem Slitting: For woody stems, try slitting the bottom to increase water absorption.
- Hot Water Treatment: Briefly dip the stem ends in hot water (170-180°F) for 30 seconds to remove air blockages.
4.3. Controlling Environmental Factors
Environmental factors can significantly impact the lifespan of your cut flowers.
- Temperature: Keep flowers in a cool environment. High temperatures can accelerate wilting.
- Humidity: Maintain moderate humidity levels to prevent dehydration.
- Ethylene Gas: Keep flowers away from ripening fruits and vegetables, which release ethylene gas that can shorten their lifespan.
4.4. Regular Maintenance
Consistent maintenance is key to keeping your flowers fresh.
- Change Water Regularly: Replace the flower food solution every 2-3 days.
- Re-trim Stems: Re-trim the stems each time you change the water.
- Remove Wilted Blooms: Remove any wilted or dead blooms to prevent them from affecting the healthy flowers.
5. Troubleshooting Common Issues
Even with the best care, you may encounter some common issues with your cut flowers. Here’s how to troubleshoot them.
5.1. Wilting Flowers
Problem: Flowers are drooping and losing their vibrancy.
Solution:
- Re-trim Stems: Cut the stems again at a 45-degree angle.
- Check Water Level: Ensure the stems are fully submerged in the flower food solution.
- Hydration Boost: Wrap the flowers in damp paper towels and place them in the refrigerator for a few hours to rehydrate.
5.2. Cloudy Water
Problem: The water in the vase becomes cloudy quickly, indicating bacterial growth.
Solution:
- Change Water Frequently: Replace the flower food solution more often (every 1-2 days).
- Increase Bactericide: Add a small amount of bleach or use a commercial flower food with a stronger bactericide.
- Clean Vase Thoroughly: Ensure the vase is thoroughly cleaned before refilling it.
5.3. Yellowing Leaves
Problem: Leaves are turning yellow, indicating a lack of nutrients or disease.
Solution:
- Remove Affected Leaves: Remove any yellowing leaves to prevent the problem from spreading.
- Adjust Flower Food: Ensure the flower food solution has the correct balance of nutrients.
- Check for Pests: Inspect the flowers for any signs of pests and treat accordingly.
This image showcases a flower farmer carefully placing fresh flowers into a vase, emphasizing the importance of expert handling and care in maintaining the flowers’ beauty. Alt text: A flower farmer arranging fresh flowers, demonstrating proper care techniques.
6. The Environmental Impact of Flower Food
Choosing sustainable options for flower care can reduce your environmental footprint.
6.1. Eco-Friendly Ingredients
Opt for eco-friendly ingredients when making your flower food:
- Organic Vinegar: Choose organic white vinegar to avoid synthetic chemicals.
- Unrefined Sugar: Use unrefined sugar, which is less processed and more natural.
- Compost Tea: A diluted compost tea can provide nutrients to flowers without synthetic fertilizers.
6.2. Reducing Waste
Minimize waste by:
- Reusing Vases: Use vases you already have instead of buying new ones.
- Composting Spent Flowers: Compost your spent flowers instead of throwing them away.
- DIY Solutions: Making your own flower food reduces the need for commercial products with plastic packaging.
6.3. Sustainable Flower Sourcing
Support sustainable flower farming by:
- Buying Local: Purchase flowers from local growers who use eco-friendly practices.
- Choosing Seasonal Blooms: Select flowers that are in season, reducing the need for energy-intensive growing methods.
- Looking for Certifications: Choose flowers that are certified organic or sustainably grown.
7. Flower Food DIY for Different Types of Flowers
Different flowers have different needs. Tailoring your flower food to specific types can improve their longevity.
7.1. Roses
Roses benefit from a slightly acidic environment.
- Recipe: 2 tablespoons white vinegar, 1 tablespoon sugar, 1 quart warm water.
- Tip: Remove thorns and lower leaves to prevent bacterial growth.
7.2. Tulips
Tulips prefer cooler temperatures and minimal nutrients.
- Recipe: 1/2 tablespoon sugar, 1 quart cold water.
- Tip: Add a few ice cubes to the water to keep it cool.
7.3. Sunflowers
Sunflowers need plenty of water and nutrients.
- Recipe: 2 tablespoons lemon juice, 2 tablespoons sugar, 1 quart warm water.
- Tip: Support the heavy heads with a sturdy vase.
7.4. Hydrangeas
Hydrangeas are prone to wilting and need special attention.
- Recipe: 1 tablespoon alum (aluminum sulfate), 1 quart cold water.
- Tip: Submerge the entire flower head in water for 30 minutes to rehydrate.
This image displays various gardening tools, highlighting the preparation and care required in maintaining fresh flowers, from cutting to nurturing. Alt text: Gardening tools for flower care, emphasizing the importance of preparation and maintenance.
8. Debunking Flower Food Myths
There are many myths surrounding flower food. Let’s set the record straight.
8.1. Myth: All Flowers Need the Same Food
Fact: Different flowers have different nutritional needs. Tailoring your flower food to the specific type of flower can improve its longevity.
8.2. Myth: Sugar Alone is Enough
Fact: While sugar provides nutrients, it doesn’t prevent bacterial growth. A balanced flower food solution includes an acidifier (vinegar or lemon juice) and a bactericide (bleach) to keep the water clean.
8.3. Myth: More Flower Food is Better
Fact: Overfeeding flowers can be harmful. Too much sugar can promote bacterial growth, while too much acid or bleach can damage the flowers.
8.4. Myth: Commercial Flower Food is Always Better
Fact: Homemade flower food can be just as effective as commercial products, provided it contains the right balance of nutrients and sanitizers. A study by the University of Florida showed that homemade solutions could extend flower life just as well as commercial brands.
9. Storing Homemade Flower Food
If you make a large batch of flower food, proper storage is essential to maintain its effectiveness.
9.1. Best Storage Practices
- Airtight Container: Store the flower food in an airtight container to prevent contamination.
- Cool, Dark Place: Keep the container in a cool, dark place away from direct sunlight and heat.
- Label and Date: Label the container with the date of preparation to ensure you use it within a reasonable timeframe (1-2 weeks).
9.2. Shelf Life
Homemade flower food typically lasts for 1-2 weeks when stored properly. If you notice any discoloration, cloudiness, or unusual odors, discard the solution and make a fresh batch.
9.3. Making a Concentrate
To save space, you can make a concentrated flower food solution and dilute it with water when needed. Use a ratio of 1 part concentrate to 3 parts water.
This image portrays someone cutting flowers, highlighting the initial step in flower care and arrangement. Alt text: Cutting fresh flowers, demonstrating the first step in proper flower care.
10. Flower Food DIY: Frequently Asked Questions (FAQ)
10.1. What is Flower Food and Why Do I Need It?
Flower food is a solution that provides essential nutrients and helps prevent bacterial growth in the water, extending the life of cut flowers.
10.2. Can I Use Tap Water for My Flower Food Solution?
Yes, but it’s best to let tap water sit for a few hours to allow chlorine to dissipate. Filtered or distilled water is even better.
10.3. How Often Should I Change the Flower Food Solution?
Change the solution every 2-3 days to keep the water clean and prevent bacterial growth.
10.4. Is It Okay to Use Honey Instead of Sugar?
Honey can be used, but it may promote bacterial growth more than sugar. If using honey, add a bit more vinegar or bleach to the solution.
10.5. Can I Use Club Soda for Flower Food?
Club soda can provide carbonation, which may help with water uptake, but it doesn’t provide nutrients. Combine club soda with sugar and vinegar for a balanced solution.
10.6. What Can I Do If My Flowers Are Already Wilting?
Re-trim the stems, remove any wilted leaves, and place the flowers in a vase with fresh flower food solution. You can also try wrapping the flowers in damp paper towels and refrigerating them for a few hours.
10.7. Can I Use This Flower Food for All Types of Flowers?
While the basic recipes are suitable for most flowers, some may benefit from tailored solutions. Research the specific needs of your flowers for best results.
10.8. How Much Bleach Should I Use in My Flower Food Solution?
Use only 1/4 teaspoon of bleach per quart of water. Too much bleach can damage the flowers.
10.9. Is It Safe to Use Flower Food Around Pets?
Keep flower food solutions out of reach of pets and children. While the ingredients are generally safe in small amounts, ingestion can cause digestive upset.
10.10. Where Can I Learn More About Flower Care?
For more in-depth information and expert tips on flower care, visit FOODS.EDU.VN. We offer a wide range of articles and guides to help you keep your blooms vibrant and healthy.
By following these guidelines and exploring the resources available at FOODS.EDU.VN, you can master the art of flower care and enjoy beautiful, long-lasting blooms in your home. Remember, the right flower food DIY solution, combined with proper maintenance, can make all the difference in the vibrancy and longevity of your floral arrangements.
Want to discover more incredible flower care tips and explore a wealth of culinary knowledge? Head over to foods.edu.vn now! Contact us at 1946 Campus Dr, Hyde Park, NY 12538, United States, or give us a call at +1 845-452-9600. We’re also available on WhatsApp! Your journey into the world of delightful flowers and exquisite foods starts here.