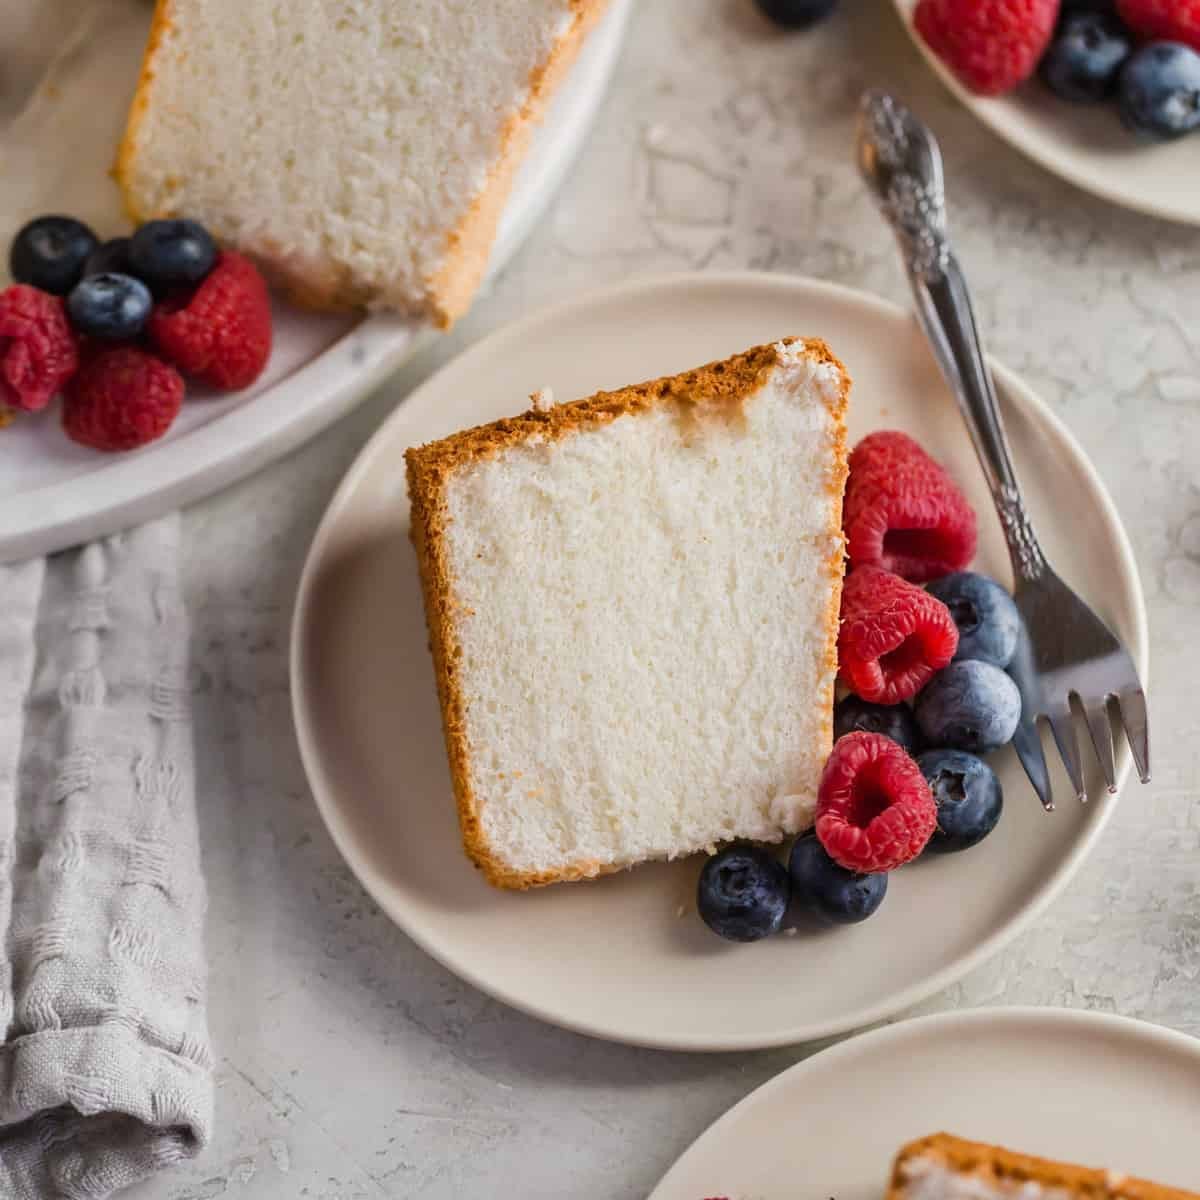
Made entirely from scratch with just six simple ingredients, light and fluffy angel food cake is the quintessential summertime dessert. This homemade cake is easier to prepare than you might think and is guaranteed to impress. For the ultimate seasonal treat, top it with fresh whipped cream and a medley of fresh berries!
While my love for chocolate runs deep, I must confess a special fondness for angel food cake. Ever since childhood, it’s been one of my absolute favorite desserts – a generous slice was the perfect ending to every Sunday dinner at my grandmother’s house during the summer. Today, I’m bringing those cherished memories to life with this incredibly fluffy angel food cake recipe!
Just 6 Ingredients for Angel Food Cake Perfection
I’m a big fan of uncomplicated recipes, especially when summer arrives. Angel food cake is a testament to simplicity, requiring only 6 basic ingredients, many of which you likely already have in your kitchen pantry.
With such a concise ingredient list, each component plays a crucial role in achieving the perfect angel food cake:
- Cake Flour: The secret to the cake’s delicate crumb is cake flour, which has a lower protein content than all-purpose flour. Substituting all-purpose flour is not recommended as it will result in a dense, heavy cake that is prone to collapsing. If you don’t have cake flour on hand, you can easily make a cake flour substitute using all-purpose flour and cornstarch.
- Granulated Sugar: Sugar not only sweetens the cake but also contributes to its tender texture.
- Salt: A pinch of salt is essential to balance the sweetness and enhance the overall flavor profile of the cake.
- Egg Whites: These are the undisputed stars of angel food cake! Egg whites are responsible for the cake’s incredible lift and airy texture, acting as the sole leavening agent. Using only egg whites, without the yolks, is key to achieving its signature light texture. It’s important to use fresh eggs; avoid liquid egg whites from a carton as they are pasteurized, which can hinder their ability to whip into stiff, stable peaks.
- Cream of Tartar: This seemingly magical ingredient stabilizes the whipped egg whites, preventing them from deflating and ensuring the cake maintains its light and fluffy texture.
- Vanilla Extract: Vanilla extract infuses the angel food cake with a beautiful, classic flavor. For a twist, consider experimenting with different extracts like almond, orange, or lemon extract, either in place of or in combination with vanilla. When choosing extracts, always check the label to ensure they are oil-free. Oil, sometimes found in flavored extracts, can interfere with the egg whites’ ability to form stiff peaks.
A note about eggs: You will need approximately 10-12 large eggs to yield 1½ cups of egg whites. The exact number can vary depending on the size of the yolks in each egg. For optimal results, separate the eggs while they are cold and then allow the whites to come to room temperature before whipping. Room temperature egg whites whip to a greater volume, resulting in a lighter cake.
The Essential Angel Food Cake Pan
A 16-cup tube pan is absolutely essential for baking angel food cake. (This angel food cake pan is my go-to and I highly recommend it). Characterized by its tall sides and central tube, this specialized pan enables the delicate batter to “climb” and adhere to the sides during baking. Perhaps even more importantly, many tube pans come equipped with “feet” which allow you to cool the cake upside down, preventing the top from touching the counter or cooling rack. This upside-down cooling is crucial for maintaining the cake’s volume and preventing collapse.
It’s imperative not to grease the pan before adding the batter. The angel food cake batter needs to grip the pan’s sides both during baking and cooling. Any grease will prevent this essential clinging action. If your tube pan lacks a removable bottom, simply line the bottom with parchment paper for easier cake removal.
While you might be tempted to use a Bundt pan or a traditional cake pan, I strongly advise against it. Angel food cake baked in a pan other than a tube pan is highly likely to fall and lose its signature airy texture.
Step-by-Step Guide: How to Make Angel Food Cake
Forget about complicated layers or intricate steps! Making angel food cake is surprisingly straightforward. Here’s a simplified overview of the process – you’ll find the detailed recipe card with complete instructions at the bottom of this post:
- Sift: Sifting is key to achieving a light and airy cake. Sift half of the sugar together with the cake flour and salt. Repeat this sifting process a total of 5 times to ensure the flour is incredibly fine and aerated.
- Combine: In a large bowl or the bowl of a stand mixer, beat the egg whites on low speed until they become frothy. Then, add the vanilla extract and cream of tartar. While a stand mixer fitted with the whisk attachment (or a hand mixer) makes this step easier, you can certainly whisk the egg whites by hand using a balloon whisk – be prepared for a bit of an arm workout!
- Add Sugar Gradually: With the mixer on medium speed, gradually add the remaining sugar, one tablespoon at a time, allowing each addition to fully incorporate before adding the next.
- Whip to Stiff Peaks: Once all the sugar has been added, increase the mixer speed to medium-high and continue to beat until stiff, glossy peaks form. This is a crucial stage – the egg whites should be voluminous and hold their shape when you lift the whisk.
- Gently Fold in Flour: Working in small batches, sift about 1/4 cup of the sifted flour mixture at a time over the whipped egg whites. Gently fold the flour into the egg whites using a spatula, being careful not to deflate the mixture. Repeat until all the flour mixture is incorporated, ensuring you maintain the airy volume of the batter.
- Fill the Pan: Carefully spoon the delicate angel food cake batter into the ungreased tube pan. Smooth the top surface of the batter and then use a knife or skewer to gently run through the batter, breaking any large air bubbles that may have formed.
- Bake: Bake the cake in a preheated oven for approximately 25-40 minutes. The cake is done when a skewer inserted about halfway between the edge and the center comes out clean.
The Critical Upside-Down Cooling Method
Yes, you read that right! Cooling angel food cake upside down is not just a suggestion, it’s essential for maintaining its signature texture. Cool the cake inverted until it is completely cool to the touch, which usually takes at least an hour.
Using a Footed Pan: If you are using a tube pan with small “feet” on the bottom rim, simply invert the pan and rest it on a wire rack, using the feet to elevate it.
Using a Pan Without Feet: If your tube pan does not have feet, you can still cool it upside down! Carefully invert the pan and balance it on the neck of a sturdy glass bottle to allow air to circulate and the cake to cool properly.
Once the cake is completely cool, it’s time to serve. First, use a thin knife or offset spatula to gently run around the inner and outer edges of the cake to loosen it from the pan. Invert the pan again onto a serving dish or plate and the cake should release. If the bottom is still attached, run the knife around the bottom edge to release it completely. When slicing angel food cake, always use a serrated knife and a gentle sawing motion (a bread knife or tomato knife work perfectly). Avoid using a straight-edge knife or pressing straight down, as this will compress and squish the delicate cake.
Delicious Topping and Serving Ideas for Angel Food Cake
One of the many wonderful things about angel food cake is its versatility. Each slice is a blank canvas, ready to be paired with a wide array of delicious toppings. Here are a few of my favorite angel food cake topping ideas:
- Homemade whipped cream or classic 7-minute frosting
- A generous helping of fresh fruit or berries (blueberries, strawberries, and raspberries are my personal favorites!)
- Homemade berry jam for a burst of fruity flavor
- A decadent drizzle of chocolate ganache or homemade salted caramel sauce for a richer touch
- Tangy lemon curd to complement the cake’s sweetness
- Fun sprinkles or mini chocolate chips for added texture and visual appeal
For parties or gatherings, create a fun and interactive angel food cake toppings bar! Offer a variety of toppings and let everyone customize their own slice.
You can also use baked and cooled angel food cake as the star ingredient in a stunning red, white, and blue berry trifle – perfect for patriotic holidays or any summer celebration.
Make-Ahead and Storage Tips for Angel Food Cake
- Storage: To store leftover angel food cake, wrap it tightly in plastic wrap and then place it in an airtight container. Store at room temperature for up to 2 days.
- Make-Ahead Instructions: You can bake angel food cake up to 1 day in advance. Once it has cooled completely, remove it from the tube pan, wrap it tightly in plastic wrap, and store it at room temperature.
- Freezing Instructions: For longer storage, angel food cake freezes beautifully. Wrap the entire cake or individual slices tightly in plastic wrap, and then wrap again in aluminum foil. Place in a freezer-safe bag or container and freeze for up to 4 months. When you are ready to serve, simply thaw at room temperature.
Frequently Asked Questions and Troubleshooting Tips for Angel Food Cake Baking
Why did my angel food cake collapse or fall?
We’ve all experienced the frustration of a fallen angel food cake! There are three primary reasons why this might happen:
- Opening the oven door too early: Opening the oven door during baking causes a temperature drop, which can lead to the cake collapsing. Resist the temptation to peek until at least the minimum baking time has elapsed.
- Incorrect oven temperature: If your oven is too hot, the cake’s exterior will bake too quickly, while the interior remains undercooked. This imbalance can cause the cake to sink as it cools. Investing in an oven thermometer is highly recommended to ensure your oven maintains a consistent 350 degrees F (175 degrees C) throughout baking.
- Improper cooling: Cooling the cake upside down is not optional, it’s essential! Inverting the pan allows gravity to work in your favor, ensuring the cake retains its volume and airy structure as it cools. Cooling it right-side up will almost certainly result in a collapsed cake.
Why is my angel food cake tough or rubbery?
Angel food cake should be incredibly light, airy, and melt-in-your-mouth tender. If your cake has a tough or rubbery texture, it’s likely that the flour was mixed into the batter too aggressively. Overmixing can deflate the delicate whipped egg whites, resulting in a denser, tougher cake. Next time, remember to gently fold the flour into the batter, taking care to preserve the airiness of the egg whites.
Light as air and virtually fat-free, angel food cake is truly a guilt-free dessert dream! If you haven’t tried making angel food cake from scratch, I wholeheartedly encourage you to give this recipe a try. And if you’re feeling adventurous, explore variations like this delightful strawberries and cream angel food cake roll!
Watch How to Make This Classic Angel Food Cake:
If you try this recipe and love it, please come back and give it a 5-star rating – your feedback helps other bakers discover this recipe! ❤️️
Angel Food Cake Recipe
Yield: 12 servings
Prep Time: 30 minutes
Cook Time: 40 minutes
Total Time: 1 hour 10 minutes
This easy-to-follow angel food cake recipe yields a beautifully light and airy dessert, perfect for spring and summer celebrations!
4.61 stars (23 ratings)
Print Recipe Pin Recipe Rate Recipe
Ingredients
- 1 cup (112 g) cake flour, sifted
- 1½ cups (298 g) granulated sugar, divided
- ¼ teaspoon salt
- 1½ cups egg whites, at room temperature
- 1½ teaspoons cream of tartar
- 1 teaspoon vanilla extract
Instructions
- Preheat oven to 350 degrees F (175 degrees C). Have an ungreased 16-cup tube pan ready.
- Sift half of the sugar with the cake flour and salt. Repeat sifting 5 times in total.
- In a large bowl, beat egg whites on low speed until frothy. Add vanilla extract and cream of tartar. Increase speed to medium, gradually adding remaining sugar 1 tablespoon at a time. Increase to medium-high speed and beat until stiff, glossy peaks form, scraping the sides and bottom of the bowl once or twice as needed. Sift about ¼ cup of the flour mixture over the egg whites and gently fold to incorporate. Repeat until all flour mixture is used.
- Spoon batter into the prepared tube pan, smooth the top, and run a knife through the batter to break any air bubbles. Bake until a skewer inserted halfway between the edge and center comes out clean, about 35 to 40 minutes.
- Cool upside down for at least 1 hour. Run a knife around the edge of the cake and invert onto a serving dish. Run a knife around the bottom and release. Place on a serving platter, slice, and serve with your favorite toppings. Angel food cake is best enjoyed the day it is made but can be stored for up to 2 days at room temperature, wrapped tightly in plastic wrap or stored in an airtight container.
Recipe Notes
- Equipment: A 16-cup tube pan is essential for this recipe; this is the one I recommend.
- Do NOT Grease the Pan: This is crucial! The cake needs to cling to the sides of the pan to rise properly and maintain its volume during cooling. Greasing the pan will prevent this. If your tube pan doesn’t have a removable bottom, line only the bottom with parchment paper for easier release.
- Egg Whites: Use fresh, real eggs for the best results. Cartoned egg whites are pasteurized and may not whip to stiff peaks.
- Cooling: If your tube pan has feet, invert it onto a wire rack to cool. If it doesn’t have feet, invert it onto the neck of a glass bottle.
- Stand Mixer Alternatives: While a stand mixer or hand mixer is convenient, you can whisk egg whites by hand with a balloon whisk.
- Egg Quantity: The number of eggs needed for 1½ cups of egg whites can vary. I typically use about 10 large eggs, but recipes often suggest 11 or 12.
- Separating Eggs: Separate eggs when cold for cleaner separation, then let the whites come to room temperature before whipping for better volume.
- Flavor Variations: Experiment with almond, orange, or lemon extract in place of or in combination with vanilla. Ensure extracts are oil-free to avoid hindering egg white whipping.
- Slicing: Use a sharp, serrated knife and a gentle sawing motion to slice angel food cake to prevent crushing it. A bread knife works well.
- Serving Suggestions: Serve with fresh berries, whipped cream, vanilla ice cream, 7-minute frosting, and/or chocolate ganache.
- Make-Ahead: Bake angel food cake one day in advance. Cool, remove from pan, wrap in plastic wrap, and store at room temperature.
- Freezing: Freeze whole or sliced angel food cake by wrapping tightly in plastic wrap, then aluminum foil. Freeze in a freezer-safe bag for up to 4 months. Thaw at room temperature before serving.
Calories: 152kcal, Carbohydrates: 33g, Protein: 5g, Fat: 1g, Saturated Fat: 1g, Sodium: 100mg, Potassium: 123mg, Fiber: 1g, Sugar: 25g, Vitamin A: 1IU, Calcium: 4mg, Iron: 1mg
Did you make this recipe?
Leave a review below, then snap a picture and tag @thebrowneyedbaker on Instagram so I can see it!
Author: Michelle
Course: Dessert
Cuisine: American
Photography by Ari Laing.