Homemade Baby Food Puffs are an excellent choice for introducing finger foods to your little one. Gluten-free, dairy-free, and optionally egg-free, these healthy baby snacks are designed to melt in your mouth, making them a safe and enjoyable option for babies 6 months and older. Plus, they are wonderfully mess-free, perfect for busy parents and active babies!
Why Make Your Own Baby Food Puffs?
As parents, we’re always on the lookout for convenient and healthy snack options for our babies. Life with a baby often involves being on the go, and portable snacks become essential. While options like yogurt pouches or fruit purees are nutritious, they can be incredibly messy. Other easily portable snacks, such as crackers or veggie sticks, often lack the nutritional value we desire for our little ones.
This is where baby food puffs come in, but store-bought versions often fall short. Many commercially available baby puffs contain unnecessary added sugars, unhealthy vegetable oils, and vague “natural flavors” that can hide less desirable ingredients. Furthermore, high-quality, clean-ingredient baby food brands can be quite expensive, adding up quickly as you try to provide the best for your baby.
Driven by these concerns, I decided to create a homemade version of baby food puffs. The result? A fantastic, healthy snack that both parents and babies will love! These homemade puffs are made with wholesome, real food ingredients, are budget-friendly, and surprisingly easy to prepare. You get to control exactly what goes into your baby’s snack, ensuring they receive the best possible nutrition right from the start.
For more ideas on introducing solids and baby-led weaning, be sure to check out my comprehensive guide on starting solids!
What Makes These Baby Food Puffs Healthy?
These homemade baby puffs are not only easy to make but also packed with goodness. By making them yourself, you avoid processed ingredients and preservatives commonly found in store-bought brands. What’s truly exciting is the versatility and health benefits they offer:
- Gluten-Free, Dairy-Free, and Egg-Free Options: Perfect for babies with sensitivities or allergies, this recipe can be adapted to suit various dietary needs.
- Real Food Ingredients: Made with fruit and vegetable purees and wholesome flours, these puffs are a far cry from processed snacks.
- Nutrient-Rich: You can boost the nutritional content even further by adding ingredients like spirulina, a powerhouse of vitamins and minerals.
- Melt-in-Mouth Texture: Specifically designed to dissolve easily, these puffs are safe and enjoyable for babies who are still developing their chewing skills.
- Toddler-Friendly and Customizable: As your baby grows into a toddler, these puffs remain a healthy snack option. You can easily customize the flavors by incorporating your child’s favorite fruits and vegetables, or use them to introduce new tastes.
These homemade baby food puffs are a snack you can feel truly good about giving to your little one, offering both nutrition and peace of mind.
Ingredients You’ll Need for Homemade Baby Puffs
One of the best aspects of this baby food puffs recipe is its flexibility. Feel free to use whatever fruits and vegetables you have on hand. Here’s a breakdown of the ingredients and some helpful substitution tips:
- Sprouted Oat Flour: I prefer sprouted oat flour as it’s easier for babies to digest. Sprouting grains helps break down anti-nutrients like phytates, which can hinder mineral absorption, making the nutrients more bioavailable. If sprouted oat flour isn’t available, you can substitute with regular oat flour, rice flour, or even brown rice flour. You can find sprouted oat flour here.
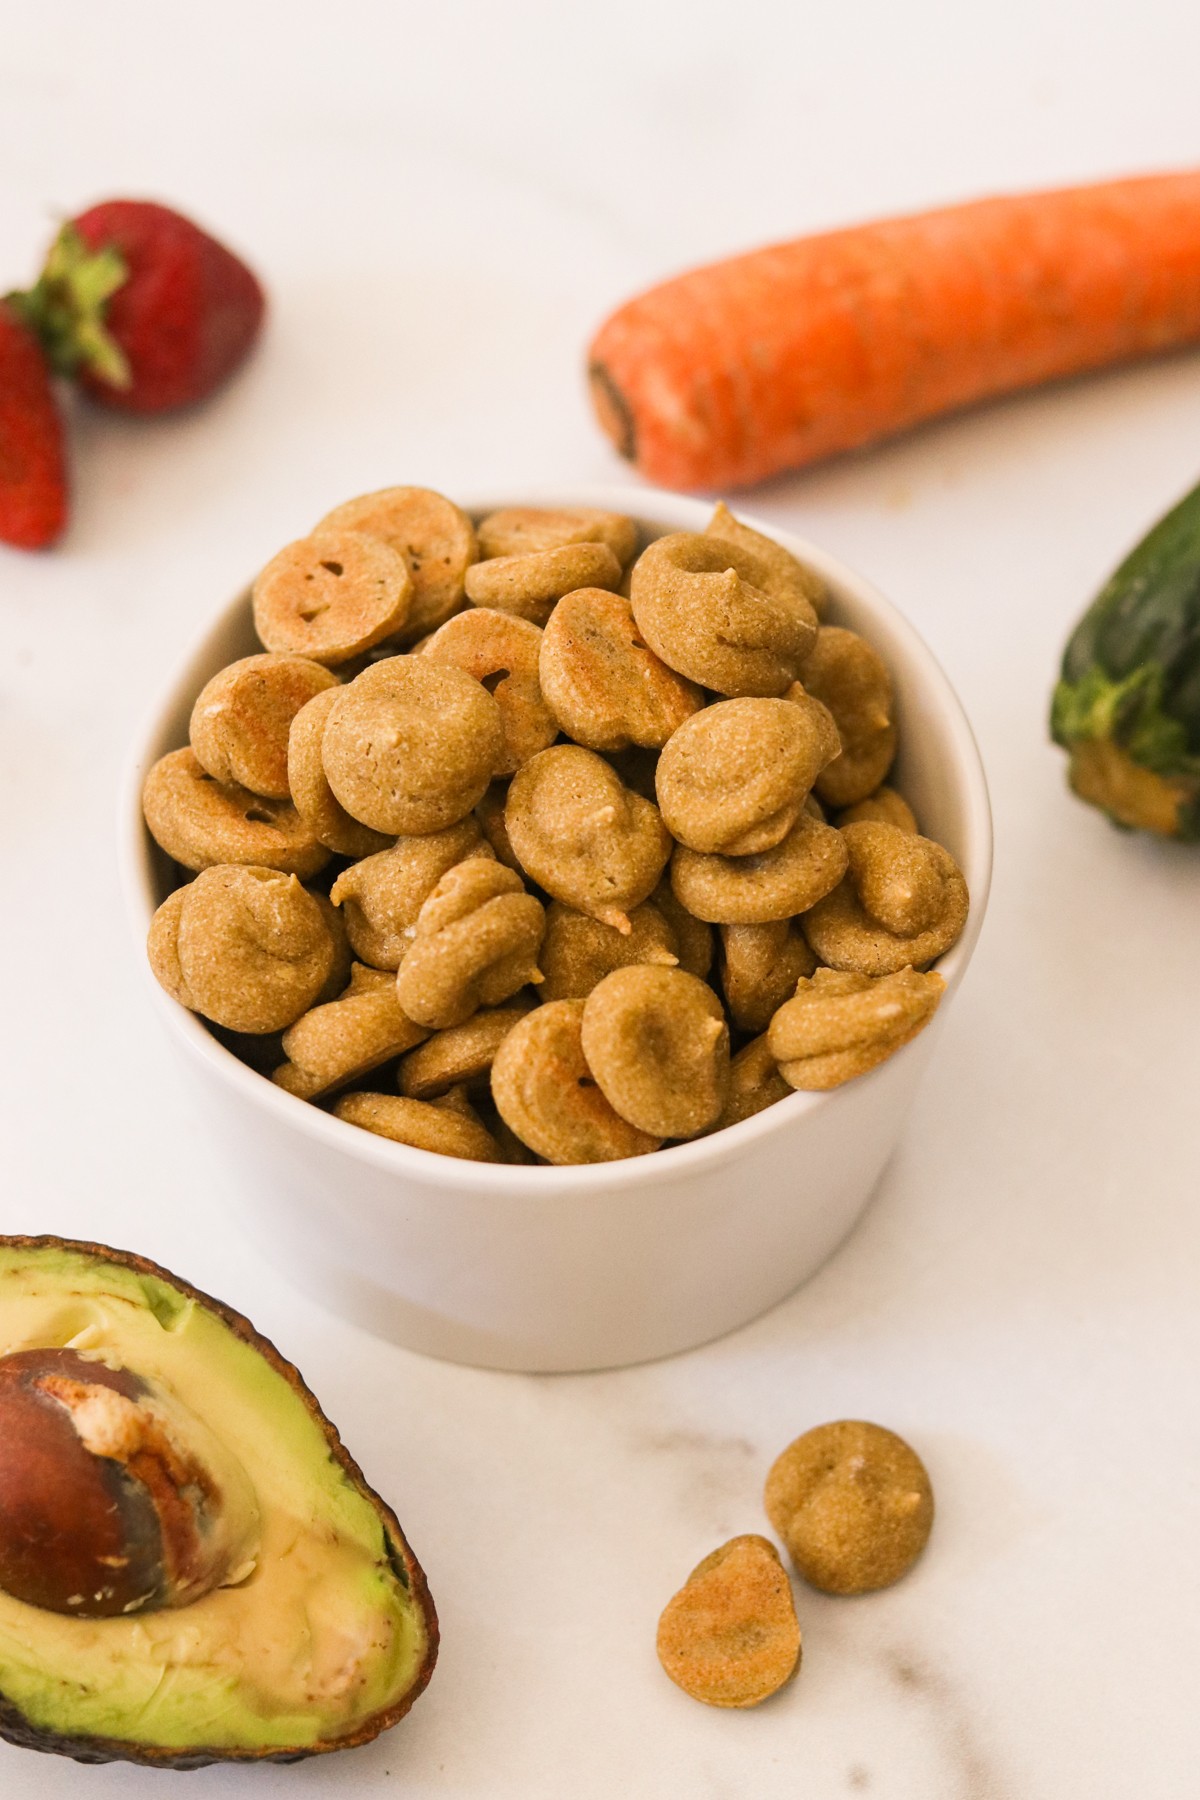
- Pureed Fruits and Vegetables: The base of these puffs is a fruit puree, which provides natural sweetness and flavor. You can get creative and combine various fruits and vegetables. For the puffs pictured, I used a blend of apple, banana, and kale. Aim for a predominantly fruit base to ensure a naturally appealing taste for your baby. Great puree options include:
- Fruits: banana, apple, pears, peach, mango, berries (strawberries, blueberries, etc.)
- Vegetables: spinach, kale, beet, sweet potato, chard, avocado, broccoli, carrot, peas
- Coconut Oil: Adds a touch of healthy fat and helps with texture. If your baby tolerates dairy, ghee can be used as a substitute.
- Egg Yolks: Egg yolks contribute to the puff’s structure and richness. For an egg-free version, flax eggs work wonderfully. To make a flax egg, mix 2 tablespoons of flaxseed meal with 5 tablespoons of water and let it sit until it thickens.
- Aluminum-Free Baking Powder: Ensures the puffs are light and airy. This aluminum-free baking powder is a great option.
- Spirulina (Optional): A nutritional powerhouse, spirulina is a complete protein source and packed with essential nutrients like iron, calcium, zinc, magnesium, and B vitamins, promoting healthy development. It’s an excellent way to boost the nutritional value of these puffs. This is my preferred brand of spirulina, and you can use code GREATGRANDMA10 for a discount.
- Bone Broth, Breast Milk, or Water (If Needed): Depending on the consistency of your puree and whether you use eggs or flax eggs, you might need to adjust the moisture level. Add any of these liquids, one tablespoon at a time, until the batter reaches a thick pancake batter consistency.
Step-by-Step Guide to Making Baby Food Puffs
Making these healthy baby food puffs is simpler than you might think! Here’s a step-by-step guide to help you through the process:
- Preheat and Prep: Preheat your oven to 350°F (175°C). Line a baking sheet with parchment paper to prevent sticking.
- Mix the Batter: In a mixing bowl, combine all the ingredients. Stir until you achieve a smooth batter with the consistency of thick pancake batter. If the batter seems too dry, add bone broth, breast milk, or water, one tablespoon at a time, until you reach the desired consistency.
- Pipe the Puffs: Transfer the batter into a piping bag fitted with a round tip. If you don’t have a piping bag, a zip-top plastic bag with a corner snipped off will work just as well. Pipe small circles or any shapes you desire onto the prepared baking sheet, leaving a little space between each puff.
- Bake in Two Stages: Bake for 8 minutes, then rotate the baking sheet halfway through to ensure even baking. Reduce the oven temperature to 250°F (120°C) and bake for an additional 20-30 minutes, or until the puffs are lightly golden and dry to the touch. The extended baking at a lower temperature is key to achieving that melt-in-your-mouth texture.
- Cool Completely: Allow the baby food puffs to cool completely on the baking sheet on the countertop. They will firm up as they cool, achieving the perfect puff texture.
Expert Tips for Perfect Baby Food Puffs
To ensure your homemade baby food puffs are a success, here are some expert tips:
- Allergen Awareness: If you have already introduced common allergens like peanut butter, other nut butters, and eggs to your baby and they have tolerated them well, feel free to incorporate them into your puffs. If not, stick to seed butters and flax eggs. Be mindful that certain fruits like pineapple and strawberries can also be allergenic for some babies. Always consult with your pediatrician if you have any concerns about allergies.
- Egg-Free Puffs: For an egg-free option that still provides good binding, flax eggs are your best friend. Remember to let the flax egg mixture sit for a few minutes to thicken properly before adding it to the batter.
- Texture Perfection: The key to melt-in-mouth puffs is achieving the right batter consistency and baking them properly. If your puffs are too dry or crumbly, try adding a bit more liquid to your batter next time. If they are not melting enough, ensure you bake them at the lower temperature for the full duration to dry them out thoroughly.
- Flavor Exploration: Don’t be afraid to experiment with different fruit and vegetable combinations to find your baby’s favorite flavors. You can also add a pinch of baby-safe spices like cinnamon or nutmeg for a little extra flavor (for older babies).
Storage Solutions for Baby Food Puffs
Proper storage keeps these homemade baby food puffs fresh and ready for snacking:
- Room Temperature Storage: Store the cooled puffs in an airtight container at room temperature for up to one week.
- On-the-Go Tip: If you have an empty store-bought baby puff container, repurpose it to store your homemade puffs. These containers are perfectly sized for portability, making snack time on the go much easier and mess-free.
FAQs About Baby Food Puffs
How do you know when a baby is ready for puffs?
Babies typically show readiness for finger foods like puffs once they:
- Can sit upright independently.
- Exhibit chewing motions when food is in their mouth.
- Demonstrate the ability to bring food to their mouth on their own.
While every baby develops at their own pace, most babies are generally ready for puffs around 6 months of age.
Can babies eat puffs without teeth?
Yes! These baby food puffs are specifically designed to melt in the mouth, making them safe for babies even without teeth. If you are still concerned, you can make the puffs smaller, similar in size to store-bought baby cereal puffs, or break them into smaller pieces before serving.
Are baby puffs a choking hazard?
While these puffs are designed to melt, it’s always crucial to test a puff yourself to ensure it dissolves easily before giving it to your baby. The melt-in-mouth quality depends on the correct ingredient ratios and baking time. Always supervise your baby closely during feeding times, as you should with any food. Finger foods like baby puffs are excellent for helping babies develop fine motor skills and learn the pincer grasp, essential for self-feeding.
What are the healthiest snacks for babies?
As a nutritionist, I believe that establishing healthy eating habits starts from the very beginning. The best baby snacks are those made with whole, real ingredients, with minimal to no processed components, preservatives, and added sugars. Focus on offering a variety of fresh fruits and vegetables. When choosing pre-packaged snacks like pouches or bars, always read the ingredient labels carefully to ensure they align with your nutritional goals for your baby. Remember, every baby’s food journey is unique and personal. Trust your instincts, consult with your pediatrician or allergist when needed, and set clear boundaries with caregivers about your baby’s diet. You’ve got this!
More Baby and Kid-Friendly Recipes
Looking for more healthy recipes for your little one? Check out these kid-friendly ideas:
Healthy Homemade Popsicles for Toddlers
AIP & Paleo Blueberry Sour Gummies
How to Start Solids at 6 Months: Our Experience
Non Toxic Baby Products For The Nursery and Registry
How to Make Gluten Free Playdough
If you try this recipe, please leave a star rating and comment below! Your feedback is valuable. For more delicious and healthy recipes, follow me on social media: Instagram, Facebook, and Pinterest.