Are you looking to bring a uniquely gruesome and fun appetizer to your next Halloween bash or zombie-themed party? Look no further than zombie finger food, the perfect way to spook your guests while tantalizing their taste buds. This isn’t your average finger food; we’re taking party snacks to a terrifyingly tasty new level! Get ready to learn how to make these incredibly realistic and delightfully disgusting treats that are guaranteed to be a conversation starter.
What Makes Zombie Finger Food Great for Parties?
Finger Food Party Food is all about convenience and fun, and zombie finger food takes that concept and injects it with a dose of thrilling horror. Here’s why they are a fantastic choice for your next gathering:
- Thematic Appeal: Perfectly aligned with Halloween, zombie themes, or any spooky occasion, these finger foods instantly set the mood and enhance your party’s atmosphere.
- Conversation Starter: Their gruesome appearance is designed to shock and amuse, making them a fantastic icebreaker and a memorable addition to your food spread. Guests will be talking about these long after the party ends!
- Easy to Eat: As true finger food, they are simple to grab and enjoy, allowing your guests to mingle and move around without the need for plates and cutlery.
- Customizable Gross-Out Factor: You can adjust the level of “grossness” to suit your audience, from subtly spooky to outrageously gruesome.
- Budget-Friendly: Made primarily with hot dogs and a few simple ingredients, this recipe is surprisingly affordable, especially when catering for a crowd.
Ingredients You’ll Need
To create your batch of zombie finger food, gather these key ingredients:
- Hot Dogs: Use regular or turkey hot dogs for the fingers. Jumbo franks are excellent for creating thumbs and toes for extra variety. Vegetarian hot dogs work just as well if you have guests with dietary preferences.
- Onion: This will be used to create the fingernails, adding a realistic touch.
- Mozzarella Cheesesticks: Replacing the original parsnip, mozzarella cheesesticks are easier to use and provide a great “bone” effect. Ensure they are added after baking.
- Ketchup (Optional): For that essential “blood” effect, adding a touch of ketchup at the end really elevates the gruesome realism.
- Green or Blue Food Coloring (Optional): For a classic “zombie” look, use food coloring to give the hot dogs a sickly, undead hue.
- Kitchen String & Foil: For shaping the fingers during baking (optional but recommended).
You’ll also need standard kitchen tools like a knife, cutting board, baking sheet, and optionally a drinking straw.
Step-by-Step Guide to Make Zombie Finger Food
Let’s get started on creating these spooky snacks! Follow these steps to bring your zombie finger food to life (or rather, un-death!).
Step 1: Preparing the “Ripped” Fingers
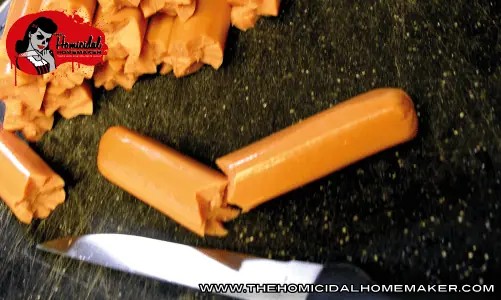
Begin by giving your hot dogs a gruesome “ripped” texture. Instead of slicing them cleanly, partially insert your knife at an angle midway down the length of the hot dog. Rotate the hot dog while making angled cuts. This irregular, meaty texture will significantly enhance the realistic, gross-out effect, making them look freshly torn.
Step 2: Creating the Nail Bed and Knuckles
Next, create a small flap on each hot dog where the fingernail will be inserted. Cut a small, shallow flap and then make a tiny slit at the base of this “nail bed.” This slit is where you’ll insert a wedge of onion, which will help keep the fingernail securely in place.
To create the knuckles, make shallow cuts across the width of the hot dog. Don’t cut too deep; you only want the hot dog to slightly open up along these cuts as it cooks, mimicking finger joints.
Step 3: Crafting the Fingernails
Take your onion and cut off a slice. From this slice, cut out small rectangles that are slightly longer than you want your fingernails to be. Trim one end of each rectangle to a point to give it a more nail-like shape. Insert these onion “fingernails” into the slits you created in Step 2.
Step 4: Adding the “Bone” (or Mozzarella)
For the “bone,” use mozzarella cheesesticks. If you have a drinking straw, use it to remove a small plug from the ripped end of the hot dog. Alternatively, you can carefully cut a small “X” with your knife. Make the hole deep enough to insert the cheesestick securely but not so deep that you puncture the other end. Insert pieces of mozzarella cheesestick into these holes to resemble bone fragments sticking out of the finger.
Zombie Style Variation: If you want to create zombie fingers with a greenish hue, you can boil the hot dogs in water colored with green or blue food coloring before proceeding with these steps. This will give them an undead, pallid appearance.
Step 5: Shaping with Foil and String (Optional)
This step is optional but highly recommended for shaping. Cut foil into 1-inch strips and fold them in half. Wrap a foil strip around the base of the hot dog (below the knuckle slits) and secure it with kitchen string. Repeat this above the knuckle slits, ensuring the onion fingernail is also held in place. These wrappings help create a defined finger shape as the hot dog bakes.
Step 6: Baking to Perfection
Place your prepared zombie fingers on a baking sheet and bake at 350 degrees Fahrenheit (175 degrees Celsius) for about 20 minutes. Baking is preferred over boiling as it allows the hot dogs to swell slightly and the cut edges to brown, enhancing the gruesome look. The onions will cook perfectly, and the mozzarella (if added before baking – though it’s best added after) will soften slightly.
Step 7: The Gruesome Finishing Touch
Let the zombie fingers cool slightly before removing the foil strips and kitchen string. Arrange them on a platter and add the final, horrifying touch: ketchup “blood.” Drizzle ketchup generously over the ripped ends of the fingers to maximize the gruesome effect.
Serving Suggestion: For a less bloody presentation, you can serve them without ketchup for a subtly spooky look, as shown in the “Without Blood” image.
Serve your zombie finger food and watch your guests’ reactions – they’re guaranteed to be a hit!
Tips for the Best Zombie Finger Food Party Appetizer
- Make Ahead: Prepare the finger components ahead of time and bake them closer to the party to ensure they are warm and fresh.
- Vegetarian Options: Easily adaptable for vegetarian guests by using vegetarian hot dogs.
- Customize the Grossness: Adjust the amount of “rip” and “blood” to control how gruesome you want them to be.
- Presentation Matters: Use spooky platters or serving dishes to enhance the theme.
- Safety First: Remind guests that while they look like severed fingers, they are indeed delicious and safe to eat!
Zombie finger food is more than just a snack; it’s an experience. Perfect for Halloween or any spooky themed party, these finger food party food appetizers will definitely leave a lasting impression. Get creative, have fun, and prepare for some delightfully horrified reactions from your guests!