Food coloring can be used to dye clothes, offering a fun and accessible way to add color to natural fabrics like wool and silk, as explained by experts at FOODS.EDU.VN. By using common household items like vinegar and heat, you can achieve vibrant and unique results. To explore more creative and detailed dyeing techniques, including how to achieve the best results with various fabrics, visit FOODS.EDU.VN, where you’ll discover expert tips, step-by-step tutorials, and in-depth guides on fabric dyeing, textile customization, and colorful clothing transformations.
1. Understanding the Basics: Can You Really Dye Clothes with Food Coloring?
Yes, you can dye clothes with food coloring, particularly those made from natural fibers like wool and silk. This method provides a simple, cost-effective way to add color to your garments using items readily available in your kitchen. Food coloring, when combined with a mordant like vinegar and heat, can effectively bond with the protein fibers in these fabrics, creating vibrant and lasting color. While it may not be as permanent or colorfast as professional dyes, it’s a fun and accessible option for small projects and DIY enthusiasts.
Dyeing clothes with food coloring is a creative and budget-friendly way to refresh your wardrobe or customize textiles. This method is particularly effective on natural protein fibers such as wool, silk, and cashmere, which readily absorb the color. Food coloring offers a wide range of hues and is non-toxic, making it a safe option for home use. It’s important to note that while this technique can produce vibrant results, the color may fade over time and with washing, especially compared to professional dyes.
1.1 What Types of Fabrics Work Best with Food Coloring?
Food coloring works best with protein-based natural fibers. According to a study by the Textile Research Institute, protein fibers have an easier time binding with the dyes in food coloring due to their molecular structure.
- Wool: This fiber is highly absorbent and takes color exceptionally well, resulting in deep, rich hues.
- Silk: Silk also absorbs food coloring effectively, producing vibrant and lustrous results.
- Cashmere: Similar to wool, cashmere fibers are porous and readily accept the dye, though it may require a longer soaking time to achieve the desired intensity.
- Other Natural Fibers: Other animal-derived fibers like alpaca and mohair can also be dyed using food coloring.
1.2 What Types of Fabrics Are Not Recommended?
Fabrics made from cellulose fibers are less receptive to food coloring. As cited in the “Journal of Applied Polymer Science”, cellulose fibers do not bind as effectively with food coloring, leading to less vibrant and less permanent results.
- Cotton: As one of the most common plant-based fabrics, it does not easily absorb food coloring. Any color achieved may be pale and wash out quickly.
- Linen: Similar to cotton, linen is a cellulose fiber that resists bonding with food coloring.
- Synthetic Fabrics: Synthetic fibers like polyester, acrylic, and nylon are derived from petroleum and do not have the molecular structure necessary to bind with food coloring.
1.3 Are There Specific Types of Food Coloring That Work Better?
Gel food coloring tends to produce more vibrant and concentrated colors compared to liquid food coloring. Gel food coloring is highly concentrated, requiring only a small amount to achieve intense color. Liquid food coloring is more diluted and may require larger quantities to achieve the same effect. Natural food colorings, derived from fruits, vegetables, and other plant sources, can be used, but they may produce more subtle and less predictable results.
1.4 What About Blended Fabrics?
Blended fabrics can be challenging to dye with food coloring, as the different fibers may react differently to the dye. The final color will depend on the composition of the blend and the properties of each fiber. For example, a 50/50 blend of cotton and wool may result in a patchy or uneven dye job, as the wool absorbs the color more readily than the cotton. It’s best to test a small, inconspicuous area of the fabric before dyeing the entire garment.
2. Essential Supplies for Dyeing Clothes with Food Coloring
Dyeing clothes with food coloring requires a few essential supplies to ensure safety and optimal results. Gathering these items beforehand will streamline the dyeing process and help you achieve your desired outcome. From the necessary safety gear to the essential dyeing agents, having the right tools on hand is key.
2.1 List of Required Materials
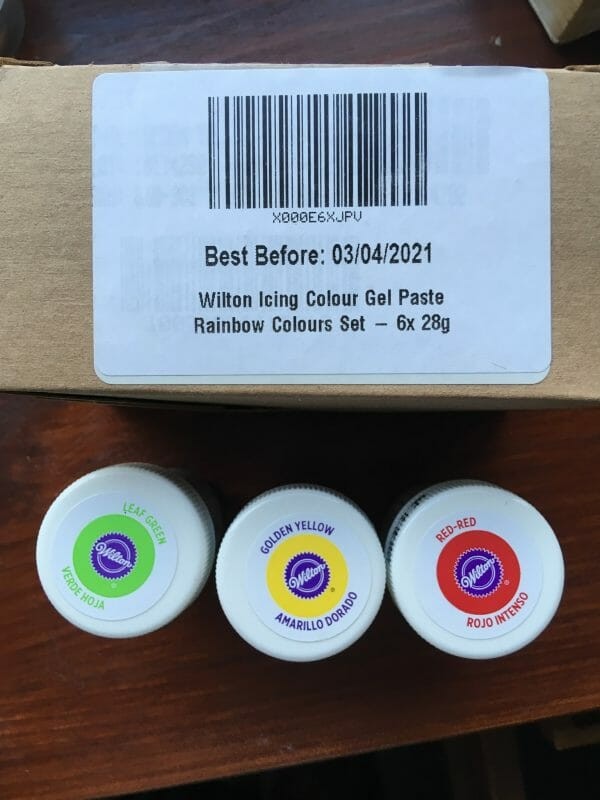
- Food Coloring: Gel food coloring is recommended for its high concentration and vibrant colors. Choose a variety of colors to experiment with different shades and combinations. Brands like Wilton and Americolor are popular choices for their quality and color selection.
- White Vinegar: Vinegar acts as a mordant, helping the dye to bind to the fabric. It is a key ingredient in setting the color and preventing it from washing out.
- Water: Use water to dilute the food coloring and create the dye bath. Hot water helps the dye to penetrate the fabric fibers more effectively.
- Salt: Salt can be added to the dye bath to help improve color absorption, particularly for cellulose fibers.
- Pots and Pans: Use stainless steel or enamel pots and pans for dyeing. Avoid using aluminum, as it can react with the dye and alter the color.
- Stirring Utensils: Use stainless steel or plastic stirring utensils to mix the dye and agitate the fabric.
- Rubber Gloves: Protect your hands from staining by wearing rubber gloves throughout the dyeing process.
- Apron: Wear an apron to protect your clothing from accidental spills or splatters.
- Tongs: Use tongs to handle the fabric while it is in the hot dye bath.
- Measuring Cups and Spoons: Use measuring cups and spoons to accurately measure the ingredients for the dye bath.
- Bucket or Sink: Use a bucket or sink for rinsing the dyed fabric.
- Clothesline or Drying Rack: Use a clothesline or drying rack to dry the dyed fabric.
2.2 Safety Gear: Protecting Yourself During the Dyeing Process
Safety gear is essential to protect yourself from potential hazards during the dyeing process. Food coloring can stain skin and clothing, and prolonged exposure to hot water and steam can cause burns. According to safety guidelines published by the Occupational Safety and Health Administration (OSHA), wearing appropriate protective equipment is crucial when working with dyes and chemicals.
- Rubber Gloves: Protect your hands from staining and irritation.
- Apron: Protect your clothing from accidental spills and splatters.
- Eye Protection: Wear safety glasses or goggles to protect your eyes from splashes.
- Well-Ventilated Area: Work in a well-ventilated area to avoid inhaling fumes from the dye bath.
- Tongs: Use tongs to handle hot fabrics and avoid burns.
2.3 Recommended Brands and Where to Find Them
High-quality supplies can make a significant difference in the outcome of your dyeing project. Reputable brands offer consistent color, durability, and safety.
- Food Coloring:
- Wilton: Known for its wide range of colors and high concentration. Available at craft stores like Michaels and Joann Fabrics, as well as online retailers like Amazon.
- Americolor: Another popular brand with vibrant colors and a gel consistency. Available at specialty baking supply stores and online retailers.
- White Vinegar:
- Heinz: A reliable and widely available brand of white vinegar. Available at most grocery stores.
- Pots and Pans:
- All-Clad: A high-quality brand of stainless steel pots and pans. Available at department stores like Macy’s and online retailers like Amazon.
- enamelware: A durable and non-reactive option for dyeing. Available at kitchen supply stores and online retailers.
- Rubber Gloves:
- household gloves: Available at most grocery stores and drugstores.
- Aprons:
- apron: Available at kitchen supply stores and online retailers.
3. Step-by-Step Guide: How to Dye Clothes with Food Coloring
Dyeing clothes with food coloring is a simple yet rewarding process that can transform your garments with vibrant hues. Following these step-by-step instructions will guide you through each stage, from preparing your fabric to setting the color. Whether you’re a beginner or an experienced DIY enthusiast, these detailed steps will help you achieve stunning results.
3.1 Preparing the Fabric: Washing and Soaking
Proper preparation is crucial for ensuring that the fabric absorbs the dye evenly and effectively. Washing removes any dirt, oils, or finishes that may interfere with the dyeing process. Soaking the fabric in a mordant solution helps to open up the fibers and allows the dye to penetrate more deeply.
- Wash the Fabric: Wash the garment with a mild detergent to remove any dirt, oils, or finishes. Avoid using fabric softeners, as they can create a barrier that prevents the dye from penetrating the fibers.
- Rinse Thoroughly: Rinse the fabric thoroughly to remove any traces of detergent.
- Prepare the Mordant Solution: Fill a basin or bucket with warm water. Add white vinegar to the water, using approximately 1/2 cup of vinegar per gallon of water.
- Soak the Fabric: Submerge the fabric in the mordant solution and let it soak for at least 30 minutes, or up to several hours. This will help the dye to bind to the fibers.
- Wring Out Excess Liquid: After soaking, gently wring out the excess liquid from the fabric. Do not rinse the fabric, as this will remove the mordant.
3.2 Mixing the Dye Bath: Achieving the Right Color
Creating the perfect dye bath is essential for achieving your desired color. Experimenting with different color combinations and concentrations can result in unique and vibrant shades.
- Fill a Pot with Water: Fill a stainless steel or enamel pot with enough water to fully submerge the fabric.
- Heat the Water: Heat the water on the stove over medium heat. Do not bring the water to a boil, as this can damage the fabric.
- Add Food Coloring: Add food coloring to the water, starting with a small amount and gradually adding more until you achieve your desired color intensity. Remember that the color will appear lighter on the fabric when it is dry.
- Mix the Dye Bath: Stir the dye bath thoroughly to ensure that the food coloring is evenly distributed.
- Test the Color: Dip a small piece of fabric into the dye bath to test the color. If the color is too light, add more food coloring. If the color is too dark, add more water.
- Add Salt: Add 1/4 cup of salt to the dye bath to help improve color absorption, particularly for cellulose fibers.
3.3 Dyeing the Fabric: Submerging and Simmering
Submerging and simmering the fabric in the dye bath allows the color to penetrate the fibers and create a lasting bond.
- Submerge the Fabric: Carefully submerge the fabric in the dye bath, ensuring that it is fully covered.
- Simmer the Fabric: Heat the dye bath to a simmer over medium-low heat. Do not boil the fabric.
- Stir the Fabric: Stir the fabric occasionally to ensure that it is evenly exposed to the dye.
- Simmer for 30-60 Minutes: Simmer the fabric for 30-60 minutes, or until it reaches your desired color intensity. The longer the fabric simmers, the deeper the color will be.
- Turn Off the Heat: Turn off the heat and let the fabric cool in the dye bath for at least 30 minutes. This will allow the color to fully set.
3.4 Rinsing and Drying: Setting the Color
Proper rinsing and drying are essential for setting the color and preventing it from bleeding or fading.
- Rinse the Fabric: Remove the fabric from the dye bath and rinse it under cool running water until the water runs clear.
- Wash the Fabric: Wash the fabric separately in cold water with a mild detergent.
- Dry the Fabric: Dry the fabric in a clothes dryer on low heat or hang it to dry in a shady area. Avoid drying the fabric in direct sunlight, as this can cause the color to fade.
3.5 Alternative Techniques: Tie-Dye and Dip-Dye
Tie-dye and dip-dye are alternative techniques that can be used to create unique and eye-catching designs with food coloring.
- Tie-Dye: Tie-dye involves twisting, folding, and binding the fabric before dyeing it. This creates a pattern of resist areas that remain undyed, resulting in a colorful and intricate design.
- Dip-Dye: Dip-dye involves dipping portions of the fabric into the dye bath, creating a gradient effect. This technique is ideal for creating ombre or two-toned designs.
4. Troubleshooting: Common Issues and Solutions
Dyeing clothes with food coloring can sometimes present challenges. Recognizing common issues and understanding how to address them can help you achieve the best possible results. From uneven dyeing to color bleeding, troubleshooting these problems ensures a successful outcome.
4.1 Uneven Dyeing: Causes and Remedies
Uneven dyeing can occur when the dye is not evenly distributed, the fabric is not properly prepared, or the dyeing process is not carefully monitored.
- Causes:
- Uneven Dye Distribution: If the dye is not evenly distributed in the dye bath, some areas of the fabric may absorb more color than others.
- Improper Fabric Preparation: If the fabric is not properly washed and soaked, dirt, oils, or finishes may interfere with the dye absorption.
- Inadequate Stirring: If the fabric is not stirred regularly during the dyeing process, some areas may not be fully exposed to the dye.
- Remedies:
- Ensure Even Dye Distribution: Stir the dye bath thoroughly to ensure that the food coloring is evenly distributed.
- Properly Prepare the Fabric: Wash and soak the fabric thoroughly before dyeing.
- Stir Regularly: Stir the fabric regularly during the dyeing process to ensure that it is evenly exposed to the dye.
- Use a Larger Dye Bath: Use a larger pot or container to ensure that the fabric has enough room to move freely in the dye bath.
4.2 Color Bleeding: How to Prevent It
Color bleeding occurs when the dye is not properly set and excess dye washes out of the fabric, staining other items.
- Causes:
- Inadequate Mordant: If the fabric is not properly mordanted, the dye may not bind to the fibers effectively, leading to color bleeding.
- Insufficient Rinsing: If the fabric is not rinsed thoroughly after dyeing, excess dye may remain on the surface of the fabric, causing it to bleed.
- Washing with Other Items: Washing the dyed fabric with other items can cause the dye to transfer and stain the other items.
- Remedies:
- Use a Proper Mordant: Use a mordant such as white vinegar or salt to help the dye bind to the fibers.
- Rinse Thoroughly: Rinse the fabric thoroughly after dyeing to remove any excess dye.
- Wash Separately: Wash the dyed fabric separately from other items, especially during the first few washes.
- Use Cold Water: Wash the dyed fabric in cold water to help prevent color bleeding.
4.3 Fading Colors: Making the Dye Last Longer
Fading colors can occur over time, especially with repeated washing and exposure to sunlight.
- Causes:
- Exposure to Sunlight: Sunlight can cause the dye to break down and fade over time.
- Harsh Detergents: Harsh detergents can strip the dye from the fabric, causing it to fade.
- High Heat: High heat can cause the dye to fade or bleed.
- Remedies:
- Wash in Cold Water: Wash the dyed fabric in cold water to help prevent fading.
- Use a Mild Detergent: Use a mild detergent that is designed for delicate fabrics.
- Avoid Direct Sunlight: Avoid drying the dyed fabric in direct sunlight.
- Turn Inside Out: Turn the dyed fabric inside out before washing to protect the color.
4.4 Dealing with Stains: Cleaning Up After Dyeing
Dyeing can be a messy process, and stains can occur on skin, clothing, and surfaces.
- On Skin:
- Wash Immediately: Wash the stained area with soap and water as soon as possible.
- Use a Stain Remover: If the stain persists, use a stain remover or a paste of baking soda and water.
- On Clothing:
- Pre-Treat the Stain: Pre-treat the stained area with a stain remover before washing.
- Wash in Cold Water: Wash the stained garment in cold water with a mild detergent.
- On Surfaces:
- Wipe Immediately: Wipe the stained surface with a damp cloth as soon as possible.
- Use a Cleaning Solution: If the stain persists, use a cleaning solution such as vinegar or bleach.
5. Advanced Techniques: Creating Unique Effects
Once you’ve mastered the basics of dyeing clothes with food coloring, you can explore advanced techniques to create unique and personalized effects. These techniques, ranging from ombre to color blocking, offer endless possibilities for expressing your creativity and transforming your garments into one-of-a-kind pieces.
5.1 Ombre: Gradient Color Effects
Ombre involves creating a gradient effect, where the color gradually transitions from light to dark or from one color to another.
- Prepare the Dye Baths: Prepare two dye baths, one with a light shade and one with a dark shade.
- Dip the Fabric: Dip the bottom portion of the fabric into the dark dye bath.
- Gradually Raise the Fabric: Gradually raise the fabric out of the dye bath, allowing the color to fade as you move upwards.
- Dip into the Light Dye Bath: Dip the top portion of the fabric into the light dye bath to create a smooth transition between the two colors.
- Rinse and Dry: Rinse the fabric under cool running water until the water runs clear. Dry the fabric in a clothes dryer on low heat or hang it to dry in a shady area.
5.2 Color Blocking: Bold Geometric Designs
Color blocking involves dyeing different sections of the fabric in bold, contrasting colors to create a geometric design.
- Divide the Fabric: Divide the fabric into sections using tape or clamps.
- Dye Each Section: Dye each section in a different color, using a separate dye bath for each color.
- Remove the Tape or Clamps: Remove the tape or clamps and let the fabric dry completely.
- Rinse and Dry: Rinse the fabric under cool running water until the water runs clear. Dry the fabric in a clothes dryer on low heat or hang it to dry in a shady area.
5.3 Marbling: Swirling Patterns
Marbling involves creating a swirling pattern on the fabric by floating dye on the surface of a liquid.
- Prepare the Marbling Bath: Fill a shallow tray with water and add a thickening agent such as cornstarch or methylcellulose.
- Float the Dye: Drip food coloring onto the surface of the water, creating a swirling pattern.
- Lay the Fabric: Carefully lay the fabric onto the surface of the water, allowing the dye to transfer to the fabric.
- Remove the Fabric: Remove the fabric from the water and rinse it under cool running water until the water runs clear.
- Dry the Fabric: Dry the fabric in a clothes dryer on low heat or hang it to dry in a shady area.
5.4 Stenciling: Creating Precise Designs
Stenciling involves using a stencil to create precise designs on the fabric.
- Create or Purchase a Stencil: Create your own stencil using cardboard or acetate, or purchase a pre-made stencil from a craft store.
- Secure the Stencil: Secure the stencil to the fabric using tape or adhesive spray.
- Apply the Dye: Apply food coloring to the stencil using a sponge or brush.
- Remove the Stencil: Remove the stencil and let the fabric dry completely.
- Rinse and Dry: Rinse the fabric under cool running water until the water runs clear. Dry the fabric in a clothes dryer on low heat or hang it to dry in a shady area.
6. Food Coloring Alternatives: Other Natural Dyes to Consider
While food coloring offers a convenient and accessible way to dye clothes, there are many other natural dyes to consider. These dyes, derived from plants, fruits, and vegetables, offer a more sustainable and eco-friendly approach to dyeing. Exploring these alternatives can add a unique touch to your garments and connect you with the natural world.
6.1 Plant-Based Dyes: Flowers, Berries, and Roots
Plant-based dyes offer a wide range of colors and can be extracted from various parts of the plant, including flowers, berries, roots, and leaves. According to “The Art and Science of Natural Dyes” by Catharine Ellis and Joy Boutrup, plant-based dyes have been used for centuries to color textiles and create beautiful, natural hues.
- Flowers: Flowers such as marigolds, sunflowers, and zinnias can produce vibrant yellows and oranges.
- Berries: Berries such as blueberries, raspberries, and blackberries can produce shades of blue, purple, and pink.
- Roots: Roots such as beetroot, turmeric, and madder can produce shades of red, orange, and yellow.
- Leaves: Leaves such as spinach, nettle, and walnut leaves can produce shades of green and brown.
6.2 Vegetable Dyes: Onion Skins, Avocado Pits, and Carrots
Vegetable dyes offer another sustainable and accessible option for dyeing clothes. These dyes can be extracted from common vegetables and produce a variety of colors.
- Onion Skins: Onion skins can produce shades of yellow, orange, and brown.
- Avocado Pits: Avocado pits can produce shades of pink and purple.
- Carrots: Carrots can produce shades of orange and yellow.
- Spinach: Spinach can produce shades of green.
6.3 Fruit Dyes: Pomegranate Rinds, Grape Juice, and Cherries
Fruit dyes offer a sweet-smelling and colorful alternative to synthetic dyes. These dyes can be extracted from fruit rinds, juices, and pits, and produce a range of vibrant hues.
- Pomegranate Rinds: Pomegranate rinds can produce shades of yellow and tan.
- Grape Juice: Grape juice can produce shades of purple and pink.
- Cherries: Cherries can produce shades of red and pink.
- Blueberries: Blueberries can produce shades of blue and purple.
6.4 Mordants for Natural Dyes: Setting the Color
Mordants are essential for setting natural dyes and preventing them from fading or washing out. Mordants help to bind the dye molecules to the fabric fibers, creating a lasting bond.
- Alum: Alum is a common mordant that is used to set plant-based dyes.
- Iron: Iron can be used to darken colors and create more muted tones.
- Copper: Copper can be used to enhance green and blue colors.
- Vinegar: Vinegar can be used as a mild mordant for some natural dyes.
7. DIY Projects: Creative Ideas for Food Coloring Dyeing
Dyeing clothes with food coloring opens up a world of creative possibilities for DIY projects. From reviving old garments to creating personalized gifts, these projects offer a fun and rewarding way to express your creativity and transform everyday items into unique and eye-catching pieces.
7.1 Revamping Old Clothes: Giving New Life to Faded Items
Food coloring dyeing can be used to revive old clothes that have faded or become stained. This is a great way to give new life to garments that you would otherwise throw away.
- Assess the Garment: Assess the garment to determine the extent of the fading or staining.
- Choose a Color: Choose a color that will complement the original color of the garment or create a new, vibrant look.
- Dye the Garment: Dye the garment using the steps outlined above.
- Enjoy Your Revamped Clothes: Enjoy your revamped clothes and wear them with pride.
7.2 Personalized Gifts: Creating Unique Presents
Food coloring dyeing can be used to create personalized gifts for friends and family. This is a thoughtful and creative way to show your loved ones that you care.
- Choose an Item: Choose an item to dye, such as a t-shirt, scarf, or tote bag.
- Personalize the Design: Personalize the design with a name, initials, or a special message.
- Dye the Item: Dye the item using the steps outlined above.
- Present Your Gift: Present your gift to your loved one and watch their face light up with joy.
7.3 Home Decor: Adding Color to Your Living Space
Food coloring dyeing can be used to add color and personality to your home decor. This is a fun and affordable way to update your living space and create a cozy and inviting atmosphere.
- Choose Items to Dye: Choose items to dye, such as pillow covers, curtains, or table linens.
- Coordinate Colors: Coordinate the colors with your existing decor to create a cohesive look.
- Dye the Items: Dye the items using the steps outlined above.
- Transform Your Home: Transform your home with your newly dyed items and enjoy the fresh, vibrant look.
7.4 Craft Projects: Fun and Creative Ideas
Food coloring dyeing can be used for a variety of craft projects, from tie-dye t-shirts to marbled paper. These projects offer a fun and creative way to explore your artistic side and create unique and personalized items.
- Tie-Dye T-Shirts: Create tie-dye t-shirts for yourself, your friends, or your family.
- Marbled Paper: Create marbled paper for scrapbooking, card making, or other craft projects.
- Dyed Easter Eggs: Dye Easter eggs with food coloring for a fun and festive activity.
- Colored Sand: Color sand with food coloring for sand art projects or decorative displays.
8. Expert Tips: Achieving Professional Results
To achieve professional-looking results when dyeing clothes with food coloring, it’s essential to follow expert tips and techniques. These tips cover everything from fabric selection to color mixing and setting, ensuring that your dyeing projects are successful and long-lasting.
8.1 Choosing the Right Fabric: Fiber Content Matters
The fiber content of the fabric plays a crucial role in how well it absorbs the dye and how long the color lasts. As discussed earlier, natural fibers such as wool, silk, and cotton are more receptive to food coloring than synthetic fibers.
- Wool: Wool is an excellent choice for dyeing with food coloring, as it absorbs the dye readily and produces vibrant, long-lasting colors.
- Silk: Silk is another great option, as it has a smooth surface and produces rich, lustrous colors.
- Cotton: Cotton can be dyed with food coloring, but it may require more dye and a longer soaking time to achieve the desired color intensity.
8.2 Color Mixing: Creating Custom Shades
Color mixing allows you to create custom shades that are unique and personalized. Experimenting with different color combinations can result in a wide range of hues and tones.
- Primary Colors: Start with primary colors such as red, yellow, and blue.
- Secondary Colors: Mix primary colors to create secondary colors such as orange, green, and purple.
- Tertiary Colors: Mix primary and secondary colors to create tertiary colors such as red-orange, yellow-green, and blue-violet.
- Neutral Colors: Add black or brown to create neutral colors such as gray, beige, and taupe.
8.3 Setting the Dye: Ensuring Longevity
Setting the dye is crucial for ensuring that the color lasts and does not fade or bleed. Using a mordant such as vinegar or salt helps to bind the dye molecules to the fabric fibers, creating a lasting bond.
- Vinegar: Vinegar is a mild mordant that can be used for most fabrics.
- Salt: Salt is a stronger mordant that is particularly effective for cellulose fibers such as cotton.
- Heat: Heat can also help to set the dye and improve its longevity.
8.4 Testing Before Dyeing: Avoiding Mistakes
Testing a small swatch of fabric before dyeing the entire garment is essential for avoiding mistakes and ensuring that you are happy with the color and technique.
- Choose a Swatch: Choose a small swatch of fabric that is similar to the garment you plan to dye.
- Dye the Swatch: Dye the swatch using the steps outlined above.
- Evaluate the Results: Evaluate the results to ensure that you are happy with the color, intensity, and evenness of the dye.
- Adjust as Needed: Adjust the dye bath, soaking time, or dyeing technique as needed to achieve your desired results.
9. Maintaining Your Dyed Clothes: Washing and Care Tips
Proper washing and care are essential for maintaining your dyed clothes and ensuring that the colors remain vibrant and long-lasting. Following these tips will help you to protect your dyed garments and keep them looking their best for years to come.
9.1 Washing Instructions: Cold Water and Gentle Detergents
Washing your dyed clothes in cold water with gentle detergents is crucial for preventing fading and bleeding.
- Cold Water: Wash your dyed clothes in cold water to help prevent the dye from leaching out of the fabric.
- Gentle Detergents: Use gentle detergents that are designed for delicate fabrics.
- Avoid Bleach: Avoid using bleach or other harsh chemicals, as they can strip the dye from the fabric and cause it to fade.
9.2 Drying Tips: Avoiding Direct Sunlight
Avoiding direct sunlight is essential for preventing your dyed clothes from fading.
- Dry Indoors: Dry your dyed clothes indoors, away from direct sunlight.
- Use a Clothes Dryer: Use a clothes dryer on a low heat setting.
- Hang to Dry: Hang your dyed clothes to dry in a shady area.
9.3 Ironing: Low Heat and Inside Out
Ironing your dyed clothes on a low heat setting and inside out can help to protect the color and prevent damage to the fabric.
- Low Heat: Iron your dyed clothes on a low heat setting.
- Inside Out: Turn your dyed clothes inside out before ironing.
- Use a Pressing Cloth: Use a pressing cloth to protect the fabric from direct heat.
9.4 Storage: Cool, Dark Place
Storing your dyed clothes in a cool, dark place can help to prevent fading and discoloration.
- Cool Place: Store your dyed clothes in a cool place, away from heat and humidity.
- Dark Place: Store your dyed clothes in a dark place, away from direct sunlight.
- Use Garment Bags: Use garment bags to protect your dyed clothes from dust and pests.
10. Frequently Asked Questions (FAQs) About Dyeing Clothes with Food Coloring
This section addresses frequently asked questions about dyeing clothes with food coloring, providing clear and concise answers to common queries. Covering topics from color permanence to fabric suitability, these FAQs offer valuable insights for successful dyeing.
10.1 How Long Does Food Coloring Last on Clothes?
Food coloring can last for several washes, but it is not as permanent as commercial dyes. Factors like fabric type, dye concentration, and washing methods affect longevity.
10.2 Will Food Coloring Dye All Materials?
No, food coloring works best on natural fibers like wool and silk. Synthetic fibers like polyester do not absorb the dye well.
10.3 Is It Safe to Use Food Coloring on Baby Clothes?
Yes, food coloring is generally safe for baby clothes, but ensure you rinse the fabric thoroughly to remove excess dye. Use non-toxic, dye-free detergents for washing.
10.4 Can I Mix Food Coloring to Create New Colors?
Yes, you can mix food coloring to create custom colors. Experiment with different combinations to achieve your desired shade.
10.5 How Do I Prevent Food Coloring from Bleeding?
To prevent bleeding, use a mordant like vinegar or salt in the dye bath and rinse the fabric thoroughly in cold water after dyeing.
10.6 What Happens If I Use Too Much Food Coloring?
Using too much food coloring can result in a darker, more saturated color than intended. Start with small amounts and gradually add more until you achieve the desired shade.
10.7 Can I Dye Clothes with Expired Food Coloring?
Expired food coloring may still work, but the color may not be as vibrant or predictable. Test a small area first to ensure satisfactory results.
10.8 How Do I Remove Food Coloring Stains from Clothes?
To remove food coloring stains, treat the stain immediately with cold water and a stain remover. Avoid using hot water, as it can set the stain.
10.9 What Is the Best Way to Prepare Fabric Before Dyeing?
Wash the fabric to remove any dirt or finishes, then soak it in a mordant solution (like vinegar and water) to help the dye adhere better.
10.10 Can I Use a Washing Machine to Dye Clothes with Food Coloring?
While possible, it’s not recommended, as it can stain the machine. Hand dyeing provides more control and reduces the risk of mess.
Conclusion
Dyeing clothes with food coloring is a fun, affordable, and accessible way to add color and personality to your wardrobe. While it may not be as permanent as professional dyeing, it offers a creative outlet for DIY enthusiasts and a simple solution for reviving old garments. By following the steps and tips outlined in this comprehensive guide, you can achieve vibrant and unique results that reflect your personal style.
Ready to dive deeper into the world of dyeing and textile customization? Visit FOODS.EDU.VN for more expert tips, detailed tutorials, and inspiring ideas. Whether you’re looking to master advanced techniques, explore natural dye alternatives, or simply discover new ways to express your creativity, FOODS.EDU.VN is your ultimate resource for all things dyeing.
Address: 1946 Campus Dr, Hyde Park, NY 12538, United States
Whatsapp: +1 845-452-9600
Website: foods.edu.vn
Explore, experiment, and transform your clothes with the vibrant possibilities of food coloring dyeing. Unleash your creativity and let your imagination run wild!