Can You Use Food Coloring To Dye Eggs? Absolutely. This method is not only feasible but also provides a delightful and creative way to decorate eggs. FOODS.EDU.VN offers insights into this process, simplifying it for everyone. With some simple steps and readily available ingredients, you can create vibrant and personalized eggs. Learn more about food coloring options, coloring techniques, and unique design ideas to make your egg dyeing experience even more enjoyable.
1. Understanding Food Coloring for Egg Dyeing
What types of food coloring are best for dyeing eggs?
The best types of food coloring for dyeing eggs are liquid, gel, and natural food colorings. Liquid food coloring is readily available and easy to use, providing consistent results. Gel food coloring is more concentrated, allowing for vibrant colors with less liquid, which is beneficial in maintaining the integrity of the eggshell. Natural food colorings, derived from fruits, vegetables, and spices, offer a more subtle, eco-friendly approach, ideal for those seeking to avoid artificial additives.
1.1 Liquid Food Coloring
Liquid food coloring is the most common and accessible option for dyeing eggs. It disperses easily in water and produces consistent colors. However, because it’s less concentrated, you may need to use more drops to achieve the desired intensity.
Pros of Liquid Food Coloring
- Accessibility: Widely available in most grocery stores.
- Ease of Use: Simple to measure and mix.
- Cost-Effective: Generally less expensive than other types of food coloring.
Cons of Liquid Food Coloring
- Less Concentrated: Requires more drops for vibrant colors.
- Can Dilute Dye: Adding too much liquid can dilute the dye and affect the color absorption.
1.2 Gel Food Coloring
Gel food coloring is a more concentrated option, ideal for achieving vibrant and deep colors with less liquid. This type of food coloring is perfect for creating intense shades without compromising the egg’s surface.
Pros of Gel Food Coloring
- Highly Concentrated: Produces vibrant colors with fewer drops.
- Minimal Dilution: Less liquid means less dilution of the dye mixture.
- Variety of Colors: Available in a wide range of colors, including specialty shades.
Cons of Gel Food Coloring
- Requires Careful Measurement: Due to its concentration, precise measurement is crucial to avoid overly intense colors.
- May Stain Easily: More likely to stain skin and surfaces.
1.3 Natural Food Coloring
Natural food colorings offer an eco-friendly and health-conscious alternative to artificial dyes. These colorings are derived from natural sources like fruits, vegetables, and spices.
Pros of Natural Food Coloring
- Eco-Friendly: Made from sustainable and natural sources.
- Safe for Consumption: Free from artificial additives and chemicals.
- Unique Shades: Offers subtle and unique color variations.
Cons of Natural Food Coloring
- Subtle Colors: Produces less vibrant and more pastel shades.
- Requires More Preparation: Often involves boiling or steeping natural ingredients.
- Shorter Shelf Life: Natural dyes may not last as long as artificial dyes.
1.4 Comparing Food Coloring Types
Here is a comparison table to help you decide which type of food coloring is best for your needs:
| Feature | Liquid Food Coloring | Gel Food Coloring | Natural Food Coloring |
|---|---|---|---|
| Color Intensity | Low to Medium | High | Low |
| Concentration | Low | High | Variable |
| Ease of Use | Easy | Moderate | Moderate to High |
| Cost | Low | Medium | Medium to High |
| Natural/Artificial | Artificial | Artificial | Natural |
| Color Range | Wide | Wide | Limited |
2. Preparing Eggs for Dyeing
2.1 Selecting the Right Eggs
Choosing the right eggs is the first step in achieving beautifully dyed Easter eggs. Consider the following factors when selecting eggs:
- Egg Color: White eggs produce the most vibrant colors, while brown eggs result in more muted, earthy tones.
- Egg Size: Medium to large eggs are easier to handle and decorate.
- Egg Condition: Inspect the eggs for any cracks or imperfections before boiling.
2.2 Hard-Boiling Eggs Perfectly
Hard-boiling eggs correctly ensures they are fully cooked and safe to handle during the dyeing process. Follow these steps for perfect hard-boiled eggs:
- Place Eggs in a Saucepan: Arrange the eggs in a single layer in a saucepan.
- Add Water: Cover the eggs with at least an inch of cold water.
- Bring to a Boil: Heat the water over medium-high heat until it reaches a rolling boil.
- Remove from Heat: Turn off the heat, cover the saucepan, and let the eggs sit for 12-15 minutes.
- Cool the Eggs: Drain the hot water and immediately rinse the eggs under cold running water until they are cool to the touch.
Tip: Adding a teaspoon of vinegar to the water can help prevent the eggs from cracking during boiling.
2.3 Ensuring Eggs Are Crack-Free
Preventing cracks in eggs is essential for even dyeing. Here are some tips to minimize the risk of cracking:
- Use Fresh Eggs: Fresher eggs are less likely to crack.
- Avoid Temperature Shocks: Do not transfer cold eggs directly into boiling water.
- Gentle Handling: Handle the eggs carefully during boiling and dyeing to avoid any impact.
2.4 Safety Considerations
Handling eggs safely is crucial to prevent foodborne illnesses. Keep these safety tips in mind:
- Wash Your Hands: Always wash your hands thoroughly before and after handling raw or cooked eggs.
- Refrigerate Promptly: Refrigerate hard-boiled eggs within two hours of cooking.
- Discard Cracked Eggs: If an egg cracks during boiling, discard it to avoid contamination.
3. Creating Food Coloring Dye Solutions
3.1 Basic Dye Recipe
The basic recipe for dyeing eggs with food coloring involves combining food coloring, water, and vinegar. Here’s a simple guide:
-
Ingredients:
- 1/2 cup boiling water
- 1 teaspoon white vinegar
- 10-20 drops food coloring (depending on desired intensity)
-
Instructions:
- In a heat-safe cup or bowl, combine boiling water and white vinegar.
- Add the food coloring drops and stir until the color is evenly distributed.
- Repeat for each color you want to create.
3.2 Experimenting with Color Combinations
Creating unique colors is one of the most exciting parts of egg dyeing. Here are some color combinations to try:
- Orange: Red + Yellow
- Purple: Red + Blue
- Green: Yellow + Blue
- Teal: Blue + Green
- Pink: Red + White (add white food coloring or dilute red with more water)
3.3 Achieving Vibrant Colors
To achieve vibrant colors, follow these tips:
- Use Enough Food Coloring: Don’t be afraid to add more drops of food coloring to deepen the shade.
- Use White Eggs: White eggs provide a cleaner base for colors to pop.
- Soak Eggs Longer: Allow the eggs to soak in the dye for a longer period (up to 10 minutes) to intensify the color.
3.4 Pastel Shades
For pastel shades, use less food coloring and more water. Here’s how:
- Dilute the Dye: Add a few drops of food coloring to a larger volume of water.
- White Food Coloring: Mix in a drop or two of white food coloring to soften the colors.
- Short Soak Time: Soak the eggs for a shorter time to achieve a lighter tint.
4. Dyeing Eggs with Food Coloring: Step-by-Step
4.1 Setting Up Your Dyeing Station
Setting up a well-organized dyeing station is essential for a smooth and enjoyable egg dyeing experience. Gather the following supplies:
- Heat-Safe Cups or Bowls: One for each color you plan to use.
- Food Coloring: Liquid, gel, or natural food coloring in your desired colors.
- White Vinegar: To help the dye adhere to the eggshells.
- Boiling Water: To create the dye solutions.
- Spoons or Wire Egg Holders: For submerging and retrieving eggs.
- Paper Towels: To wipe up spills and dry dyed eggs.
- Egg Carton or Drying Rack: To allow the dyed eggs to dry evenly.
- Tablecloth or Newspaper: To protect your work surface.
4.2 Submerging Eggs into Dye
- Prepare the Dye: In each cup or bowl, mix ½ cup of boiling water, 1 teaspoon of white vinegar, and 10-20 drops of food coloring.
- Submerge the Egg: Using a spoon or wire egg holder, gently lower an egg into the dye.
- Soak: Allow the egg to soak in the dye for 5-10 minutes, depending on the desired color intensity.
- Check the Color: Periodically remove the egg to check the color.
- Remove and Dry: Once the desired color is achieved, carefully remove the egg and place it on a paper towel or drying rack to dry.
4.3 Achieving Consistent Color
- Stir Regularly: Keep the dye solutions well-stirred to ensure even color distribution.
- Use the Same Soaking Time: Soak each egg for the same amount of time to maintain consistent color intensity.
- Monitor the Dye: Check the dye levels and add more food coloring as needed to maintain the desired shade.
4.4 Drying Dyed Eggs
- Paper Towels: Place the dyed eggs on a layer of paper towels to absorb excess dye.
- Egg Carton: Stand the eggs in an empty egg carton to allow them to dry evenly.
- Drying Rack: Use a wire drying rack to elevate the eggs and promote airflow.
- Patience: Allow the eggs to dry completely before handling them to prevent smudging.
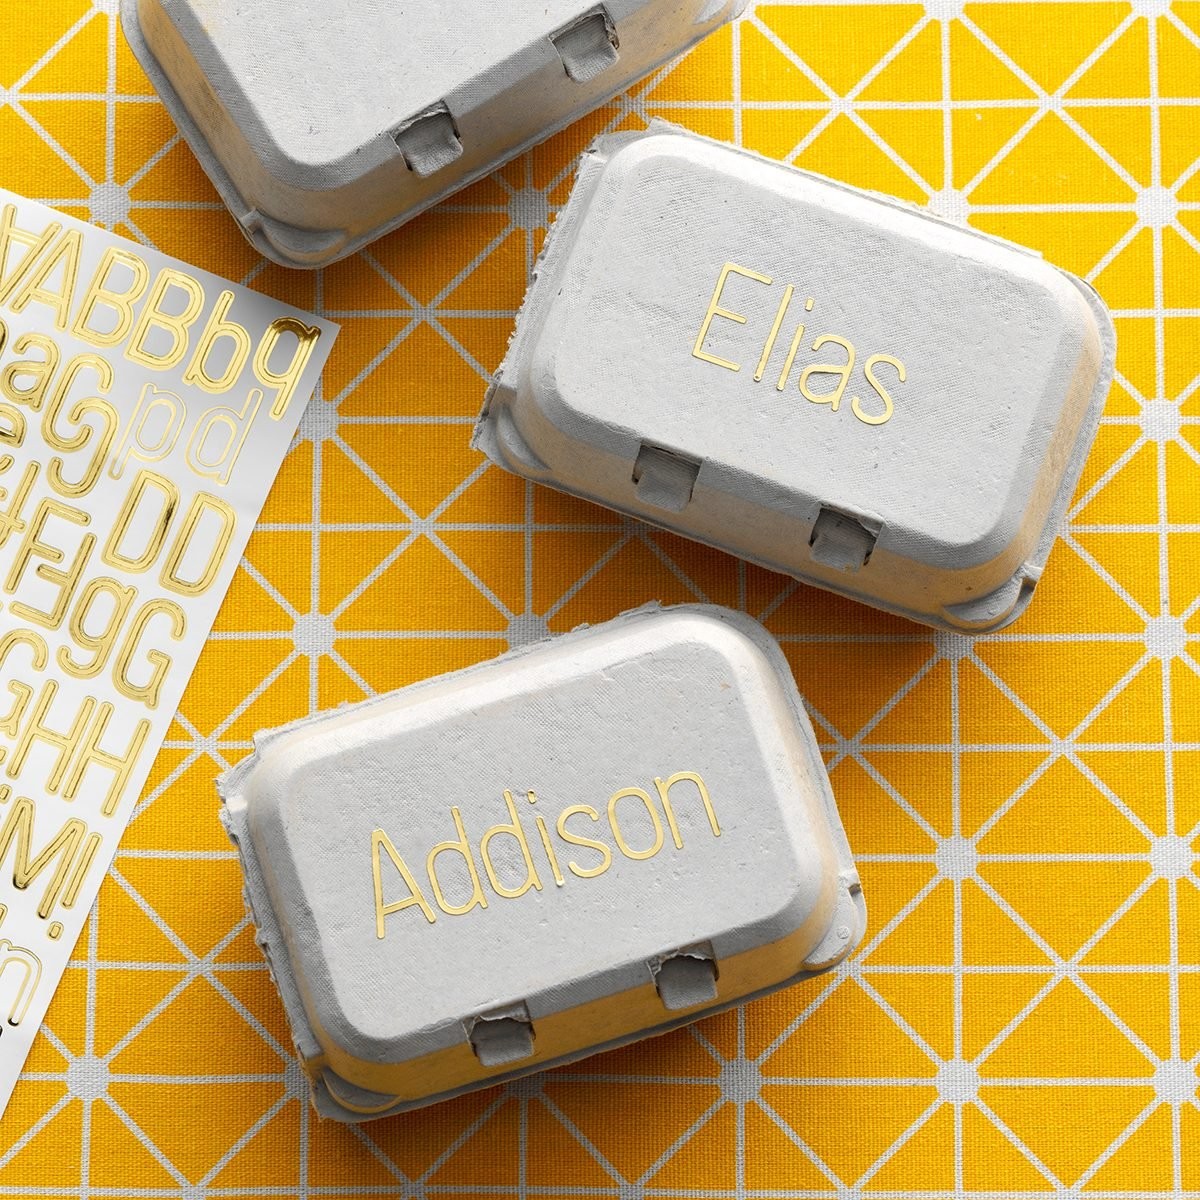
Drying dyed Easter eggs evenly on paper towels in a decorated half-dozen egg carton.
5. Creative Egg Dyeing Techniques
5.1 Marbling Effect
Create a unique marbling effect by adding a few drops of oil to the dye solution. The oil will create a swirling pattern on the egg’s surface.
- Prepare the Dye: Mix ½ cup of boiling water, 1 teaspoon of white vinegar, and 10-20 drops of food coloring.
- Add Oil: Add a few drops of vegetable oil to the dye solution.
- Swirl Gently: Gently swirl the oil on the surface of the dye.
- Dip the Egg: Roll the egg in the dye to create a marbled pattern.
5.2 Ombre Eggs
Achieve an ombre effect by gradually dipping the egg into the dye.
- Prepare the Dye: Mix ½ cup of boiling water, 1 teaspoon of white vinegar, and 10-20 drops of food coloring.
- Dip Partially: Dip one end of the egg into the dye for a few minutes.
- Dip Further: Gradually dip more of the egg into the dye, holding it for shorter intervals to create a gradient effect.
5.3 Layered Colors
Create layered colors by dyeing the egg in multiple colors, one at a time.
- Dye the Base Color: Dye the egg in a light base color and let it dry completely.
- Apply Additional Colors: Dip the egg into different colors, allowing each layer to dry before applying the next.
5.4 Using Resist Techniques
Use resist techniques to create patterns and designs on your eggs.
- Rubber Bands: Wrap rubber bands around the egg before dyeing to create striped patterns.
- Wax Crayons: Draw designs on the egg with wax crayons. The wax will resist the dye, leaving the design visible.
- Stickers: Apply stickers to the egg before dyeing. Remove the stickers after dyeing to reveal the original egg color underneath.
6. Natural Food Coloring Options
6.1 Making Natural Dyes
Natural food colorings can be made from various fruits, vegetables, and spices. Here are some common sources and methods:
- Red: Beet juice or hibiscus tea. Boil beets or steep hibiscus flowers in water.
- Yellow: Turmeric powder. Simmer turmeric in water.
- Blue: Red cabbage. Boil chopped red cabbage in water.
- Orange: Onion skins. Boil onion skins in water.
- Green: Spinach. Boil spinach leaves in water.
6.2 Recipes for Natural Egg Dyes
Here are a few recipes for making natural egg dyes:
Beetroot Dye (Red)
-
Ingredients:
- 2 cups chopped beetroot
- 4 cups water
- 2 tablespoons white vinegar
-
Instructions:
- Boil beetroot in water for 30 minutes.
- Strain the liquid and add white vinegar.
Turmeric Dye (Yellow)
-
Ingredients:
- 4 tablespoons turmeric powder
- 4 cups water
- 2 tablespoons white vinegar
-
Instructions:
- Simmer turmeric in water for 30 minutes.
- Strain the liquid and add white vinegar.
Red Cabbage Dye (Blue)
-
Ingredients:
- 4 cups chopped red cabbage
- 4 cups water
- 2 tablespoons white vinegar
-
Instructions:
- Boil red cabbage in water for 30 minutes.
- Strain the liquid and add white vinegar.
6.3 Achieving Deeper Shades with Natural Dyes
To achieve deeper shades with natural dyes, follow these tips:
- Concentrate the Dye: Use a higher concentration of the natural ingredient.
- Longer Soaking Time: Allow the eggs to soak in the dye for a longer period, even overnight.
- Mordants: Use mordants like vinegar or salt to help the dye adhere to the eggshells.
6.4 Tips for Using Natural Dyes
- Test First: Test the dye on a single egg to check the color before dyeing the entire batch.
- Use White Eggs: White eggs provide a cleaner base for natural dyes to show their true colors.
- Be Patient: Natural dyes may take longer to achieve the desired color intensity.
7. Safety and Storage of Dyed Eggs
7.1 Handling Dyed Eggs Safely
Handling dyed eggs safely is crucial to prevent foodborne illnesses. Follow these guidelines:
- Wash Hands: Always wash your hands thoroughly before and after handling eggs.
- Avoid Cracks: Do not use eggs with cracks, as bacteria can enter through the cracks.
- Refrigerate Promptly: Refrigerate dyed eggs within two hours of dyeing.
7.2 Refrigeration Guidelines
- Store Properly: Store dyed eggs in the refrigerator at a temperature of 40°F (4°C) or below.
- Use Egg Cartons: Place the eggs in an egg carton to prevent them from rolling around and cracking.
- Short Shelf Life: Hard-boiled eggs, whether dyed or not, should be consumed within one week.
7.3 Determining If Eggs Are Safe to Eat
- Check for Odor: If the eggs have an unusual odor, discard them.
- Inspect Appearance: Look for any signs of spoilage, such as a slimy or discolored surface.
- When in Doubt, Throw It Out: If you are unsure about the safety of an egg, it’s best to discard it.
7.4 Disposing of Eggs Properly
- Composting: Eggshells can be composted to enrich garden soil.
- Garbage Disposal: Dispose of spoiled eggs in a sealed bag in the garbage.
- Avoid Draining: Do not pour egg dye or egg contents down the drain, as it can clog pipes.
8. Troubleshooting Common Egg Dyeing Problems
8.1 Uneven Coloring
- Cause: Insufficient dye, uneven soaking, or dirty eggshells.
- Solution: Use enough food coloring, ensure even soaking, and clean the eggshells before dyeing.
8.2 Fading Colors
- Cause: Not enough vinegar, diluted dye, or exposure to light.
- Solution: Use the correct amount of vinegar, avoid diluting the dye too much, and store dyed eggs in the refrigerator away from direct light.
8.3 Cracked Eggs
- Cause: Temperature shock, rough handling, or weak eggshells.
- Solution: Avoid sudden temperature changes, handle eggs gently, and use fresh, high-quality eggs.
8.4 Dye Not Adhering
- Cause: Oily eggshells, insufficient vinegar, or hard water.
- Solution: Clean the eggshells with vinegar water, use the correct amount of vinegar in the dye, and use distilled water if you have hard water.
9. Advanced Egg Decorating Ideas
9.1 Decoupage Eggs
Decoupage involves decorating eggs with paper cutouts, creating intricate and artistic designs.
- Gather Materials: You’ll need hard-boiled eggs, decoupage paper (napkins or tissue paper with designs), decoupage glue (Mod Podge), small scissors, and a soft brush.
- Cut Out Designs: Carefully cut out the designs from the decoupage paper.
- Apply Glue: Apply a thin layer of decoupage glue to the area of the egg where you want to place the design.
- Place Design: Gently place the paper cutout onto the glue.
- Seal with Glue: Brush another thin layer of decoupage glue over the paper to seal it.
- Dry: Let the egg dry completely on a drying rack.
9.2 Painting Eggs
Painting eggs allows for detailed and personalized designs, turning each egg into a miniature work of art.
- Gather Materials: You’ll need hard-boiled eggs, acrylic paints, small paintbrushes, a palette, and a container of water for rinsing brushes.
- Base Coat (Optional): Apply a base coat of paint to the egg if desired. Let it dry completely.
- Paint Designs: Use the paintbrushes to create your designs on the egg.
- Dry: Let the egg dry completely on a drying rack.
- Seal (Optional): Seal the painted design with a clear acrylic sealant for added protection.
9.3 Using Metallic Accents
Adding metallic accents can elevate your egg designs, giving them a touch of elegance and sophistication.
- Gather Materials: You’ll need hard-boiled eggs, metallic paint pens or metallic leafing, adhesive (for leafing), and a soft brush.
- Apply Adhesive (If Using Leafing): Apply a thin layer of adhesive to the areas where you want to apply the metallic leafing.
- Apply Metallic Leafing: Gently press the metallic leafing onto the adhesive. Use a soft brush to remove excess leafing.
- Use Metallic Paint Pens: Alternatively, use metallic paint pens to draw designs or highlight specific areas of the egg.
- Dry: Let the egg dry completely on a drying rack.
9.4 Adding Texture
Adding texture to your eggs can create a tactile and visually appealing effect.
- Gather Materials: You’ll need hard-boiled eggs, glue, and various textured materials such as glitter, beads, sequins, rice, or sand.
- Apply Glue: Apply glue to the areas where you want to add texture.
- Apply Textured Material: Sprinkle or press the textured material onto the glue.
- Shake Off Excess: Shake off any excess material.
- Dry: Let the egg dry completely on a drying rack.
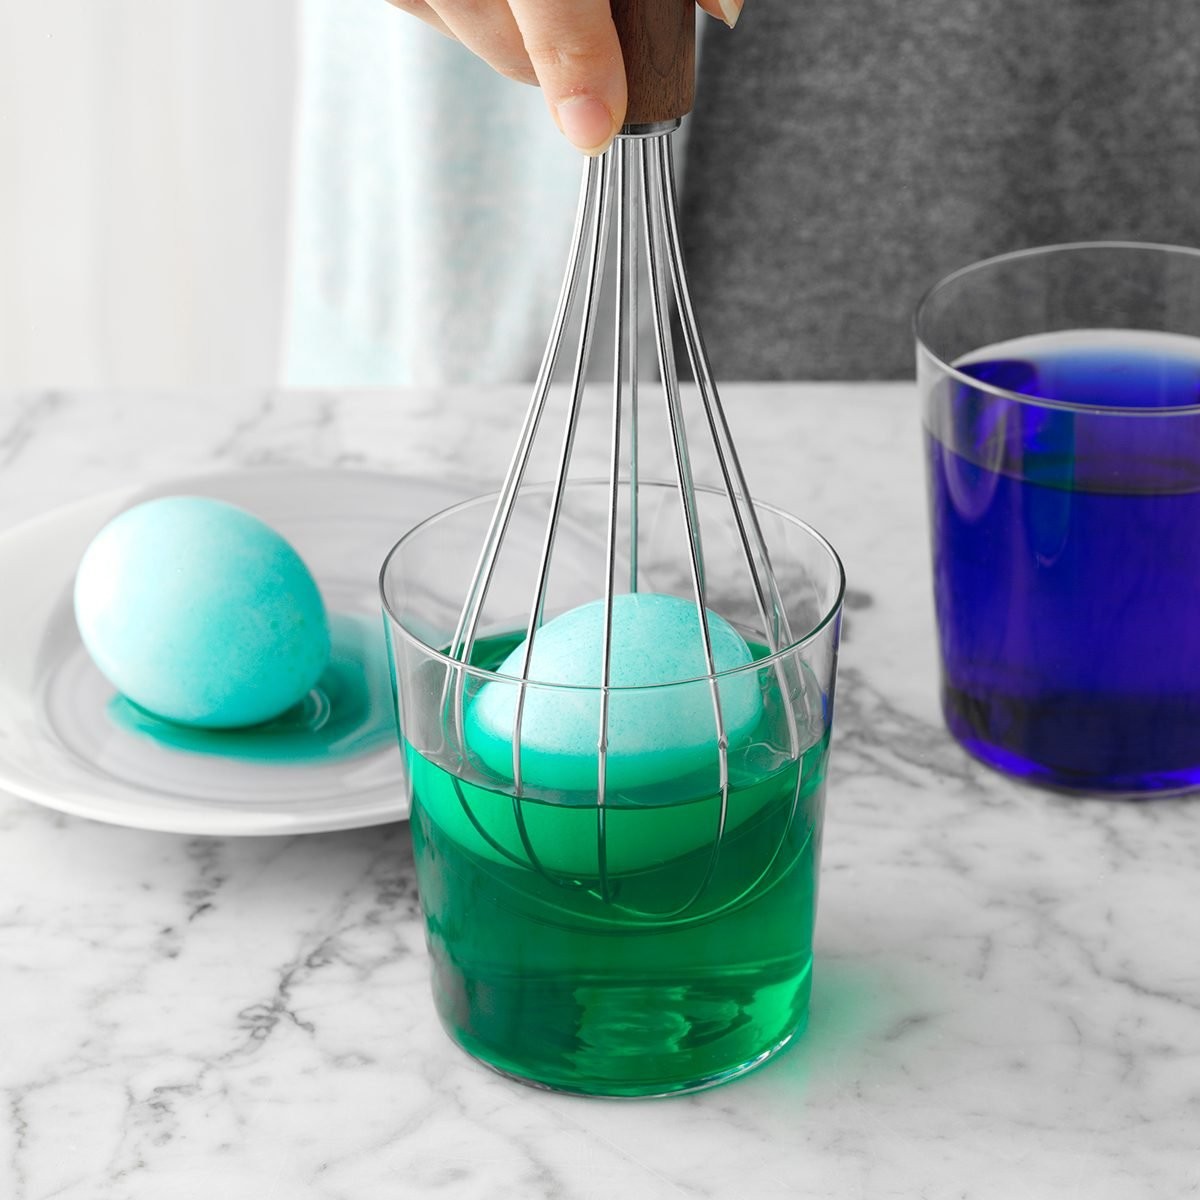
Using a whisk to dip Easter eggs into cups of dye for decoration.
10. Egg Dyeing FAQs
10.1 Can you dye raw eggs?
Technically, you can dye raw eggs, but it’s risky. A raw egg is more likely to crack—and once cracked, it’ll ruin your whole batch of dye. It’s best to stick to hard-boiled eggs.
10.2 Can you dye eggs without vinegar?
If you don’t have vinegar on hand, you can use a vinegar replacement. Lemon juice is great for this, although the color will be less vibrant. If you’re looking for more of a pastel coloring, it’s perfect for the job.
10.3 What do you do if an egg cracks?
If an egg cracks during the dyeing or drying process, it’s no big deal. The ingredients in this dye are safe to eat and won’t affect the flavor of your hard-boiled eggs.
10.4 Can you dye brown eggs?
Yes, you can dye brown eggs. The end result will be a bit more muted, but brown eggs will still take on color.
10.5 Are there other ways to decorate eggs?
You bet. Decorating Easter eggs isn’t just limited to food dye. There are all types of Easter egg decorating ideas to choose from, including using natural dyes, temporary tattoos, wax crayons, and other craft supplies.
10.6 How long do dyed eggs last?
Dyed hard-boiled eggs, if refrigerated properly, can last up to one week. Make sure to store them in the refrigerator within two hours of dyeing.
10.7 Can I use expired food coloring?
It’s generally best to use food coloring that is not expired. Expired food coloring may not produce vibrant colors and could potentially affect the safety of the dyed eggs.
10.8 Is it safe to eat eggs dyed with food coloring?
Yes, it is safe to eat eggs dyed with food coloring, as long as you use food-grade dyes and handle the eggs safely. Avoid using eggs with cracks, and refrigerate them promptly after dyeing.
10.9 Can I reuse the dye solutions?
It is not recommended to reuse dye solutions, as they can become contaminated with bacteria. It’s best to make fresh dye solutions each time you dye eggs.
10.10 How do I dispose of leftover dye?
Leftover dye solutions can be diluted with water and poured down the drain. Alternatively, you can dispose of them in a sealed container in the garbage.
Dyeing eggs with food coloring is a fun and creative activity that can be enjoyed by people of all ages. Whether you’re using liquid, gel, or natural food coloring, following these tips and techniques will help you create beautifully decorated eggs for any occasion. For more insights, explore our comprehensive guides at FOODS.EDU.VN, where you can find everything from simple recipes to advanced culinary techniques. Don’t forget to share your creations with us and inspire others with your unique designs.
Ready to elevate your culinary skills and explore a world of delicious possibilities? Visit FOODS.EDU.VN today! Dive into our extensive collection of recipes, cooking tips, and expert advice designed to inspire and empower you in the kitchen. Whether you’re a beginner or a seasoned chef, foods.edu.vn has something for everyone. Contact us at 1946 Campus Dr, Hyde Park, NY 12538, United States or via Whatsapp at +1 845-452-9600. Start your culinary adventure now!