Easy finger foods for a party are the ultimate solution for effortless entertaining, and foods.edu.vn is your go-to resource for a variety of delectable and simple recipes. From savory bites to sweet treats, explore options that will impress your guests and make your next gathering a memorable one with simple appetizers, bite-sized treats, and party snacks.
Table of Contents
- Why Choose Easy Finger Foods for Your Party?
- Sausage Rolls
- Hummus
- Loaded Potato Skins
- Quick Cheese Straws
- Smoked Mackerel & Horseradish Chicory Cups
- Baked Ham Hock Pots
- Carrot & Caraway Crackers
- Aubergine & Chickpea Bites
- Mini Quiches
- Classic Devilled Eggs
- Mini Muffin Pizzas
- Onion Rings
- Mini Choc-Orange Cheesecake Tarts
- Vegan Chocolate Party Traybake
- Halloumi Chips with Yogurt & Pomegranate
- FAQ Section
1. Why Choose Easy Finger Foods for Your Party?
Easy finger foods are a fantastic choice for any party because they offer convenience, variety, and appeal to a wide range of tastes. These bite-sized delights allow guests to mingle and enjoy the celebration without the fuss of formal dining. Preparation is simple, cleanup is minimal, and the culinary options are endless.
1.1. What Are the Benefits of Serving Finger Foods?
Serving finger foods at a party provides several advantages that enhance the overall experience for both the host and the guests. Here’s why finger foods are a great choice:
- Convenience: Finger foods are easy to eat and require no utensils, making them ideal for mingling and casual gatherings.
- Variety: You can offer a wide range of flavors and textures, catering to different dietary preferences and tastes.
- Reduced Cleanup: Less need for plates and cutlery means less cleanup after the party.
- Cost-Effective: Many finger foods can be made with affordable ingredients, helping you stay within your budget.
- Portion Control: Bite-sized portions help guests sample different dishes without overeating.
- Social Interaction: Guests can easily eat while standing and socializing, promoting a more interactive atmosphere.
- Aesthetic Appeal: Well-presented finger foods can add a visual element to your party, enhancing the overall ambiance.
1.2. How Can Finger Foods Enhance Party Atmosphere?
Finger foods can significantly enhance the atmosphere of a party by encouraging mingling and interaction among guests. They allow people to move around freely, engage in conversations, and sample different dishes without being tied to a table. This creates a relaxed and social environment, perfect for celebrations.
- Encouraging Mingling: Easy-to-eat snacks enable guests to move around and chat without the need for a formal dining setup.
- Creating a Relaxed Vibe: The casual nature of finger foods helps create a laid-back atmosphere, making everyone feel more comfortable.
- Promoting Interaction: Guests are more likely to interact when they can easily eat and talk simultaneously.
- Adding Visual Appeal: Colorful and artfully arranged finger foods can serve as a visual centerpiece, enhancing the party’s aesthetic.
- Simplifying Logistics: With no need for assigned seating or formal place settings, you can focus on enjoying the party yourself.
- Supporting Themed Events: Finger foods can be easily tailored to fit the theme of your party, adding an extra layer of fun and cohesion.
1.3. What Makes a Great Finger Food Recipe?
A great finger food recipe balances flavor, ease of preparation, and visual appeal. It should be easy to handle, delicious, and offer a variety of textures and tastes. Recipes that can be made ahead of time are especially valuable, reducing stress on the day of the event.
- Flavor Balance: The recipe should offer a harmonious blend of flavors that appeal to a wide range of palates.
- Ease of Handling: Finger foods should be easy to pick up and eat without creating a mess.
- Preparation Time: The recipe should be relatively quick and easy to prepare, especially if you’re making multiple dishes.
- Visual Appeal: The presentation of the finger food should be attractive and enticing.
- Texture Variety: Incorporating different textures (e.g., crunchy, creamy, chewy) adds interest and satisfaction.
- Make-Ahead Option: Recipes that can be prepared in advance are ideal for stress-free entertaining.
- Ingredient Availability: Using readily available ingredients ensures that the recipe is accessible to everyone.
2. Sausage Rolls
Sausage rolls are a classic party favorite that are easy to make and always a hit. Using ready-rolled puff pastry saves time, allowing you to focus on socializing. Serve them with a homemade tomato chutney for an extra touch.
2.1. Why Are Sausage Rolls a Party Staple?
Sausage rolls have long been a party staple due to their delicious flavor, convenience, and ability to satisfy a crowd. Their savory filling encased in flaky pastry makes them irresistible, while their easy-to-handle size is perfect for mingling guests.
- Delicious Flavor: The combination of seasoned sausage meat and buttery puff pastry is universally appealing.
- Convenience: Sausage rolls are easy to eat and require no utensils, making them ideal for parties.
- Crowd-Pleaser: They are generally well-liked by people of all ages, ensuring they’ll be a hit at any gathering.
- Easy to Prepare: Using ready-made puff pastry cuts down on prep time, making them a quick and simple option.
- Versatile: Sausage rolls can be served hot or cold, making them adaptable to different party setups.
- Portable: Their compact size makes them easy to transport, whether you’re hosting at home or bringing a dish to a potluck.
- Customizable: You can easily customize the filling with different herbs, spices, or types of meat to suit your preferences.
2.2. How to Make Sausage Rolls Easily at Home?
Making sausage rolls at home is easy, especially when using ready-rolled puff pastry. Simply spread sausage meat seasoned with herbs and spices onto the pastry, roll it up, slice into individual portions, and bake until golden brown.
- Ingredients:
- Ready-rolled puff pastry
- Sausage meat
- Herbs and spices (e.g., sage, thyme, pepper)
- Egg (for egg wash)
- Instructions:
- Preheat your oven to 400°F (200°C).
- Unroll the puff pastry on a lightly floured surface.
- Spread the sausage meat evenly over the pastry.
- Roll the pastry tightly around the sausage meat.
- Slice the roll into individual portions.
- Brush with egg wash for a golden finish.
- Bake for 20-25 minutes, or until golden brown.
2.3. What Variations Can You Try with Sausage Rolls?
There are many variations of sausage rolls you can try to cater to different tastes and dietary needs. Consider adding different types of meat, spices, or even incorporating vegetables for a healthier twist.
- Spicy Sausage Rolls: Add chili flakes or hot sauce to the sausage meat for a fiery kick.
- Vegetarian Sausage Rolls: Use a vegetarian sausage filling made from lentils, vegetables, and herbs.
- Apple and Sage Sausage Rolls: Incorporate diced apple and sage into the sausage meat for a sweet and savory flavor.
- Cheese and Onion Sausage Rolls: Add grated cheese and caramelized onions to the filling for a rich and savory twist.
- Pork and Chorizo Sausage Rolls: Mix pork sausage meat with chorizo for a spicy and flavorful variation.
- Chicken and Herb Sausage Rolls: Use ground chicken instead of pork, and add a mix of fresh herbs like parsley, thyme, and rosemary.
- Vegan Sausage Rolls: Use vegan puff pastry and a plant-based sausage filling, ensuring a delicious option for vegan guests.
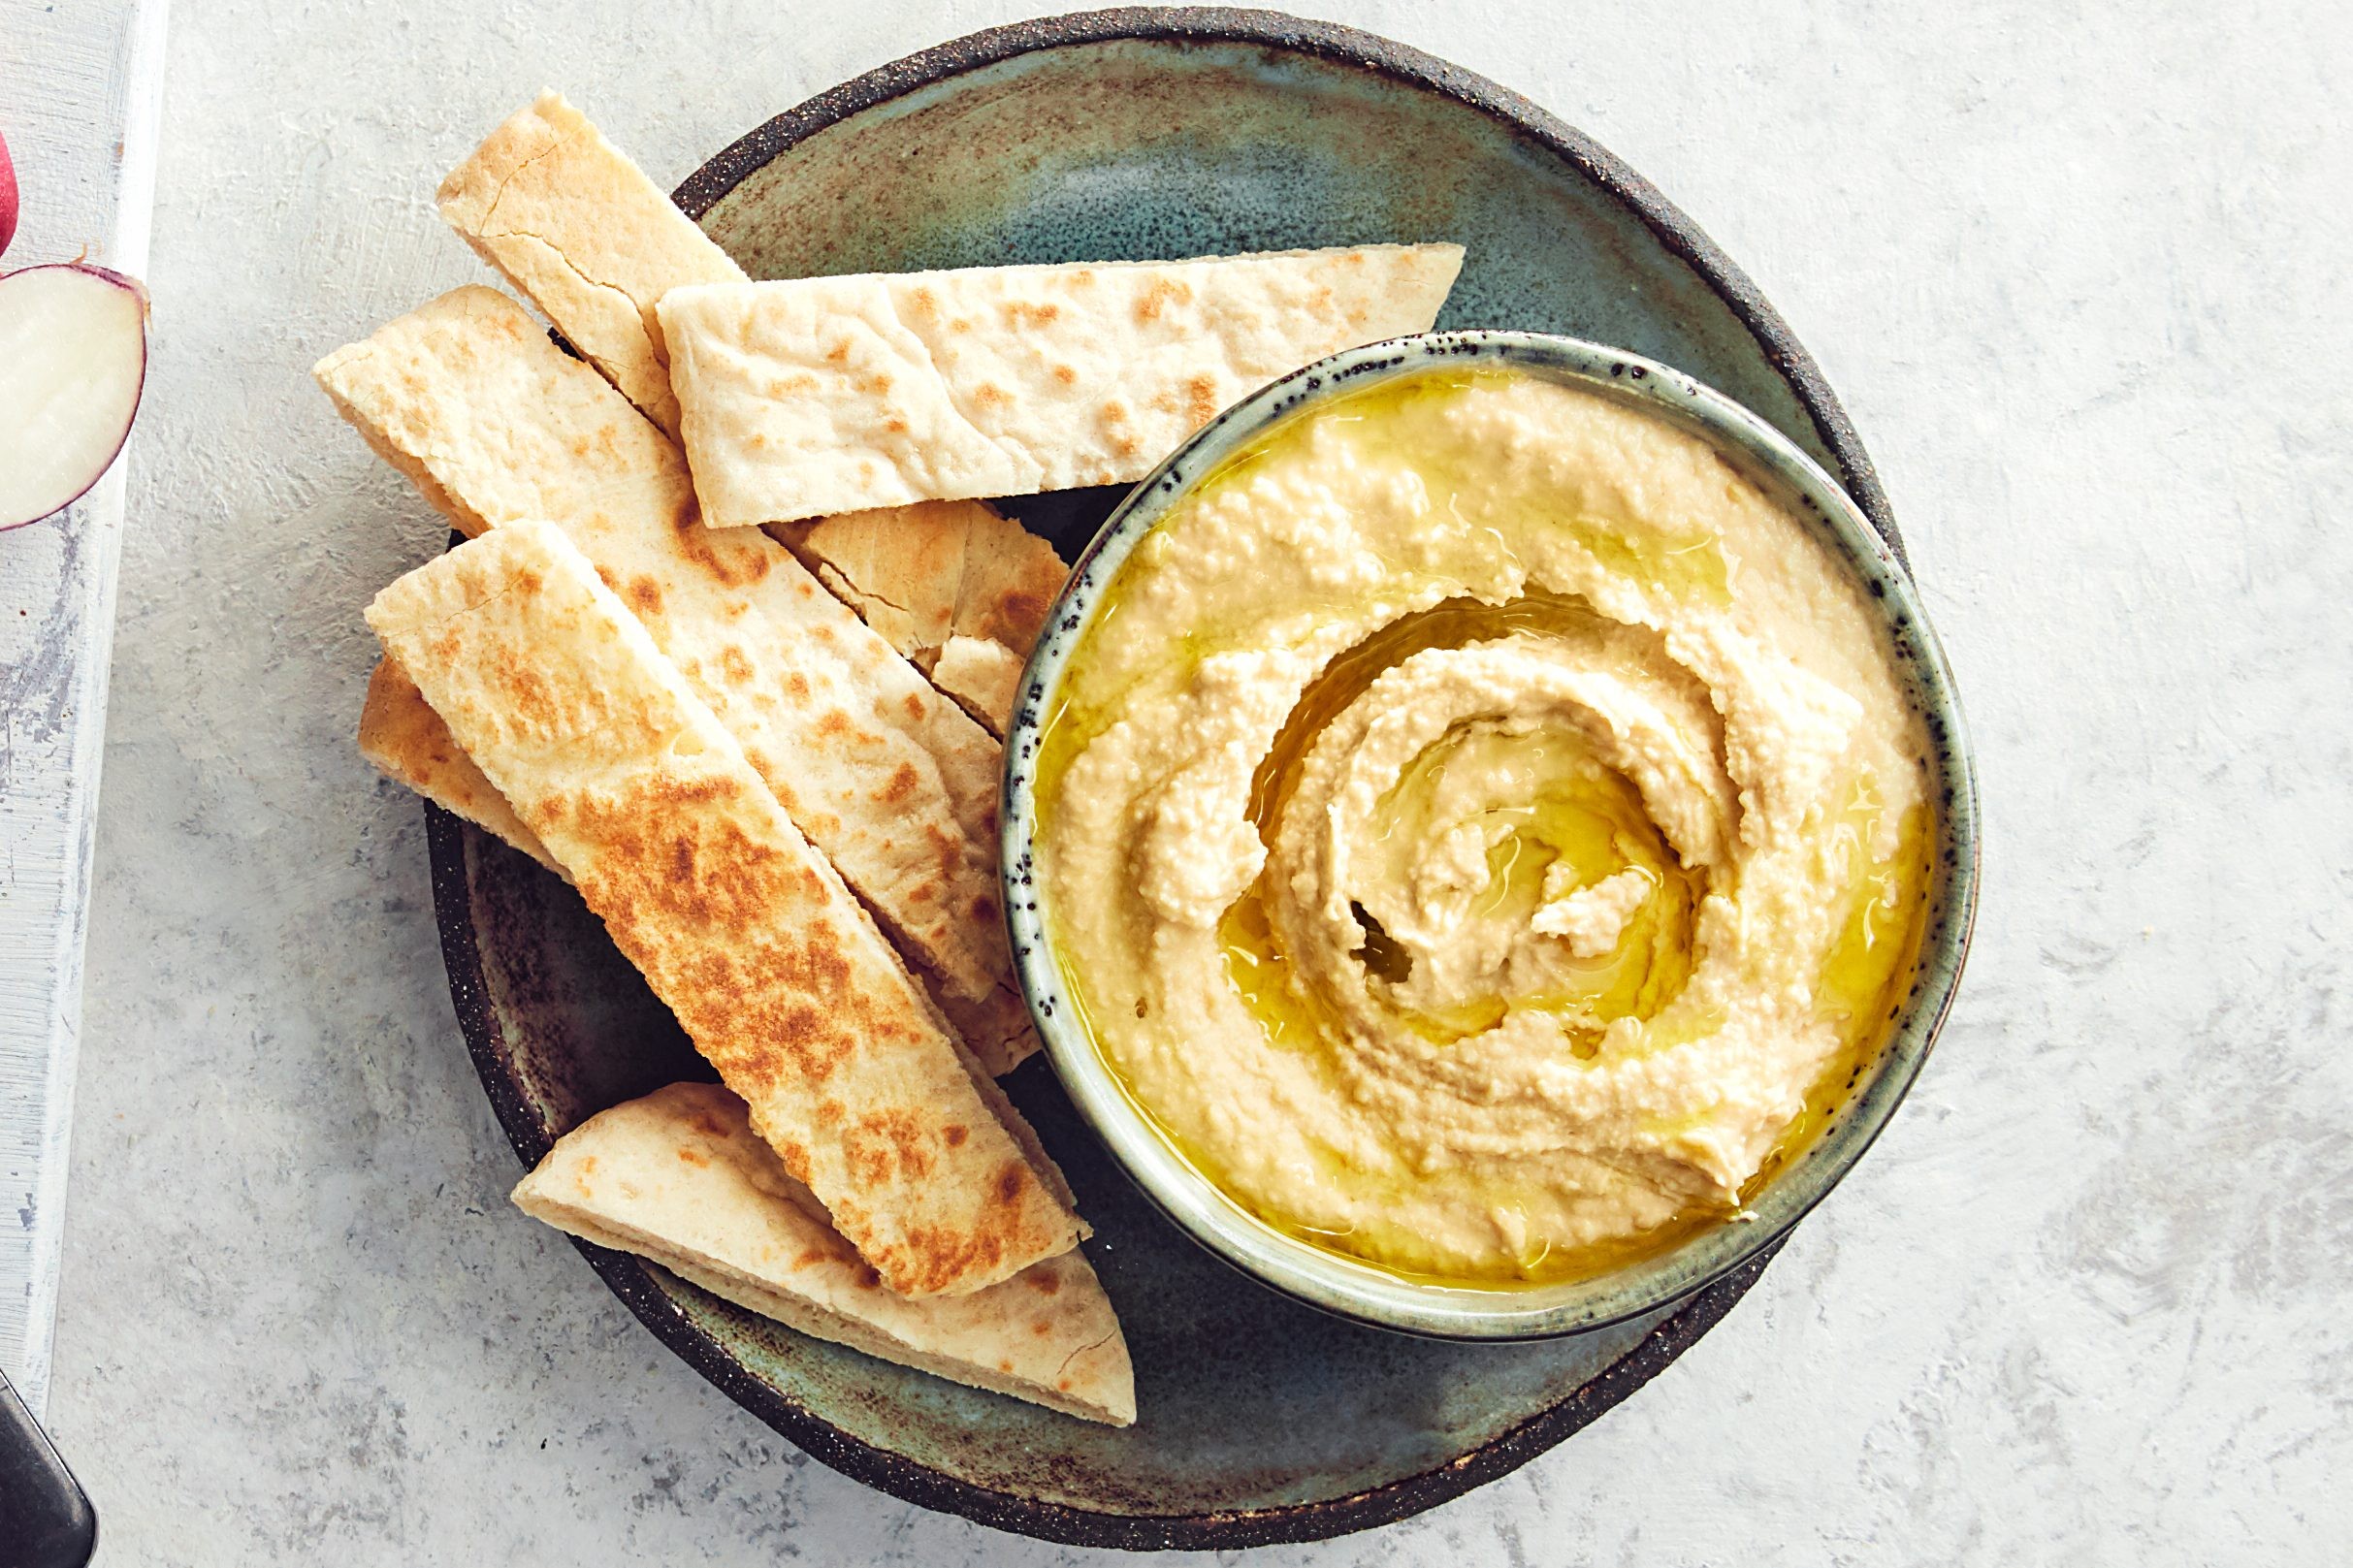
3. Hummus
Homemade hummus is far superior to store-bought versions and incredibly easy to make. Using pantry staples like chickpeas, garlic, and tahini, you can whip up a delicious dip in minutes. Serve with warm toasted pittas and veggie crudités.
3.1. Why Is Hummus a Great Party Dip?
Hummus is an excellent party dip because it’s healthy, flavorful, and versatile. Made from chickpeas, tahini, lemon juice, and garlic, it offers a creamy texture and savory taste that pairs well with various dippers.
- Healthy: Hummus is packed with protein and fiber, making it a nutritious choice for guests.
- Flavorful: The combination of chickpeas, tahini, lemon juice, and garlic creates a delicious and satisfying flavor.
- Versatile: It can be served with a variety of dippers, including pita bread, vegetables, and crackers.
- Vegan-Friendly: Hummus is naturally vegan, making it a great option for guests with dietary restrictions.
- Easy to Make: It’s quick and easy to prepare at home with a food processor or blender.
- Budget-Friendly: The ingredients are relatively inexpensive, making it an affordable party dip.
- Customizable: You can easily customize the flavor by adding different spices, herbs, or roasted vegetables.
3.2. How to Make Hummus from Scratch?
Making hummus from scratch is simple and results in a much fresher and more flavorful dip than store-bought versions. Here’s a basic recipe:
- Ingredients:
- 1 can (15 ounces) chickpeas, drained and rinsed
- 1/4 cup tahini
- 2-3 cloves garlic, minced
- 1/4 cup lemon juice
- 2 tablespoons olive oil
- Salt and pepper to taste
- Water (to adjust consistency)
- Instructions:
- Combine all ingredients in a food processor.
- Blend until smooth, adding water as needed to reach desired consistency.
- Taste and adjust seasoning.
- Serve with olive oil, paprika, and fresh herbs.
3.3. What Are Some Creative Hummus Variations?
There are numerous creative variations you can try to elevate your homemade hummus. Experiment with different flavors and ingredients to create unique and delicious dips.
- Roasted Red Pepper Hummus: Add roasted red peppers for a smoky and sweet flavor.
- Spicy Hummus: Add chili flakes or a dash of hot sauce for a fiery kick.
- Avocado Hummus: Incorporate avocado for a creamy and vibrant green dip.
- Sun-Dried Tomato Hummus: Add sun-dried tomatoes for a tangy and savory flavor.
- Olive Hummus: Mix in chopped olives for a salty and briny twist.
- Beet Hummus: Add roasted beets for a vibrant pink color and earthy flavor.
- Pesto Hummus: Stir in pesto for a herbaceous and flavorful variation.
4. Loaded Potato Skins
Loaded potato skins are a budget-friendly and satisfying party snack. Scoop out the cooked potato flesh, mash it with sour cream and cheddar cheese, and load the skins with bacon or other toppings. Chives make a great alternative to spring onions.
4.1. Why Are Loaded Potato Skins a Crowd-Pleaser?
Loaded potato skins are a crowd-pleaser due to their comforting flavors, satisfying textures, and customizable toppings. They offer a perfect combination of crispy skin, creamy potato filling, and savory additions that appeal to a wide range of tastes.
- Comforting Flavors: The combination of potatoes, cheese, and sour cream creates a comforting and familiar flavor.
- Satisfying Textures: The crispy potato skin paired with the creamy filling provides a delightful textural contrast.
- Customizable Toppings: You can easily customize the toppings to suit different preferences, making them a versatile snack.
- Budget-Friendly: Potatoes are an affordable ingredient, making this a cost-effective option for parties.
- Easy to Make: They are relatively simple to prepare, especially if you bake the potatoes in advance.
- Versatile: They can be served as appetizers, snacks, or even as part of a buffet spread.
- Shareable: They are perfect for sharing, making them a great option for social gatherings.
4.2. How to Load Potato Skins for Maximum Flavor?
To load potato skins for maximum flavor, focus on layering complementary flavors and textures. Start with a base of mashed potato mixed with sour cream and cheese, then add savory toppings like bacon, chives, and a sprinkle of extra cheese.
- Ingredients:
- Baked potatoes
- Sour cream
- Cheddar cheese
- Bacon bits
- Chives
- Salt and pepper to taste
- Instructions:
- Bake potatoes until soft.
- Cut in half and scoop out the flesh, leaving a thin layer inside the skin.
- Mash the potato flesh with sour cream, cheese, salt, and pepper.
- Fill the potato skins with the mashed potato mixture.
- Top with bacon bits, chives, and extra cheese.
- Bake until the cheese is melted and bubbly.
4.3. What Creative Topping Ideas Can Elevate Potato Skins?
Elevate your potato skins with creative toppings that add unique flavors and textures. Consider options like pulled pork, caramelized onions, jalapenos, or a drizzle of BBQ sauce for a gourmet twist.
- Pulled Pork Potato Skins: Top with slow-cooked pulled pork and a drizzle of BBQ sauce.
- Caramelized Onion and Gruyere Potato Skins: Add caramelized onions and grated Gruyere cheese for a sophisticated flavor.
- Jalapeno Popper Potato Skins: Top with cream cheese, jalapenos, and bacon for a spicy kick.
- Buffalo Chicken Potato Skins: Add shredded chicken tossed in buffalo sauce and a drizzle of ranch dressing.
- Broccoli and Cheddar Potato Skins: Top with steamed broccoli and melted cheddar cheese for a vegetarian option.
- Pizza Potato Skins: Add pizza sauce, mozzarella cheese, and your favorite pizza toppings like pepperoni or mushrooms.
- Mediterranean Potato Skins: Top with hummus, feta cheese, olives, and sun-dried tomatoes for a Mediterranean twist.
5. Quick Cheese Straws
Cheese straws are incredibly easy to make with ready-rolled puff pastry. Sprinkle grated Parmesan over the pastry, cut it into strips, twist, and bake until golden brown.
5.1. Why Are Cheese Straws a Delightful Party Snack?
Cheese straws are a delightful party snack because they are simple, savory, and satisfying. Made from flaky puff pastry and cheese, they offer a crispy texture and rich flavor that pairs well with various dips and drinks.
- Simple: Cheese straws require only a few ingredients and minimal effort to prepare.
- Savory: The cheesy flavor is universally appealing and makes them a great alternative to sweet snacks.
- Satisfying: The combination of crispy pastry and cheese provides a satisfying crunch and flavor.
- Easy to Customize: You can easily customize the cheese and seasonings to suit your preferences.
- Make-Ahead Option: Cheese straws can be made ahead of time and stored in an airtight container, making them ideal for parties.
- Versatile: They can be served as appetizers, snacks, or as part of a cheese board.
- Elegant Presentation: Their twisted shape and golden color add an elegant touch to any party spread.
5.2. How to Make Cheese Straws Quickly?
Making cheese straws quickly involves using ready-rolled puff pastry and a simple cheese topping. Here’s a basic recipe:
- Ingredients:
- Ready-rolled puff pastry
- Grated Parmesan cheese
- Egg (for egg wash)
- Salt and pepper to taste
- Instructions:
- Preheat your oven to 400°F (200°C).
- Unroll the puff pastry on a lightly floured surface.
- Brush with egg wash and sprinkle generously with Parmesan cheese, salt, and pepper.
- Cut the pastry into strips.
- Twist each strip and place on a baking sheet.
- Bake for 12-15 minutes, or until golden brown.
5.3. What Flavors Can You Add to Cheese Straws?
Enhance your cheese straws with a variety of flavors by adding different cheeses, herbs, and spices. Consider options like cheddar, Gruyere, rosemary, or paprika for unique and delicious variations.
- Cheddar Cheese Straws: Use grated cheddar cheese for a sharper and more robust flavor.
- Gruyere Cheese Straws: Add grated Gruyere cheese for a nutty and slightly sweet taste.
- Rosemary Cheese Straws: Sprinkle dried rosemary over the cheese for a fragrant and herbaceous twist.
- Paprika Cheese Straws: Add a pinch of paprika for a smoky and slightly spicy flavor.
- Garlic Cheese Straws: Mix garlic powder with the cheese for a savory and aromatic variation.
- Chili Cheese Straws: Add chili flakes to the cheese for a spicy kick.
- Everything Bagel Cheese Straws: Sprinkle everything bagel seasoning over the cheese for a flavorful and textured topping.
6. Smoked Mackerel & Horseradish Chicory Cups
For a more refined palate, these chicory cups are both fancy and budget-friendly. Using tinned mackerel, horseradish, and chicory leaves, you can create a sophisticated appetizer in minutes.
6.1. Why Choose Smoked Mackerel for Party Appetizers?
Smoked mackerel is an excellent choice for party appetizers due to its rich flavor, nutritional benefits, and affordability. It offers a delicious and healthy alternative to traditional party snacks, making it a standout option for discerning guests.
- Rich Flavor: Smoked mackerel has a distinctive, smoky flavor that pairs well with various ingredients.
- Nutritional Benefits: It’s packed with omega-3 fatty acids, protein, and vitamins, making it a healthy choice.
- Affordability: Tinned mackerel is relatively inexpensive, making it a budget-friendly option for party appetizers.
- Easy to Prepare: It requires minimal preparation and can be used in a variety of quick and easy recipes.
- Versatile: Smoked mackerel can be used in dips, spreads, salads, and canapés.
- Unique: It offers a unique and sophisticated flavor profile that sets it apart from typical party snacks.
- Sustainable: Mackerel is a sustainable seafood choice, making it an environmentally responsible option.
6.2. How to Prepare Chicory Cups with Mackerel and Horseradish?
Preparing chicory cups with mackerel and horseradish is quick and easy. Simply mix smoked mackerel with horseradish, yogurt, and lemon juice, then spoon the mixture into chicory leaves for a refreshing appetizer.
- Ingredients:
- Tinned smoked mackerel fillets
- Horseradish sauce
- Greek yogurt
- Lemon juice
- Chicory leaves
- Fresh dill (optional)
- Instructions:
- Flake the smoked mackerel fillets in a bowl.
- Add horseradish sauce, Greek yogurt, and lemon juice to the mackerel.
- Mix well.
- Spoon the mixture into chicory leaves.
- Garnish with fresh dill, if desired.
6.3. What Other Ingredients Pair Well with Smoked Mackerel?
Smoked mackerel pairs well with a variety of ingredients that complement its rich, smoky flavor. Consider options like lemon, dill, cream cheese, capers, and avocado for delicious and balanced appetizers.
- Lemon: Adds brightness and acidity to balance the richness of the mackerel.
- Dill: Provides a fresh, herbaceous flavor that complements the smoky taste.
- Cream Cheese: Creates a creamy and smooth texture that pairs well with the mackerel.
- Capers: Add a salty and briny flavor that enhances the overall taste.
- Avocado: Provides a creamy texture and healthy fats that complement the mackerel.
- Beetroot: Offers a sweet and earthy flavor that contrasts well with the smoky taste.
- Horseradish: Adds a spicy kick that cuts through the richness of the mackerel.
7. Baked Ham Hock Pots
These ham hock pots can be prepared up to two days in advance, making them perfect for minimizing last-minute stress. Serve in individual ramekins for easy portioning.
7.1. Why Are Ham Hock Pots a Convenient Party Appetizer?
Ham hock pots are a convenient party appetizer because they can be made in advance, served in individual portions, and offer a rich and savory flavor that appeals to many palates. Their make-ahead nature reduces stress on the day of the party.
- Make-Ahead: The uncooked mixture can be prepared and refrigerated up to two days in advance.
- Individual Portions: Serving in individual ramekins makes portioning easy and elegant.
- Rich Flavor: Ham hock provides a deep, savory flavor that is both comforting and delicious.
- Versatile: They can be served warm or cold, making them adaptable to different party setups.
- Elegant Presentation: Serving in ramekins adds an elegant touch to the appetizer.
- Easy to Scale: The recipe can easily be scaled up or down to suit your entertaining needs.
- Budget-Friendly: Using ham hock is a cost-effective way to add flavor to your party spread.
7.2. How to Make Ham Hock Pots in Advance?
To make ham hock pots in advance, prepare the mixture according to the recipe, divide it into ramekins, and refrigerate until ready to bake. This allows the flavors to meld and reduces stress on the day of the party.
- Ingredients:
- Cooked ham hock
- Double cream
- Dijon mustard
- Fresh parsley
- Gelatin leaves
- Salt and pepper to taste
- Instructions:
- Shred the cooked ham hock.
- Soften the gelatin leaves in cold water.
- Heat the double cream in a saucepan.
- Remove from heat and stir in Dijon mustard, parsley, and softened gelatin.
- Add the shredded ham hock and mix well.
- Season with salt and pepper.
- Divide the mixture into ramekins.
- Refrigerate for at least 4 hours, or until set.
7.3. What Are Some Flavor Variations for Ham Hock Pots?
Explore different flavor variations to enhance your ham hock pots. Consider adding ingredients like apple cider, smoked paprika, or caramelized onions for unique and delicious twists.
- Apple Cider Ham Hock Pots: Add apple cider to the cream mixture for a sweet and tangy flavor.
- Smoked Paprika Ham Hock Pots: Incorporate smoked paprika for a smoky and slightly spicy flavor.
- Caramelized Onion Ham Hock Pots: Add caramelized onions to the mixture for a sweet and savory twist.
- Mushroom Ham Hock Pots: Sauté mushrooms and add them to the mixture for an earthy flavor.
- Truffle Oil Ham Hock Pots: Drizzle truffle oil over the top of the pots for a luxurious and aromatic touch.
- Herb Ham Hock Pots: Use a mix of fresh herbs like thyme, rosemary, and sage for a fragrant and herbaceous flavor.
- Spicy Ham Hock Pots: Add chili flakes or a dash of hot sauce for a spicy kick.
8. Carrot & Caraway Crackers
These carrot canapés are not only cost-effective but also vegan-friendly. Impress your guests by piping homemade carrot purée onto the crackers for an elegant presentation.
8.1. Why Choose Carrot Canapés for Vegan Guests?
Carrot canapés are an excellent choice for vegan guests because they are plant-based, nutritious, and can be easily customized to suit different tastes. They offer a delicious and visually appealing option that caters to dietary restrictions.
- Plant-Based: Carrot canapés are entirely plant-based, making them suitable for vegan diets.
- Nutritious: Carrots are rich in vitamins, minerals, and antioxidants, making them a healthy choice.
- Customizable: The carrot purée can be flavored with various spices and herbs to suit different preferences.
- Cost-Effective: Carrots are an affordable vegetable, making this a budget-friendly option.
- Visually Appealing: The vibrant orange color of the carrot purée adds a visually appealing touch to the canapés.
- Easy to Prepare: They are relatively simple to prepare, especially if you make the carrot purée in advance.
- Versatile: They can be served as appetizers, snacks, or as part of a vegan buffet spread.
8.2. How to Make Carrot & Caraway Crackers?
Making carrot and caraway crackers involves preparing a carrot purée flavored with caraway seeds and serving it on crackers. Here’s a basic recipe:
- Ingredients:
- Carrots
- Caraway seeds
- Olive oil
- Vegetable broth
- Salt and pepper to taste
- Crackers
- Instructions:
- Cook carrots until soft.
- Blend the carrots with caraway seeds, olive oil, and vegetable broth until smooth.
- Season with salt and pepper.
- Spoon or pipe the carrot purée onto crackers.
- Garnish with fresh herbs, if desired.
8.3. What Are Creative Ways to Present Carrot Canapés?
Present carrot canapés in creative ways to enhance their visual appeal. Consider piping the carrot purée onto the crackers, garnishing with fresh herbs, or arranging the canapés on a tiered serving platter.
- Piping Carrot Purée: Use a piping bag to create elegant designs with the carrot purée on the crackers.
- Garnishing with Fresh Herbs: Add fresh herbs like parsley, dill, or chives for a pop of color and flavor.
- Arranging on a Tiered Platter: Display the canapés on a tiered serving platter to create a visually appealing centerpiece.
- Using Different Crackers: Experiment with different types of crackers, such as whole wheat, rye, or gluten-free, for variety.
- Adding a Drizzle: Drizzle olive oil or balsamic glaze over the canapés for added flavor and visual appeal.
- Sprinkling with Seeds: Sprinkle sesame seeds, poppy seeds, or caraway seeds over the canapés for added texture and flavor.
- Creating a Color Contrast: Use a contrasting ingredient, such as a dollop of vegan cream cheese or a slice of cucumber, to create visual interest.
9. Aubergine & Chickpea Bites
These healthy vegan canapés are a twist on classic chickpea falafel, incorporating aubergine for added flavor. Serve with coconut yogurt and harissa paste for a simple dip.
9.1. Why Are Aubergine & Chickpea Bites a Healthy Appetizer Option?
Aubergine and chickpea bites are a healthy appetizer option because they are packed with nutrients, plant-based protein, and fiber. They offer a nutritious and delicious alternative to traditional fried snacks.
- Nutrient-Rich: Aubergine and chickpeas are both rich in vitamins, minerals, and antioxidants.
- Plant-Based Protein: Chickpeas are an excellent source of plant-based protein, making these bites a satisfying snack.
- High in Fiber: The high fiber content promotes digestive health and helps keep you feeling full.
- Low in Fat: These bites are typically baked or air-fried, resulting in a lower fat content compared to fried snacks.
- Vegan-Friendly: They are entirely plant-based, making them suitable for vegan diets.
- Gluten-Free: If made with gluten-free ingredients, these bites can be a great option for those with gluten sensitivities.
- Versatile: They can be served with a variety of dips and toppings, making them a versatile appetizer.
9.2. How to Make Aubergine & Chickpea Bites?
Making aubergine and chickpea bites involves combining cooked aubergine and chickpeas with spices and herbs, then baking or air-frying until golden brown. Here’s a basic recipe:
- Ingredients:
- Aubergine
- Chickpeas
- Onion
- Garlic
- Cumin
- Coriander
- Olive oil
- Salt and pepper to taste
- Instructions:
- Roast or grill the aubergine until soft.
- Mash the aubergine and chickpeas together.
- Sauté the onion and garlic.
- Combine all ingredients and mix well.
- Form the mixture into small balls or patties.
- Bake or air-fry until golden brown.
9.3. What Dips Complement Aubergine & Chickpea Bites?
A variety of dips complement aubergine and chickpea bites, enhancing their flavor and texture. Consider options like tahini sauce, yogurt dip, spicy hummus, or a refreshing cucumber dip.
- Tahini Sauce: A classic Middle Eastern dip made from tahini, lemon juice, garlic, and water.
- Yogurt Dip: Mix Greek yogurt with herbs, lemon juice, and garlic for a creamy and refreshing dip.
- Spicy Hummus: Add chili flakes or hot sauce to hummus for a fiery kick.
- Cucumber Dip: Combine grated cucumber with yogurt, dill, and garlic for a cooling and refreshing dip.
- Baba Ghanoush: A smoky aubergine dip that complements the flavor of the bites.
- Harissa Paste: A spicy North African chili paste that adds a bold flavor.
- Sweet Chili Sauce: A sweet and spicy sauce that provides a delightful contrast to the savory bites.
10. Mini Quiches
No party is complete without mini quiches. Bake them the day before or freeze them ahead to ensure stress-free entertaining on a budget.
10.1. Why Are Mini Quiches a Perfect Party Food?
Mini quiches are a perfect party food because they are easy to handle, customizable, and can be made ahead of time. Their small size makes them ideal for mingling guests, and their versatility allows you to cater to different dietary preferences.
- Easy to Handle: Their small size makes them easy to pick up and eat without creating a mess.
- Customizable: You can easily customize the fillings to suit different tastes and dietary needs.
- Make-Ahead Option: They can be made ahead of time and stored in the refrigerator or freezer.
- Versatile: They can be served warm or cold, making them adaptable to different party setups.
- Elegant Presentation: Their miniature size and colorful fillings add an elegant touch to any party spread.
- Budget-Friendly: Using affordable ingredients like eggs, cheese, and vegetables makes them a cost-effective option.
- Crowd-Pleaser: They are generally well-liked by people of all ages, ensuring they’ll be a hit at any gathering.
10.2. How to Prepare Mini Quiches in Advance?
To prepare mini quiches in advance, bake them according to the recipe, let them cool completely, and then store them in the refrigerator or freezer. Reheat them before serving for a warm and delicious appetizer.
- Ingredients:
- Puff pastry or shortcrust pastry
- Eggs
- Cream or milk
- Cheese
- Vegetables or meat
- Salt and pepper to taste
- Instructions:
- Line mini muffin tins with pastry.
- Whisk together eggs, cream or milk, cheese, and seasonings.
- Add vegetables or meat to the pastry-lined tins.
- Pour the egg mixture over the fillings.
- Bake until golden brown and set.
- Let cool completely and store in the refrigerator or freezer.
10.3. What Are Some Delicious Mini Quiche Filling Ideas?
Explore different filling ideas to create a variety of mini quiches that cater to different tastes. Consider options like spinach and feta, bacon and cheddar, mushroom and Gruyere, or roasted vegetable quiches.
- Spinach and Feta Quiche: Combine spinach, feta cheese, and a touch of nutmeg for a Mediterranean-inspired filling.
- Bacon and Cheddar Quiche: Add crispy bacon and cheddar cheese for a classic and savory flavor combination.
- Mushroom and Gruyere Quiche: Sauté mushrooms and combine them with Gruyere cheese for an earthy and sophisticated filling.
- Roasted Vegetable Quiche: Use a mix of roasted vegetables like bell peppers, zucchini, and onions for a colorful and healthy option.
- Lorraine Quiche: A classic French quiche with bacon, eggs, and cream.
- Salmon and Dill Quiche: Add smoked salmon and fresh dill for a flavorful and elegant filling.
- Broccoli and Cheddar Quiche: Combine steamed broccoli and cheddar cheese for a vegetarian option.
11. Classic Devilled Eggs
Devilled eggs are a great veggie option for your party spread. Hard-boiled eggs are filled with storecupboard staples like mayo, mustard, yogurt, and cayenne pepper. Garnish