Food Processor Pie Crust is the baker’s secret weapon for consistently delectable results. At FOODS.EDU.VN, we understand that creating the perfect pie crust can be a challenge, but with a food processor, it becomes surprisingly simple and rewarding. Discover how to use this appliance to make flaky pie dough every time, and elevate your baking game with ease and precision. Learn about the best techniques for making a tender pie crust, and discover our time-saving tips to bake great desserts.
1. Understanding the Allure of Food Processor Pie Crust
Making pie crust can be intimidating, but a food processor simplifies the process. Instead of cutting butter into flour by hand, which requires patience and technique, the food processor automates the process. This results in a consistent, evenly mixed dough, which is the foundation for a perfect pie crust. Let’s look at some reasons why using a food processor for pie crust is a superb choice:
- Consistency: The food processor ensures the butter is uniformly distributed, leading to a consistently flaky texture.
- Speed: It significantly reduces preparation time compared to manual methods.
- Ease: It requires less physical effort, making it accessible to bakers of all skill levels.
- Temperature Control: The quick processing time helps keep the butter cold, which is crucial for flakiness.
Using a food processor transforms pie-making from a daunting task into an enjoyable experience.
2. Essential Ingredients for Flawless Food Processor Pie Crust
Achieving a superior pie crust starts with gathering high-quality, cold ingredients. Each component plays a crucial role in the final texture and flavor. Here’s a detailed list of essentials:
| Ingredient | Quantity | Purpose | Notes |
|---|---|---|---|
| All-Purpose Flour | 2 ½ cups (325g) | Provides structure; use the “spoon and level” method to ensure accurate measurement. | Bread flour can make for a tougher crust. |
| Unsalted Butter | 1 cup (230g) | Adds flavor and creates flaky layers; must be very cold, cut into ½-inch cubes. | Salted butter can be used, but reduce added salt. |
| Ice Water | 6 to 8 tablespoons | Binds the dough; add gradually until the dough just comes together. | Keep water ice-cold to prevent butter from melting. |
| Salt | 1 teaspoon (kosher) | Enhances flavor; use kosher or fine sea salt. | Adjust the quantity based on your taste preferences. |
| Sugar (Optional) | 1 tablespoon | Adds a hint of sweetness and aids in browning; optional for savory pies. | Can be omitted or substituted with other sweeteners like honey or maple syrup. |
2.1. Selecting the Right Flour for Your Pie Crust
All-purpose flour is the most commonly used flour for pie crusts due to its balanced protein content. The right balance ensures the crust is both tender and strong enough to hold its shape.
2.2. The Importance of Cold Butter in Pie Crust
Using very cold butter is vital for creating a flaky pie crust. The cold butter pieces create steam when baking, resulting in pockets that separate the layers of dough.
2.3. Why Ice Water is Essential
Ice water helps to keep the butter cold and prevents the gluten in the flour from overdeveloping. Overdeveloped gluten leads to a tough crust, so keeping the water as cold as possible is essential.
2.4. The Role of Salt and Sugar
Salt enhances the overall flavor profile of the crust, while sugar, though optional, adds a subtle sweetness and helps with browning. This balance is particularly important for sweet pies.
3. Step-by-Step Guide to Food Processor Pie Crust
Follow these detailed steps to create a perfect pie crust using a food processor. Each step is designed to ensure consistency, flakiness, and ease of handling.
- Combine Dry Ingredients:
- In the food processor bowl, combine 1 ½ cups of all-purpose flour, salt, and sugar (if using).
- Pulse 2 to 3 times to mix evenly. This ensures the salt and sugar are well distributed throughout the flour.
- Add Cold Butter:
- Scatter the cold butter cubes over the flour mixture in the food processor.
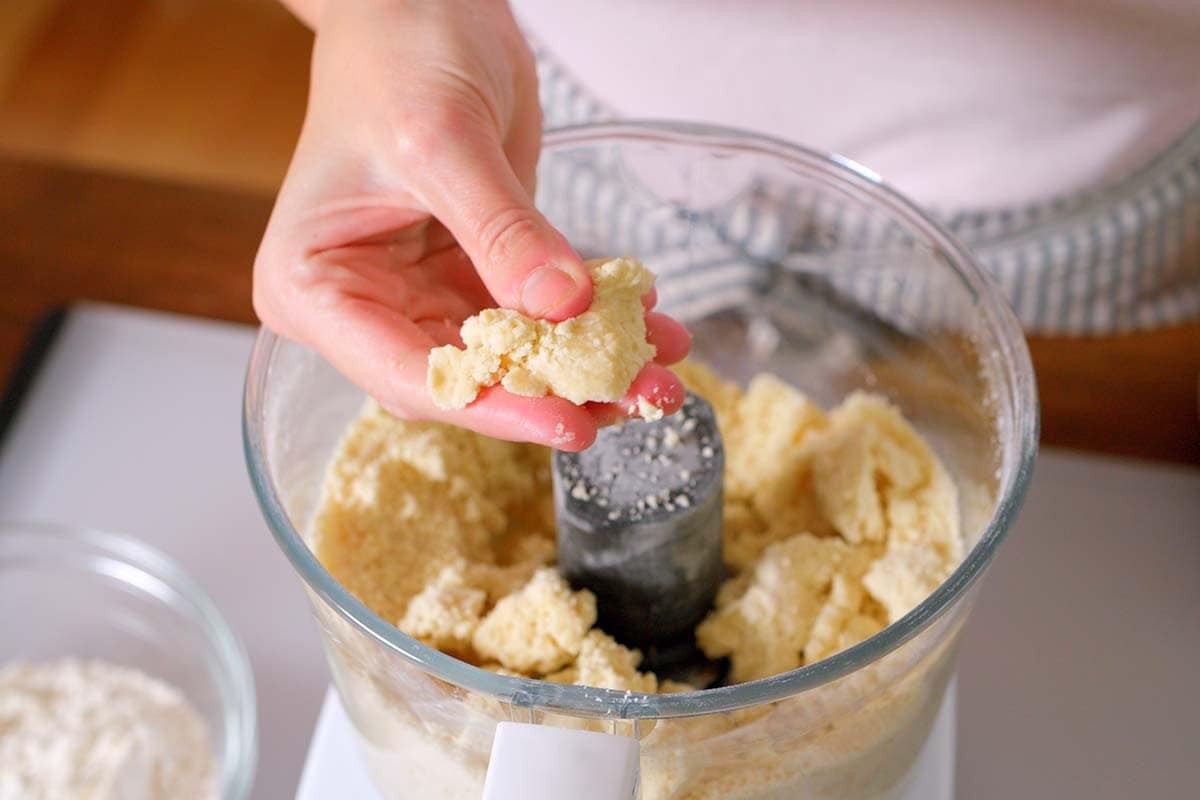
- Process until the mixture forms a dough or paste, about 15 seconds.
- There should be no uncoated flour at this stage. The mixture should resemble coarse crumbs.
- Incorporate Remaining Flour:
- Add the remaining 1 cup of flour to the food processor.
- Pulse 4 to 5 times until the flour is evenly distributed.
- The dough should look broken up and slightly crumbly.
- Add Ice Water Gradually:
- Transfer the mixture to a medium bowl.
- Sprinkle ice water over the mixture, starting with 4 tablespoons.
- Use a rubber spatula to press the dough into itself.
- The crumbs should begin to form larger clusters.
- If the dough holds together when pinched, it’s ready. If it falls apart, add 2 to 4 more tablespoons of water and continue to press until the dough comes together.
- Form Dough Disks:
- Remove the dough from the bowl and place it on a clean surface.
- Work the dough just enough to form a ball. Avoid over-kneading.
- Cut the ball in half and form each half into disks.
- Wrap each disk tightly with plastic wrap.
- Chill the Dough:
- Refrigerate the dough for at least 1 hour and up to 2 days.
- Chilling allows the gluten to relax and the butter to firm up, making the dough easier to roll out.
- For longer storage, freeze the dough for up to 3 months. Thaw it overnight in the refrigerator before using.
3.1. Tips for Combining Dry Ingredients
Ensure that all dry ingredients are thoroughly combined before adding the butter. This helps in even distribution and prevents pockets of salt or sugar in the final crust.
3.2. Achieving the Right Consistency with Butter and Flour
The key is to pulse the butter and flour until the mixture resembles coarse crumbs. This creates small pockets of butter that, when baked, create flaky layers.
3.3. Adding Ice Water for Perfect Hydration
Adding ice water gradually is crucial. Over-watering can lead to a tough crust. Add just enough water for the dough to come together without becoming sticky.
3.4. The Importance of Chilling the Dough
Chilling the dough allows the gluten to relax and the butter to solidify. This prevents the dough from shrinking during baking and ensures a tender, flaky crust.
4. Rolling Out Your Food Processor Pie Crust
Rolling out the dough properly is essential for achieving the desired shape and thickness. Here’s how to roll out your food processor pie crust with ease:
- Prepare the Dough:
- Remove one of the dough disks from the refrigerator.
- Let it sit at room temperature for 5 minutes to soften slightly. This prevents the dough from cracking when rolling.
- Prepare the Work Surface:
- Lightly flour your work surface, the top of the dough, and your rolling pin.
- Use a pastry mat for easier cleanup and to prevent sticking.
- Roll Out the Dough:
- Use the rolling pin to roll out the dough into a 12-inch circle.
- Aim for a thickness of about 1/8 inch.
- Start from the center and roll outwards, rotating the dough as you go to maintain a circular shape.
- Check for Sticking:
- Periodically check if the dough is sticking to the surface below.
- Add a small amount of flour when necessary to prevent sticking.
- Transfer to Pie Dish:
- Invert your pie dish over the dough round to check for size. You should have a 1-inch edge around the pie dish.
- To transfer the dough, start at one end and gently roll the dough around the rolling pin.
- Unroll the dough over the pie dish.
- Press and Trim:
- Gently press the dough down into the dish so that it lines the bottom and sides.
- Be careful not to pull or stretch the dough.
- Use a knife or kitchen scissors to trim the dough to within 1/2-inch of the edge of the dish.
- Crimp the Edges:
- Fold the edge of the dough underneath itself to create a thicker, 1/4-inch border that rests on the lip of the dish.
- Crimp the edges by pressing the pointer finger of one hand against the edge of the dough from the inside of the dish while gently pressing with two knuckles of the other hand from the outside.
- Chill Again:
- Refrigerate the dough for at least 20 minutes or freeze for 5 minutes before baking.
- This helps the crust maintain its shape during baking.
4.1. Preventing Dough from Sticking
Keeping the work surface and dough lightly floured is crucial. Use a light hand and add flour sparingly to avoid drying out the dough.
4.2. Achieving Uniform Thickness
Roll from the center outwards, applying even pressure. Rotate the dough frequently to ensure a uniform thickness throughout.
4.3. Transferring Dough Without Tearing
Rolling the dough around a rolling pin provides a stable and easy way to transfer it to the pie dish without tearing.
4.4. Perfecting the Crimp
A well-executed crimp not only looks beautiful but also helps to seal the edges of the pie, preventing filling from leaking out.
5. Baking Your Food Processor Pie Crust
Baking the pie crust properly is crucial for achieving a golden-brown, flaky texture. Here are two methods: blind baking for single-crust pies and baking a double-crust pie.
5.1. Blind Baking a Single-Crust Pie
Blind baking is pre-baking the pie crust before adding the filling. This method is essential for pies with wet fillings, such as quiches or cream pies.
- Prepare the Oven:
- Preheat the oven to 425°F (218°C).
- Place a baking sheet on a middle oven rack.
- Prepare the Crust:
- Roll out enough dough to make one 9-inch crust (1 dough disk).
- Place the dough into a pie plate.
- Pierce the bottom of the crust with a fork to prevent air pockets from forming.
- Line and Weigh Down:
- Line the crust with two sheets of aluminum foil or parchment paper.
- Be sure to push the foil against the edges of the crust.
- Fill the foil with dried rice, dried beans, or pie weights to prevent the crust from puffing up.
- Chill the Crust:
- Refrigerate the crust for 30 minutes or freeze for 10 minutes, or until firm to the touch.
- Bake the Crust:
- Place the pie crust onto the preheated baking sheet.
- Reduce the oven temperature to 400°F (204°C).
- For a fully baked crust, bake for 20 to 30 minutes or until the crust is golden.
- For a partially-baked crust (for quiches), bake until the bottom crust is just beginning to brown, 5 to 10 minutes.
- Add Egg Wash (Optional):
- To add a shiny exterior to a fully baked crust, make an egg wash by whisking one egg yolk and 1 tablespoon of cream in a small bowl.
- Remove the rice, beans, or pie weights and foil from the pie crust.
- Brush the bottom and sides of the crust with the egg wash.
- Bake until the egg wash is dry and shiny, 3 to 5 minutes.
- Cool Completely:
- Cool the crust completely before filling.
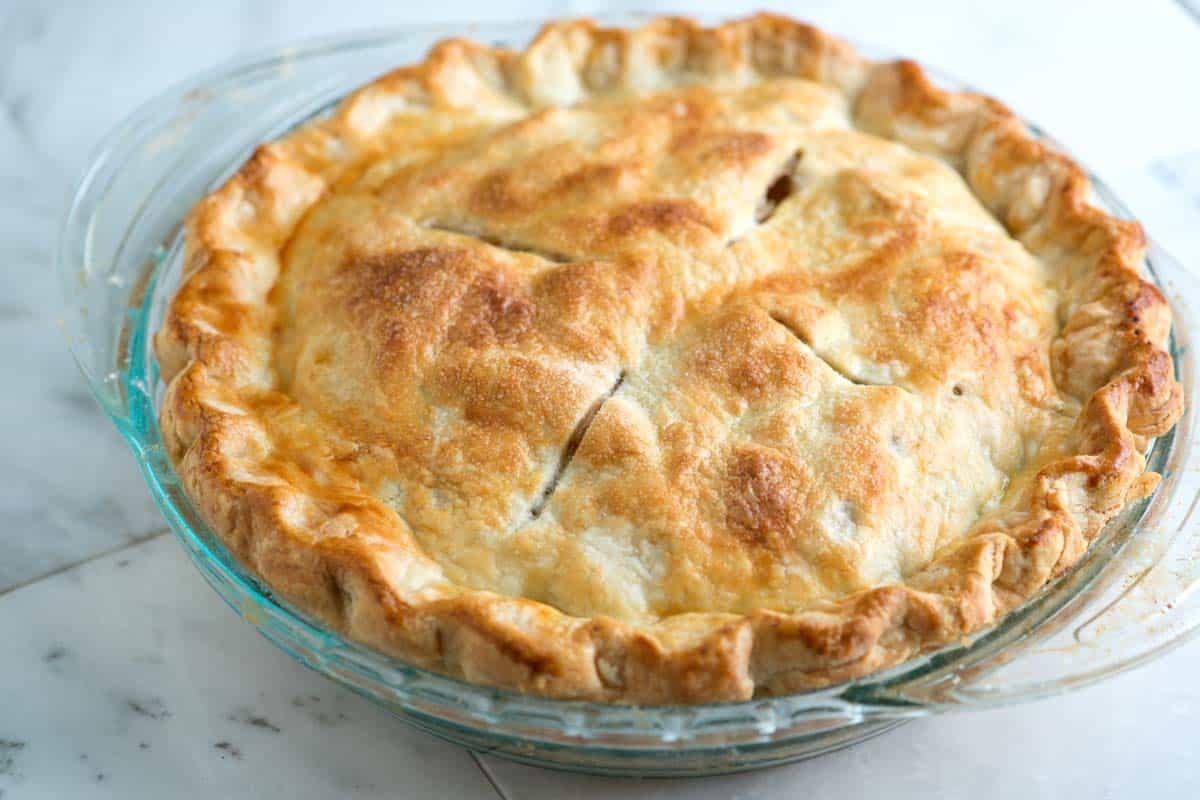
5.2. Baking a Double-Crust Pie
Baking a double-crust pie involves encasing the filling between two layers of dough. This method is common for fruit pies and requires careful attention to venting.
- Prepare the Oven:
- Oven temperature and bake time will vary depending on the pie recipe you are following.
- As an example, set the oven to 400°F for a double-crust cherry pie.
- Prepare the Bottom Crust:
- Remove half of the dough from the refrigerator and let it sit at room temperature for 5 minutes.
- On a lightly floured surface, roll out the dough to a 13-inch (1/8-inch thick) circle.
- Carefully press the dough into the dish.
- Spoon the pie filling into the pie crust.
- Prepare the Top Crust:
- Roll out the second half of the dough.
- Top the pie with the second dough round.
- Use a knife or pair of kitchen scissors to trim the dough to within 3/4-inch of the edge of the dish.
- Seal and Crimp:
- Fold the edges of the top crust underneath the edges of the bottom crust.
- Press the edge to seal it, creating a thicker, 1/4-inch border that rests on the lip of the dish.
- Crimp the edges by pressing the pointer finger of one hand against the edge of the dough from the inside of the dish while gently pressing with two knuckles of the other hand from the outside.
- Chill Again:
- Refrigerate the pie for at least 20 minutes or freeze for 5 minutes before baking.
- Prepare for Baking:
- Just before baking, make an egg wash by whisking an egg yolk and cream together in a small bowl.
- Use a pastry brush to brush over the top crust.
- Sprinkle with 1 tablespoon of sugar.
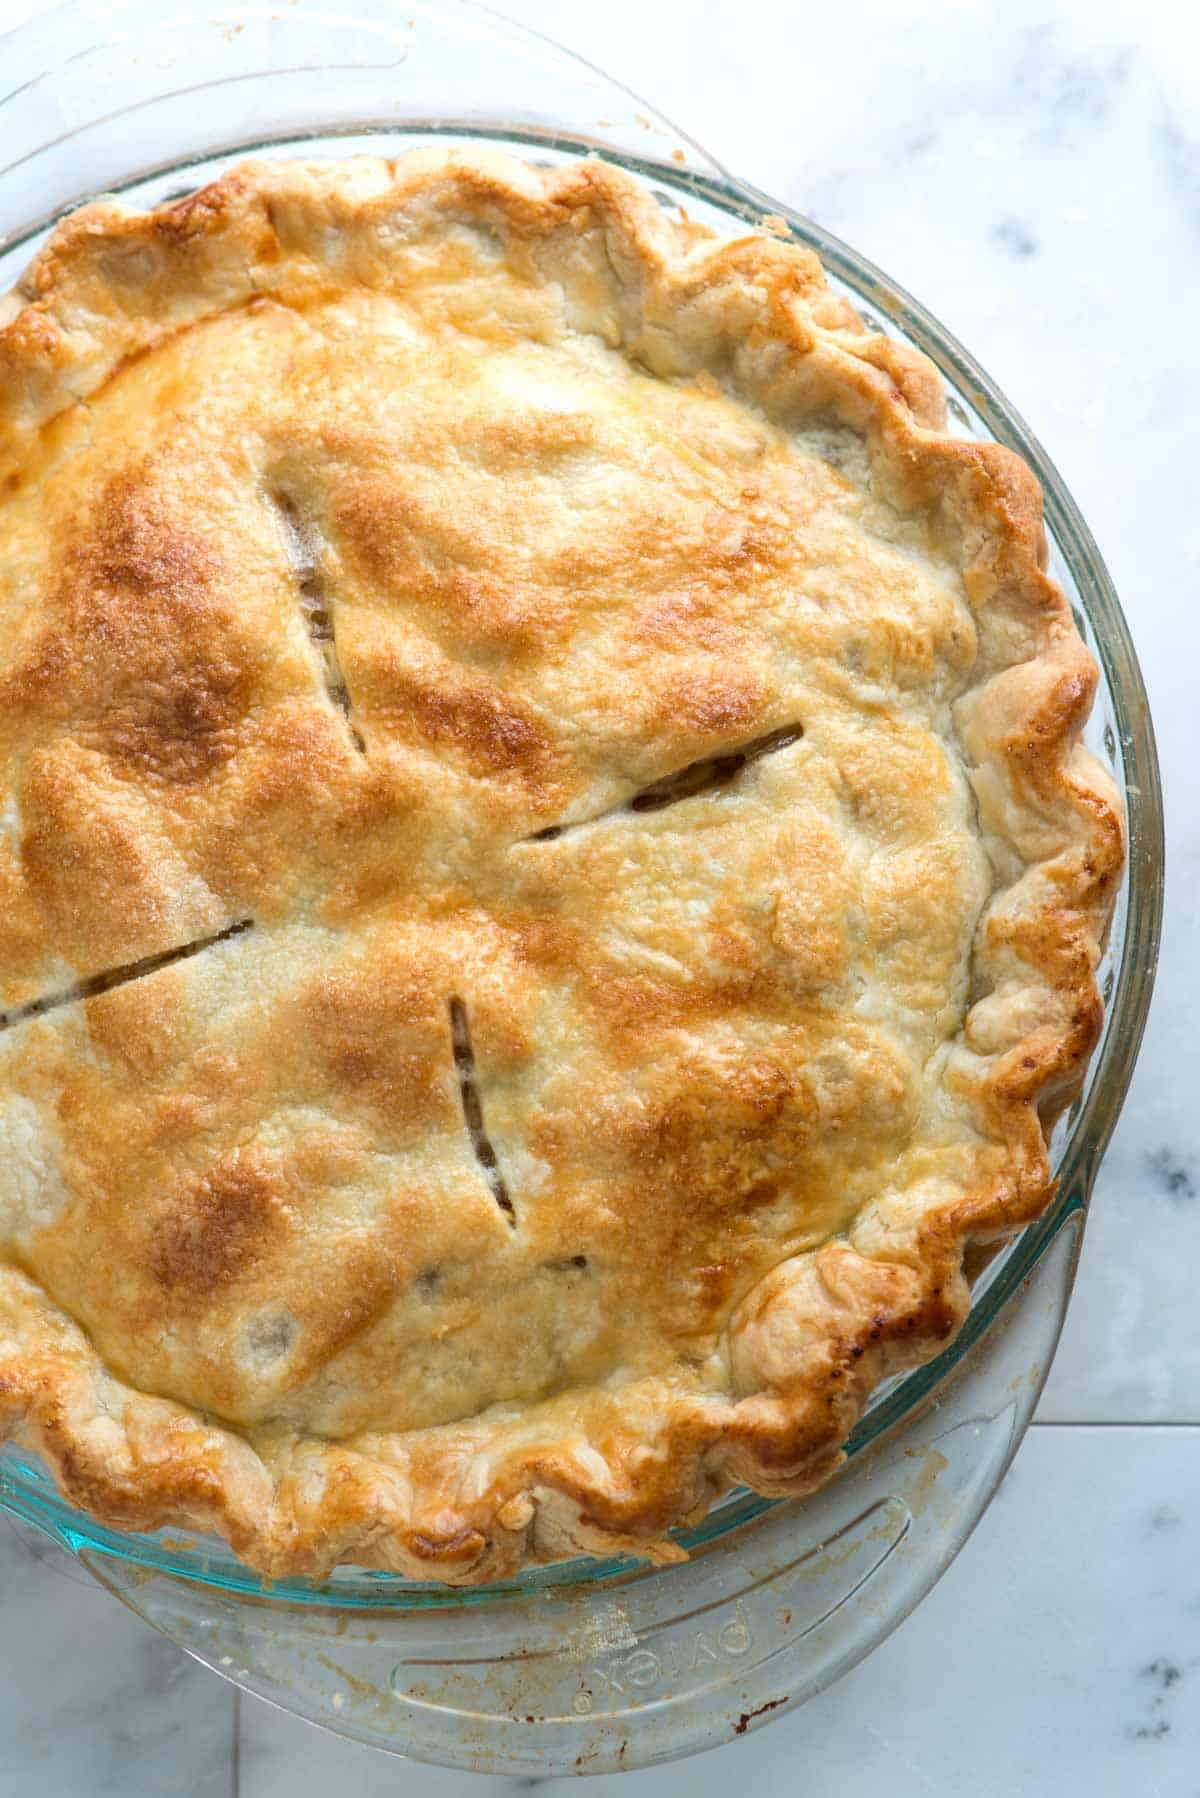
- Cut 3 to 4 slits in the top of the pie to allow steam to escape.
- Bake:
- Bake as directed by the specific recipe you are following.
5.3. Preventing Soggy Bottom Crusts
Blind baking the bottom crust before adding the filling can help prevent a soggy bottom crust.
5.4. Achieving Even Browning
Rotating the pie during baking ensures even browning. If the edges are browning too quickly, use pie shields to protect them.
5.5. Venting Double-Crust Pies
Cutting slits in the top crust allows steam to escape, preventing the crust from puffing up and bursting.
6. Troubleshooting Common Pie Crust Issues
Even with the best recipes and techniques, pie crust issues can arise. Here’s how to troubleshoot some common problems:
| Problem | Cause | Solution |
|---|---|---|
| Tough Crust | Overdeveloped gluten, too much water, over-kneading. | Use cold ingredients, avoid over-processing, add water gradually, chill the dough adequately. |
| Soggy Bottom | Wet filling, insufficient blind baking. | Blind bake the crust before adding filling, use a thicker bottom crust, ensure the filling is not too runny. |
| Shrinking Crust | Dough not relaxed, over-stretched during rolling. | Chill the dough properly, avoid stretching when placing in the dish, let the dough relax before baking. |
| Crumbly Crust | Not enough moisture, too much flour. | Add water gradually until the dough just comes together, measure flour accurately, use a pastry blender or food processor carefully. |
| Uneven Browning | Uneven oven temperature, crust not properly shielded. | Rotate the pie during baking, use pie shields to protect the edges, check oven temperature with an oven thermometer. |
| Bubbling Crust | Insufficient docking (piercing with a fork). | Dock the crust thoroughly before baking, use pie weights or dried beans to weigh down the crust during blind baking. |
6.1. Addressing Tough Crusts
A tough crust is often the result of overdeveloped gluten. Minimize gluten development by using cold ingredients, avoiding over-processing, and chilling the dough.
6.2. Preventing Soggy Bottoms
A soggy bottom can ruin an otherwise perfect pie. Blind baking the crust and using a thicker bottom crust can help prevent this issue.
6.3. Minimizing Shrinkage
Shrinkage occurs when the dough is not relaxed before baking. Ensure the dough is properly chilled and avoid stretching it when placing it in the dish.
6.4. Fixing Crumbly Crusts
A crumbly crust is often caused by a lack of moisture. Add water gradually until the dough just comes together, and measure flour accurately to avoid dryness.
6.5. Ensuring Even Browning
Uneven browning can be corrected by rotating the pie during baking and using pie shields to protect the edges.
7. Flavor Variations for Food Processor Pie Crust
While the classic pie crust is delicious on its own, experimenting with flavors can elevate your pies to a new level. Here are some ideas for flavor variations:
| Flavor Addition | Quantity | How to Incorporate | Best Used For |
|---|---|---|---|
| Lemon Zest | 1-2 teaspoons | Add to the dry ingredients before processing. | Fruit pies, custard pies |
| Orange Zest | 1-2 teaspoons | Add to the dry ingredients before processing. | Chocolate pies, nut pies |
| Cinnamon | ½-1 teaspoon | Add to the dry ingredients before processing. | Apple pie, pumpkin pie |
| Nutmeg | ¼-½ teaspoon | Add to the dry ingredients before processing. | Sweet potato pie, pecan pie |
| Herbs (Rosemary, Thyme) | 1-2 teaspoons (finely chopped) | Add to the dry ingredients before processing. | Savory pies, quiches |
| Cocoa Powder | 2-3 tablespoons | Reduce the flour by an equal amount, then add the cocoa powder to the dry ingredients before processing. | Chocolate pies, mocha pies |
| Almond Extract | ¼-½ teaspoon | Add to the ice water before mixing with the dry ingredients. | Cherry pie, almond pie |
7.1. Citrus Zest
Adding lemon or orange zest provides a bright, aromatic flavor that complements fruit and custard pies beautifully.
7.2. Spices
Spices like cinnamon and nutmeg add warmth and depth, making them perfect for classic pies like apple and pumpkin.
7.3. Herbs
For savory pies and quiches, incorporating herbs like rosemary and thyme adds a savory, aromatic dimension.
7.4. Cocoa Powder
Cocoa powder transforms the pie crust into a chocolatey delight, ideal for chocolate and mocha pies.
7.5. Extracts
A touch of almond extract can enhance the flavor of cherry and almond pies, adding a subtle nutty sweetness.
8. Pie Recipes to Showcase Your Food Processor Pie Crust
Now that you’ve mastered the art of making pie crust with a food processor, here are some delectable pie recipes to showcase your skills:
- Classic Apple Pie:
- A timeless favorite with a sweet and tart apple filling, enhanced by warm spices.
- Easy Pumpkin Pie:
- A holiday staple with a creamy, spiced pumpkin filling.
- Homemade Blueberry Pie:
- Bursting with fresh blueberries and a hint of lemon, perfect for summer.
4. Perfect Sweet Potato Pie:
- A Southern classic with a smooth, spiced sweet potato filling.
- Easy Cherry Pie:
- A vibrant pie with a sweet and tangy cherry filling.
- Fresh Strawberry Pie:
- A simple pie with fresh strawberries and whipped cream, showcasing the crust.
- Savory Quiche Lorraine:
- A savory pie with a rich custard filling, bacon, and cheese.
8.1. Fruit Pies
Fruit pies are a great way to showcase a flaky, buttery crust. Use seasonal fruits for the best flavor.
8.2. Custard Pies
Custard pies require a well-baked crust to support the creamy filling. Blind baking is essential for these pies.
8.3. Savory Pies
Savory pies and quiches offer a delicious alternative to sweet pies. Experiment with different fillings and herbs.
9. Storing and Freezing Your Food Processor Pie Crust
Proper storage and freezing techniques can extend the shelf life of your pie crust, allowing you to prepare it in advance.
- Storing Pie Crust:
- Wrap the dough tightly with plastic wrap.
- Keep it in the refrigerator for up to 3 days.
- Freezing Pie Crust:
- Wrap the wrapped dough in a freezer bag.
- Freeze for up to 3 months.
- Thaw frozen dough in the refrigerator overnight before using.
- Storing Baked Pie Crust:
- Store baked pie crust in an airtight container at room temperature for up to 2 days.
- For longer storage, freeze the baked crust, wrapped tightly in plastic wrap and aluminum foil, for up to 2 months.
9.1. Short-Term Storage
For short-term storage, wrapping the dough tightly and refrigerating it prevents it from drying out.
9.2. Long-Term Storage
Freezing pie crust allows you to prepare it well in advance. Thaw it slowly in the refrigerator to maintain its texture.
9.3. Storing Baked Crusts
Baked pie crusts can be stored at room temperature or frozen for longer shelf life.
10. Why Choose FOODS.EDU.VN for Your Culinary Education
At FOODS.EDU.VN, we are committed to providing you with comprehensive and reliable culinary knowledge. Our expert-curated content ensures that you have access to the best tips, techniques, and recipes. Here’s why you should choose FOODS.EDU.VN:
- Expert Guidance: Learn from experienced chefs and culinary professionals.
- Detailed Recipes: Access step-by-step recipes with clear instructions.
- Troubleshooting Tips: Get solutions to common cooking challenges.
- Flavor Exploration: Discover exciting flavor combinations and variations.
- Community Support: Connect with fellow food enthusiasts.
10.1. Expert-Curated Content
Our content is meticulously reviewed and updated by culinary experts to ensure accuracy and relevance.
10.2. Step-by-Step Instructions
Our recipes are designed to be easy to follow, with detailed instructions and helpful visuals.
10.3. Comprehensive Troubleshooting
We provide solutions to common cooking issues, helping you to overcome challenges and improve your skills.
10.4. Creative Flavor Exploration
Discover new and exciting flavor combinations to elevate your culinary creations.
10.5. Community Engagement
Connect with a vibrant community of food enthusiasts to share tips, ask questions, and celebrate your culinary achievements.
Making pie crust with a food processor is a game-changer for any baker. With the right ingredients, techniques, and troubleshooting tips, you can consistently create flaky, delicious crusts for all your favorite pies. At FOODS.EDU.VN, we’re here to guide you every step of the way, offering expert-curated content, detailed recipes, and a supportive community to help you achieve baking perfection.
Ready to take your baking skills to the next level? Visit FOODS.EDU.VN today and explore our extensive collection of pie recipes, baking tips, and culinary guides. Don’t miss out on the opportunity to become a pie-making pro!
Contact us:
Address: 1946 Campus Dr, Hyde Park, NY 12538, United States
Whatsapp: +1 845-452-9600
Website: foods.edu.vn
FAQ About Food Processor Pie Crust
-
Can I use salted butter instead of unsalted butter?
Yes, you can, but reduce the amount of salt added to the dry ingredients.
-
Why is my pie crust tough?
A tough pie crust is often caused by overdeveloped gluten. Avoid over-mixing the dough and use cold ingredients.
-
How do I prevent my pie crust from shrinking?
Chill the dough thoroughly before rolling it out and avoid stretching it when placing it in the pie dish.
-
Can I make pie dough without a food processor?
Yes, you can use a pastry blender or your fingers to cut the butter into the flour. The key is to keep the butter cold. -
How long can I store pie dough in the refrigerator?
Pie dough can be stored in the refrigerator for up to 3 days. -
Can I freeze pie dough?
Yes, pie dough can be frozen for up to 3 months. Thaw it in the refrigerator overnight before using. -
Why is my bottom crust soggy?
A soggy bottom crust can be prevented by blind baking the crust before adding the filling and using a thicker crust. -
What is blind baking?
Blind baking is pre-baking the pie crust before adding the filling. This is essential for pies with wet fillings. -
How do I prevent air bubbles from forming in the crust while baking?
Pierce the bottom of the crust with a fork before baking and use pie weights or dried beans to weigh down the crust during blind baking. -
What is the best way to transfer the dough to the pie dish?
Gently roll the dough around the rolling pin and then unroll it over the pie dish. This prevents the dough from tearing.