How Do You Color Eggs With Food Coloring? Discover the vibrant world of egg dyeing with simple food coloring techniques, perfect for creating stunning Easter eggs and more, brought to you by FOODS.EDU.VN. Unleash your creativity and transform ordinary eggs into colorful masterpieces with our expert tips and tricks, including natural dyes and safe coloring methods.
1. Introduction: The Magic of Egg Coloring with Food Coloring
Egg coloring is a delightful tradition that transcends mere decoration; it’s an art form, a family activity, and a celebration of color. While Easter eggs are the most common canvas, the techniques and joy of egg dyeing can be enjoyed year-round. This comprehensive guide, brought to you by FOODS.EDU.VN, will walk you through the enchanting process of how do you color eggs with food coloring, unlocking a spectrum of shades and effects that will transform ordinary eggs into edible works of art. From vibrant hues to subtle pastels, the possibilities are endless, and the process is surprisingly simple. We’ll cover everything from preparing your eggs and choosing the right food coloring to mastering techniques for creating unique patterns and designs.
2. Why Food Coloring? Benefits and Advantages
2.1. Accessibility and Affordability
One of the most significant advantages of using food coloring to dye eggs is its accessibility and affordability. Food coloring is readily available in most grocery stores and comes in a wide variety of colors. This makes it a cost-effective option compared to specialized egg-dyeing kits.
2.2. Versatility and Customization
Food coloring offers unparalleled versatility, allowing you to create a vast array of colors and shades. By mixing different colors of food coloring, you can achieve custom hues that perfectly match your desired aesthetic. The concentration of food coloring can also be adjusted to create lighter or darker shades, providing even greater control over the final result.
2.3. Safety and Non-Toxicity
When used correctly, food coloring is generally considered safe for dyeing eggs that will be consumed. However, it’s essential to use food-grade coloring and avoid using excessive amounts. Always follow the instructions on the food coloring packaging and ensure that the eggs are properly cooked before dyeing.
2.4. Ease of Use and Application
Food coloring is incredibly easy to use, even for beginners. The dyeing process typically involves mixing food coloring with water and vinegar, then immersing the eggs in the solution. The simplicity of the process makes it a fun and accessible activity for people of all ages.
3. Essential Supplies: Gathering Your Egg-Coloring Arsenal
Before embarking on your egg-dyeing adventure, gather the necessary supplies. Having everything on hand will streamline the process and ensure a smooth and enjoyable experience.
- Eggs: White-shelled eggs are ideal for achieving vibrant colors, but brown-shelled eggs can also be used for more muted, earthy tones.
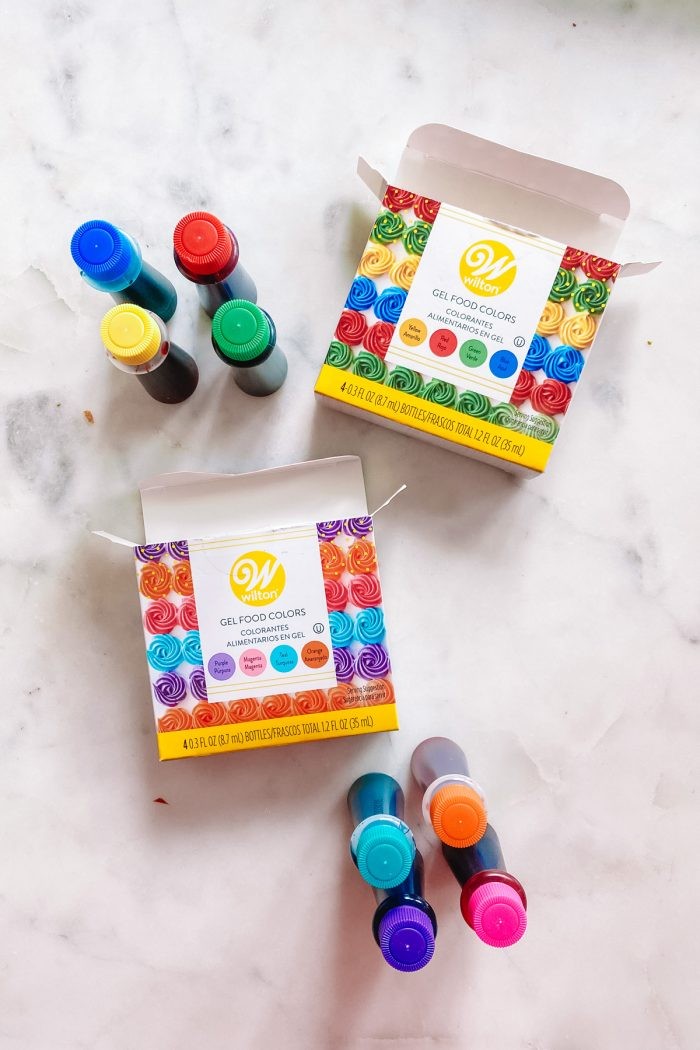
- Food Coloring: Gel food coloring or liquid food coloring work equally well. Choose a variety of colors to create a diverse palette. Wilton food coloring gels are highly recommended.
- Vinegar: White vinegar helps the dye adhere to the eggshell, resulting in a more even and vibrant color.
- Water: Hot water is used to dissolve the food coloring and create the dye solution.
- Containers: Use cups, bowls, or jars to hold the dye solutions.
- Spoon or Whisk: A spoon or whisk is used to mix the dye solutions and gently lower the eggs into the dye.
- Drying Rack: A wire rack or an egg carton can be used to dry the dyed eggs.
- Paper Towels: Paper towels are essential for cleaning up spills and patting the eggs dry.
- Gloves (Optional): Gloves can protect your hands from staining.
4. Preparing Your Canvas: Hard Boiling Eggs Like a Pro
Hard boiling eggs is a crucial step in the egg-dyeing process, especially if you plan to eat the eggs after dyeing them. Proper hard boiling ensures that the eggs are fully cooked and safe to consume.
- Place the Eggs in a Saucepan: Gently place the eggs in a single layer at the bottom of a saucepan.
- Add Water: Cover the eggs with at least an inch of cold water.
- Bring to a Boil: Bring the water to a rolling boil over medium-high heat.
- Remove from Heat: Once the water is boiling, remove the saucepan from the heat and cover it with a lid.
- Let Sit: Let the eggs sit in the hot water for 10-12 minutes for large eggs. Adjust the time accordingly for smaller or larger eggs.
- Cool the Eggs: After 10-12 minutes, carefully drain the hot water and immediately rinse the eggs with cold water. You can also place the eggs in an ice bath to cool them down quickly. This helps prevent the yolks from turning green.
Pro Tip: Adding a teaspoon of vinegar to the water while boiling can help prevent the eggshells from cracking.
5. The Dyeing Process: Step-by-Step Instructions for Vibrant Colors
Now that your eggs are hard boiled and your supplies are gathered, it’s time to dive into the exciting part: dyeing the eggs!
- Prepare the Dye Solutions: In separate containers, combine 1/2 cup of hot water, 1 teaspoon of white vinegar, and the desired amount of food coloring. Start with a few drops of food coloring and add more until you achieve the desired color intensity.
- Submerge the Eggs: Gently lower the eggs into the dye solutions using a spoon or whisk. Ensure that the eggs are fully submerged in the dye.
- Soak the Eggs: Let the eggs soak in the dye for the desired amount of time. The longer the eggs soak, the more vibrant the color will be. For pastel shades, soak the eggs for a few seconds. For deeper, more intense colors, soak the eggs for several minutes or even longer.
- Remove the Eggs: Once the eggs have reached the desired color, carefully remove them from the dye solutions using a spoon or whisk.
- Dry the Eggs: Place the dyed eggs on a drying rack or an egg carton to dry. You can also gently pat the eggs dry with paper towels to speed up the drying process.
Important Note: The dyeing time will vary depending on the type of food coloring used, the color intensity desired, and the type of eggshell. Experiment with different dyeing times to achieve your desired results.
6. Color Mixing Magic: Creating a Rainbow of Hues
One of the most exciting aspects of dyeing eggs with food coloring is the ability to create a vast array of colors by mixing different food colorings. Here are some basic color mixing guidelines:
- Red + Yellow = Orange
- Red + Blue = Purple
- Yellow + Blue = Green
- Red + Yellow + Blue = Brown
By varying the proportions of each color, you can create an endless spectrum of hues. For example, adding more red to a mixture of red and yellow will result in a more reddish-orange, while adding more yellow will result in a more yellowish-orange.
6.1. Color Chart for Egg Dyeing
| Color | Food Coloring Combination | Soaking Time | Notes |
|---|---|---|---|
| Pink | 5 drops red | 30 seconds – 3 mins | Lighter shades for shorter soaking times. |
| Purple | 5-10 drops blue + 5-10 drops red | 3-5 mins | Adjust the ratio of blue to red for different shades of purple. |
| Blue | 5-10 drops blue | 3-5 mins | Deeper blues can be achieved by adding a tiny drop of black. |
| Green | 5-10 drops yellow + 5-10 drops blue | 3-5 mins | For a lime green, use more yellow. For a forest green, use more blue. |
| Orange | 5-10 drops red + 5-10 drops yellow | 3-5 mins | To create a softer peach color, add a drop of white food coloring (if available). |
| Teal | 5 drops blue + 3 drops green | 3-5 mins | Experiment to find your favorite shade. |
| Lavender | 5 drops purple | 30 seconds or less | For a deeper lavender, increase soaking time. |
| Aqua | 5 drops blue | 30 seconds or less | |
| Chartreuse | 5 drops green | 3 minutes | |
| Salmon | 10 drops yellow + 5 drops red | 30 seconds or less | |
| Navy (on Brown) | 5 drops blue + 5 drops purple | 5 minutes | Brown eggs yield deeper, more muted tones. |
| Evergreen (on Brown) | 5 drops teal | 5 minutes | Monitor closely as the color develops. |
| Rust (on Brown) | 10 drops orange + 5 drops red | 5 minutes | |
| Wine (on Brown) | 5 drops pink + 5 drops purple | 5 minutes |

7. Creative Techniques: Beyond Basic Dyeing
Once you’ve mastered the basic egg-dyeing techniques, you can explore more creative ways to decorate your eggs.
7.1. Marbling
Marbling is a technique that creates a swirling, marbled effect on the eggshell. To marble eggs, add a few drops of oil (such as vegetable oil or olive oil) to the dye solution. The oil will create a film on the surface of the dye, which will then adhere to the eggshell in a marbled pattern.
7.2. Ombre
Ombre dyeing creates a gradient effect, with the color gradually transitioning from light to dark. To create an ombre effect, gradually dip the egg into the dye solution, allowing the color to absorb more intensely at the bottom of the egg.
7.3. Tie-Dye
Tie-dyeing eggs involves wrapping the eggs in rubber bands or string before dyeing them. The rubber bands or string will create a resist, preventing the dye from penetrating the eggshell in those areas. This results in a tie-dye pattern.
7.4. Wax Resist
Wax resist is a technique that involves drawing designs on the eggshell with melted wax before dyeing them. The wax will prevent the dye from penetrating the eggshell in those areas, creating a design.
7.5. Natural Dyes
For a more natural approach, consider using natural dyes derived from fruits, vegetables, and spices.
- Red/Pink: Beet juice, cranberry juice
- Orange: Onion skins, carrot juice
- Yellow: Turmeric, saffron
- Green: Spinach, liquid chlorophyll
- Blue: Red cabbage
To use natural dyes, simmer the dye source in water for about 30 minutes, then strain the liquid and use it as a dye solution.
8. Drying Techniques: Preventing Streaks and Smudges
Proper drying is essential for achieving a flawless finish on your dyed eggs. Here are some tips for preventing streaks and smudges:
- Use a Drying Rack: A wire rack allows air to circulate around the eggs, promoting even drying.
- Pat Dry with Paper Towels: Gently pat the eggs dry with paper towels to remove excess dye and prevent drips.
- Turn the Eggs Regularly: Turn the eggs every few minutes to ensure that all sides dry evenly.
- Avoid Overcrowding: Don’t overcrowd the drying rack, as this can prevent proper air circulation.
9. Troubleshooting: Common Egg-Dyeing Problems and Solutions
Even with careful planning, you may encounter some common egg-dyeing problems. Here are some solutions:
- Uneven Color: If the color is uneven, try soaking the eggs for a longer period of time or using a higher concentration of food coloring.
- Streaks and Smudges: Streaks and smudges are usually caused by improper drying. Make sure to dry the eggs thoroughly and evenly.
- Cracked Shells: Cracked shells can occur during hard boiling or dyeing. To prevent cracked shells, handle the eggs gently and avoid sudden temperature changes.
- Faded Colors: Faded colors can be caused by using old or expired food coloring. Use fresh food coloring for best results.
10. Safety First: Tips for Safe Egg Dyeing
While egg dyeing is generally a safe activity, it’s important to take some precautions to ensure everyone’s safety:
- Use Food-Grade Coloring: Only use food-grade coloring that is specifically designed for use in food.
- Avoid Excessive Amounts: Don’t use excessive amounts of food coloring, as this can make the eggs unsafe to eat.
- Supervise Children: Supervise children closely during the egg-dyeing process to prevent accidents.
- Wash Hands Thoroughly: Wash your hands thoroughly after handling food coloring.
- Don’t Eat Cracked Eggs: Don’t eat any eggs with cracked shells, as they may be contaminated with bacteria.
- Keep Dye Away From Eyes: Be cautious and keep dye solutions away from your eyes.
11. Storage and Display: Preserving Your Colorful Creations
Once your eggs are dyed and dried, you’ll want to store and display them properly.
- Refrigerate Hard-Boiled Eggs: If you plan to eat the dyed eggs, store them in the refrigerator at 40°F (4°C) or below. Hard-boiled eggs should be consumed within one week.
- Display Eggs Safely: If you’re displaying the eggs, keep them away from direct sunlight and heat, as this can cause the colors to fade.
- Use Egg Holders or Trays: Use egg holders or trays to prevent the eggs from rolling around and getting damaged.
- Avoid Stacking: Avoid stacking the eggs on top of each other, as this can cause them to crack.
12. Egg-cellent Ideas: Beyond Easter – Year-Round Egg Decorating
While Easter is the most popular time for egg dyeing, the techniques and joy of egg decorating can be enjoyed year-round.
- Birthday Parties: Dye eggs in the birthday person’s favorite colors and use them as decorations or party favors.
- Baby Showers: Dye eggs in pastel colors and use them as decorations or centerpieces.
- Holiday Celebrations: Dye eggs in festive colors to celebrate holidays like Christmas, Halloween, and Thanksgiving.
- Everyday Decor: Dye eggs in colors that complement your home decor and use them as decorative accents.
13. FOODS.EDU.VN: Your Culinary Companion for Egg-cellent Adventures
At FOODS.EDU.VN, we’re passionate about empowering you to explore the world of culinary arts with confidence and creativity. Our website is a treasure trove of recipes, techniques, and inspiration, designed to help you elevate your cooking skills and create memorable meals.
13.1. Explore Our Recipe Collection
Discover a diverse range of recipes for every occasion, from everyday meals to special celebrations. Our recipes are carefully curated and tested to ensure that they are easy to follow and deliver delicious results.
13.2. Master Culinary Techniques
Enhance your culinary expertise with our comprehensive guides on essential cooking techniques. From knife skills to sauce making, we’ll provide you with the knowledge and skills you need to excel in the kitchen.
13.3. Discover Food Culture
Immerse yourself in the rich tapestry of food culture from around the world. Explore the history, traditions, and ingredients that make each cuisine unique.
13.4. Connect with Our Community
Join our vibrant community of food lovers and share your culinary creations, tips, and experiences. Connect with like-minded individuals and inspire others with your passion for food.
14. Conclusion: Unleash Your Inner Egg Artist
Egg dyeing with food coloring is a fun, creative, and rewarding activity that can be enjoyed by people of all ages. With a little bit of practice and experimentation, you can transform ordinary eggs into colorful works of art. So gather your supplies, unleash your inner artist, and get ready to create some egg-cellent masterpieces!
15. FAQs: Your Egg-Dyeing Questions Answered
15.1. Can I use vinegar other than white vinegar?
White vinegar is recommended because it’s clear and won’t affect the color of the dye. Other types of vinegar may alter the color slightly.
15.2. How long can I store dyed eggs?
Hard-boiled eggs, whether dyed or not, should be refrigerated and consumed within one week.
15.3. Can I use natural food coloring?
Yes, natural food colorings are a great alternative. Beet juice, spinach juice, and turmeric are popular choices.
15.4. What if the dye is not sticking to the eggs?
Make sure the eggs are clean and free of any oily residue. Also, ensure you’re using enough vinegar in the dye solution.
15.5. How do I get a speckled effect on my eggs?
Flick dye onto the eggs using a toothbrush or paintbrush for a speckled effect.
15.6. Can I dye eggs with brown shells?
Yes, but the colors will be more muted and earthy. You might need to use more food coloring to achieve the desired intensity.
15.7. How do I make the colors more vibrant?
Use gel food coloring and ensure the eggs soak in the dye for a longer period.
15.8. Is it safe to eat eggs dyed with food coloring?
Yes, as long as you use food-grade coloring and the eggs are properly cooked and stored.
15.9. How do I prevent the dye from staining my hands?
Wear gloves while dyeing eggs to protect your hands from staining.
15.10. What can I do with leftover dye?
Leftover dye can be discarded down the drain with plenty of water. Avoid pouring large amounts of dye into septic systems.
Remember, the information provided in this article is for informational purposes only and should not be considered as professional advice. Always consult with a qualified expert for any specific concerns or questions.
Ready to take your egg-dyeing skills to the next level? Visit FOODS.EDU.VN today and discover a world of culinary inspiration! Explore our extensive recipe collection, master essential cooking techniques, and connect with a vibrant community of food lovers. Let FOODS.EDU.VN be your trusted companion on your culinary journey.
Contact Us:
Address: 1946 Campus Dr, Hyde Park, NY 12538, United States
Whatsapp: +1 845-452-9600
Website: foods.edu.vn