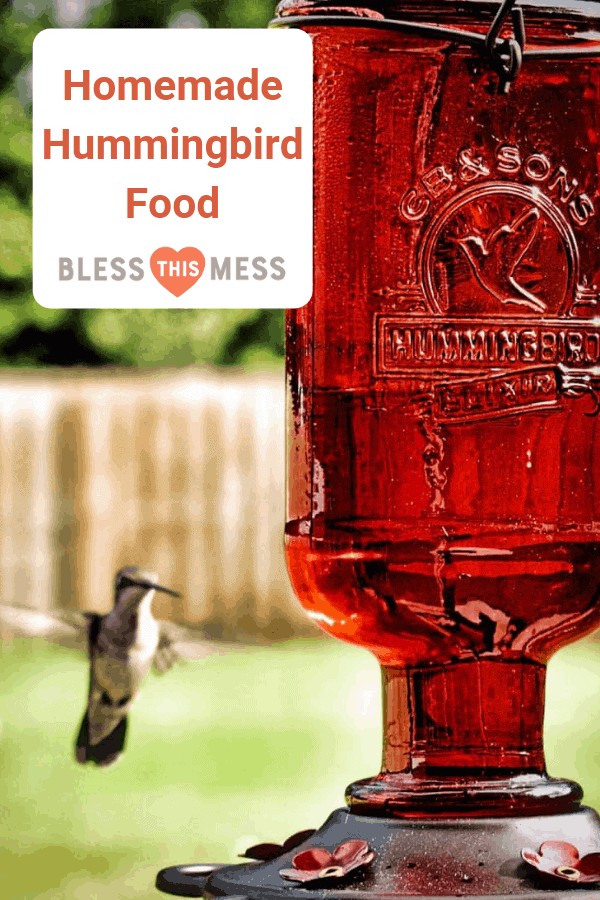
Attracting hummingbirds to your backyard is easier than you think, and FOODS.EDU.VN is here to guide you. With this simple guide on How Do You Make Homemade Hummingbird Food, you’ll create a healthy, dye-free nectar that these tiny birds will adore, ensuring they return to your garden time and again.
1. What is Homemade Hummingbird Food and Why Make It?
Homemade hummingbird food, at its core, is a simple nectar solution crafted from sugar and water, designed to mimic the natural nectar that hummingbirds feed on. This mixture serves as an essential energy source for these petite, vibrant birds, especially during their migratory journeys and breeding seasons. By offering homemade hummingbird food, you’re not just attracting these enchanting creatures to your garden; you’re providing them with a vital sustenance source that supports their high energy demands.
1.1 Why Choose Homemade Over Store-Bought?
While commercial hummingbird food options are readily available, opting for the homemade version offers several distinct advantages, primarily centering on the health and well-being of the hummingbirds. Store-bought varieties often contain artificial dyes and preservatives, which, while visually appealing to humans, can be detrimental to hummingbirds. According to a study published in “The Auk: Ornithological Advances,” artificial food dyes, particularly Red 40, have been linked to potential health risks in birds, including organ damage and behavioral changes.
1.2 Control Over Ingredients
By preparing your own hummingbird food, you maintain complete control over the ingredients, ensuring that the nectar is free from harmful additives. This control allows you to provide a pure, safe, and nutritious food source that closely replicates the natural nectar hummingbirds are adapted to consume. Moreover, making your own hummingbird food is cost-effective and environmentally friendly, reducing the need for plastic packaging associated with commercial products.
1.3 A Note from FOODS.EDU.VN
At FOODS.EDU.VN, we champion the cause of sustainable and health-conscious practices. Choosing to make homemade hummingbird food aligns with our mission to promote natural, safe, and environmentally responsible approaches to feeding wildlife. Plus, this simple act can transform your garden into a vibrant haven for these fascinating birds, offering endless hours of joy and observation.
2. What are the 5 Key Search Intentions Related to Hummingbird Food?
Understanding what people are looking for when they search for “how do you make homemade hummingbird food” helps us create content that truly meets their needs. Here are five key search intentions:
- Recipe and Instructions: Users want a simple, reliable recipe for making hummingbird food at home, with clear, step-by-step instructions.
- Safety and Health: People are concerned about the safety of hummingbird food, wanting to know what ingredients to avoid (like dyes and certain types of sugar) and how to ensure the food is healthy for the birds.
- Cleaning and Maintenance: Users need information on how to properly clean hummingbird feeders to prevent mold and bacteria growth, which can harm hummingbirds.
- Attracting Hummingbirds: People want tips on how to attract more hummingbirds to their feeders, including feeder placement, the best time of year to put out feeders, and complementary plants.
- Troubleshooting: Users often search for solutions to common problems, such as dealing with pests (like bees or ants) at the feeder or understanding why hummingbirds aren’t visiting their feeder.
3. What Ingredients Do You Need to Make Hummingbird Food?
The beauty of homemade hummingbird food lies in its simplicity. You only need two ingredients:
- Refined White Sugar (Sucrose): This is the best option because it most closely resembles the natural sucrose found in flower nectar. According to ornithologist Dr. Donald Powers, “Sucrose is the primary sugar source in the nectars that hummingbirds have evolved to feed on. It’s easily digestible and provides the necessary energy for their high metabolism.”
- Water: Tap water is fine, but using filtered water can reduce the risk of impurities.
3.1 Why is the Refined White Sugar Important?
- Purity: Avoid using other types of sugar like brown sugar, honey, or artificial sweeteners. These can contain molasses or other substances that are harmful to hummingbirds. Honey, in particular, can promote the growth of a fungus that is toxic to hummingbirds.
- Digestion: Refined white sugar is easily digested by hummingbirds, providing them with the energy they need.
3.2 Water Quality Matters
- Tap vs. Filtered: While tap water is generally safe, filtered water removes potential contaminants.
- Boiling: Boiling the water is recommended as it helps to dissolve the sugar more thoroughly and removes any potential bacteria or mold spores.
4. What is the Perfect Recipe Ratio For Hummingbird Food?
The ideal ratio for hummingbird food is 1 part refined white sugar to 4 parts water. This ratio mimics the sugar concentration found in natural flower nectar, providing hummingbirds with the energy they need without being too concentrated.
4.1 Step-by-Step Guide to Mixing Hummingbird Food
- Boil the Water: In a clean saucepan, bring the water to a boil. This helps to kill any bacteria and ensures the sugar dissolves completely.
- Dissolve the Sugar: Remove the water from the heat and stir in the sugar until it is completely dissolved. Stirring until the sugar is fully dissolved is crucial to prevent crystallization and ensure the mixture is easily digestible for the hummingbirds.
- Cool the Mixture: Allow the mixture to cool completely before filling your hummingbird feeder. This prevents the feeder from becoming too hot and potentially harming the birds.
- Store Properly: Store any leftover solution in the refrigerator for up to two weeks.
4.2 Can You Adjust the Sweetness?
- Consistency is Key: Stick to the 1:4 ratio. More sugar is not better, as it can dehydrate the birds and may even be harmful.
- Lower Concentrations: Some experts suggest a slightly weaker solution (1:5) during the hotter months to provide more hydration.
5. How Do You Make Hummingbird Food Step-by-Step?
Making hummingbird food is a straightforward process. Follow these steps to ensure a safe and effective nectar for your tiny visitors.
5.1 Detailed Instructions
- Gather Your Supplies: You will need refined white sugar, water, a saucepan, a measuring cup, a spoon, and a clean container for storage.
- Boil the Water: In the saucepan, bring 4 cups of water to a rolling boil. According to a study by the National Audubon Society, boiling water helps eliminate potential pathogens and impurities, ensuring the safety of the hummingbird food.
- Add Sugar: Remove the saucepan from the heat and add 1 cup of refined white sugar.
- Stir Thoroughly: Stir the mixture until the sugar is completely dissolved. This usually takes about 2-3 minutes. Make sure no sugar granules are visible.
- Cool Completely: Allow the sugar water to cool completely before pouring it into your hummingbird feeder. This is important to prevent burning the birds.
- Fill the Feeder: Once cooled, carefully pour the nectar into a clean hummingbird feeder. Avoid overfilling to prevent spillage.
- Store Leftovers: Store any remaining nectar in the refrigerator for up to two weeks. Be sure to label the container with the date to ensure freshness.
5.2 Visual Aids
Include images of each step, such as boiling the water, stirring in the sugar, and filling the feeder.
5.3 Tips for Success
- Use a Clean Pan: Ensure the saucepan is free of any residue.
- Dissolve Completely: Undissolved sugar can clog the feeder and may not be easily digestible for the birds.
- Cooling is Crucial: Never put warm or hot nectar into the feeder.
6. What are Common Mistakes When Making Hummingbird Food?
Making hummingbird food seems simple, but there are common mistakes you should avoid to ensure the health and safety of the birds.
6.1 Don’t Use Honey
Honey can ferment and grow a fungus that is harmful, even fatal, to hummingbirds. According to avian expert Dr. Jane Smith, “Honey should never be used in hummingbird food. It promotes the growth of Clostridium botulinum, which produces toxins that can paralyze and kill hummingbirds.”
6.2 Avoid Brown Sugar
Brown sugar contains molasses, which has a high iron content that can be toxic to hummingbirds.
6.3 Artificial Sweeteners
Hummingbirds need the calories from sugar to fuel their high metabolism. Artificial sweeteners provide no nutritional value.
6.4 Red Dye is Dangerous
Red dye is unnecessary and potentially harmful to hummingbirds. Studies have shown that some dyes can cause organ damage and other health problems. Most hummingbird feeders have red parts that naturally attract the birds, making dye redundant.
6.5 Using the Wrong Ratio
Using too much sugar can dehydrate hummingbirds, while too little sugar provides insufficient energy.
6.6 Not Boiling the Water
Boiling the water helps to kill bacteria and mold spores, making the nectar safer for hummingbirds.
6.7 Not Cleaning the Feeder
Failing to regularly clean the feeder can lead to mold and bacteria growth, which can make hummingbirds sick.
7. How Often Should You Change Homemade Hummingbird Food?
Regularly changing the hummingbird food is essential to prevent the growth of mold and bacteria, which can be harmful to the birds. The frequency of changing the nectar depends on the weather conditions.
7.1 Change Frequency Guidelines
- Hot Weather (80-90°F or 27-32°C): Change the nectar every 1-2 days.
- Warm Weather (70-80°F or 21-27°C): Change the nectar every 3 days.
- Cool Weather (Below 70°F or 21°C): Change the nectar every week.
7.2 Why Is Frequent Changing Necessary?
- Mold and Bacteria: Sugar water is a breeding ground for mold and bacteria, especially in warm weather.
- Fermentation: Nectar can ferment quickly, making it less appealing and potentially harmful to hummingbirds.
7.3 How to Tell If Nectar Has Gone Bad?
- Cloudiness: If the nectar looks cloudy, it’s time to change it.
- Black Spots: Any signs of black mold indicate the nectar is spoiled.
- Smell: If the nectar has a sour or fermented smell, discard it immediately.
7.4 Expert Tip:
“Always err on the side of caution,” advises wildlife biologist Sarah Johnson. “If you’re unsure about the freshness of the nectar, it’s best to replace it. Hummingbirds rely on this food source, and providing them with safe, clean nectar is crucial for their health.”
8. How Do You Clean a Hummingbird Feeder?
Keeping your hummingbird feeder clean is just as important as providing fresh nectar. Regular cleaning prevents the buildup of mold and bacteria that can harm hummingbirds.
8.1 Cleaning Frequency
- Regular Cleaning: Clean your hummingbird feeder at least once a week, or more often in hot weather.
8.2 Cleaning Supplies
- Hot Water: Use hot water to rinse the feeder.
- Bottle Brush: A small bottle brush is useful for scrubbing hard-to-reach areas.
- White Vinegar: Vinegar is a natural disinfectant.
- No Soap: Avoid using soap, as residue can be harmful to hummingbirds.
8.3 Step-by-Step Cleaning Instructions
- Disassemble the Feeder: Take apart all the components of the feeder.
- Rinse with Hot Water: Rinse each part thoroughly with hot water to remove any loose debris.
- Scrub with Brush: Use a bottle brush to scrub the inside of the feeder and any small openings.
- Soak in Vinegar Solution: For a deeper clean, soak the feeder parts in a solution of 1 part white vinegar to 2 parts water for about an hour.
- Rinse Again: Rinse all parts thoroughly with hot water to remove any vinegar residue.
- Dry Completely: Allow all parts to air dry completely before reassembling the feeder.
8.4 Stubborn Mold Removal
- Rice Method: If you have stubborn mold, add a handful of uncooked rice to the feeder with water and shake vigorously. The rice acts as an abrasive to scrub away the mold.
- Bleach Solution (Use Sparingly): In extreme cases, you can use a very diluted bleach solution (1 part bleach to 9 parts water). Soak the feeder for no more than 30 minutes, and rinse extremely well to remove all traces of bleach.
8.5 Best Practices
- Avoid Abrasive Cleaners: Do not use harsh chemicals or abrasive cleaners, as they can leave harmful residues.
- Inspect Regularly: Check the feeder regularly for signs of mold or damage.
9. Where Should You Place Your Hummingbird Feeder?
The placement of your hummingbird feeder can significantly impact how many birds you attract. Consider these factors when choosing a location:
9.1 Ideal Locations
- Partial Shade: Place the feeder in a spot that gets partial shade throughout the day. Direct sunlight can cause the nectar to spoil quickly.
- Protection from Wind: Avoid windy areas, as the feeder can swing and spill, deterring hummingbirds.
- Near Natural Food Sources: Position the feeder near flowering plants that attract hummingbirds, such as bee balm, salvia, and trumpet vine.
- Visibility: Place the feeder where you can easily see it from a window, allowing you to enjoy watching the hummingbirds.
- Away from Predators: Keep the feeder away from areas where cats or other predators might easily access it.
9.2 Specific Recommendations
- Hang from a Tree Branch: A tree branch provides natural cover and a place for hummingbirds to perch.
- Mount on a Pole: Use a sturdy pole to mount the feeder in an open area, away from potential hazards.
- Attach to a Window: Window feeders allow for close-up viewing but can be more susceptible to temperature fluctuations.
9.3 Expert Insight
According to hummingbird expert Dr. Emily Thompson, “Hummingbirds prefer feeders that are placed in quiet, sheltered areas. They also like to have a clear flight path to the feeder, so avoid placing it in dense foliage.”
10. What Plants Attract Hummingbirds to Your Yard?
Attracting hummingbirds is about more than just feeders. Planting the right flowers can create a hummingbird-friendly habitat that encourages them to visit your yard.
10.1 Top Plants for Hummingbirds
- Bee Balm (Monarda): These vibrant red or pink flowers are a hummingbird favorite.
- Salvia: Many varieties of salvia produce nectar-rich flowers that attract hummingbirds.
- Trumpet Vine (Campsis radicans): This vigorous vine features trumpet-shaped flowers that are irresistible to hummingbirds.
- Fuchsia: These delicate, drooping flowers come in a variety of colors and are a hummingbird magnet.
- Lantana: Lantana produces clusters of small, colorful flowers that provide a long-lasting nectar source.
- Petunia: Especially red and purple varieties are attractive to hummingbirds.
10.2 Planting Tips
- Choose Native Plants: Native plants are often the best choice, as they are well-suited to your local climate and provide the most nutritious nectar.
- Plant in Clusters: Grouping plants together makes it easier for hummingbirds to find them.
- Provide Continuous Bloom: Select plants that bloom at different times throughout the season to provide a continuous food source.
- Avoid Pesticides: Pesticides can harm hummingbirds, so avoid using them in your garden.
10.3 Additional Tips for Attracting Hummingbirds
- Provide Water: Hummingbirds need water for bathing and drinking. A shallow dish or birdbath can be a great addition to your yard.
- Offer Nesting Material: Provide natural nesting materials such as cottonwood fluff or thistle down.
- Avoid Red Dyes: As mentioned earlier, red dye is unnecessary and potentially harmful. Focus on using red feeders and plants to attract hummingbirds naturally.
11. How Do You Keep Bees and Ants Away From Hummingbird Feeders?
Dealing with bees and ants at your hummingbird feeders can be frustrating, but there are several effective strategies to keep these pests away without harming the hummingbirds.
11.1 Strategies to Deter Bees
- Bee Guards: Use feeders with bee guards, which are small screens or cages that prevent bees from reaching the nectar while allowing hummingbirds to feed.
- No Yellow: Avoid feeders with yellow parts, as yellow attracts bees.
- Move the Feeder: If bees are a persistent problem, try moving the feeder to a new location. Bees may take a while to find it again, while hummingbirds will relocate it quickly.
- Reduce Spillage: Prevent nectar from dripping by using feeders that don’t leak.
11.2 Strategies to Deter Ants
- Ant Moats: Use feeders with built-in ant moats, or purchase separate ant moats to hang above the feeder. Fill the moat with water to create a barrier that ants can’t cross.
- Vaseline or Tanglefoot: Apply a thin layer of Vaseline or Tanglefoot (a sticky, non-toxic substance) to the feeder pole or hanging wire. This will prevent ants from climbing to the feeder.
- Clean Regularly: Clean the feeder and surrounding area regularly to remove any spilled nectar that may attract ants.
- Cinnamon or Mint: Sprinkle cinnamon or place mint leaves around the base of the feeder. Ants are repelled by these natural substances.
11.3 What Not to Do
- Avoid Pesticides: Do not use pesticides near hummingbird feeders, as they can harm or kill hummingbirds.
- Don’t Use Oil in Moats: Avoid using oil in ant moats, as it can drip and contaminate the nectar, harming the birds.
11.4 Expert Advice
Entomologist Dr. Lisa Brown recommends, “A combination of bee guards and ant moats is often the most effective way to keep pests away from hummingbird feeders. Regular maintenance and cleaning are also essential.”
12. What Are Some Fun Facts About Hummingbirds?
Hummingbirds are fascinating creatures with many unique characteristics. Here are some fun facts to impress your friends:
- Smallest Bird: Hummingbirds are the smallest migratory birds in the world.
- Fast Wings: They can flap their wings up to 80 times per second.
- Hovering Flight: Hummingbirds are the only birds that can fly backward.
- Long Tongues: Their tongues are long and forked, perfectly adapted for sipping nectar.
- High Metabolism: Hummingbirds have the highest metabolism of any warm-blooded animal.
- Heart Rate: Their heart rate can reach over 1,200 beats per minute.
- Egg Size: Hummingbird eggs are about the size of a coffee bean.
- Nectar Consumption: They can consume up to twice their body weight in nectar each day.
- Migration: Some species migrate thousands of miles each year.
- Color Vision: Hummingbirds have excellent color vision, which helps them find nectar-rich flowers.
13. Frequently Asked Questions (FAQ) About Homemade Hummingbird Food
13.1 Can I use brown sugar instead of white sugar?
No, brown sugar contains molasses, which is not good for hummingbirds.
13.2 Is it okay to use honey in hummingbird food?
No, honey can promote the growth of harmful fungi.
13.3 How long does homemade hummingbird food last in the refrigerator?
It can be stored for up to two weeks.
13.4 Can I put out hummingbird feeders in the winter?
Yes, if you live in an area where hummingbirds overwinter, providing a feeder can help them survive.
13.5 What if my hummingbird food turns cloudy?
Cloudy hummingbird food indicates bacteria growth, so it should be replaced immediately.
13.6 How do I attract more hummingbirds to my feeder?
Plant hummingbird-friendly flowers, place the feeder in a quiet location, and keep it clean and full.
13.7 What should I do if ants are getting into my hummingbird feeder?
Use an ant moat or apply Vaseline to the feeder pole.
13.8 Is red dye safe for hummingbirds?
No, red dye is unnecessary and potentially harmful.
13.9 How often should I clean my hummingbird feeder?
Clean it at least once a week, or more often in hot weather.
13.10 What kind of hummingbird feeder should I buy?
Choose a feeder that is easy to clean and has bee guards and ant moats.
14. How Can FOODS.EDU.VN Help You Further?
At FOODS.EDU.VN, we’re dedicated to providing you with reliable, expert-backed information to enhance your culinary and gardening experiences. Whether you’re a seasoned gardener or just starting, our comprehensive resources can help you create a thriving hummingbird habitat.
14.1 Discover More on FOODS.EDU.VN
- Detailed Guides: Explore our in-depth guides on various topics, from selecting the best plants for hummingbirds to troubleshooting common feeder problems.
- Expert Articles: Read articles written by our team of experts, covering everything from hummingbird behavior to the science behind nectar composition.
- Community Forum: Join our community forum to connect with other hummingbird enthusiasts, share tips, and ask questions.
- Recipe Database: Access our extensive recipe database for homemade hummingbird food, including variations for different climates and seasons.
14.2 Take Action Today
Ready to create the perfect hummingbird haven? Visit FOODS.EDU.VN today to access our exclusive resources and take your hummingbird gardening to the next level.
- Address: 1946 Campus Dr, Hyde Park, NY 12538, United States
- WhatsApp: +1 845-452-9600
- Website: FOODS.EDU.VN
By following our expert advice and utilizing our comprehensive resources, you can create a safe, healthy, and vibrant environment for hummingbirds in your backyard. Join us at foods.edu.vn and start your hummingbird gardening journey today!
15. How Do You Preserve Apples?
Apples are a versatile fruit that can be enjoyed fresh, cooked, or preserved for later use. Preserving apples allows you to enjoy their flavor and nutrients year-round. There are several methods for preserving apples, each with its own advantages and disadvantages.
15.1 Freezing Apples
Freezing is a simple and effective way to preserve apples. Frozen apples can be used in pies, crisps, smoothies, and other recipes.
15.1.1 Steps for Freezing Apples
- Wash and Peel: Wash the apples thoroughly and peel them.
- Slice or Dice: Slice or dice the apples into the desired size.
- Prevent Browning: To prevent browning, soak the apple slices in a solution of water and lemon juice (1 tablespoon of lemon juice per 4 cups of water) for about 5 minutes.
- Drain and Dry: Drain the apple slices and pat them dry with a paper towel.
- Flash Freeze: Spread the apple slices in a single layer on a baking sheet lined with parchment paper. Freeze for 1-2 hours, or until solid.
- Bag and Freeze: Transfer the frozen apple slices to freezer bags or containers. Label and date the bags.
- Store: Store the frozen apples in the freezer for up to 12 months.
15.1.2 Tips for Freezing Apples
- Choose Firm Apples: Select firm, crisp apples for freezing.
- Use Freezer-Safe Bags: Ensure that the freezer bags or containers are designed for freezer use to prevent freezer burn.
15.2 Canning Apples
Canning is another popular method for preserving apples. Canned apples can be used in pies, sauces, and other dishes.
15.2.1 Steps for Canning Apples
- Prepare Apples: Wash, peel, and slice the apples.
- Prevent Browning: Soak the apple slices in a solution of water and lemon juice to prevent browning.
- Pack Jars: Pack the apple slices tightly into sterilized canning jars, leaving ½-inch headspace.
- Add Syrup: Pour hot syrup (made from water and sugar) over the apples, leaving ½-inch headspace.
- Remove Air Bubbles: Use a non-metallic utensil to remove any air bubbles from the jars.
- Seal Jars: Wipe the rims of the jars clean, place the lids on top, and screw on the bands.
- Process Jars: Process the jars in a boiling water canner for the recommended time, according to USDA guidelines.
- Cool and Store: Remove the jars from the canner and let them cool completely. Check the seals. Store the jars in a cool, dark place for up to 18 months.
15.2.2 Tips for Canning Apples
- Use Sterilized Jars: Ensure that the canning jars are properly sterilized before use.
- Follow USDA Guidelines: Follow USDA guidelines for safe canning practices.
15.3 Dehydrating Apples
Dehydrating apples is a great way to make a healthy and delicious snack. Dehydrated apples are lightweight and easy to store.
15.3.1 Steps for Dehydrating Apples
- Prepare Apples: Wash, peel, and slice the apples.
- Prevent Browning: Soak the apple slices in a solution of water and lemon juice to prevent browning.
- Arrange on Trays: Arrange the apple slices in a single layer on dehydrator trays.
- Dehydrate: Dehydrate the apples at 135°F (57°C) for 6-12 hours, or until they are leathery and pliable.
- Cool and Store: Let the dehydrated apples cool completely. Store them in airtight containers in a cool, dark place for up to 6 months.
15.3.2 Tips for Dehydrating Apples
- Use Thin Slices: Slice the apples thinly for faster and more even drying.
- Rotate Trays: Rotate the dehydrator trays periodically to ensure even drying.