Are you curious about how long vacuum-sealed food lasts? At FOODS.EDU.VN, we provide an expert guide to help you understand the shelf life of vacuum-packed foods, ensuring freshness and safety. Vacuum sealing extends the longevity of your food by removing air, but understanding specific timelines is crucial for optimal storage and consumption. By learning about the shelf life of vacuum-sealed foods, you can reduce waste and make meal planning much easier.
1. What is Vacuum Sealed Food and Why Does It Matter?
Vacuum-sealed food refers to products or raw materials enclosed in an airtight film from which air has been extracted. Vacuum sealing, also known as reduced oxygen packaging (ROP), is a process that removes oxygen from a container to prevent oxidation and the growth of aerobic bacteria. This method often includes an oxygen absorber packet for enhanced effectiveness before the package passes through a vacuum-packing machine. This process protects food from spoilage and extends its shelf life, making it a valuable technique for both home cooks and food industry professionals.
Vacuum sealing can also maintain the freshness and flavor of ingredients. Because volatile flavors are trapped within the packaging, they remain unaffected by oxidation and other chemical reactions. The process can change the appearance of certain foods, particularly meat, which often turns a deep purple-red color in the absence of oxygen, and retains this color until the packaging is opened.
Additionally, vacuum packaging is a space-efficient food storage solution. Vacuum-packed foods take up less space and are easier to transport. This makes it simpler to store food in bulk and optimize storage areas. For more on optimizing your food storage techniques and extending the life of your groceries, visit FOODS.EDU.VN.
1.1 How Vacuum Sealing Prevents Bacterial Growth
The primary goal of vacuum sealing is to inhibit the growth of aerobic bacteria, which require oxygen to thrive. By removing oxygen, vacuum sealing significantly extends the shelf life of products by limiting bacterial biological processes. This makes vacuum packing an essential method for preserving food quality and safety.
However, it’s important to note that vacuum sealing is not a foolproof method. Some anaerobic bacteria, such as Clostridium botulinum, can still grow in the absence of oxygen. Proper handling and storage are crucial to prevent the growth of these harmful microorganisms.
1.2 HACCP Plan Considerations for Vacuum Sealers
If you operate a food business that uses vacuum packaging for commercial products, especially in raw vegetables, raw meat, or raw poultry, a Hazard Analysis and Critical Control Points (HACCP) plan may be required for food safety compliance.
A HACCP plan for reduced oxygen packaging (ROP) ensures that your operations are safe and compliant with food safety regulations. Proper implementation of a HACCP plan can mitigate the risks associated with ROP, ensuring the safety and quality of your products.
2. Understanding the HACCP Plan for Vacuum Sealers
As a food business dealing with raw vegetables, raw meat, or raw poultry, regulations often mandate a HACCP plan for reduced oxygen packaging (ROP). This plan is essential for ensuring food safety when using vacuum sealers. A well-structured HACCP plan for vacuum sealers includes several critical components to ensure food safety and regulatory compliance. These components cover everything from food handling procedures to monitoring and verification processes.
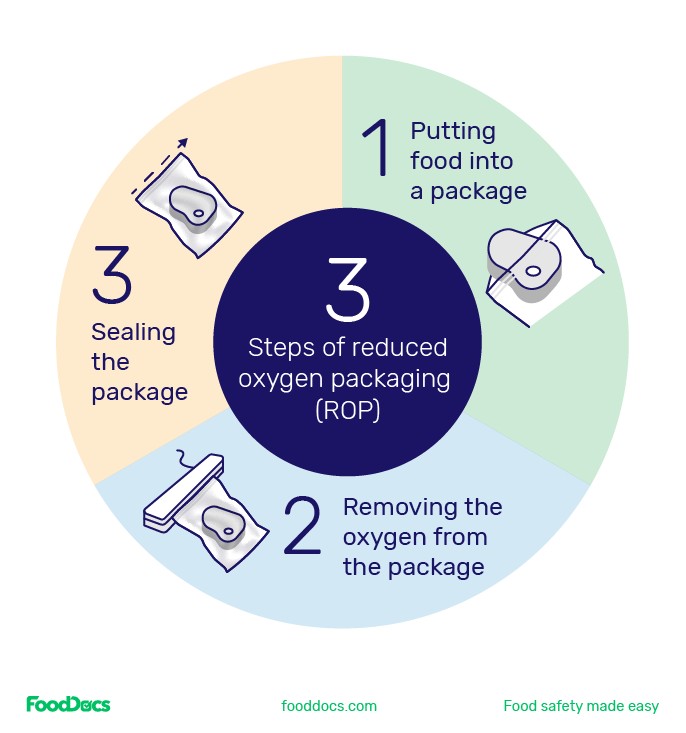
In the food industry, reduced oxygen packaging involves:
- Placing food into a package.
- Removing oxygen from the package.
- Sealing the package.
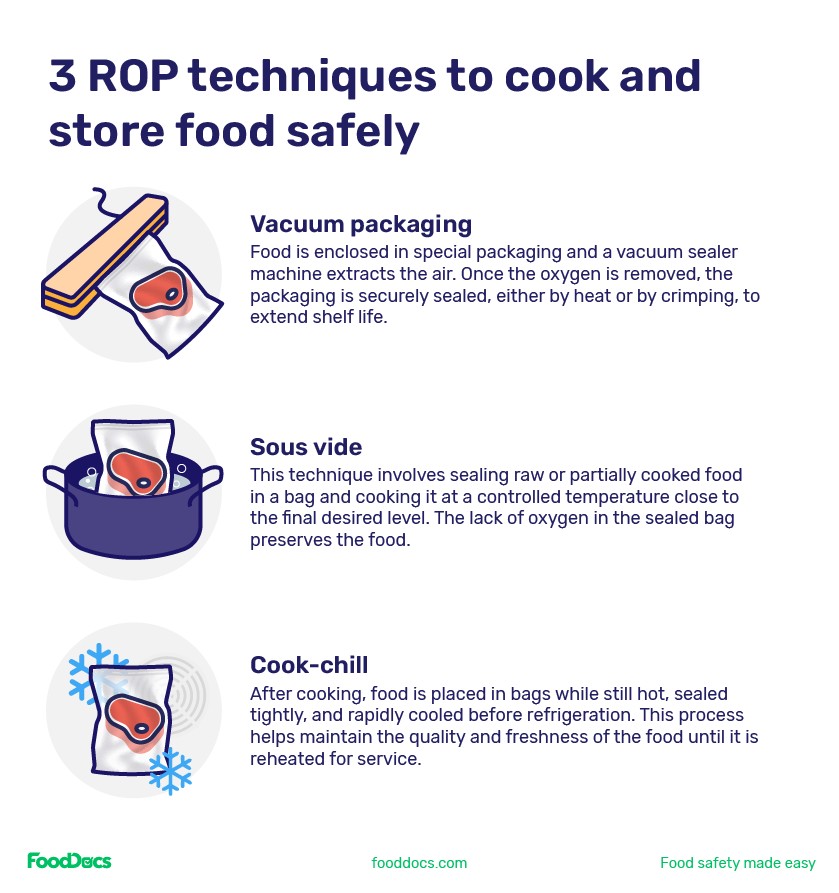
2.1 Key ROP Techniques
- Vacuum Packaging: Food is sealed in special packaging, and a vacuum sealer extracts the air. The packaging is then sealed by heat or crimping.
- Sous Vide: Raw or partially cooked food is sealed in a bag and cooked at a controlled temperature.
- Cook-Chill: Food is placed in bags while hot, sealed tightly, rapidly cooled, and refrigerated.
2.2 Risks of Improper ROP
Harmful bacteria, such as Clostridium botulinum and Listeria monocytogenes, thrive in low-oxygen environments. If ROP is not performed correctly, these bacteria can multiply, increasing the risk of bacterial growth. This underscores the importance of a HACCP plan for reduced oxygen packing operations.
2.3 FDA Food Code Updates for ROP
According to the latest FDA Food Code updates for Reduced Oxygen Packaging with One Barrier (Cook-Chill and Sous Vide) for TCS foods, businesses have four options for food storage:
- Cool to 34°F (1°C) within 48 hours: Discard if unused after 30 days.
- Keep at 41°F (5°C) for 7 days: Discard if not consumed within that time.
- Cool to 34°F (1°C) within 48 hours, then hold at 41°F (5°C) for no longer than 7 days: Discard if not consumed within 30 days.
- Freeze indefinitely until used.
2.4 HACCP Plan Components
Here’s an outline of what your HACCP plan for food vacuum sealers could include:
| HACCP Plan Section | Requirements |
|---|---|
| Covered Foods | Raw vegetables, raw meat, and raw poultry. These must be stored in refrigerated conditions (41°F or lower). |
| Flow Diagram | Includes receiving, cooler storage, vacuum packaging, labeling, chilling (ice bath), and refrigerated storage (41°F or lower until used or discarded after 14 days). |
| Training Program | Employees must be trained in: allowed foods, food safety risks, equipment use, labeling requirements, handling and storage procedures, critical and operating limits at CCPs, and cleaning. |
| General Operating Procedures | Only trained personnel can operate equipment. Only covered foods are allowed for vacuum packaging. Use food-grade packaging. Clean equipment every 4 hours or after use. |
| Labeling | Products must be labeled with “Maintain at 41°F or below” and “Use by (14 days from the date of packaging).” Discard unlabeled or expired products. |
| Critical Control Points (CCPs) | Monitor using calibrated continuous thermometers for refrigerated storage, visual checks twice a day, and daily review of data. Correct if temperature exceeds 41°F. |
| Corrective Actions | If temperature exceeds 41°F, evaluate the food by a process authority. Discard unsafe products and repair storage equipment. |
| Verification | A manager/supervisor must review records weekly, including temperature logs and labeling checks, to ensure all critical limits are maintained. |
Creating and implementing a HACCP plan can seem daunting, but FOODS.EDU.VN offers templates and resources to simplify the process. For instance, you can use our free and customizable HACCP plan template to create your own. By using FOODS.EDU.VN, you ensure that your food safety practices are up to par.
3. Why Use a Vacuum Sealed Food Shelf Life Chart?
A vacuum sealed food shelf life chart is an essential tool for food handlers to determine the shelf life expectancy of vacuum-sealed foods. While vacuum sealing extends food shelf life, products can still spoil or deteriorate over time. The impact of vacuum sealing varies by food type, making a reference chart crucial for proper storage and labeling.
For instance, fresh meat like ground beef typically stays fresh for 2 to 3 days in the refrigerator. When vacuum-packed properly, it can last up to 10 days. Lettuce, on the other hand, may only stay fresh for 6 to 8 days, even when vacuum-packed and refrigerated.
According to Kara Lynch, a Registered Dietician and Food Safety Educator at Michigan State University Extension, vacuum sealing reduces oxygen exposure and significantly extends food’s quality shelf life while reducing waste. This underscores the importance of understanding the specific shelf life of different vacuum-sealed foods.
A vacuum sealed food storage life chart compares the regular food storage shelf life with the extended shelf life achieved through vacuum packing. This chart is an invaluable tool for labeling vacuum-sealed foods with accurate use-by dates.
3.1 Benefits of Using a Shelf Life Chart
- Extended Shelf Life: Properly vacuum-sealed foods can last up to five times longer than those stored conventionally.
- Preserved Quality: Vacuum sealing maintains food’s flavor, texture, and nutritional value by preventing oxidation and moisture loss.
- Reduced Waste: By knowing the exact shelf life of vacuum-sealed items, you can plan meals more effectively and minimize spoilage.
- Better Organization: Vacuum-sealed packages are compact and easy to stack, making it simpler to organize your refrigerator and freezer.
- Cost Savings: By extending the life of your food, you reduce the frequency of grocery shopping and minimize food waste, saving you money in the long run.
3.2 Implementing a Shelf Life Chart
To effectively use a vacuum sealed food shelf life chart:
- Consult the Chart Regularly: Keep the chart in a visible location in your kitchen or storage area.
- Label Properly: Always label vacuum-sealed packages with the date of sealing and the expected use-by date based on the chart.
- Monitor Storage Conditions: Ensure that vacuum-sealed foods are stored at the correct temperature, as temperature fluctuations can affect shelf life.
- Inspect Packages: Regularly check vacuum-sealed packages for signs of spoilage, such as swelling or discoloration.
4. How Long Does Vacuum Packed Food Last?
Determining how long vacuum-packed food lasts depends on several factors, including the type of food, storage conditions, and whether it’s refrigerated or frozen. Vacuum sealing significantly extends the shelf life by removing air and preventing oxidation, but it’s crucial to follow recommended storage guidelines to ensure safety and quality. Below, we explore the typical shelf life of various foods when vacuum-packed, providing you with a comprehensive reference for your kitchen.
4.1. Meats
Vacuum sealing can significantly extend the shelf life of meats compared to traditional storage methods.
| Type of Meat | Refrigerated (Regular) | Refrigerated (Vacuum Sealed) | Frozen (Regular) | Frozen (Vacuum Sealed) |
|---|---|---|---|---|
| Beef | 3-5 days | 10-14 days | 6-12 months | 2-3 years |
| Pork | 3-5 days | 7-10 days | 4-6 months | 1-2 years |
| Poultry | 1-2 days | 5-7 days | Up to 1 year | Up to 2 years |
| Ground Meat | 1-2 days | 3-5 days | 3-4 months | 1 year |
| Processed Meats | 7 days | 14-21 days | 1-2 months | 6-12 months |
These timelines provide a general guideline. It is essential to monitor the condition of the meat and adhere to food safety standards.
4.2. Seafood
Vacuum sealing is particularly beneficial for seafood, which tends to spoil quickly.
| Type of Seafood | Refrigerated (Regular) | Refrigerated (Vacuum Sealed) | Frozen (Regular) | Frozen (Vacuum Sealed) |
|---|---|---|---|---|
| Fish | 1-2 days | 3-5 days | 4-8 months | 6-12 months |
| Shellfish | 1-2 days | 2-3 days | 2-3 months | 3-6 months |
| Smoked Fish | 7-14 days | 14-21 days | 2-3 months | 6-8 months |
It’s essential to ensure that seafood is fresh before vacuum sealing and to store it at appropriate temperatures.
4.3. Fruits and Vegetables
The shelf life of fruits and vegetables can also be extended with vacuum sealing, although it’s essential to consider their texture and moisture content.
| Type of Produce | Refrigerated (Regular) | Refrigerated (Vacuum Sealed) | Frozen (Regular) | Frozen (Vacuum Sealed) |
|---|---|---|---|---|
| Berries | 2-3 days | 5-7 days | 6-12 months | 12-18 months |
| Leafy Greens | 3-7 days | 7-14 days | Not Recommended | Not Recommended |
| Root Vegetables | 2-3 weeks | 4-6 weeks | 8-12 months | 12-18 months |
| Cut Vegetables | 3-5 days | 7-10 days | 6-8 months | 8-12 months |
Blanching vegetables before freezing and vacuum sealing can help preserve their quality and extend their shelf life further.
4.4. Dairy Products
Vacuum sealing can help preserve the quality of some dairy products.
| Type of Dairy | Refrigerated (Regular) | Refrigerated (Vacuum Sealed) | Frozen (Regular) | Frozen (Vacuum Sealed) |
|---|---|---|---|---|
| Hard Cheeses | 2-4 weeks | 4-8 weeks | 6-8 months | 8-12 months |
| Soft Cheeses | 1-2 weeks | 2-4 weeks | Not Recommended | Not Recommended |
| Butter | 1-3 months | 3-6 months | 6-12 months | 12-18 months |
It is important to note that vacuum sealing may not be suitable for all dairy products, particularly those with high moisture content.
4.5. Cooked Foods
Vacuum sealing is also a great way to extend the shelf life of leftovers.
| Type of Cooked Food | Refrigerated (Regular) | Refrigerated (Vacuum Sealed) | Frozen (Regular) | Frozen (Vacuum Sealed) |
|---|---|---|---|---|
| Cooked Meats | 3-4 days | 7-10 days | 2-3 months | 6-8 months |
| Soups and Stews | 3-4 days | 6-8 days | 2-3 months | 6-8 months |
| Casseroles | 3-4 days | 5-7 days | 1-2 months | 3-4 months |
Always cool cooked foods to a safe temperature before vacuum sealing to prevent bacterial growth.
By understanding these timelines, you can confidently use vacuum sealing to extend the life of your food, reduce waste, and save money. Regularly consulting a vacuum sealed food shelf life chart and adhering to proper storage guidelines will ensure that you are using this method effectively and safely.
5. Vacuum Sealing Food: Detailed Steps
To ensure the safety and quality of your food when vacuum sealing, it’s important to follow a detailed, step-by-step approach. Proper techniques not only extend the shelf life of your food but also prevent the growth of harmful bacteria. Here’s a comprehensive guide to effective vacuum sealing.
5.1. Gather Necessary Equipment
- Vacuum Sealer: Choose a reliable vacuum sealer that suits your needs. There are various models available, ranging from handheld devices for occasional use to professional-grade machines for frequent sealing.
- Vacuum Sealer Bags: Use high-quality vacuum sealer bags that are specifically designed for food storage. These bags are made of durable materials that can withstand the vacuum sealing process and prevent air from re-entering.
- Sharp Knife or Scissors: To cut the bags to the appropriate size.
- Labels and Markers: For labeling the vacuum-sealed packages with the date and contents.
5.2. Prepare the Food
- Wash and Dry: Thoroughly wash fruits and vegetables to remove any dirt or contaminants. Pat them dry with a clean cloth or paper towel before sealing.
- Cut and Portion: Cut the food into appropriate portions for easy meal preparation and storage. Consider the size of your vacuum sealer bags and your future meal plans.
- Pre-Freeze (Optional): For soft foods like berries or ground meat, pre-freezing them for about an hour on a baking sheet can help them maintain their shape during the vacuum sealing process.
5.3. Fill the Vacuum Sealer Bag
- Leave Enough Space: When filling the vacuum sealer bag, leave at least one to two inches of space between the food and the top of the bag. This ensures a proper seal and prevents food from being sucked into the sealing mechanism.
- Arrange Neatly: Arrange the food neatly inside the bag to ensure even distribution and prevent sharp edges from puncturing the bag.
- Remove Excess Air: Gently press out as much air as possible from the bag before placing it in the vacuum sealer.
5.4. Vacuum Seal the Bag
- Follow Manufacturer Instructions: Place the open end of the bag into the vacuum sealer according to the manufacturer’s instructions.
- Start the Sealing Process: Close the lid and start the vacuum sealing process. The machine will remove the air from the bag and create a tight seal.
- Ensure a Proper Seal: Check the seal to ensure it is airtight. If the seal is weak or incomplete, reseal the bag.
5.5. Label and Store
- Label the Bag: Use a permanent marker to label each vacuum-sealed bag with the date of sealing and the contents. This helps you keep track of the storage time and prevents confusion.
- Store Properly: Store the vacuum-sealed food in the refrigerator or freezer, depending on your storage needs. Ensure that the temperature is consistent to maintain the quality and safety of the food.
- Organize Storage: Organize your refrigerator or freezer to easily access the vacuum-sealed items. Use shelves or bins to keep the food neatly arranged.
5.6. Tips for Best Results
- Use High-Quality Bags: Invest in high-quality vacuum sealer bags to ensure a proper seal and prevent freezer burn.
- Avoid Overfilling: Overfilling the bags can prevent a proper seal and compromise the effectiveness of the vacuum sealing process.
- Cool Hot Foods: Always cool hot foods to room temperature before vacuum sealing to prevent condensation and bacterial growth.
- Monitor Storage Conditions: Regularly check the condition of the vacuum-sealed packages to ensure they are still properly sealed and that the food shows no signs of spoilage.
5.7. Additional Resources
For more detailed instructions and tips on vacuum sealing, visit FOODS.EDU.VN. Our website offers a variety of resources, including guides, videos, and expert advice to help you master the art of vacuum sealing and ensure the safety and quality of your stored foods.
6. Common Mistakes to Avoid When Vacuum Sealing Food
Vacuum sealing is a highly effective method for preserving food, but it’s essential to avoid common mistakes to ensure safety and maximize shelf life. Here are some pitfalls to watch out for:
6.1. Sealing Food That Is Not Fresh
Vacuum sealing is not a method to revive spoiled food. Always start with fresh, high-quality ingredients. Vacuum sealing food that is already past its prime will only prolong the inevitable and could potentially create a hazardous environment for bacterial growth.
6.2. Improperly Cleaning and Drying Food
Failing to thoroughly clean and dry food before vacuum sealing can introduce bacteria and excess moisture, leading to spoilage. Always wash fruits and vegetables to remove dirt and contaminants, and pat them dry to minimize moisture.
6.3. Overfilling the Bags
Overfilling vacuum sealer bags can prevent a proper seal, as the machine may not be able to remove all the air. Always leave at least one to two inches of space between the food and the top of the bag to ensure an airtight seal.
6.4. Not Using the Right Type of Bags
Using regular plastic bags instead of vacuum sealer bags is a common mistake. Vacuum sealer bags are specifically designed to withstand the vacuum sealing process and provide an airtight barrier. Regular bags are not as durable and may allow air to re-enter, compromising the preservation.
6.5. Failing to Cool Hot Foods Before Sealing
Sealing hot foods can create condensation inside the bag, leading to moisture buildup and potential bacterial growth. Always allow hot foods to cool to room temperature before vacuum sealing.
6.6. Improper Sealing Technique
Ensure that the sealing process is done correctly. A weak or incomplete seal can compromise the effectiveness of the vacuum sealing. Always check the seal to ensure it is airtight, and reseal if necessary.
6.7. Neglecting to Label and Date the Bags
Failing to label and date the vacuum-sealed bags can lead to confusion and potential spoilage. Always use a permanent marker to label each bag with the date of sealing and the contents.
6.8. Not Monitoring Storage Conditions
Even when vacuum-sealed, food can still spoil if not stored properly. Monitor the temperature of your refrigerator and freezer to ensure that the food is stored at the correct temperature. Regularly check the condition of the vacuum-sealed packages to ensure they are still properly sealed and that the food shows no signs of spoilage.
6.9. Vacuum Sealing Certain Vegetables Without Blanching
Some vegetables, such as broccoli, Brussels sprouts, and peas, should be blanched before vacuum sealing to stop enzyme activity that can lead to spoilage. Blanching involves briefly boiling the vegetables and then plunging them into ice water to halt the cooking process.
6.10. Storing Vacuum-Sealed Foods for Too Long
While vacuum sealing extends the shelf life of food, it does not make it last indefinitely. Be sure to consult a vacuum sealed food shelf life chart and consume the food within the recommended time frame.
By avoiding these common mistakes, you can ensure that you are using vacuum sealing effectively and safely, preserving the quality and extending the shelf life of your food.
7. Expert Tips for Maximizing the Shelf Life of Vacuum Packed Foods
To truly maximize the benefits of vacuum sealing, it’s crucial to implement expert strategies that go beyond the basics. Here are some advanced tips to help you extend the shelf life of your vacuum-packed foods:
7.1. Choose the Right Vacuum Sealer
Not all vacuum sealers are created equal. Invest in a high-quality vacuum sealer with adjustable settings for different types of food. Some sealers also come with features like a pulse function for delicate items or a marinade function for enhancing flavor.
7.2. Use Oxygen Absorbers
For added protection against spoilage, consider using oxygen absorbers in your vacuum-sealed bags. These small packets remove any residual oxygen, further inhibiting bacterial growth and oxidation.
7.3. Flash Freezing
Flash freezing involves freezing food quickly on a baking sheet before vacuum sealing. This method helps maintain the food’s shape and texture, preventing it from clumping together during the sealing process.
7.4. Blanch Vegetables Before Sealing
Blanching is a crucial step for preserving vegetables before vacuum sealing. This process deactivates enzymes that can cause spoilage, preserving the color, texture, and nutritional value of the vegetables.
7.5. Marinate Before Sealing
Enhance the flavor of your meats and vegetables by marinating them before vacuum sealing. The vacuum sealing process helps the marinade penetrate deeper into the food, resulting in a more flavorful and tender dish.
7.6. Portion Control
Vacuum seal food in individual portions for easy meal preparation. This not only saves time but also reduces waste by ensuring you only thaw what you need.
7.7. Rotate Your Stock
Practice the FIFO (First In, First Out) method by using the oldest vacuum-sealed items first. This ensures that you are consuming food within its optimal shelf life.
7.8. Monitor Freezer Temperature
Ensure that your freezer maintains a consistent temperature of 0°F (-18°C) or lower. Fluctuations in temperature can compromise the quality of vacuum-sealed foods.
7.9. Consider Modified Atmosphere Packaging (MAP)
For commercial applications, consider using Modified Atmosphere Packaging (MAP) in conjunction with vacuum sealing. MAP involves replacing the air inside the packaging with a specific mixture of gases, such as carbon dioxide and nitrogen, to further extend shelf life and preserve quality.
7.10. Regularly Inspect Seals
Make it a habit to regularly inspect the seals of your vacuum-sealed bags. If you notice any signs of damage or air leakage, reseal the bag immediately.
By implementing these expert tips, you can take your vacuum sealing game to the next level and enjoy the benefits of extended shelf life, reduced waste, and enhanced food quality.
8. The Science Behind Vacuum Sealing: Why It Works
Understanding the science behind vacuum sealing can help you appreciate why it’s such an effective method for preserving food. Vacuum sealing primarily works by removing oxygen, which is a key element in food spoilage. Here’s a detailed look at the scientific principles that make vacuum sealing work:
8.1. Preventing Oxidation
Oxidation is a chemical reaction that occurs when food is exposed to oxygen. This process can lead to changes in color, flavor, and texture, causing food to spoil. Vacuum sealing removes oxygen, preventing oxidation and preserving the quality of the food.
8.2. Inhibiting Microbial Growth
Many microorganisms, such as bacteria and mold, require oxygen to grow. By removing oxygen, vacuum sealing inhibits the growth of these microorganisms, significantly extending the shelf life of food.
8.3. Reducing Freezer Burn
Freezer burn occurs when moisture evaporates from the surface of frozen food, leading to dehydration and changes in texture. Vacuum sealing prevents freezer burn by creating an airtight barrier that minimizes moisture loss.
8.4. Enzyme Deactivation
Enzymes are naturally present in food and can cause spoilage by breaking down cellular structures. While vacuum sealing doesn’t directly deactivate enzymes, it slows down their activity by removing oxygen. Blanching vegetables before vacuum sealing deactivates enzymes, further preserving their quality.
8.5. Maintaining Moisture Content
Vacuum sealing helps maintain the moisture content of food by preventing water loss. This is particularly important for preserving the texture and juiciness of meats and the crispness of vegetables.
8.6. Flavor Retention
By creating an airtight seal, vacuum sealing helps retain the volatile compounds that contribute to the flavor of food. This prevents the loss of flavor and aroma, ensuring that the food tastes fresh and delicious when it’s finally consumed.
8.7. Extending Shelf Life
The combination of these scientific principles results in a significant extension of shelf life for vacuum-sealed foods. By preventing oxidation, inhibiting microbial growth, reducing freezer burn, slowing down enzyme activity, maintaining moisture content, and retaining flavor, vacuum sealing helps keep food fresh for longer.
8.8. Studies and Research
Several studies have demonstrated the effectiveness of vacuum sealing in preserving food quality and extending shelf life. For example, a study published in the Journal of Food Science found that vacuum sealing significantly reduced microbial growth and maintained the quality of meat products compared to traditional storage methods.
8.9. Understanding the Limitations
While vacuum sealing is highly effective, it’s important to understand its limitations. Vacuum sealing does not kill bacteria, and some anaerobic bacteria can still grow in the absence of oxygen. Therefore, it’s crucial to follow proper food safety practices and store vacuum-sealed foods at the correct temperature.
By understanding the science behind vacuum sealing, you can appreciate why it’s such a valuable tool for preserving food and ensuring its safety and quality.
9. Vacuum Sealing for Different Types of Food: A Comprehensive Guide
Vacuum sealing is a versatile preservation method, but the technique may need to be adjusted depending on the type of food you’re sealing. Here’s a comprehensive guide to vacuum sealing different types of food:
9.1. Meats
- Preparation: Trim excess fat and remove bones to prevent puncturing the bag.
- Technique: Pat the meat dry before sealing to remove excess moisture. Consider pre-freezing for about an hour to help maintain its shape.
- Storage: Store in the refrigerator for up to 14 days or in the freezer for up to 2-3 years.
9.2. Seafood
- Preparation: Ensure seafood is fresh and free of scales and bones. Pat dry to remove excess moisture.
- Technique: Place a paper towel inside the bag to absorb excess moisture. Pre-freezing can also help maintain the seafood’s shape.
- Storage: Store in the refrigerator for up to 3-5 days or in the freezer for up to 6-12 months.
9.3. Fruits and Vegetables
- Preparation: Wash and dry thoroughly. Blanch vegetables before sealing to deactivate enzymes.
- Technique: For soft fruits and vegetables, pre-freezing can help maintain their shape. Arrange items in a single layer to prevent clumping.
- Storage: Store in the refrigerator for up to 7-14 days or in the freezer for up to 12-18 months.
9.4. Dairy Products
- Preparation: Hard cheeses can be vacuum sealed directly. Soft cheeses should be wrapped in cheese paper before sealing.
- Technique: Ensure that the dairy products are dry to prevent moisture buildup inside the bag.
- Storage: Store in the refrigerator for up to 4-8 weeks or in the freezer for up to 8-12 months.
9.5. Cooked Foods
- Preparation: Cool cooked foods to room temperature before sealing.
- Technique: Portion the food into individual servings for easy meal preparation.
- Storage: Store in the refrigerator for up to 7-10 days or in the freezer for up to 6-8 months.
9.6. Liquids
- Preparation: Freeze liquids in ice cube trays or small containers before sealing.
- Technique: Place the frozen liquid cubes or containers inside the vacuum sealer bag and seal.
- Storage: Store in the freezer for up to 6-8 months.
9.7. Dry Goods
- Preparation: Ensure that dry goods are completely dry before sealing.
- Technique: Seal in individual portions for easy use.
- Storage: Store in a cool, dry place for up to 1-2 years.
9.8. Tips for Specific Foods
- Berries: Flash freeze before vacuum sealing to prevent them from clumping together.
- Leafy Greens: Place a paper towel inside the bag to absorb excess moisture.
- Root Vegetables: Peel and cut into uniform pieces before sealing.
- Soups and Sauces: Cool completely and freeze in small containers before sealing.
By following these guidelines, you can effectively vacuum seal different types of food, preserving their quality and extending their shelf life.
10. Frequently Asked Questions (FAQs) About Vacuum Packed Food
To help clarify any remaining questions about vacuum-packed food, here are some frequently asked questions with detailed answers:
Q1: How does vacuum sealing extend the shelf life of food?
Vacuum sealing removes oxygen, which inhibits the growth of aerobic bacteria and prevents oxidation, thus extending the shelf life of food.
Q2: Is vacuum sealing safe for all types of food?
While vacuum sealing is generally safe, it’s not suitable for all types of food. Certain foods, like soft cheeses and some vegetables, may require specific preparation techniques to prevent spoilage.
Q3: Can vacuum sealing prevent freezer burn?
Yes, vacuum sealing helps prevent freezer burn by creating an airtight barrier that minimizes moisture loss from frozen food.
Q4: How long can I store vacuum-sealed meat in the refrigerator?
Vacuum-sealed meat can be stored in the refrigerator for up to 14 days, compared to 3-5 days for traditionally stored meat.
Q5: Do I need a special vacuum sealer for home use?
While professional-grade vacuum sealers are available, there are many affordable and effective vacuum sealers designed for home use.
Q6: Can I reuse vacuum sealer bags?
Some vacuum sealer bags can be reused if they are properly cleaned and not damaged. However, it’s generally recommended to use new bags for sealing raw meats and seafood.
Q7: What is the best way to prepare vegetables for vacuum sealing?
The best way to prepare vegetables for vacuum sealing is to wash, dry, and blanch them before sealing. Blanching deactivates enzymes that can cause spoilage.
Q8: Can I vacuum seal hot foods?
No, it’s important to cool hot foods to room temperature before vacuum sealing to prevent condensation and bacterial growth.
Q9: How do I know if vacuum-sealed food has gone bad?
Signs of spoilage in vacuum-sealed food include a foul odor, discoloration, swelling of the bag, and a slimy texture.
Q10: Are there any risks associated with vacuum sealing?
While vacuum sealing is generally safe, there is a risk of botulism if food is not properly prepared and stored. Anaerobic bacteria, such as Clostridium botulinum, can grow in the absence of oxygen.
Navigating the world of vacuum sealing can be complex, but FOODS.EDU.VN is here to help. Our comprehensive resources provide the knowledge and tools you need to confidently preserve your food and reduce waste.
Ready to dive deeper into the world of culinary arts and food preservation? Visit FOODS.EDU.VN today to explore more articles, recipes, and expert tips. Whether you’re a home cook or a professional chef, we have something for everyone.
Address: 1946 Campus Dr, Hyde Park, NY 12538, United States
Whatsapp: +1 845-452-9600
Website: FOODS.EDU.VN
Don’t miss out on the opportunity to enhance your culinary skills and knowledge. Join the foods.edu.vn community today and start your journey towards becoming a food expert!