Cleaning baked-on food in the oven can be a daunting task, but with the right techniques and cleaning solutions, you can restore your oven to its sparkling clean condition. At FOODS.EDU.VN, we provide proven methods to remove stubborn stains and food residues, ensuring your oven is ready for your next culinary adventure. Explore our website for more cleaning tips and delicious recipes, enhancing your cooking experience with expert advice and support.
1. Understanding the Challenge of Cleaning Baked-On Food
Baked-on food in the oven presents a common yet challenging cleaning issue. The high temperatures and prolonged cooking times cause food splatters and spills to harden, creating a stubborn, often burnt, layer on the oven’s interior surfaces. Effective cleaning requires understanding the nature of these residues and employing methods that can break them down without damaging the oven.
1.1. Why Does Food Bake On So Strongly?
The process of food baking onto oven surfaces involves several factors:
- High Temperatures: Ovens typically operate at temperatures between 300°F and 500°F (150°C to 260°C). At these temperatures, sugars caramelize, proteins denature, and fats polymerize.
- Dehydration: The heat causes food particles to dry out and harden, creating a strong bond with the metal surface of the oven.
- Chemical Reactions: Maillard reaction, a chemical reaction between amino acids and reducing sugars, contributes to the browning and flavor development but also results in stubborn residues.
According to a study published in the “Journal of Food Science,” the Maillard reaction not only affects flavor but also creates compounds that are difficult to dissolve, leading to persistent stains.
1.2. The Impact of Baked-On Food on Oven Performance
Accumulated baked-on food can have several negative impacts:
- Reduced Efficiency: The residues can insulate the oven, causing it to take longer to heat up and maintain temperature, thereby increasing energy consumption.
- Uneven Cooking: Uneven heat distribution can result from the residues absorbing or reflecting heat in unpredictable ways.
- Unpleasant Odors: Burnt food particles can emit unpleasant smells, especially when the oven is heated, affecting the taste and aroma of subsequently cooked dishes.
- Potential Fire Hazard: Excessive buildup of grease and food particles can ignite at high temperatures, posing a fire risk.
1.3. Safety Precautions Before Cleaning
Before embarking on any cleaning method, ensure the oven is cool to prevent burns. Disconnect the oven from its power source or turn off the circuit breaker to avoid electrical hazards. Wear gloves to protect your hands from harsh chemicals and abrasive cleaners. Ensure adequate ventilation by opening windows or using a kitchen fan. Always consult the oven’s manual for specific cleaning recommendations and warnings.
2. Key Ingredients and Tools for Effective Cleaning
Successful oven cleaning depends on the right combination of cleaning agents and tools. The best options are those that can effectively break down baked-on residues without causing damage to the oven’s interior.
2.1. Natural Cleaning Agents
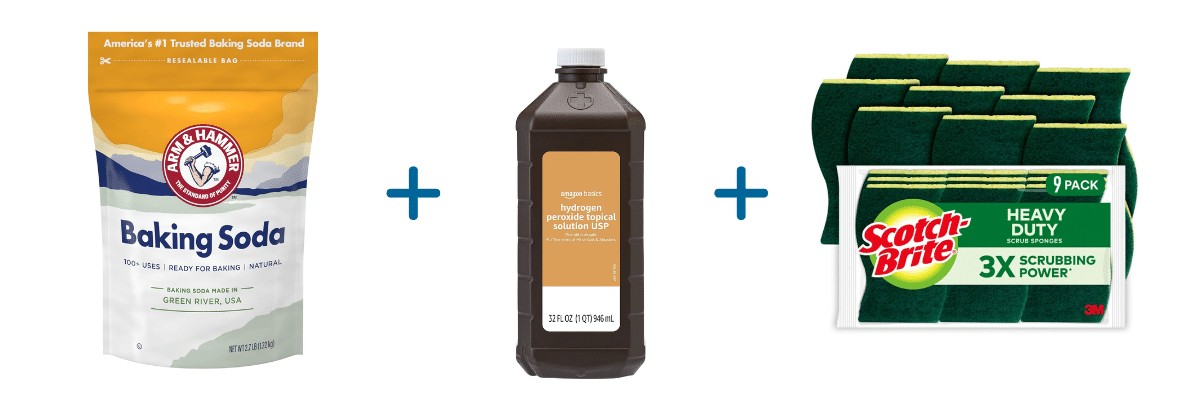
- Baking Soda: Baking soda is a mild alkali that can dissolve grease and grime. Its gentle abrasive properties make it ideal for scrubbing without scratching.
- Vinegar: Vinegar, particularly white vinegar, is an acid that can cut through grease and loosen baked-on food.
- Lemon Juice: Lemon juice contains citric acid, a natural degreaser and deodorizer.
- Salt: Coarse salt can act as an abrasive to help scrub away stubborn stains when combined with other cleaners.
- Hydrogen Peroxide: Hydrogen peroxide is a mild oxidizing agent that can help lift stains and disinfect surfaces.
2.2. Commercial Cleaning Products
- Oven Cleaners: Available in various forms (sprays, gels, foams), these are formulated with strong chemicals to dissolve baked-on food. Choose fume-free options to minimize health risks.
- Degreasers: Effective for cutting through grease and oil, these are particularly useful for ovens with heavy buildup.
- Multi-Purpose Cleaners: Some multi-purpose cleaners can be effective on light to moderate baked-on food, but ensure they are safe for oven surfaces.
- Bar Keepers Friend: Contains oxalic acid, which is effective for removing rust, tarnish, and baked-on food from stainless steel surfaces.
2.3. Essential Cleaning Tools
- Scrubbing Sponges: Non-scratch scrubbing sponges are essential to avoid damaging oven surfaces while effectively removing residues.
- Scrub Brushes: Useful for reaching corners and crevices, scrub brushes with durable bristles can help dislodge stubborn particles.
- Plastic Scrapers: These are ideal for gently scraping off thick layers of baked-on food without scratching the oven’s surface.
- Spray Bottles: For even application of liquid cleaners, spray bottles are a convenient tool.
- Microfiber Cloths: These cloths are excellent for wiping surfaces clean and leaving a streak-free finish.
- Rubber Gloves: Protect hands from harsh chemicals and hot water.
- Safety Glasses: Protect eyes from splashes, especially when using commercial cleaners.
- Putty Knife: For removing stubborn, stuck-on debris.
3. Step-by-Step Guide to Cleaning Baked-On Food
Effective oven cleaning involves a systematic approach, from preparation to final wipe-down. Follow these steps for a thorough and safe cleaning process.
3.1. Preparation
- Cool Down: Ensure the oven is completely cool before starting. This prevents burns and allows cleaning agents to work more effectively.
- Remove Racks: Take out the oven racks, broiler pan, and any other removable items. These can be cleaned separately.
- Protect the Floor: Place old newspapers, cloths, or a plastic sheet under the oven to catch drips and spills.
- Ventilate: Open windows and turn on the kitchen fan to ensure good ventilation, especially when using commercial cleaners.
- Gather Supplies: Have all your chosen cleaning agents, tools, and protective gear readily available.
3.2. Initial Scrubbing
- Loosen Residues: Use a plastic scraper or putty knife to gently scrape off any loose or thick layers of baked-on food.
- Apply Cleaner: Depending on the severity of the buildup and your preference, choose a natural or commercial cleaner.
- Baking Soda Paste: Mix baking soda with water to form a thick paste. Apply it generously to the affected areas.
- Vinegar Solution: Mix equal parts of white vinegar and water in a spray bottle. Spray the solution onto the oven surfaces.
- Commercial Oven Cleaner: Follow the product instructions carefully, ensuring proper ventilation and protective gear.
- Let it Sit: Allow the cleaning agent to sit for a sufficient period to soften the baked-on food.
- Baking Soda Paste: Leave it on for at least 3 hours, or preferably overnight.
- Vinegar Solution: Let it sit for 30 minutes to 1 hour.
- Commercial Oven Cleaner: Follow the manufacturer’s recommended time, typically 20-30 minutes.
3.3. Thorough Cleaning
- Scrub the Oven: Use a non-scratch scrubbing sponge or scrub brush to thoroughly scrub the interior surfaces. Apply moderate pressure to dislodge the softened residues.
- Stubborn Spots: For particularly tough spots, make a paste of baking soda and hydrogen peroxide and apply it directly to the area. Let it sit for 15-20 minutes before scrubbing.
- Wipe Clean: Use a damp microfiber cloth to wipe away the loosened residues and cleaning agent. Rinse the cloth frequently in clean water.
- Inspect and Repeat: Inspect the oven for any remaining baked-on food. Repeat the cleaning process if necessary, focusing on persistent stains.
3.4. Cleaning Oven Racks and Accessories
- Soaking: Soak the oven racks and accessories in hot, soapy water for at least 30 minutes to loosen the grime.
- Scrubbing: Use a scrub brush or sponge to remove the softened residues. For stubborn spots, use a baking soda paste or Bar Keepers Friend.
- Rinsing: Rinse thoroughly with clean water.
- Drying: Dry the racks and accessories completely before placing them back in the oven.
3.5. Final Touches
- Wipe Down: Do a final wipe-down of the oven interior with a clean, damp microfiber cloth to ensure all residues are removed.
- Dry the Oven: Leave the oven door open for a few hours to allow it to air dry completely.
- Reassemble: Replace the oven racks and accessories.
- Test the Oven: Turn on the oven at a low temperature for a few minutes to ensure there are no lingering odors or residues.
4. Specialized Cleaning Methods for Different Oven Types
Different oven types may require specialized cleaning methods to ensure effective and safe cleaning. Understanding the specific requirements of each type is crucial for maintaining your appliance.
4.1. Self-Cleaning Ovens
Self-cleaning ovens use high temperatures (around 900°F or 482°C) to burn off food residues. While convenient, this method produces smoke and odors and may not remove all buildup.
- Preparation: Remove oven racks and accessories. Wipe away any loose food particles.
- Initiate Cleaning Cycle: Follow the manufacturer’s instructions to start the self-cleaning cycle. Typically, this involves locking the oven door and setting the cleaning time.
- Ventilation: Ensure adequate ventilation by opening windows and turning on the kitchen fan.
- Cool Down: Allow the oven to cool completely after the cleaning cycle is complete.
- Wipe Away Ash: Use a damp cloth to wipe away any remaining ash.
According to the Association of Home Appliance Manufacturers (AHAM), it’s important to ventilate the kitchen during the self-cleaning cycle due to the release of carbon monoxide and other byproducts.
4.2. Steam Ovens
Steam ovens use steam to loosen food residues, making them easier to wipe away.
- Preparation: Remove oven racks and accessories.
- Fill Water Reservoir: Fill the water reservoir according to the manufacturer’s instructions.
- Run Steam Cycle: Select the steam cleaning cycle and allow it to run.
- Wipe Clean: After the cycle, use a soft cloth to wipe away the loosened residues.
- Dry the Oven: Leave the oven door open to air dry.
4.3. Convection Ovens
Convection ovens have a fan that circulates hot air, which can cause food splatters to bake on more evenly.
- Regular Cleaning: Clean convection ovens regularly to prevent buildup.
- Gentle Cleaners: Use gentle, non-abrasive cleaners to protect the fan and heating elements.
- Focus on Fan Area: Pay special attention to cleaning the area around the fan, as this is where food particles tend to accumulate.
4.4. Gas Ovens
Gas ovens require careful cleaning to avoid damaging the gas lines and burners.
- Turn Off Gas Supply: Before cleaning, turn off the gas supply to the oven.
- Protect Gas Lines: Avoid spraying cleaners directly onto gas lines and burners.
- Clean Burners: Remove and clean the burners separately, using a wire brush to remove any clogs.
- Reassemble Carefully: Ensure all parts are properly reassembled before turning the gas supply back on.
5. Dealing with Stubborn Baked-On Food
Despite regular cleaning, some baked-on food can be particularly stubborn. Here are some additional techniques to tackle these tough stains.
5.1. Baking Soda and Hydrogen Peroxide Paste
- Mix Ingredients: Combine baking soda and hydrogen peroxide to form a thick paste.
- Apply to Stain: Apply the paste directly to the stubborn stain.
- Let it Sit: Allow the paste to sit for 20-30 minutes.
- Scrub Gently: Use a non-scratch scrubbing sponge to gently scrub the area.
- Wipe Clean: Wipe away the residue with a damp cloth.
5.2. Ammonia Treatment
- Boil Water: Boil a pot of water and place it in the oven.
- Add Ammonia: Place a bowl of ammonia on the rack below the pot of water.
- Close the Oven: Close the oven door and let it sit overnight.
- Ventilate: Open the oven and ventilate the kitchen thoroughly.
- Wipe Clean: Wipe away the loosened residues with a damp cloth.
5.3. Commercial Oven Cleaners for Heavy Buildup
- Choose Strong Cleaner: Select a commercial oven cleaner specifically designed for heavy buildup.
- Follow Instructions: Follow the manufacturer’s instructions carefully, including wearing protective gear and ensuring proper ventilation.
- Apply Evenly: Apply the cleaner evenly to the affected areas.
- Let it Sit: Allow the cleaner to sit for the recommended time.
- Scrub and Wipe: Scrub the area with a non-scratch scrubbing sponge and wipe away the residue with a damp cloth.
5.4. Salt Scrub for Burnt Areas
- Sprinkle Salt: Generously sprinkle coarse salt over the burnt areas.
- Dampen the Salt: Lightly dampen the salt with water.
- Scrub Gently: Use a scrubbing sponge to gently scrub the area, allowing the salt to act as an abrasive.
- Wipe Clean: Wipe away the salt and residue with a damp cloth.
6. Preventative Measures to Minimize Baked-On Food
Prevention is key to minimizing the effort required for oven cleaning. Implementing these preventative measures can significantly reduce the buildup of baked-on food.
6.1. Use Oven Liners and Baking Sheets
- Oven Liners: Place a reusable oven liner on the bottom of the oven to catch drips and spills.
- Baking Sheets: Use baking sheets with raised edges to contain spills when baking or roasting.
- Foil: Line baking sheets with aluminum foil for easy cleanup.
6.2. Clean Spills Immediately
- Act Fast: Clean up spills as soon as they occur to prevent them from baking onto the oven surfaces.
- Use a Damp Cloth: Use a damp cloth to wipe away spills before they harden.
6.3. Avoid Overfilling Dishes
- Leave Space: Leave enough space in dishes to prevent them from boiling over.
- Use Deeper Dishes: Use deeper dishes for recipes that tend to bubble and spill.
6.4. Regular Light Cleaning
- Wipe Down: Wipe down the oven interior with a damp cloth after each use to remove any fresh splatters.
- Use a Mild Cleaner: Use a mild cleaner for regular wipe-downs to prevent buildup.
6.5. Proper Ventilation
- Use Kitchen Fan: Use the kitchen fan while cooking to help remove steam and grease particles from the air.
- Open Windows: Open windows to improve ventilation and reduce the buildup of grease on oven surfaces.
6.6. Utilize Parchment Paper
- Line Baking Sheets: Line baking sheets with parchment paper to prevent food from sticking and burning onto the surface.
- Wrap Food: Wrap food in parchment paper when roasting to contain juices and prevent splatters.
7. Maintaining a Clean Oven for Optimal Cooking
Maintaining a clean oven is not only about aesthetics but also about ensuring optimal cooking performance and safety.
7.1. Regular Cleaning Schedule
- Establish Schedule: Establish a regular cleaning schedule based on how frequently you use the oven.
- Light Cleaning Weekly: Perform light cleaning tasks weekly, such as wiping down the interior and cleaning oven racks.
- Deep Cleaning Quarterly: Perform a deep cleaning every quarter to remove stubborn buildup and maintain the oven’s performance.
7.2. Monitor Oven Performance
- Check Temperature: Regularly check the oven’s temperature to ensure it is heating accurately.
- Inspect for Hot Spots: Inspect for hot spots that may indicate uneven heat distribution due to buildup.
7.3. Address Issues Promptly
- Repair Malfunctions: Address any malfunctions promptly, such as faulty heating elements or door seals, to prevent uneven cooking and energy waste.
- Clean After Repairs: Clean the oven thoroughly after any repairs to remove any debris or residues.
7.4. Professional Cleaning Services
- Consider Professional Help: Consider hiring professional cleaning services for deep cleaning if you are unable to do it yourself.
- Ensure Expertise: Ensure the cleaning service has experience with oven cleaning and uses safe, effective cleaning methods.
By implementing these strategies, you can maintain a clean and efficient oven, ensuring your culinary creations are always perfectly cooked.
8. Expert Tips and Tricks for Oven Cleaning
To elevate your oven-cleaning game, consider these expert tips and tricks that simplify the process and enhance the results.
8.1. Use Steam to Loosen Grime
- Boil Water: Boil a large pot of water on the stovetop.
- Pour into Pan: Carefully pour the hot water into an oven-safe pan and place it on the bottom rack.
- Close Door: Close the oven door and let the steam work for 20-30 minutes.
- Wipe Away: The steam will loosen the baked-on food, making it easier to wipe away with a cloth or sponge.
8.2. Coffee Grounds as Abrasive
- Save Coffee Grounds: Save used coffee grounds after brewing your coffee.
- Apply to Stains: Sprinkle the damp coffee grounds on stubborn stains.
- Scrub Gently: Use a non-scratch sponge to gently scrub the area. The coffee grounds will act as a mild abrasive, helping to lift the stains.
- Wipe Clean: Wipe away the coffee grounds and residue with a damp cloth.
8.3. Baking Soda and Dish Soap Combination
- Mix Ingredients: Mix baking soda with a squirt of dish soap to form a paste.
- Apply to Stains: Apply the paste to the baked-on food.
- Let it Sit: Allow the paste to sit for 1-2 hours.
- Scrub Gently: Scrub the area with a non-scratch sponge. The dish soap enhances the cleaning power of the baking soda.
- Wipe Clean: Wipe away the paste and residue with a damp cloth.
8.4. Cream of Tartar Paste
- Mix Ingredients: Mix cream of tartar with water to form a paste.
- Apply to Stains: Apply the paste to the baked-on food.
- Let it Sit: Allow the paste to sit for 30 minutes.
- Scrub Gently: Scrub the area with a non-scratch sponge.
- Wipe Clean: Wipe away the paste and residue with a damp cloth.
8.5. Citric Acid Soak
- Dissolve Citric Acid: Dissolve two tablespoons of citric acid in a bucket or deep sink filled with hot water.
- Soak Racks: Submerge the oven racks in the solution and let them soak for 20-30 minutes.
- Scrub and Rinse: Scrub the racks with a brush and rinse thoroughly with clean water.
8.6. Toothpaste for Glass Door
- Apply Toothpaste: Apply a thin layer of non-gel toothpaste to the glass door of the oven.
- Let it Sit: Allow the toothpaste to sit for 10-15 minutes.
- Scrub Gently: Scrub the area with a damp cloth.
- Wipe Clean: Wipe away the toothpaste and residue with a clean, damp cloth. The mild abrasives in toothpaste can help remove stains without scratching the glass.
9. The Science Behind Effective Oven Cleaning
Understanding the scientific principles behind cleaning agents and techniques can help you make informed choices and achieve better results.
9.1. The Chemistry of Baking Soda
Baking soda, or sodium bicarbonate (NaHCO3), is a mild alkaline compound. Its cleaning properties stem from its ability to:
- Neutralize Acids: Baking soda can neutralize acidic food residues, making them easier to dissolve.
- Abrasive Action: Its fine particles provide a gentle abrasive action, helping to lift stains without scratching surfaces.
- Deodorizing Properties: Baking soda can absorb and neutralize odors, leaving the oven smelling fresh.
9.2. The Power of Vinegar
Vinegar, particularly white vinegar, contains acetic acid (CH3COOH). Acetic acid is effective because it:
- Dissolves Grease: It can dissolve grease and oil, breaking down the bonds that hold them to surfaces.
- Loosens Baked-On Food: Acetic acid can penetrate and loosen baked-on food, making it easier to scrub away.
- Antibacterial Properties: Vinegar has mild antibacterial properties, helping to sanitize the oven.
9.3. How Heat and Steam Work
Heat and steam are essential in oven cleaning because they:
- Soften Residues: Heat softens hardened food residues, making them more susceptible to cleaning agents.
- Increase Solubility: Heat increases the solubility of many compounds, allowing cleaning agents to penetrate and dissolve them more effectively.
- Steam Hydration: Steam hydrates dried food residues, loosening their grip on oven surfaces.
9.4. The Role of Enzymes in Cleaning
Enzymatic cleaners contain enzymes that:
- Break Down Proteins: Enzymes can break down proteins, fats, and carbohydrates into smaller, more soluble molecules.
- Target Specific Stains: Different enzymes target different types of stains, making enzymatic cleaners highly effective for specific cleaning tasks.
- Eco-Friendly Option: Enzymatic cleaners are often more environmentally friendly than harsh chemical cleaners.
9.5. The Science of Surfactants
Surfactants, found in many commercial cleaners, work by:
- Reducing Surface Tension: They reduce the surface tension of water, allowing it to spread more easily and penetrate into small crevices.
- Emulsifying Grease: Surfactants can emulsify grease, breaking it into small droplets that can be easily washed away.
- Lifting Dirt: They can lift dirt and grime from surfaces, keeping them suspended in water so they don’t redeposit.
10. FAQs About Cleaning Baked-On Food in the Oven
1. What is the best way to clean baked-on food in the oven?
The best way to clean baked-on food in the oven is to use a combination of baking soda and vinegar. First, make a paste of baking soda and water and apply it to the affected areas. Let it sit overnight, then spray with vinegar and scrub clean.
2. Can I use a self-cleaning oven to remove baked-on food?
Yes, you can use a self-cleaning oven, but it’s important to remove oven racks and accessories first. The high temperatures can damage these items. Ensure proper ventilation during the cleaning cycle.
3. How often should I clean my oven to prevent baked-on food buildup?
You should perform a light cleaning after each use and a deep cleaning every three to six months, depending on how frequently you use your oven.
4. What tools do I need to clean baked-on food in the oven?
Essential tools include a non-scratch scrubbing sponge, a scrub brush, a plastic scraper, a spray bottle, microfiber cloths, rubber gloves, and safety glasses.
5. Are commercial oven cleaners safe to use?
Commercial oven cleaners can be effective, but they often contain harsh chemicals. Choose fume-free options and ensure proper ventilation. Always wear gloves and safety glasses when using these products.
6. Can I use aluminum foil to prevent baked-on food in the oven?
Yes, lining baking sheets with aluminum foil can help prevent food from sticking and burning onto the surface.
7. How can I clean oven racks with baked-on food?
Soak the oven racks in hot, soapy water for at least 30 minutes. Then, scrub them with a scrub brush or sponge. For stubborn spots, use a baking soda paste or Bar Keepers Friend.
8. What is the best natural cleaner for baked-on food in the oven?
Baking soda is an excellent natural cleaner due to its mild alkalinity and gentle abrasive properties. Vinegar and lemon juice are also effective degreasers.
9. How can I remove stubborn stains from the oven glass door?
Apply a thin layer of non-gel toothpaste to the glass door. Let it sit for 10-15 minutes, then scrub gently with a damp cloth. Wipe clean.
10. Can I use a dishwasher to clean oven racks?
If your dishwasher is large enough, you can clean oven racks in it. However, it may not remove all the baked-on food, so pre-soaking and scrubbing may still be necessary.
We hope these tips and tricks from FOODS.EDU.VN help you maintain a clean and efficient oven. For more detailed guides, delicious recipes, and expert culinary advice, visit our website today. Let us help you elevate your cooking experience!
Remember, a clean oven not only performs better but also ensures the safety and quality of your culinary creations. Happy cooking!
Is your oven still a mess? Don’t worry! At FOODS.EDU.VN, we provide even more detailed guides, recipes, and expert culinary advice to help you tackle any kitchen challenge. Visit our website at foods.edu.vn today and discover a world of culinary knowledge! You can also reach us at 1946 Campus Dr, Hyde Park, NY 12538, United States or contact us via Whatsapp at +1 845-452-9600.