Coloring eggs with food coloring is a timeless tradition, and at FOODS.EDU.VN, we’re excited to guide you through the process, ensuring vibrant, beautifully dyed eggs every time. Discover the secrets to achieving stunning egg colors using simple food coloring techniques. Unlock exciting culinary knowledge and enhance your Easter egg decorating skills with us, and explore the magic of edible art and creative food coloring solutions.
Table of Contents
- Gathering Your Supplies for Egg Dyeing
- Mastering the Art of Hard-Boiling Eggs
- Crafting the Perfect Food Coloring Dye
- Dyeing Your Easter Eggs: A Step-by-Step Guide
- Achieving Unique Color Effects: Tips and Tricks
- Exploring Natural Food Coloring Options
- Creative Egg Decorating Ideas Beyond Dyeing
- Food Safety Tips for Dyed Easter Eggs
- Troubleshooting Common Egg Dyeing Problems
- Delicious Recipes to Use Your Hard-Boiled Eggs
- Frequently Asked Questions (FAQs) About Egg Dyeing
1. Gathering Your Supplies for Egg Dyeing
Before you begin your egg dyeing adventure, it’s essential to gather all the necessary supplies. Having everything on hand will ensure a smooth and enjoyable process, allowing you to focus on creating beautiful, colorful eggs. Here’s a comprehensive list of what you’ll need:
- Eggs: The star of the show! You can use white or brown eggs, depending on the desired color intensity. White eggs will produce brighter, more vibrant colors, while brown eggs will result in more muted, pastel shades.
- Food Coloring: Liquid food coloring is the most common and readily available option. Gel food coloring can also be used, but it needs to be thoroughly dissolved in water before adding it to the dye bath. Avoid using oil-based food coloring, as it will not mix well with water and vinegar.
- White Vinegar: Vinegar helps the eggshells absorb the food coloring, resulting in more vibrant and long-lasting colors.
- Water: Use boiling water to ensure the food coloring dissolves properly and the dye is evenly distributed.
- Cups or Bowls: You’ll need separate containers for each color you plan to create. Clear glass cups are ideal as they allow you to see the color of the dye.
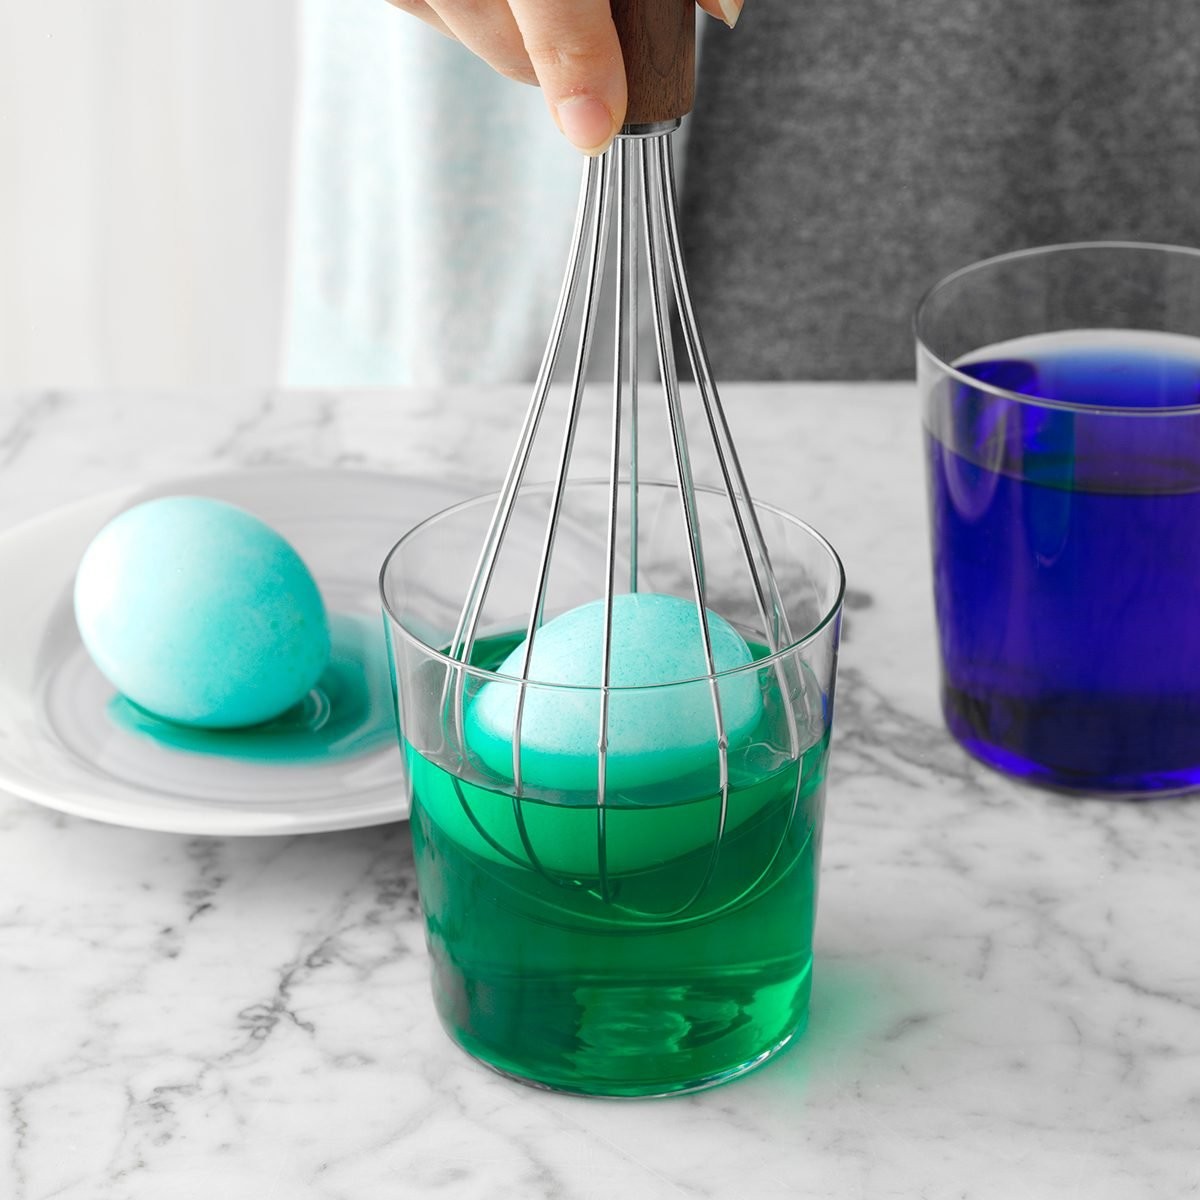
- Spoon or Wire Egg Holder: These tools will help you submerge the eggs in the dye bath and remove them without staining your hands. A whisk can also be used as an egg holder by gently separating the wires and slipping the egg inside.
- Paper Towels: Essential for wiping up spills and drying the dyed eggs.
- Egg Carton: Use an empty egg carton as a drying rack for the dyed eggs. This will prevent them from rolling around and smudging the colors.
- Tablecloth or Newspapers: Protect your work surface from stains by covering it with a tablecloth or newspapers.
- Gloves (Optional): If you’re concerned about staining your hands, wear gloves while dyeing the eggs.
With these supplies in hand, you’re ready to embark on your egg dyeing journey. Remember to prepare your workspace and gather all the ingredients before you start, ensuring a seamless and enjoyable experience.
2. Mastering the Art of Hard-Boiling Eggs
Before you can start dyeing your eggs, you need to hard-boil them properly. Hard-boiled eggs that are cooked to perfection are essential for achieving the best results when dyeing. Here’s a step-by-step guide to mastering the art of hard-boiling eggs:
- Place the eggs in a saucepan: Gently place the desired number of eggs in a saucepan, ensuring they are in a single layer. Avoid overcrowding the pan, as this can lead to uneven cooking.
- Cover the eggs with water: Add enough cold water to the saucepan to cover the eggs by at least an inch. This will ensure that the eggs cook evenly.
- Bring the water to a boil: Place the saucepan over medium-high heat and bring the water to a rolling boil.
- Remove from heat and cover: Once the water reaches a boil, immediately remove the saucepan from the heat and cover it with a lid.
- Let the eggs sit: Allow the eggs to sit in the hot water for 12-15 minutes, depending on the desired level of doneness. For firmer yolks, let them sit for the full 15 minutes.
- Cool the eggs: After the sitting time is up, drain the hot water from the saucepan and immediately rinse the eggs under cold running water. This will stop the cooking process and prevent the yolks from turning green.
- Peel the eggs (optional): If you plan to eat the eggs after dyeing them, you can peel them before or after the dyeing process. To peel the eggs easily, gently tap them on a hard surface to crack the shell, then roll them between your hands to loosen the shell. Start peeling from the larger end of the egg and work your way around.
Tips for Perfect Hard-Boiled Eggs:
- Use older eggs: Older eggs tend to peel more easily than fresh eggs.
- Add vinegar or salt to the water: Adding a tablespoon of vinegar or salt to the water can help prevent the eggshells from cracking during boiling.
- Don’t overcook the eggs: Overcooked eggs will have a green ring around the yolk and a rubbery texture.
- Cool the eggs quickly: Cooling the eggs quickly in cold water will help prevent the yolks from turning green and make them easier to peel.
By following these tips, you can consistently achieve perfectly hard-boiled eggs that are ideal for dyeing and decorating.
3. Crafting the Perfect Food Coloring Dye
Creating vibrant and consistent dye colors is crucial for achieving beautifully decorated Easter eggs. Here’s how to craft the perfect food coloring dye, ensuring your eggs come out with the desired hues:
- Prepare the dye baths: In separate cups or bowls, pour 1/2 cup of boiling water into each container.
- Add vinegar: Add 1 teaspoon of white vinegar to each cup of boiling water. The vinegar helps the eggshells absorb the food coloring, resulting in more vibrant and long-lasting colors.
- Add food coloring: Add 10-20 drops of liquid food coloring to each cup, depending on the desired shade and intensity of the color. Start with fewer drops and add more until you achieve the desired color. Remember that the color will appear lighter on the eggshell than it does in the dye bath.
- Mix the dye: Stir the dye bath thoroughly to ensure the food coloring is evenly distributed.
- Experiment with color mixing: Get creative and experiment with mixing different food coloring colors to create unique and custom shades. Here are a few basic color combinations:
| Color Combination | Resulting Color |
|---|---|
| Red + Yellow | Orange |
| Red + Blue | Purple |
| Yellow + Blue | Green |
| Red + Green | Brown |


- Test the dye: Before dyeing all of your eggs, test the dye on a single egg to ensure the color is to your liking. If the color is too light, add more food coloring. If it’s too dark, add more water.
Tips for Crafting the Perfect Dye:
- Use high-quality food coloring: High-quality food coloring will produce more vibrant and consistent colors.
- Use boiling water: Boiling water helps the food coloring dissolve properly and the dye to be evenly distributed.
- Add enough vinegar: Vinegar is essential for helping the eggshells absorb the food coloring.
- Start with fewer drops of food coloring: It’s easier to add more food coloring than to remove it.
- Mix the dye thoroughly: Ensure the food coloring is evenly distributed throughout the dye bath.
- Test the dye before dyeing all of your eggs: This will allow you to make any necessary adjustments to the color.
By following these tips, you can craft the perfect food coloring dye for your Easter eggs, ensuring they come out with the desired colors and vibrancy.
4. Dyeing Your Easter Eggs: A Step-by-Step Guide
Now that you have your hard-boiled eggs and dye prepared, it’s time to start dyeing your Easter eggs! Here’s a step-by-step guide to ensure a successful and enjoyable egg dyeing experience:
- Protect your work area: Cover your work surface with a tablecloth or newspapers to protect it from stains.
- Set up your dye stations: Arrange the cups of dye in a convenient location on your work surface.
- Submerge the eggs in the dye: Using a spoon, wire egg holder, or whisk, gently submerge an egg into one of the dye baths. Ensure the egg is completely covered by the dye.
- Let the eggs sit in the dye: Allow the egg to sit in the dye for 5-10 minutes, depending on the desired color intensity. The longer the egg sits in the dye, the more vibrant the color will be. You can periodically check the egg’s color by lifting it out of the dye bath.
- Remove the eggs from the dye: Once the egg has reached the desired color, carefully remove it from the dye bath using a spoon, wire egg holder, or whisk.
- Dry the eggs: Place the dyed egg on a paper towel or in an empty egg carton to dry. Allow the egg to dry completely before handling it.
- Repeat the process: Repeat steps 3-6 with the remaining eggs, using different colors of dye to create a variety of colorful Easter eggs.
Tips for Dyeing Easter Eggs:
- Use cool or room-temperature eggs: Eggs that are too warm can cause the dye to run or streak.
- Don’t overcrowd the dye baths: Overcrowding the dye baths can prevent the eggs from dyeing evenly.
- Gently stir the dye baths: Stirring the dye baths occasionally will help to keep the food coloring evenly distributed.
- Use multiple dye baths: Using multiple dye baths will allow you to create a wider range of colors.
- Experiment with different dyeing techniques: Try dipping the eggs in multiple colors, using rubber bands or stickers to create patterns, or using a cotton swab to apply dye to specific areas.
By following these steps and tips, you can dye your Easter eggs with ease and create a beautiful and colorful display.
5. Achieving Unique Color Effects: Tips and Tricks
Beyond simply dyeing eggs in solid colors, there are numerous techniques you can use to achieve unique and eye-catching effects. Here are some tips and tricks to elevate your egg dyeing game:
- Ombre Eggs: Create a gradient effect by gradually dipping the egg into the dye bath, increasing the submersion time with each dip. This will result in a beautiful ombre effect, with the color getting darker towards the bottom of the egg.
- Marbled Eggs: Add a teaspoon of oil to the dye bath and gently swirl it around. Dip the egg into the dye, and the oil will create a marbled effect on the shell.
- Tie-Dye Eggs: Wrap rubber bands around the egg before dyeing it. The rubber bands will prevent the dye from reaching certain areas, creating a tie-dye effect.
- Speckled Eggs: Dip a toothbrush into the dye and flick it onto the egg to create a speckled effect.
- Wax Resist: Use a white crayon or wax to draw designs on the egg before dyeing it. The wax will resist the dye, leaving the design in its original color.
- Layered Colors: Dip the egg into one color of dye and let it dry completely. Then, dip it into another color to create a layered effect.
- Natural Textures: Before dyeing, attach small leaves, flowers, or other natural items to the egg using glue or tape. After dyeing, remove the items to reveal the un-dyed shape underneath.
Additional Tips for Unique Effects:
- Use different types of eggs: Experiment with dyeing quail eggs, duck eggs, or even wooden eggs for a unique look.
- Add glitter or embellishments: After the eggs are dry, add glitter, sequins, or other embellishments to create a sparkly and festive look.
- Use stencils: Use stencils to create intricate designs on the eggs.
- Get creative with your tools: Use cotton swabs, paintbrushes, or even your fingers to apply the dye in different ways.
By experimenting with these techniques and tips, you can create truly unique and personalized Easter eggs that are sure to impress.
6. Exploring Natural Food Coloring Options
While food coloring is a convenient option for dyeing eggs, many people prefer to use natural alternatives. Natural food coloring options offer a more sustainable and eco-friendly way to color your eggs, while also adding unique and subtle hues. Here are some natural food coloring options you can explore:
- Beets: Beets produce a beautiful pink or red color. To make beet dye, boil chopped beets in water until the water turns a deep red color. Strain the liquid and use it as a dye bath.
- Red Cabbage: Red cabbage creates a blue or purple color. To make red cabbage dye, boil chopped red cabbage in water until the water turns a deep purple color. Strain the liquid and add a tablespoon of vinegar to set the color.
- Turmeric: Turmeric produces a vibrant yellow color. To make turmeric dye, boil turmeric powder in water until the water turns a deep yellow color. Strain the liquid and use it as a dye bath.
- Onion Skins: Onion skins create a brown or orange color. To make onion skin dye, boil onion skins in water until the water turns a deep brown color. Strain the liquid and use it as a dye bath.
- Spinach: Spinach creates a green color. To make spinach dye, boil spinach leaves in water until the water turns a deep green color. Strain the liquid and use it as a dye bath.
- Coffee: Coffee produces a light brown or tan color. To make coffee dye, brew a strong pot of coffee and let it cool. Use the coffee as a dye bath.
- Blueberries: Blueberries create a blue or purple color. To make blueberry dye, boil blueberries in water until the water turns a deep purple color. Strain the liquid and use it as a dye bath.
Tips for Using Natural Food Coloring:
- Use more concentrated dyes: Natural dyes tend to be less potent than food coloring, so you may need to use more concentrated dyes to achieve the desired color intensity.
- Soak the eggs longer: Natural dyes may require longer soaking times to achieve the desired color.
- Add vinegar: Adding vinegar to the dye bath can help to set the color and make it more vibrant.
- Experiment with different ingredients: Don’t be afraid to experiment with different fruits, vegetables, and spices to create your own unique natural dyes.
By exploring these natural food coloring options, you can create beautiful and eco-friendly Easter eggs that are both visually appealing and environmentally conscious.
7. Creative Egg Decorating Ideas Beyond Dyeing
While dyeing eggs is a classic Easter tradition, there are many other creative ways to decorate eggs that go beyond traditional dyeing techniques. Here are some fun and innovative egg decorating ideas to inspire you:
- Painting: Use acrylic paints, watercolors, or even edible food paints to create intricate designs on your eggs. You can paint flowers, animals, geometric patterns, or anything else that inspires you.
- Decoupage: Cut out images from magazines, newspapers, or decorative paper and glue them onto the eggs using Mod Podge or other decoupage glue.
- Glitter: Cover the eggs in glue and sprinkle them with glitter for a sparkly and festive look.
- Washi Tape: Use washi tape to create colorful and patterned designs on the eggs. Washi tape is easy to apply and remove, making it a great option for kids.
- Markers: Use permanent markers or paint markers to draw designs on the eggs.
- Embroidery: Use a needle and thread to embroider designs onto the eggs. This technique requires some skill and patience, but the results can be stunning.
- Beading: Glue beads, sequins, or other embellishments onto the eggs to create intricate and textured designs.
- Melted Crayon Art: Use a hot glue gun to melt crayon pieces onto the eggs, creating a colorful and textured effect.
- Paper Mache: Cover the eggs in paper mache to create a textured surface that can be painted or decorated.
Tips for Creative Egg Decorating:
- Use a variety of materials: Experiment with different materials and techniques to create unique and personalized eggs.
- Get inspired by nature: Look to nature for inspiration for your designs.
- Involve the whole family: Egg decorating is a great activity to do with the whole family.
- Don’t be afraid to experiment: Try new things and don’t be afraid to make mistakes.
- Have fun: The most important thing is to have fun and enjoy the process of creating beautiful and unique Easter eggs.
By exploring these creative egg decorating ideas, you can create a stunning and personalized Easter egg display that is sure to impress.
8. Food Safety Tips for Dyed Easter Eggs
While dyeing Easter eggs is a fun and festive activity, it’s important to prioritize food safety to prevent any potential health risks. Here are some essential food safety tips to keep in mind when dyeing Easter eggs:
- Use food-safe dyes: Always use food-safe dyes that are specifically designed for coloring eggs. Avoid using non-food-safe dyes, paints, or markers, as these can be harmful if ingested.
- Start with fresh eggs: Use fresh eggs that are free from cracks or blemishes. Cracked eggs can harbor bacteria, which can contaminate the dye and make the eggs unsafe to eat.
- Hard-boil the eggs properly: Hard-boil the eggs thoroughly to kill any bacteria that may be present. Follow the instructions in Section 2 to ensure the eggs are cooked to a safe internal temperature.
- Cool the eggs quickly: After hard-boiling the eggs, cool them quickly in cold water to prevent bacterial growth.
- Dye the eggs in a clean environment: Dye the eggs in a clean environment, free from dirt, dust, and other contaminants.
- Wash your hands: Wash your hands thoroughly with soap and water before and after handling the eggs and dyes.
- Don’t let the eggs sit at room temperature for too long: Dyed eggs should be refrigerated within two hours of dyeing.
- Discard cracked eggs: If an egg cracks during the dyeing process, discard it immediately to prevent bacterial contamination.
- Don’t eat eggs that have been sitting out for more than two hours: Eggs that have been sitting out at room temperature for more than two hours should be discarded.
- Store the eggs properly: Store the dyed eggs in the refrigerator in a clean container.
- Eat the eggs within one week: Dyed eggs should be eaten within one week of dyeing.
By following these food safety tips, you can enjoy the fun of dyeing Easter eggs without compromising your health or the health of your family.
9. Troubleshooting Common Egg Dyeing Problems
Even with careful planning and preparation, you may encounter some common problems when dyeing eggs. Here’s a troubleshooting guide to help you overcome these challenges:
- Uneven Color:
- Problem: The color is not evenly distributed on the eggshell.
- Solution: Ensure the egg is completely submerged in the dye bath and that the dye is stirred frequently. You can also try using a spoon or wire egg holder to gently rotate the egg in the dye.
- Pale Color:
- Problem: The color is too light or faded.
- Solution: Add more food coloring to the dye bath to increase the color intensity. You can also try leaving the egg in the dye bath for a longer period of time.
- Streaky Color:
- Problem: The color appears streaky or uneven.
- Solution: Ensure the egg is clean and dry before dyeing it. You can also try using a different type of dye or a different dyeing technique.
- Cracked Eggs:
- Problem: The eggshells crack during the dyeing process.
- Solution: Handle the eggs gently and avoid dropping them. You can also try adding a tablespoon of vinegar or salt to the water when hard-boiling the eggs to help prevent cracking.
- Dye Staining Hands:
- Problem: The dye stains your hands.
- Solution: Wear gloves while dyeing the eggs. You can also try washing your hands with soap and water immediately after handling the dye.
- Dye Not Adhering:
- Problem: The dye doesn’t stick to the eggshell.
- Solution: Ensure the eggshell is clean and free from grease or oil. You can also try adding more vinegar to the dye bath.
- Dye Bubbling:
- Problem: Bubbles form on the eggshell during dyeing.
- Solution: Gently wipe the bubbles away with a clean cloth or paper towel.
- Unwanted Marbling:
- Problem: Unintentional marbling occurs during dyeing.
- Solution: Make sure the dye is mixed well. Avoid agitating the egg too much in the dye bath.
By following these troubleshooting tips, you can overcome common egg dyeing problems and achieve beautifully decorated Easter eggs.
10. Delicious Recipes to Use Your Hard-Boiled Eggs
After you’ve finished dyeing your Easter eggs, you’ll likely have a surplus of hard-boiled eggs. Here are some delicious recipes to help you use up those eggs and enjoy their nutritional benefits:
- Deviled Eggs: A classic and crowd-pleasing appetizer made with hard-boiled egg yolks, mayonnaise, mustard, and seasonings.
- Egg Salad Sandwiches: A simple and satisfying lunch option made with chopped hard-boiled eggs, mayonnaise, celery, onion, and seasonings.
- Smoked Salmon Egg Salad: Elevate your egg salad with the smoky flavor of salmon.
- Kale & Bacon Salad with Honey-Horseradish Vinaigrette: Add protein and flavor to your salad with hard-boiled eggs.
- Avocado Egg Salad Toast: A healthy and delicious twist on traditional egg salad, using avocado instead of mayonnaise.
- BLT Chicken Salad: Combine the flavors of a BLT sandwich with chicken salad for a unique and flavorful meal.
- Copycat Chick-fil-A Chicken Salad: Recreate a popular fast-food favorite at home.
- DIY Ramen Soup: Add hard-boiled eggs to your homemade ramen soup for extra protein and flavor.
- Tuna Nicoise Salad: A classic French salad with tuna, tomatoes, beans, and hard-boiled eggs.
- Cobb Salad Sub: Transform a Cobb salad into a sandwich for a quick and easy meal.
- Judy’s Macaroni Salad: A vintage macaroni salad recipe with pickles and a tangy dressing.
- Scotch Eggs: Hard-boiled eggs coated in sausage and breadcrumbs, then fried or baked.
- Aunt Karen’s Shrimp Salad: A quick and easy shrimp salad that is perfect for unexpected company.
- Cauliflower Potato Salad: A lighter version of potato salad, using cauliflower instead of potatoes.
- Ham and Swiss Salad in a Jar: A portable and convenient salad that is perfect for lunchboxes.
- Curried Egg Salad: Add a curry kick to your egg salad for a flavorful twist.
- Veggie Nicoise Salad: A vegetarian version of the classic Nicoise salad.
- Campfire Cheese Hash Brown Packets: Add hard-boiled eggs to your campfire hash for a hearty and satisfying meal.
- Thai-Style Cobb Salad: A fusion salad with Thai-inspired flavors.
- Bacon ‘n’ Egg Sandwiches: A unique grilled sandwich with bacon, hard-boiled eggs, and green onions.
- Spinach Salad with Warm Bacon Dressing: A classic spinach salad with a warm bacon dressing and hard-boiled eggs.
- Classic Egg Salad: A simple and versatile egg salad that can be used in sandwiches, salads, or as a dip.
- Red Potato and Egg Salad: A flavorful potato salad with red potatoes, hard-boiled eggs, and a creamy dressing.
- Chef Salad: A classic salad with a variety of meats, cheeses, vegetables, and hard-boiled eggs.
- Make-Ahead Hearty Six-Layer Salad: A layered salad that can be made ahead of time and is perfect for potlucks.
- Barbecue Chicken Cobb Salad: A barbecue-inspired Cobb salad with grilled chicken and hard-boiled eggs.
- Dilly Potato & Egg Salad: A creamy potato salad with dill and hard-boiled eggs.
- Pesto Egg Salad Sandwiches: A flavorful twist on egg salad, with pesto and Parmesan cheese.
- Grandma’s Spinach Salad: A hearty spinach salad with mushrooms and a celery seed vinaigrette.
- Easy Macaroni Salad: A classic macaroni salad that is perfect for summer gatherings.
- Egg Salad with Cream Cheese: A tangy and creamy egg salad with cream cheese and Dijon mustard.
- Classic Cobb Salad: A classic salad with a variety of meats, cheeses, vegetables, and hard-boiled eggs.
With these delicious recipes, you can make the most of your hard-boiled eggs and enjoy their versatility and nutritional benefits.
11. Frequently Asked Questions (FAQs) About Egg Dyeing
Here are some frequently asked questions about egg dyeing, along with their answers, to help you navigate the process with ease:
1. Can you dye raw eggs?
Technically, you can dye raw eggs, but it’s risky. A raw egg is more likely to crack, which can ruin your whole batch of dye. It’s best to stick to hard-boiled eggs.
2. Can you dye eggs without vinegar?
If you don’t have vinegar on hand, you can use a vinegar replacement. Lemon juice is a great alternative, although the color may be less vibrant. If you’re looking for more of a pastel coloring, it’s perfect for the job.
3. What do you do if an egg cracks?
If an egg cracks during the dyeing or drying process, it’s usually not a big deal, as long as you’re using food-safe dyes. The ingredients in this dye are safe to eat and won’t affect the flavor of your hard-boiled eggs. However, it’s best to discard cracked eggs to prevent bacterial contamination.
4. Can you dye brown eggs?
Yes, you can dye brown eggs. However, the end result will be a bit more muted, as the brown shell will affect the color. Brown eggs will still take on color, but the shades will be more pastel or earthy.
5. Are there other ways to decorate eggs?
Absolutely! Decorating Easter eggs isn’t just limited to food dye. There are all types of Easter egg decorating ideas to choose from, including using natural dyes, temporary tattoos, wax crayons, and other craft supplies.
6. How long do dyed eggs last?
Dyed eggs should be stored in the refrigerator and eaten within one week of dyeing.
7. Can I use gel food coloring to dye eggs?
Yes, you can use gel food coloring to dye eggs. However, you’ll need to dissolve the gel food coloring in a small amount of hot water before adding it to the dye bath.
8. Can I reuse the dye?
It’s generally not recommended to reuse the dye, as it can become contaminated with bacteria. It’s best to make a fresh batch of dye for each dyeing session.
9. How do I make pastel colors?
To make pastel colors, use less food coloring in the dye bath. You can also add a few drops of white food coloring to lighten the color.
10. How do I make dark colors?
To make dark colors, use more food coloring in the dye bath. You can also leave the eggs in the dye bath for a longer period of time.
We hope these FAQs have answered your questions about egg dyeing. If you have any other questions, feel free to reach out to us at FOODS.EDU.VN.
Ready to take your culinary skills to the next level? At FOODS.EDU.VN, we offer a wealth of in-depth articles, detailed recipes, and expert advice to help you master any dish. Whether you’re curious about the science of sourdough or want to perfect your pastry techniques, our comprehensive resources are here to guide you. Don’t just follow recipes—understand them. Visit foods.edu.vn today and unlock a world of culinary knowledge. You can also reach us at 1946 Campus Dr, Hyde Park, NY 12538, United States or Whatsapp: +1 845-452-9600. Happy cooking!