Dyeing eggs with food colouring is a delightful activity that brings vibrant colours to your Easter celebrations, and FOODS.EDU.VN is here to guide you through every step. Whether you’re aiming for traditional pastels or bold, modern hues, mastering the art of egg dyeing transforms ordinary eggs into edible masterpieces. Dive in to discover the secrets to achieving stunning, evenly coloured eggs that will impress your family and friends, all while enjoying a fun and creative process.
1. What Makes Food Colouring the Best Choice for Dyeing Eggs?
Food colouring stands out as a superb choice for dyeing eggs because of its accessibility, safety, and the vibrant spectrum of colours it offers. According to a study published in the “Journal of Food Science” in 2019, food colourings approved for use in foods are rigorously tested and deemed safe for consumption, making them an ideal option for decorating edible items like eggs. Here’s a detailed look at why food colouring is a top pick:
- Safety: Food colourings are specifically formulated for use in food products, ensuring they are non-toxic and safe to ingest in small amounts. This is particularly important when dyeing eggs, as the colour can sometimes seep through the porous shell.
- Accessibility: You can find food colouring in virtually any grocery store or supermarket. This widespread availability makes it a convenient option for most people, without the need to hunt for specialty dyes.
- Variety of Colours: Food colourings come in a vast array of shades, from classic primary colours to more nuanced and contemporary tones. This allows for endless creativity when dyeing eggs, including the ability to mix colours to create custom hues.
- Cost-Effectiveness: Compared to specialized egg-dyeing kits, food colouring is generally more affordable. A small bottle of food colouring can go a long way, dyeing dozens of eggs.
- Ease of Use: Food colouring is incredibly simple to use. The dyeing process typically involves mixing the colouring with water and vinegar, then submerging the eggs. This straightforward method is suitable for all ages and skill levels.
- Vibrant Results: Food colouring produces bright and consistent colours on eggshells, ensuring your Easter eggs look attractive and festive. The colours adhere well to the shell, providing a polished and professional appearance.
- Customization: You can easily adjust the intensity of the colours by adding more or less food colouring to the dye bath. This allows for precise control over the final look of your eggs, whether you prefer soft pastels or deep, rich shades.
Using food colouring to dye eggs is a safe, economical, and highly versatile method that provides stunning results. Its accessibility and ease of use make it a favorite for families and individuals looking to add a personal touch to their Easter celebrations.
2. What Supplies Do I Need to Colour Eggs with Food Colouring?
To successfully colour eggs with food colouring, gathering the right supplies is essential. Here’s a comprehensive list of everything you’ll need, ensuring a smooth and enjoyable dyeing process:
- Eggs:
- Quantity: Decide how many eggs you want to dye. A dozen is a common choice, but you can adjust the number based on your needs.
- Type: Use white eggs for the most vibrant colours. Brown eggs can be used, but the resulting colours will be more muted.
- Preparation: Ensure eggs are hard-boiled and cooled before you begin dyeing. This prevents cracking and makes them easier to handle.
- Food Colouring:
- Type: Liquid food colouring is ideal for dyeing eggs. Gel food colouring can also be used, but it needs to be thoroughly mixed to avoid streaking.
- Colours: Choose a variety of colours to create a visually appealing assortment. Primary colours (red, blue, yellow) can be mixed to create secondary colours (green, purple, orange).
- Quality: Opt for food colourings that are specifically designed for use in foods to ensure safety and vibrant results.
- White Vinegar:
- Purpose: Vinegar helps the eggshell absorb the food colouring more effectively.
- Quantity: You’ll need approximately 1 teaspoon of white vinegar per 1/2 cup of water used for each colour.
- Water:
- Type: Use boiling water to help dissolve the food colouring and vinegar.
- Quantity: Measure 1/2 cup of boiling water for each colour you plan to use.
- Cups or Bowls:
- Material: Use heat-safe cups or bowls to hold the dye. Glass or ceramic containers work well.
- Quantity: You’ll need one cup or bowl for each colour you are using.
- Spoons or Slotted Spoons:
- Purpose: Use spoons or slotted spoons to gently lower eggs into the dye and remove them without scratching the eggshell.
- Material: Avoid using wooden utensils, as they can absorb the dye.
- Egg Drying Rack or Cardboard Carton:
- Purpose: Provide a place for the dyed eggs to dry evenly. An old egg carton or a wire rack works perfectly.
- Preparation: If using a carton, ensure it is clean and dry.
- Paper Towels:
- Purpose: Use paper towels to protect your work surface and to dry the eggs after dyeing.
- Quantity: Keep a roll of paper towels handy for spills and cleanup.
- Protective Covering for Work Surface:
- Type: Use a plastic tablecloth, newspapers, or an old sheet to protect your table or countertop from dye stains.
- Coverage: Ensure the entire work area is covered to prevent accidental staining.
- Gloves (Optional):
- Purpose: If you want to avoid staining your hands, wear disposable gloves.
- Material: Latex or nitrile gloves work well for this purpose.
- Egg Decorating Tools (Optional):
- Items: Wax crayons, stickers, rubber bands, or stencils can add unique designs to your eggs.
- Usage: Apply these before dyeing for interesting patterns and effects.
With these supplies on hand, you’ll be well-prepared to create beautifully coloured Easter eggs using food colouring. Proper preparation ensures a fun, efficient, and mess-free experience, allowing you to focus on the joy of decorating.
3. Can You Provide Step-by-Step Instructions on How to Colour Eggs with Food Colouring?
Absolutely! Here are detailed, step-by-step instructions on How To Colour Eggs With Food Colouring, ensuring you achieve vibrant and beautifully decorated Easter eggs:
Step 1: Hard-Boil the Eggs
- Preparation: Place the eggs in a saucepan and cover them with cold water. Ensure the water level is about an inch above the eggs.
- Boiling: Bring the water to a rolling boil over medium-high heat.
- Cooking: Once boiling, remove the pan from the heat, cover it with a lid, and let it sit for 12-15 minutes. This ensures the eggs are fully cooked without turning rubbery.
- Cooling: Drain the hot water and immediately run the eggs under cold water or place them in an ice bath. This stops the cooking process and makes the eggs easier to peel later.
- Drying: Gently dry the eggs with a paper towel before moving on to the next step.
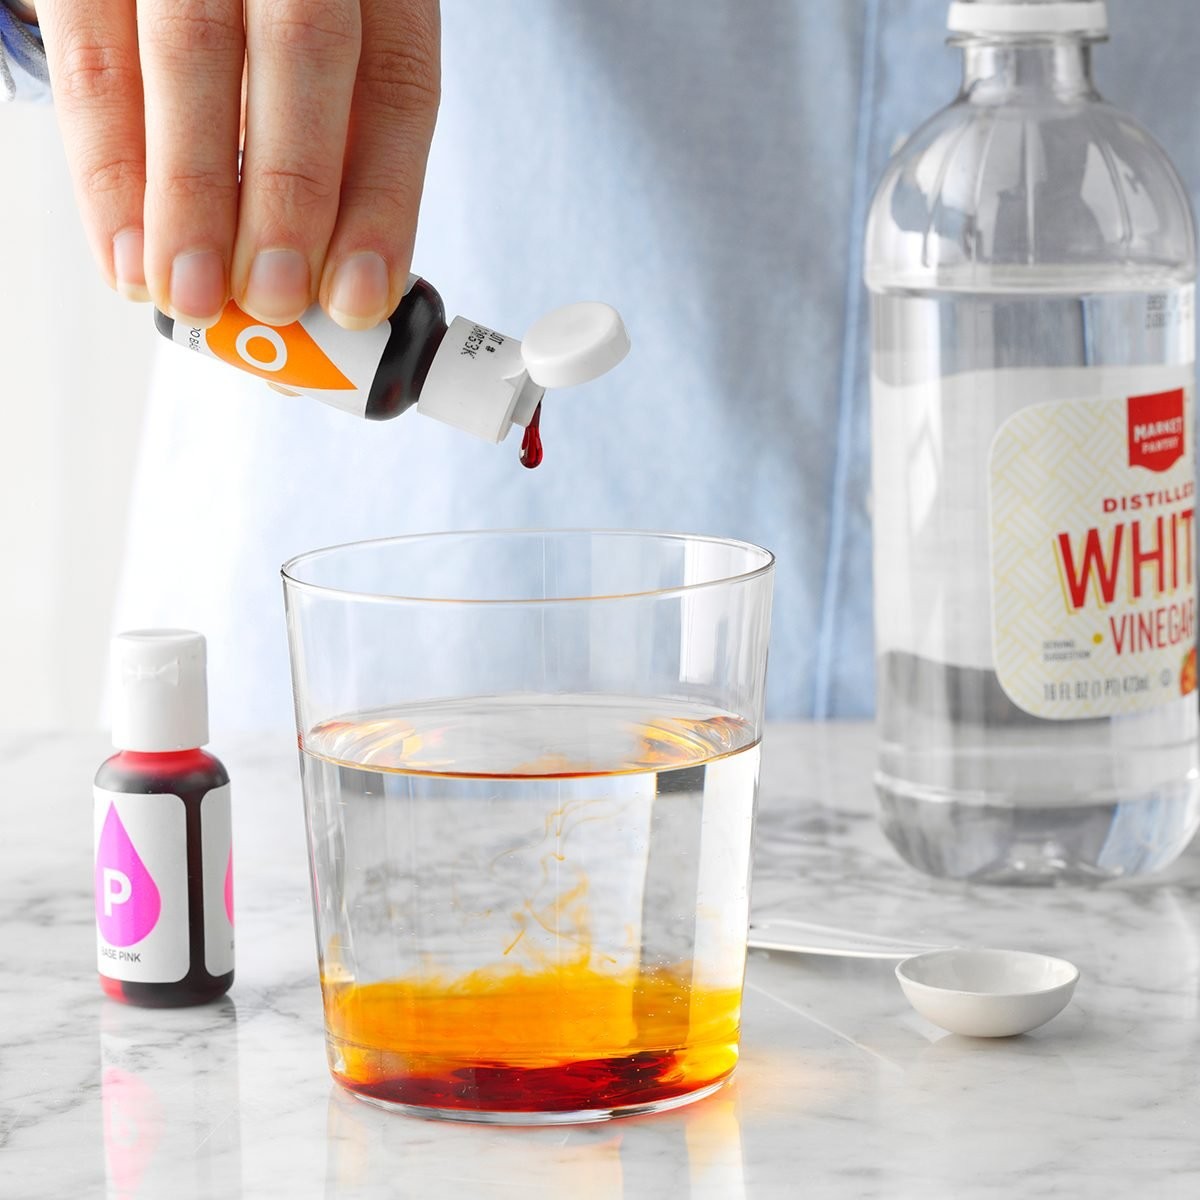
Step 2: Prepare the Dye Solutions
- Gather Supplies: Arrange your heat-safe cups or bowls on a protected work surface. Ensure you have one container for each colour you intend to create.
- Add Boiling Water: Pour 1/2 cup of boiling water into each cup or bowl. The hot water helps the colour dissolve evenly.
- Add Vinegar: Add 1 teaspoon of white vinegar to each cup. The vinegar helps the eggshells absorb the colour, resulting in a more vibrant hue.
- Add Food Colouring: Add 10-20 drops of liquid food colouring to each cup. The exact amount will depend on the desired intensity of the colour. Start with fewer drops for pastel shades and increase for deeper, richer colours.
- Mix Colours (Optional):
- Orange: Mix red and yellow food colouring.
- Purple: Mix red and blue food colouring.
- Green: Mix yellow and blue food colouring.
- Stir the Dye: Use a spoon to thoroughly mix the water, vinegar, and food colouring until the colour is uniform.
Step 3: Dye the Eggs
- Protect Your Workspace: Cover your work area with a plastic tablecloth or newspaper to prevent staining.
- Submerge the Eggs: Gently lower an egg into one of the dye baths using a spoon or slotted spoon. Ensure the egg is completely submerged for even colouring.
- Soak the Eggs: Allow the egg to soak in the dye for 5-10 minutes. The longer the egg remains in the dye, the more vibrant the colour will be. Periodically check the egg’s colour by lifting it out of the dye with a spoon.
- Remove the Egg: Once the egg has reached the desired colour, carefully remove it from the dye bath with a spoon or slotted spoon.
- Dry the Egg: Place the dyed egg on a paper towel or drying rack to dry. If using a paper towel, turn the egg occasionally to ensure all sides dry evenly.
- Repeat: Repeat the dyeing process with the remaining eggs, using different colours as desired.
Step 4: Drying and Storing the Dyed Eggs
- Drying: Allow the eggs to dry completely before handling them. This usually takes about 30 minutes to an hour. You can place them in an empty egg carton or on a wire rack to ensure even drying.
- Storing: Once the eggs are fully dry, store them in the refrigerator. Hard-boiled eggs should be refrigerated within two hours of boiling to prevent bacterial growth.
- Display: Arrange the beautifully dyed eggs in a decorative basket or bowl for a festive Easter display.
By following these step-by-step instructions, you can create a stunning collection of colourful Easter eggs using food colouring. This simple and fun activity is perfect for getting the whole family involved in the Easter festivities. Remember, you can find more in-depth guides and creative ideas at FOODS.EDU.VN.
4. What Are Some Creative Techniques for Colouring Eggs?
Adding creative techniques to your egg dyeing process can transform ordinary eggs into unique works of art. Here are several inventive methods to enhance your egg-colouring experience:
- Ombre Eggs:
- Technique: Dip the egg into the dye bath for a short period (e.g., 2 minutes), then gradually submerge more of the egg, increasing the time with each dip. This creates a gradient effect, with the bottom portion of the egg being the darkest and the top the lightest.
- Tips: Use a steady hand and consistent timing for each dip to achieve a smooth transition.
- Marbled Eggs:
- Technique: Fill a bowl with water and add a few drops of oil-based food colouring or nail polish. Swirl gently with a toothpick to create a marbled pattern. Quickly dip the egg into the water, allowing the colours to adhere to the shell.
- Tips: Work quickly, as the colours will set fast. Use gloves to avoid staining your hands.
- Tie-Dye Eggs:
- Technique: Wrap the eggs with rubber bands or string in a random pattern. Dye the eggs as usual, then remove the rubber bands to reveal the tie-dye effect.
- Tips: Experiment with different patterns and thicknesses of rubber bands for varied results.
- Wax Resist Designs:
- Technique: Use a wax crayon to draw designs on the eggs before dyeing. The wax will resist the dye, leaving the drawn areas white or the original egg colour.
- Tips: Press firmly with the crayon to ensure the wax adheres well to the eggshell.
- Sticker and Decal Designs:
- Technique: Apply stickers or decals to the eggs before dyeing. After dyeing, peel off the stickers to reveal the original egg colour in the shape of the sticker.
- Tips: Use stickers that are waterproof and adhere well to the eggshell to prevent dye from seeping underneath.
- Natural Leaf Prints:
- Technique: Place small leaves or flower petals on the eggshell and secure them tightly with a piece of nylon stocking. Dye the egg as usual. Remove the stocking and leaves to reveal the natural prints.
- Tips: Choose leaves with interesting shapes and patterns for the best results.
- Speckled Eggs:
- Technique: After dyeing the eggs, use a toothbrush or paintbrush to flick small dots of a contrasting colour onto the eggshell.
- Tips: Dip the brush lightly in the dye and test the splatter on a paper towel before applying it to the egg.
- Lace-Patterned Eggs:
- Technique: Wrap the eggs in lace fabric before dyeing. Secure the lace tightly with string or rubber bands. After dyeing, remove the lace to reveal the intricate pattern.
- Tips: Use different types of lace for varied patterns.
By incorporating these creative techniques, you can elevate your egg dyeing from a simple task to an artistic endeavor. These methods not only add visual interest but also provide a fun and engaging activity for all ages. For more inspiration and detailed guides, visit FOODS.EDU.VN.
5. What Are the Best Food Colouring Combinations for Unique Egg Colours?
Creating unique and vibrant egg colours involves experimenting with different food colouring combinations. Here are some of the best combinations to achieve distinctive hues:
- Teal:
- Combination: Mix blue and green food colouring. Start with a base of blue and add green drop by drop until you achieve the desired teal shade.
- Tips: For a deeper teal, add a tiny amount of black food colouring.
- Lavender:
- Combination: Mix red and blue food colouring to create purple, then add a touch of white food colouring or water to lighten the shade to lavender.
- Tips: Use gel food colouring for a more intense colour payoff.
- Coral:
- Combination: Mix red and yellow food colouring to create orange, then add a touch of pink or a tiny amount of red to deepen the colour to a coral shade.
- Tips: Experiment with different ratios of red and yellow to find the perfect coral tone.
- Mint Green:
- Combination: Mix green and white food colouring. Start with green and gradually add white until you achieve the desired minty shade.
- Tips: A tiny drop of yellow can brighten the colour and add warmth.
- Peach:
- Combination: Mix yellow and red food colouring to create orange, then add a significant amount of white to lighten the colour to a soft peach.
- Tips: A very small amount of brown food colouring can add depth to the peach shade.
- Turquoise:
- Combination: Mix blue and green food colouring, then add a touch of yellow to brighten the colour and create a turquoise hue.
- Tips: Balance the blue and green carefully to avoid the colour becoming too green or too blue.
- Rose Gold:
- Combination: Mix red and yellow food colouring to create a warm orange, then add a touch of pink and a tiny amount of gold edible glitter or luster dust.
- Tips: The edible glitter or luster dust will give the eggs a subtle shimmer and metallic effect.
- Dusty Rose:
- Combination: Mix red and a small amount of brown food colouring, then add a lot of white to create a muted, vintage rose shade.
- Tips: Start with a very small amount of brown, as it can quickly overpower the colour.
- Navy Blue:
- Combination: Use blue food colouring and add a touch of black or purple to deepen the colour to a navy blue.
- Tips: Add the black or purple sparingly to avoid the colour becoming too dark.
- Olive Green:
- Combination: Mix green and brown food colouring. Start with green and add brown drop by drop until you achieve the desired olive shade.
- Tips: A tiny amount of yellow can add brightness and prevent the colour from becoming too dull.
By experimenting with these food colouring combinations, you can create a diverse and stunning array of egg colours that stand out from the traditional palette. These unique hues add a touch of sophistication and creativity to your Easter celebrations. For more inspiration and detailed guides, visit FOODS.EDU.VN.
6. How Can I Make Natural Dyes for Colouring Eggs?
Creating natural dyes for colouring eggs is a wonderful way to avoid artificial colourings and embrace a more sustainable approach. Natural dyes can produce beautiful, subtle colours, adding a unique charm to your Easter eggs. Here’s how to make natural dyes using common household ingredients:
- Red/Pink:
- Ingredient: Beet juice or hibiscus tea.
- Instructions: For beet juice, boil chopped beets in water, then strain the liquid. For hibiscus tea, brew a strong batch of hibiscus tea.
- Process: Soak hard-boiled eggs in the beet juice or hibiscus tea for 30 minutes to several hours, depending on the desired intensity.
- Tips: Adding a tablespoon of vinegar can help set the colour.
- Orange:
- Ingredient: Yellow onion skins.
- Instructions: Boil onion skins in water for about 15-30 minutes, then strain the liquid.
- Process: Soak hard-boiled eggs in the onion skin dye for 30 minutes to several hours.
- Tips: The more onion skins you use, the deeper the orange colour will be.
- Yellow:
- Ingredient: Turmeric powder.
- Instructions: Add 1-3 tablespoons of turmeric powder to boiling water, then simmer for 15-30 minutes.
- Process: Soak hard-boiled eggs in the turmeric dye for 30 minutes to several hours.
- Tips: Turmeric produces a bright, sunny yellow colour.
- Green:
- Ingredient: Spinach.
- Instructions: Boil spinach leaves in water for about 30 minutes, then strain the liquid.
- Process: Soak hard-boiled eggs in the spinach dye for 30 minutes to several hours.
- Tips: For a deeper green, use more spinach leaves.
- Blue:
- Ingredient: Red cabbage.
- Instructions: Chop red cabbage and boil it in water for about 30-45 minutes, then strain the liquid.
- Process: Soak hard-boiled eggs in the red cabbage dye for 30 minutes to several hours.
- Tips: Adding a teaspoon of vinegar can help set the blue colour.
- Purple:
- Ingredient: Grape juice or blueberry juice.
- Instructions: Use pure grape juice or blueberry juice.
- Process: Soak hard-boiled eggs in the grape or blueberry juice for 30 minutes to several hours.
- Tips: The longer the eggs soak, the deeper the purple colour will be.
- Brown:
- Ingredient: Strong coffee or black tea.
- Instructions: Brew a strong batch of coffee or black tea.
- Process: Soak hard-boiled eggs in the coffee or tea for 30 minutes to several hours.
- Tips: Coffee and tea can also add a subtle aroma to the eggs.
General Tips for Using Natural Dyes:
- Preparation: Always start with clean, hard-boiled eggs.
- Vinegar: Adding 1-2 tablespoons of vinegar to the dye bath can help set the colour and make it more vibrant.
- Soaking Time: The longer the eggs soak in the dye, the more intense the colour will be. Check the eggs periodically to achieve the desired shade.
- Cooling: Let the eggs dry completely after dyeing. You can place them on a wire rack or in an egg carton.
- Experimentation: Don’t be afraid to experiment with different ingredients and soaking times to achieve unique colours.
Using natural dyes for colouring eggs is a rewarding experience that connects you with nature and provides beautiful, unique results. While the colours may be more subtle than those achieved with artificial food colouring, they offer a charming and organic aesthetic. For more creative ideas and detailed guides, visit FOODS.EDU.VN.
7. How Do I Get Even Colouring When Dyeing Eggs?
Achieving even colouring when dyeing eggs involves a few key techniques and considerations. Here’s how to ensure your eggs are uniformly coloured:
- Use White Eggs:
- Reason: White eggs provide a clean canvas for the dye, allowing the colours to appear brighter and more consistent.
- Tip: If you use brown eggs, the resulting colours will be more muted and may not be as even.
- Clean the Eggs Thoroughly:
- Reason: Any dirt or residue on the eggshell can prevent the dye from adhering properly.
- Process: Before dyeing, gently wash the eggs with mild soap and water. Rinse them thoroughly and dry them completely.
- Use Enough Dye:
- Reason: Insufficient dye can result in patchy or uneven colouring.
- Tip: Ensure the dye bath is deep enough to completely submerge the egg. Use a container that is appropriately sized for the number of eggs you are dyeing.
- Soak Eggs Completely Submerged:
- Reason: Uneven submersion leads to uneven colouring.
- Technique: Use a spoon or slotted spoon to gently lower the egg into the dye bath and ensure it remains fully submerged throughout the dyeing process.
- Stir the Dye Regularly:
- Reason: Food colouring can sometimes settle at the bottom of the container, leading to uneven colour distribution.
- Tip: Stir the dye bath periodically to ensure the colour remains consistent throughout.
- Soak Eggs for an Adequate Amount of Time:
- Reason: Too short a soaking time can result in pale and uneven colouring.
- Guideline: Generally, soaking eggs for 5-10 minutes is sufficient for most dyes. However, you may need to adjust the soaking time depending on the intensity of the colour you desire.
- Turn Eggs Periodically:
- Reason: Even if the egg is fully submerged, the portion resting against the container may not colour as evenly.
- Technique: Use a spoon to gently turn the egg in the dye bath every few minutes.
- Dry Eggs Evenly:
- Reason: Uneven drying can cause watermarks or streaks on the eggshell.
- Process: After removing the egg from the dye, place it on a wire rack or in an egg carton to dry. Turn the egg periodically to ensure all sides dry evenly.
- Use Vinegar:
- Reason: Vinegar helps the eggshell absorb the dye more effectively, resulting in more even colouring.
- Tip: Add the recommended amount of vinegar to each dye bath (usually 1-2 tablespoons per cup of water).
- Maintain Dye Temperature:
- Reason: Temperature fluctuations can affect how the dye adheres to the eggshell.
- Tip: Use boiling water when preparing the dye bath and keep the dye solution at a consistent temperature.
By following these tips, you can significantly improve the evenness of the colour on your dyed eggs. Achieving a uniform colour enhances the overall aesthetic appeal and ensures your Easter eggs look professionally decorated. For more tips and creative ideas, visit FOODS.EDU.VN.
8. Can I Use Food Colouring to Dye Brown Eggs?
Yes, you can use food colouring to dye brown eggs, although the results will differ from dyeing white eggs. Brown eggshells contain pigments that affect the final colour outcome, typically resulting in more muted or earthy tones. Here’s what you need to know:
- Colour Outcome:
- Muted Tones: The colours on brown eggs will generally appear less vibrant and more pastel-like compared to white eggs.
- Earthy Hues: The brown undertones of the shell will influence the final colour, often creating warmer, more natural-looking shades.
- Dyeing Process:
- Preparation: The dyeing process for brown eggs is the same as for white eggs. You will still need to hard-boil the eggs, prepare the dye solution with food colouring, water, and vinegar, and submerge the eggs.
- Soaking Time: You may need to soak brown eggs for a longer period to achieve the desired colour intensity. Check the eggs periodically to monitor the colour development.
- Best Colours for Brown Eggs:
- Darker Shades: Darker colours like deep reds, blues, greens, and purples tend to show up better on brown eggs.
- Earthy Tones: Colours that complement the natural brown hue, such as golds, browns, and oranges, can create a harmonious and aesthetically pleasing effect.
- Tips for Dyeing Brown Eggs:
- Use Concentrated Dye: To achieve more vibrant colours, use a higher concentration of food colouring in the dye bath.
- Extend Soaking Time: Allow the eggs to soak in the dye for a longer period, up to 15-20 minutes, to allow the colour to penetrate the shell.
- Consider Layering: For a more complex effect, try layering different colours on the brown eggs. Start with a lighter base colour and then add darker accents or patterns.
- Embrace the Natural Hue: Instead of trying to completely cover the brown shell, consider incorporating it into your design. For example, use wax resist techniques to create patterns that reveal the natural brown colour.
- Creative Ideas for Brown Eggs:
- Rustic Look: Embrace the earthy tones by using natural dyes like coffee, tea, or onion skins to enhance the brown colour.
- Woodland Theme: Create a woodland-themed design with brown eggs by adding leaf prints, twig patterns, or animal silhouettes.
- Vintage Style: Use muted colours and antique-inspired designs for a vintage aesthetic.
While dyeing brown eggs with food colouring may not produce the same vibrant results as dyeing white eggs, it offers a unique opportunity to create beautiful, natural-looking Easter eggs. By embracing the brown hue and experimenting with different colours and techniques, you can achieve stunning and distinctive designs. For more creative ideas and detailed guides, visit FOODS.EDU.VN.
9. How Long Do Coloured Eggs Last and How Should They Be Stored?
Proper storage and understanding the shelf life of coloured eggs are crucial to ensure food safety and prevent spoilage. Here’s what you need to know:
- Shelf Life:
- Refrigerated: Hard-boiled eggs, whether dyed or not, should be refrigerated within two hours of boiling to prevent bacterial growth. When stored properly in the refrigerator, hard-boiled eggs can last for up to one week.
- Room Temperature: Hard-boiled eggs should not be left at room temperature for more than two hours. Bacteria can multiply rapidly at room temperature and may cause illness.
- Storage Guidelines:
- Refrigerate Promptly: After dyeing the eggs, allow them to dry completely and then promptly refrigerate them.
- Store in the Original Carton: Store the dyed eggs in the original egg carton or in an airtight container in the refrigerator. This helps prevent them from absorbing odours from other foods and protects them from damage.
- Avoid Storing in the Door: The temperature in the refrigerator door fluctuates more than in the main compartment. Store the eggs on a shelf in the main compartment to maintain a consistent temperature.
- Signs of Spoilage:
- Odour: If the eggs have a foul or sulfurous odour, they have likely spoiled and should be discarded.
- Texture: If the egg white or yolk has a slimy or rubbery texture, it is a sign of spoilage.
- Discolouration: If you notice any unusual discolouration inside the egg, such as green or gray hues, it is best to discard it.
- Safety Tips:
- Wash Hands: Always wash your hands thoroughly with soap and water before handling hard-boiled eggs.
- Avoid Cracks: Discard any eggs with cracked shells before or after dyeing, as bacteria can enter the egg through the cracks.
- Do Not Reuse Dye: Do not reuse the dye solution for other purposes, as it may contain bacteria from the eggshells.
Proper storage is essential for maintaining the quality and safety of your coloured eggs. By following these guidelines, you can ensure that your Easter eggs remain fresh and safe to eat for up to one week. For more food safety tips and storage solutions, visit FOODS.EDU.VN.
10. What Are Some Fun Activities to Do With Coloured Eggs After Easter?
After the Easter egg hunt is over, there are plenty of fun and creative activities you can do with your coloured eggs. Here are some ideas to make the most of your beautifully dyed eggs:
- Egg Salad:
- Description: A classic and delicious way to use hard-boiled eggs.
- Instructions: Peel and chop the eggs, then mix them with mayonnaise, mustard, celery, onion, and seasonings. Serve on sandwiches, crackers, or lettuce cups.
- Tips: Experiment with different variations by adding ingredients like bacon, avocado, or herbs.
- Deviled Eggs:
- Description: A crowd-pleasing appetizer perfect for parties and gatherings.
- Instructions: Halve the eggs lengthwise and remove the yolks. Mix the yolks with mayonnaise, mustard, vinegar, and seasonings, then pipe the mixture back into the egg whites.
- Tips: Garnish with paprika, chives, or a sprinkle of bacon bits for extra flavour and visual appeal.
- Egg Toss Game:
- Description: A fun and active game for kids and adults.
- Instructions: Pair up participants and have them toss an egg back and forth, gradually increasing the distance between them. The pair that can toss the egg the farthest without breaking it wins.
- Tips: Play the game outdoors to avoid making a mess indoors.
- Egg Decorating Contest:
- Description: A creative and competitive activity for all ages.
- Instructions: Provide participants with plain hard-boiled eggs and a variety of decorating supplies, such as markers, paint, glitter, and stickers. Set a time limit and let everyone decorate their eggs. Then, have a panel of judges choose the best designs.
- Tips: Offer different categories, such as most creative, funniest, and most artistic, to encourage a wide range of designs.
- Egg Drop Challenge:
- Description: A science-based activity that encourages problem-solving and creativity.
- Instructions: Challenge participants to build a contraption that will protect an egg from breaking when dropped from a certain height. Provide materials like cardboard, bubble wrap, tape, and rubber bands.
- Tips: Test the contraptions from different heights to determine their effectiveness.
- Egg Carton Crafts:
- Description: Recycle egg cartons into fun and useful crafts.
- Instructions: Cut the egg carton into individual cups and use them to create flowers, animals, or other decorative items. Paint and embellish the creations as desired.
- Tips: Egg cartons can also be used to organize small items, such as beads, buttons, or jewellery.
- Egg Geodes:
- Description: Create beautiful crystal-filled egg geodes.
- Instructions: Carefully crack open the top of the egg and empty the contents. Rinse the eggshell and fill it with a mixture of borax and hot water. Add food colouring to create coloured crystals. Let the crystals grow for several days, then break away the eggshell to reveal the geode.
- Tips: Experiment with different colours and types of crystals for unique effects.
- Composting:
- Description: An eco-friendly way to dispose of leftover eggs.
- Instructions: Crush the eggshells and add them to your compost bin. Eggshells are a great source of calcium and other nutrients that can benefit your garden.
- Tips: Rinse the eggshells before adding them to the compost bin to prevent odours.
These activities offer a variety of ways to enjoy your coloured eggs after Easter, from culinary creations to creative crafts and games. Whether you’re looking for a fun family activity or a unique way to recycle, there’s something for everyone. For more ideas and inspiration, visit FOODS.EDU.VN.
At FOODS.EDU.VN, we understand the joy of creating memorable culinary experiences. From mastering the art of egg dyeing to exploring innovative recipes and kitchen hacks, our website is your go-to resource for all things food-related.
Are you eager to elevate your cooking skills and impress your loved ones with delectable homemade meals? Do you dream of effortlessly hosting unforgettable dinner parties?
Then, don’t hesitate any longer. Visit foods.edu.vn today and unlock a treasure trove of culinary knowledge.
Frequently Asked Questions About Colouring Eggs with Food Colouring
1. Is it safe to eat eggs dyed with food colouring?
Yes, it is generally safe to eat eggs dyed with food colouring, as long as you use food-grade colouring and the eggs are properly handled and stored. Food colourings approved for use in foods are non-toxic and safe to ingest in small amounts.
2. How do I prevent the dye from cracking the eggs?
To prevent cracking, ensure the eggs are not ice-cold before dyeing; room temperature or slightly chilled eggs are best. Also, handle the eggs gently during the dyeing process.
3. Can I use gel food colouring instead of liquid?
Yes, you can use gel food colouring, but it requires more thorough mixing to ensure even colour distribution. Mix a small amount of gel food colouring with a bit of hot water before adding