Drawing cute food has never been more accessible, and this guide from FOODS.EDU.VN is your key to unlocking delicious doodles. Whether you’re aiming to sketch adorable food characters or simply want to add a whimsical touch to your culinary creations, learning How To Draw A Cute Food can be both fun and rewarding. This article delves into the world of drawing cute food, offering a step-by-step approach that caters to artists of all skill levels. Explore techniques, ideas, and inspiration to transform everyday edibles into charming works of art, and discover the joy of bringing your favorite treats to life on paper. Want to expand your artistic skills? Then visit FOODS.EDU.VN for more drawing tutorials, culinary inspiration, and artistic tips to elevate your creations!
1. What Makes Food Cute?
The undeniable charm of kawaii food art stems from a combination of artistic choices that make even the simplest dishes irresistibly adorable. The essence lies in capturing the character of food by employing specific techniques such as anthropomorphism, color selection, and simplification of shapes. Understanding these elements is key to creating drawings that evoke feelings of warmth, joy, and playfulness.
1.1. Anthropomorphism: Giving Food Character
Anthropomorphism, the attribution of human traits, emotions, and intentions to non-human entities, is a cornerstone of cute food illustration. By endowing food items with expressive faces, tiny limbs, or engaging in human-like activities, artists transform ordinary edibles into endearing characters. Consider the following methods for incorporating anthropomorphism into your art:
-
Facial Expressions: Add large, innocent eyes, rosy cheeks, and cheerful smiles to your food drawings to instantly inject personality. Experiment with different emotions, such as surprise, happiness, or shyness, to convey a range of moods.
-
Tiny Limbs: Attach small arms and legs to your food characters, enabling them to perform actions like waving, holding objects, or dancing. These limbs not only add a whimsical touch but also enhance the character’s relatability.
-
Accessories: Accessorize your food with hats, bows, glasses, or other props that enhance their personality and make them more appealing. A tiny chef’s hat on a cupcake or a pair of spectacles on a stack of pancakes can instantly elevate their cuteness.
1.2. Color Palette: Evoking Emotions
The choice of colors plays a significant role in conveying the cuteness of food illustrations. Soft, pastel hues, such as baby pink, sky blue, and mint green, are often associated with sweetness and innocence, making them ideal for creating adorable food art. Additionally, bright, vibrant colors can add energy and excitement to your drawings, capturing the playful spirit of cute food. Consider the following guidelines for selecting a color palette:
-
Pastel Hues: Use pastel colors as a foundation for your drawings, creating a soft and dreamy atmosphere. Experiment with different combinations of pastel shades to evoke a sense of warmth and tenderness.
-
Bright Accents: Incorporate pops of bright color to highlight key features and add visual interest. Use vibrant hues for details like sprinkles, frosting, or fruit toppings to make your food drawings more appealing.
-
Harmonious Combinations: Choose colors that complement each other, creating a balanced and visually pleasing composition. Refer to color theory principles to understand how different hues interact and create harmonious combinations.
1.3. Simplifying Shapes: The Key To Cuteness
Simplifying shapes is essential for achieving the signature look of cute food illustrations. By reducing complex forms to their most basic components, artists create drawings that are easy to recognize, visually appealing, and undeniably adorable. Consider the following techniques for simplifying shapes in your food art:
-
Rounded Edges: Replace sharp corners with rounded edges to create a softer and more approachable appearance. Rounded shapes are inherently more gentle and inviting, making them perfect for cute food illustrations.
-
Exaggerated Proportions: Exaggerate the size of certain features, such as eyes or heads, to enhance the character’s cuteness. Large eyes, in particular, are a hallmark of kawaii art, instantly adding a touch of innocence and charm.
-
Minimal Details: Focus on essential details while omitting unnecessary elements that may clutter the composition. Simplify textures, patterns, and intricate designs to create a clean and uncluttered look that emphasizes the food’s inherent cuteness.
2. Essential Supplies for Drawing Cute Food
To begin your journey into drawing adorable food, gather a collection of essential supplies that cater to your artistic preferences and skill level. Here’s a comprehensive list to get you started:
2.1. Pencils: The Foundation of Your Art
Pencils serve as the foundation of your drawings, allowing you to create preliminary sketches, refine outlines, and add subtle shading. Consider the following types of pencils for your cute food illustrations:
-
Graphite Pencils: Opt for a range of graphite pencils with varying hardness levels (e.g., HB, 2B, 4B) to achieve different line weights and shading effects. Softer pencils (e.g., 4B) are ideal for creating darker, bolder lines, while harder pencils (e.g., HB) are suitable for lighter, more delicate strokes.
-
Mechanical Pencils: Mechanical pencils offer consistent line widths and eliminate the need for sharpening, making them ideal for detailed work and precise drawings. Choose a mechanical pencil with a fine lead size (e.g., 0.5mm or 0.7mm) for intricate details.
2.2. Erasers: Correcting Mistakes with Ease
Erasers are indispensable tools for correcting mistakes, refining outlines, and creating highlights in your drawings. Consider the following types of erasers for your cute food illustrations:
-
Kneaded Erasers: Kneaded erasers are soft, pliable erasers that can be molded into various shapes to erase specific areas with precision. They are particularly useful for lifting graphite without damaging the paper surface.
-
Pencil Erasers: Pencil erasers are small, cylindrical erasers that fit onto the end of a pencil, allowing for precise erasing in tight spaces. They are ideal for correcting small errors and refining details.
-
Plastic Erasers: Plastic erasers are durable, smudge-resistant erasers that effectively remove graphite from paper. They are suitable for general erasing and can be sharpened to create a clean edge for precise corrections.
2.3. Paper: The Canvas for Your Creations
The type of paper you choose can significantly impact the quality and appearance of your drawings. Consider the following types of paper for your cute food illustrations:
-
Sketchbook Paper: Sketchbook paper is lightweight, versatile paper that is ideal for preliminary sketches, practice drawings, and experimenting with different techniques. Choose a sketchbook with smooth or slightly textured paper for optimal results.
-
Drawing Paper: Drawing paper is heavier, more durable paper that is designed to withstand erasing, blending, and layering. Opt for a drawing paper with a smooth surface for detailed drawings and a textured surface for shading and blending.
-
Watercolor Paper: If you plan to incorporate watercolor paints into your cute food illustrations, choose watercolor paper that is specifically designed to absorb water without buckling or warping. Watercolor paper comes in various weights and textures, so experiment to find one that suits your preferences.
2.4. Coloring Tools: Adding Life to Your Drawings
Coloring tools are essential for bringing your cute food illustrations to life, adding depth, vibrancy, and visual appeal. Consider the following coloring tools for your art:
-
Colored Pencils: Colored pencils offer precise control and allow for detailed shading, blending, and layering. Choose a set of high-quality colored pencils with a wide range of colors for versatility.
-
Markers: Markers provide bold, vibrant color and are ideal for creating solid fills, outlines, and graphic elements. Opt for alcohol-based markers for smooth, even coverage and minimal streaking.
-
Watercolor Paints: Watercolor paints offer a translucent, luminous quality that is perfect for creating soft, dreamy effects and subtle washes of color. Experiment with different watercolor techniques, such as wet-on-wet and dry brushing, to achieve unique textures and effects.
2.5. Optional Tools: Enhancing Your Art
In addition to the essential supplies, consider incorporating optional tools to enhance your cute food illustrations and add unique effects.
-
Blending Stumps: Blending stumps are tightly wound paper tools used to blend graphite, charcoal, or colored pencil, creating smooth transitions and subtle shading effects.
-
Rulers and Templates: Rulers and templates are useful for creating precise lines, shapes, and geometric elements in your drawings.
-
Light Box: A light box provides a backlit surface that makes it easier to trace images, transfer designs, and refine outlines.
3. Step-by-Step Guide: Drawing a Cute Burger
Let’s embark on a step-by-step journey to create an irresistibly cute burger illustration that will tantalize your taste buds and warm your heart.
3.1. Sketching the Basic Shapes
Begin by sketching the basic shapes that form the foundation of your burger. Use light, gentle pencil strokes to create the following elements:
-
Bun: Draw a slightly flattened circle to represent the top bun of the burger. Add a smaller, slightly curved line beneath it to indicate the bottom bun.
-
Patty: Sketch a squiggly, uneven circle between the buns to represent the burger patty. Don’t worry about making it perfect; imperfections add character to your drawing.
-
Lettuce: Add a wavy, irregular line beneath the patty to represent the lettuce. Let the lettuce spill out slightly from the sides of the bun for a more appealing look.
-
Tomato: Draw a curved line above the patty to represent the tomato slice. Position it so that it overlaps the patty and adds visual interest.
3.2. Adding Facial Features
Now comes the fun part: giving your burger a personality by adding adorable facial features.
-
Eyes: Draw two large, round eyes on the top bun, positioning them slightly above the center. Add small pupils and highlights to make the eyes sparkle.
-
Mouth: Sketch a small, curved smile beneath the eyes to convey happiness and cheerfulness.
-
Cheeks: Add two small, rosy cheeks beneath the eyes to enhance the burger’s cuteness.
3.3. Outlining the Drawing
Once you’re satisfied with the sketch, it’s time to outline the drawing with a darker pencil or pen.
-
Trace the Sketch: Carefully trace over the pencil lines with a darker pencil or pen, creating clean, crisp outlines.
-
Vary Line Weight: Vary the line weight to add depth and visual interest to your drawing. Use thicker lines for outlines and thinner lines for details.
3.4. Coloring the Burger
Now, let’s bring your burger to life with vibrant colors.
-
Bun: Use a light brown or tan color to fill in the buns. Add subtle shading to create depth and dimension.
-
Patty: Use a darker brown color to fill in the patty. Add grill marks with a darker shade to enhance its texture.
-
Lettuce: Use a vibrant green color to fill in the lettuce. Add highlights and shadows to create a sense of depth.
-
Tomato: Use a bright red color to fill in the tomato slice. Add a touch of yellow to the edges to make it look juicy and ripe.
3.5. Adding Details and Highlights
To complete your cute burger illustration, add details and highlights to enhance its visual appeal.
-
Sesame Seeds: Draw small sesame seeds on the top bun using a white or cream-colored pencil or pen.
-
Highlights: Add highlights to the eyes, cheeks, and other key areas using a white or light-colored pencil or pen.
-
Shadows: Add subtle shadows beneath the buns, patty, and other elements to create depth and dimension.
Congratulations! You’ve successfully drawn an irresistibly cute burger illustration.
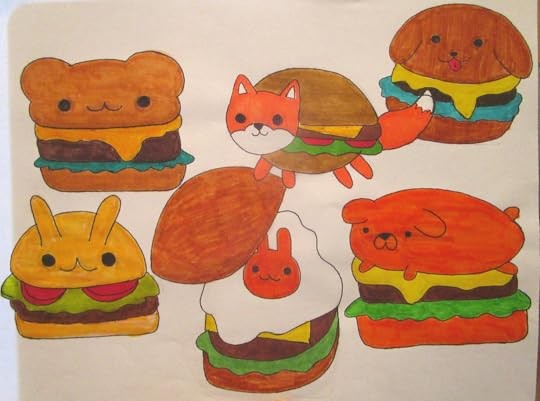
Alt: Cute food drawing of a hamburger with happy eyes and sesame seed toppings.
4. Exploring Different Food Characters
The world of cute food is vast and diverse, offering endless opportunities for creative exploration. Let’s delve into a variety of food characters and discover the unique ways to transform them into adorable illustrations.
4.1. Sweet Treats: Cupcakes, Ice Cream, and Candy
Sweet treats are a natural fit for cute food illustrations, with their inherently cheerful and indulgent nature.
-
Cupcakes: Add expressive faces to cupcakes, decorate them with colorful frosting and sprinkles, and accessorize them with tiny hats or bows.
-
Ice Cream: Draw ice cream cones with large, innocent eyes, melting smiles, and adorable toppings like cherries, sprinkles, or chocolate shavings.
-
Candy: Transform lollipops, gummy bears, and other candies into whimsical characters by adding expressive features, colorful patterns, and playful accessories.
4.2. Fruits and Vegetables: Healthy and Adorable
Fruits and vegetables can be just as cute as sweet treats when given the right treatment.
-
Apples: Draw apples with rosy cheeks, smiling faces, and tiny stems that resemble antennas.
-
Carrots: Transform carrots into cheerful characters with large eyes, bushy eyebrows, and leafy green hair.
-
Strawberries: Add cute faces to strawberries, decorate them with tiny seeds that resemble freckles, and accessorize them with leafy green hats.
4.3. Savory Dishes: Pizza, Sushi, and Tacos
Even savory dishes can be transformed into cute characters with a touch of imagination.
-
Pizza: Draw pizza slices with large, expressive eyes, smiling mouths, and adorable toppings like pepperoni, mushrooms, or olives.
-
Sushi: Transform sushi rolls into cute characters with tiny eyes, smiling faces, and seaweed wrappers that resemble kimonos.
-
Tacos: Add expressive faces to tacos, decorate them with colorful fillings like lettuce, tomatoes, and cheese, and accessorize them with tiny sombreros.
Alt: Adorable taco illustration with a happy expression, part of a cute food drawing series.
5. Advanced Techniques for Cute Food Art
Once you’ve mastered the basics of drawing cute food, you can explore advanced techniques to elevate your illustrations and add a professional touch.
5.1. Shading and Highlighting: Creating Depth and Dimension
Shading and highlighting are essential for creating depth, dimension, and realism in your drawings.
-
Light Source: Determine the direction of the light source and use shading to indicate areas that are further away from the light and highlights to indicate areas that are closer to the light.
-
Blending: Use blending stumps or your fingers to blend shading and highlights, creating smooth transitions and subtle gradations.
-
Contrast: Increase the contrast between light and shadow to create a more dramatic and visually appealing effect.
5.2. Textures and Patterns: Adding Visual Interest
Adding textures and patterns to your cute food illustrations can enhance their visual appeal and create a more realistic or whimsical effect.
-
Cross-Hatching: Use cross-hatching to create textured surfaces, such as the rough skin of a pineapple or the bumpy surface of a waffle.
-
Stippling: Use stippling, or the application of small dots, to create textured surfaces, such as the grainy texture of a cookie or the bubbly surface of a soda.
-
Patterns: Incorporate patterns into your cute food illustrations, such as polka dots on a cupcake wrapper or stripes on a candy cane.
5.3. Dynamic Poses and Expressions: Conveying Emotion
Experiment with dynamic poses and expressions to convey a range of emotions and bring your cute food characters to life.
-
Action Poses: Draw your food characters engaging in activities like waving, dancing, or holding objects to add a sense of energy and movement.
-
Exaggerated Expressions: Exaggerate facial expressions to convey a range of emotions, such as happiness, surprise, or sadness.
-
Body Language: Use body language to convey emotions, such as crossed arms to indicate shyness or raised eyebrows to indicate surprise.
6. Digital Cute Food Art
In the digital age, creating cute food art on digital platforms has become increasingly popular. Digital tools offer a wide range of options for creating, editing, and sharing your artwork.
6.1. Software and Hardware Options
Choose digital art software and hardware that suits your skill level and creative preferences.
-
Software: Popular digital art software includes Adobe Photoshop, Procreate, and Clip Studio Paint.
-
Hardware: A graphics tablet with a stylus is essential for creating digital art. Consider options from Wacom, Huion, or Apple Pencil (for iPad).
6.2. Digital Painting Techniques
Master digital painting techniques to create stunning cute food illustrations.
-
Layers: Use layers to organize your artwork and make it easier to edit and adjust individual elements.
-
Brushes: Experiment with different brushes to create various textures, effects, and line weights.
-
Color Palettes: Create custom color palettes to maintain consistency and enhance the visual appeal of your artwork.
6.3. Sharing Your Digital Creations
Share your digital cute food art on social media platforms like Instagram, Pinterest, and Behance to showcase your talent and connect with other artists.
7. Inspiration and Resources
To fuel your creativity and enhance your skills, explore a variety of sources of inspiration and resources.
7.1. Online Communities and Tutorials
Join online communities and follow tutorials to learn from other artists and stay up-to-date on the latest trends and techniques.
-
Art Forums: Participate in art forums like DeviantArt and ArtStation to share your work, receive feedback, and connect with other artists.
-
YouTube Tutorials: Watch YouTube tutorials to learn specific techniques, such as shading, highlighting, or creating textures.
7.2. Art Books and Magazines
Browse art books and magazines to discover new artists, explore different styles, and gain insights into the creative process.
-
Cute Art Books: Look for books specifically focused on cute art, kawaii art, or food illustration.
-
Art Magazines: Subscribe to art magazines like Juxtapoz and Hi-Fructose to stay informed about contemporary art trends.
7.3. Social Media Accounts to Follow
Follow social media accounts of artists who specialize in cute food illustrations to gain inspiration and stay motivated.
-
Instagram: Search for hashtags like #cuteart, #kawaiiart, and #foodillustration to discover talented artists.
-
Pinterest: Create a Pinterest board to collect images of cute food illustrations that inspire you.
8. Common Mistakes to Avoid
As you embark on your journey to draw cute food, be mindful of common mistakes that can hinder your progress.
8.1. Overcomplicating Designs
Avoid overcomplicating your designs with too many details or intricate patterns. Simplicity is key to achieving a cute and appealing aesthetic.
8.2. Inconsistent Proportions
Pay attention to proportions to ensure that your food characters are balanced and visually pleasing. Avoid exaggerating certain features to the point where they look unnatural.
8.3. Flat Coloring
Avoid using flat, unshaded colors that can make your drawings look lifeless. Use shading and highlighting to create depth and dimension.
8.4. Ignoring Anatomy
Even though you’re drawing food characters, it’s important to have a basic understanding of anatomy to ensure that your drawings are believable.
9. The Therapeutic Benefits of Drawing Cute Food
Beyond the artistic and creative aspects, drawing cute food offers a range of therapeutic benefits that can positively impact your mental and emotional well-being.
9.1. Stress Relief and Relaxation
Engaging in creative activities like drawing can help reduce stress and promote relaxation. The act of focusing on the present moment and expressing yourself through art can be a calming and therapeutic experience.
9.2. Enhanced Creativity and Imagination
Drawing cute food can stimulate your creativity and imagination. As you experiment with different shapes, colors, and expressions, you’ll develop your artistic skills and unlock new creative possibilities.
9.3. Improved Focus and Concentration
Drawing requires focus and concentration, which can help improve your cognitive abilities. The act of paying attention to details and executing precise movements can enhance your mental sharpness and concentration skills.
9.4. Increased Self-Esteem and Confidence
As you create and share your cute food illustrations, you’ll experience a sense of accomplishment and pride in your artistic abilities. This can boost your self-esteem and confidence, empowering you to pursue your creative passions.
Alt: Cute food drawing featuring smiling bread loafs, ideal for therapeutic art projects.
10. Frequently Asked Questions (FAQs)
Here are some frequently asked questions about drawing cute food, along with detailed answers to address your queries.
10.1. What Are The Best Tools For Drawing Cute Food?
The best tools for drawing cute food include graphite pencils, erasers, sketchbooks, colored pencils, markers, and digital art software. Choose tools that suit your skill level and creative preferences.
10.2. How Do I Make Food Look Cute?
To make food look cute, use techniques like anthropomorphism, soft color palettes, and simplified shapes. Add expressive faces, tiny limbs, and adorable accessories to your food characters.
10.3. How Do I Improve My Drawing Skills?
To improve your drawing skills, practice regularly, study anatomy and perspective, and seek feedback from other artists. Take online courses or workshops to learn new techniques.
10.4. What Are Some Good Sources Of Inspiration For Cute Food Art?
Good sources of inspiration for cute food art include online communities, art books, magazines, and social media accounts of artists who specialize in cute food illustrations.
10.5. How Do I Create Depth And Dimension In My Drawings?
To create depth and dimension in your drawings, use shading and highlighting techniques. Determine the direction of the light source and use shading to indicate areas that are further away from the light and highlights to indicate areas that are closer to the light.
10.6. How Do I Choose The Right Colors For My Drawings?
To choose the right colors for your drawings, consider the mood and emotions you want to convey. Use soft, pastel hues for a cute and innocent look and bright, vibrant colors for a cheerful and energetic feel.
10.7. How Do I Avoid Making My Drawings Look Flat?
To avoid making your drawings look flat, use shading and highlighting techniques to create depth and dimension. Experiment with different textures and patterns to add visual interest.
10.8. How Do I Draw Different Types Of Food?
To draw different types of food, study their shapes, textures, and colors. Practice drawing each element separately before combining them into a complete illustration.
10.9. How Do I Create Digital Cute Food Art?
To create digital cute food art, use digital art software and hardware like a graphics tablet with a stylus. Master digital painting techniques like layering, brushing, and color palette creation.
10.10. What Are The Therapeutic Benefits Of Drawing Cute Food?
The therapeutic benefits of drawing cute food include stress relief, enhanced creativity, improved focus, and increased self-esteem. Engaging in creative activities can positively impact your mental and emotional well-being.
Conclusion: Unleash Your Inner Food Artist
Drawing cute food is not only a fun and rewarding artistic endeavor but also a therapeutic activity that can enhance your creativity, reduce stress, and boost your self-esteem. By mastering the techniques, exploring different food characters, and seeking inspiration from various sources, you can unleash your inner food artist and create irresistibly adorable illustrations that will delight your senses and warm your heart.
Ready to take your culinary art to the next level? Visit FOODS.EDU.VN for even more in-depth tutorials, expert tips, and exclusive content that will transform your passion for food into breathtaking art. Don’t just dream about delicious doodles; make them a reality with the comprehensive resources available at FOODS.EDU.VN.
Address: 1946 Campus Dr, Hyde Park, NY 12538, United States
WhatsApp: +1 845-452-9600
Website: foods.edu.vn