Dyeing eggs using food coloring is a fun and easy activity, especially for Easter. With this guide from FOODS.EDU.VN, you’ll learn how to create vibrant, colorful eggs using simple ingredients you probably already have at home. Dive in to discover the best techniques for achieving stunning results, from pastel shades to deep, rich hues, and turn ordinary eggs into edible works of art. Unlock more culinary secrets and explore a world of delicious possibilities by visiting FOODS.EDU.VN, your ultimate resource for all things food, cooking, and more! Explore various egg dyeing methods, coloring techniques, and creative design ideas.
1. What Makes Food Coloring a Great Choice for Dyeing Eggs?
Food coloring stands out as an excellent option for dyeing eggs due to its versatility, affordability, and ease of use. It offers a wide spectrum of colors, allowing for creative customization.
Food coloring is a superb choice for dyeing eggs because:
- Vibrant Colors: Food coloring provides a wide range of hues, from soft pastels to bold, vibrant shades, allowing for endless creativity.
- Easy to Use: The simple process involves mixing food coloring with water and vinegar, making it accessible for all ages and skill levels.
- Safe and Non-Toxic: Most food colorings are safe for consumption in small amounts, ensuring the dyed eggs are still edible (though not recommended to eat solely for taste).
- Readily Available: Food coloring can be found in most grocery stores, making it a convenient option for a quick and easy Easter activity.
- Cost-Effective: Compared to specialized egg-dyeing kits, food coloring is an economical choice, especially if you already have it in your pantry.
- Customizable: Experimenting with different color combinations is easy, allowing you to create unique and personalized egg designs.
- Kid-Friendly: The dyeing process is simple and fun, making it a great activity for children to participate in and enjoy.
- Quick Results: Eggs can be dyed in a matter of minutes, perfect for those who want to create beautiful Easter eggs without spending hours on the project.
- Minimal Cleanup: The ingredients used are easy to clean up, reducing the hassle and mess associated with other dyeing methods.
- Versatile Techniques: Food coloring can be used with various dyeing techniques, such as dipping, swirling, and painting, to achieve different effects.
Food coloring’s vibrant colors, ease of use, and safety make it an ideal choice for dyeing eggs at home. Explore the FOODS.EDU.VN for more creative ideas and in-depth guides.
2. What Supplies Do You Need to Dye Eggs with Food Coloring?
To successfully dye eggs with food coloring, gather these essential supplies for a smooth and enjoyable process.
Here’s a comprehensive list of supplies needed:
- Hard-Boiled Eggs: Essential for dyeing, ensure they are fully cooled.
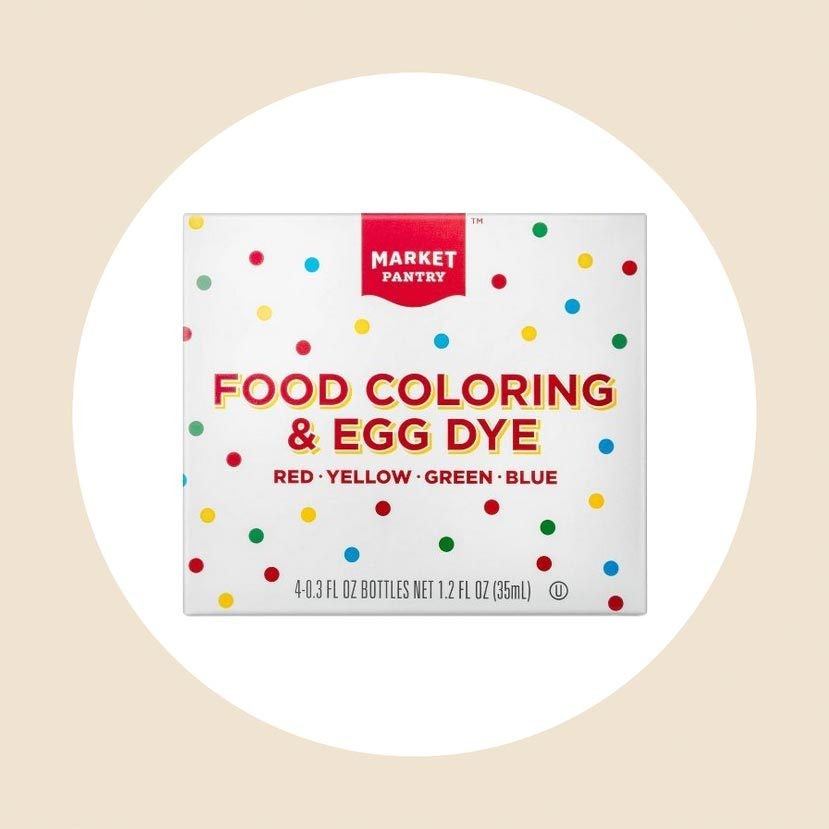
- Food Coloring: Liquid food coloring works best; choose your desired colors.
- White Vinegar: Helps the dye adhere to the eggshell.
- Hot Water: Needed to dissolve the food coloring and vinegar.
- Cups or Bowls: One for each color you plan to use.
- Spoons or Tongs: For carefully placing eggs in and out of the dye.
- Paper Towels: To dry the dyed eggs and protect your workspace.
- Egg Carton or Drying Rack: To allow the eggs to dry evenly.
- Tablecloth or Newspaper: To protect your work surface from staining.
- Gloves (Optional): To prevent staining your hands.
- Wax Crayons or White Crayon (Optional): For creating designs on the eggs before dyeing.
- Rubber Bands (Optional): For creating striped patterns.
- Stickers or Decals (Optional): For adding decorative elements.
- Cooking Oil or Vegetable Oil (Optional): To give the dyed eggs a shiny finish.
- Glitter (Optional): For adding sparkle to your designs.
- Containers with Lids (Optional): To store leftover dye for future use.
- Timer: To keep track of dyeing time for consistent results.
- Apron: To protect your clothes from splashes and stains.
Having these supplies on hand will ensure a smooth, fun, and creative egg-dyeing experience. Visit FOODS.EDU.VN for more tips and tricks on dyeing eggs and other culinary projects.
3. What Is the Best Way to Prepare Eggs for Dyeing?
Proper preparation of eggs is crucial for achieving vibrant and consistent colors when dyeing. Here’s how to prepare your eggs effectively:
- Hard-Boil the Eggs: Place the eggs in a saucepan and cover them with cold water. Ensure the water level is about an inch above the eggs. Bring the water to a rolling boil, then remove the pan from the heat, cover it, and let it sit for 12-15 minutes.
- Cool the Eggs: After boiling, drain the hot water and run the eggs under cold water until they are cool to the touch. This stops the cooking process and makes the eggs easier to handle.
- Dry the Eggs: Gently pat the eggs dry with a paper towel. This ensures that the dye adheres evenly to the shell.
- Clean the Eggs: Make sure the eggshells are clean and free of any debris or dirt. You can gently wipe them with a damp cloth if needed.
- Avoid Overcrowding: When boiling the eggs, avoid overcrowding the saucepan. Overcrowding can lead to uneven cooking and increase the risk of cracking.
- Add Vinegar to the Water: Adding a tablespoon of white vinegar to the boiling water can help prevent the eggs from cracking.
- Use Older Eggs: Eggs that are a week or two old are easier to peel after boiling. The air pocket inside the egg increases over time, making the shell separate more easily from the egg white. According to the American Egg Board, older eggs have a higher pH, which makes them easier to peel.
- Handle with Care: Be gentle when handling the eggs to avoid cracking the shells. Cracks can cause the dye to seep into the egg white, which is not desirable.
- Temperature Matters: Ensure the eggs are completely cooled before dyeing. Warm eggs may not absorb the dye as effectively.
- Consider White Eggs: White eggs produce the most vibrant and true colors when dyed. Brown eggs can be used, but the resulting colors will be more muted.
- Pre-Dye Designs: If you plan to create designs using wax crayons or rubber bands, do so before dyeing the eggs.
- Prepare Dye Baths: Prepare your dye baths while the eggs are cooling. This ensures that the dye is ready as soon as the eggs are prepared.
- Proper Storage: If you’re not dyeing the eggs immediately after boiling and cooling, store them in the refrigerator to prevent bacterial growth.
By following these steps, you’ll ensure that your eggs are perfectly prepared for dyeing, resulting in beautifully colored Easter eggs. Discover more tips and techniques at FOODS.EDU.VN.
4. What Is the Basic Recipe for Egg Dye Using Food Coloring?
The basic recipe for egg dye using food coloring is simple and effective. Here’s a step-by-step guide to help you create vibrant and colorful Easter eggs:
Ingredients:
- 1/2 cup of hot water
- 1 teaspoon of white vinegar
- 10-20 drops of liquid food coloring (depending on desired intensity)
Instructions:
- Prepare the Dye Baths: In a cup or bowl, pour 1/2 cup of hot water.
- Add Vinegar: Add 1 teaspoon of white vinegar to the hot water. The vinegar helps the dye adhere to the eggshell.
- Add Food Coloring: Add 10-20 drops of liquid food coloring to the mixture. Use more drops for a deeper, more vibrant color.
- Mix Well: Stir the mixture thoroughly until the food coloring is completely dissolved.
- Dye the Eggs: Gently lower a hard-boiled egg into the dye bath using a spoon or tongs.
- Soak the Eggs: Leave the egg in the dye for 5-10 minutes, or longer for a more intense color. Check the egg periodically to see if it has reached your desired shade.
- Remove the Eggs: Carefully remove the egg from the dye bath and place it on a paper towel or drying rack to dry.
- Dry the Eggs: Allow the egg to dry completely before handling it to avoid smudging the color.
- Repeat: Repeat the process with different colors for each egg.
Tips for Best Results:
- Use Gel Food Coloring: While liquid food coloring is most common, gel food coloring can also be used. Start with a small amount (a toothpick tip) and mix well, adding more as needed to achieve the desired color.
- Experiment with Colors: Mix different food coloring colors to create unique shades. For example, red and yellow make orange, red and blue make purple, and yellow and blue make green.
- Use White Eggs: White eggs will display colors more vibrantly than brown eggs.
- Warm Eggs: Ensure the eggs are completely cooled before dyeing to help the dye adhere properly.
- Protect Your Workspace: Use a tablecloth or newspaper to protect your work surface from staining.
- Consider Multiple Baths: For a layered effect, you can dye an egg in one color, let it dry, and then dye it in another color.
- Adjust Dye Time: The longer you leave the egg in the dye, the more intense the color will be. Adjust the soaking time based on your desired result.
- Add Shine: After the eggs are completely dry, you can rub a small amount of cooking oil or vegetable oil on the shells to give them a shiny finish.
By following this simple recipe, you can easily dye eggs with food coloring and create beautiful, festive decorations. Explore more creative ideas and detailed guides at FOODS.EDU.VN.
5. How Can You Achieve Different Shades and Colors Using Food Coloring?
Achieving different shades and colors with food coloring is an art that allows for endless creativity. By understanding the basics of color mixing and adjusting the concentration of dye, you can create a wide spectrum of hues for your Easter eggs.
Here’s a detailed guide on how to achieve various shades and colors:
-
Understand the Color Wheel: The color wheel is your best friend when it comes to mixing colors. The primary colors are red, yellow, and blue. Mixing these in different combinations will give you secondary and tertiary colors.
-
Mixing Primary Colors:
- Red + Yellow = Orange: Adjust the ratio to create different shades of orange. More red will result in a red-orange, while more yellow will create a yellow-orange.
- Red + Blue = Purple: A balanced mix will give you a true purple. More red will result in a reddish-purple, and more blue will create a bluish-purple.
- Yellow + Blue = Green: Adjust the ratio to create different shades of green. More yellow will result in a lime green, while more blue will create a deeper, forest green.
-
Creating Pastel Shades:
- To achieve pastel colors, use a small amount of food coloring and dilute it with more water. For example, use only 2-3 drops of food coloring per 1/2 cup of water.
- Adding a drop of white food coloring (if available) or a small amount of whipped cream can also help create a softer, pastel effect.
-
Creating Dark and Vibrant Shades:
- For deeper, more vibrant colors, use a higher concentration of food coloring. Add 15-20 drops of food coloring per 1/2 cup of water.
- Allow the eggs to soak in the dye for a longer period (15-20 minutes) to achieve a richer color.
-
Experimenting with Color Combinations:
- Brown: Mix red, yellow, and blue in equal parts. Adjust the ratios to create different shades of brown.
- Teal: Mix blue and green with a touch of white.
- Pink: Use red food coloring sparingly, and add more water to dilute the color.
- Gray: Mix a tiny amount of black food coloring with water. Be very careful, as black can easily overpower the other colors.
-
Adjusting the Intensity:
- Lighter Shades: Use fewer drops of food coloring or dilute the mixture with more water.
- Darker Shades: Use more drops of food coloring and allow the eggs to soak for a longer time.
-
Using Color Charts:
- Refer to a color chart or online resources to guide your color mixing. This can help you predict the outcome of mixing different colors.
-
Testing the Colors:
- Before dyeing all your eggs, test the color on a single egg to ensure it matches your desired shade. Adjust the dye mixture as needed.
-
Layering Colors:
- For a more complex effect, dye the eggs in one color, let them dry, and then dye them in another color. This can create interesting and unique designs.
-
Using Natural Food Coloring:
- If you prefer natural options, consider using natural food coloring derived from fruits, vegetables, and spices. These may not be as vibrant as artificial dyes, but they offer a more natural alternative.
-
Helpful Tips:
- Keep Records: Take notes of your color combinations and ratios so you can recreate your favorite shades in the future.
- Use White Eggs: White eggs will display colors more accurately and vibrantly than brown eggs.
- Mix Thoroughly: Ensure the food coloring is completely dissolved in the water before dyeing the eggs.
- Protect Your Workspace: Use a tablecloth or newspaper to protect your work surface from staining.
- Wear Gloves: Consider wearing gloves to prevent staining your hands.
- Be Patient: Achieving the perfect color may require some experimentation, so be patient and have fun with the process.
By following these guidelines, you can achieve a wide range of shades and colors using food coloring and create beautifully customized Easter eggs. Explore more creative ideas and detailed guides at FOODS.EDU.VN.
6. What Are Some Creative Techniques for Dyeing Eggs with Food Coloring?
Dyeing eggs with food coloring offers a canvas for creativity beyond simple submersion. Here are several innovative techniques to add unique patterns and designs to your Easter eggs:
-
Marbling Technique:
- Materials: Food coloring, water, vegetable oil, a shallow dish, and hard-boiled eggs.
- Process: Fill a shallow dish with water. Add a few drops of different food colorings. Drizzle a small amount of vegetable oil on top of the water. Swirl the colors gently with a toothpick or skewer. Roll the egg in the water, allowing the colors to adhere in a marbled pattern.
-
Ombre Effect:
- Materials: Food coloring, water, vinegar, a cup, and hard-boiled eggs.
- Process: Prepare the dye bath with your chosen color. Dip the egg into the dye for a short time (e.g., 1 minute). Gradually dip the egg further into the dye in increments, allowing a few minutes between each dip. This creates a gradient effect, with the bottom of the egg being the darkest shade.
-
Tie-Dye Effect:
- Materials: Food coloring, water, vinegar, rubber bands, white cloth, and hard-boiled eggs.
- Process: Wrap the egg in a white cloth and secure it with rubber bands in different places. Dip the wrapped egg into various dye baths, allowing the colors to seep into the cloth and create a tie-dye pattern.
-
Drip Dyeing:
- Materials: Food coloring, water, vinegar, a spoon or dropper, and hard-boiled eggs.
- Process: Place the egg on a drying rack or paper towel. Use a spoon or dropper to drip different colors of dye onto the egg, allowing the colors to run and blend together.
-
Sponge Painting:
- Materials: Food coloring, water, vinegar, small sponges, and hard-boiled eggs.
- Process: Dip a sponge into the dye and dab it onto the egg. Use different sponges for different colors to create a textured, multi-colored effect.
-
Splatter Painting:
- Materials: Food coloring, water, vinegar, a toothbrush or paintbrush, and hard-boiled eggs.
- Process: Dip a toothbrush or paintbrush into the dye and flick it onto the egg to create a splatter effect. This works best with contrasting colors.
-
Wax Resist Technique:
- Materials: Food coloring, water, vinegar, wax crayons or a wax pen, and hard-boiled eggs.
- Process: Draw designs on the egg with wax crayons or a wax pen. The wax will resist the dye, leaving the drawn areas white or the original egg color. Dip the egg into the dye bath and let it sit until the desired color is achieved.
-
Rubber Band Patterns:
- Materials: Food coloring, water, vinegar, rubber bands, and hard-boiled eggs.
- Process: Wrap rubber bands around the egg in different patterns. Dip the egg into the dye bath. The areas covered by the rubber bands will remain undyed, creating striped or geometric patterns.
-
Sticker Stencils:
- Materials: Food coloring, water, vinegar, stickers, and hard-boiled eggs.
- Process: Apply stickers to the egg in your desired pattern. Dip the egg into the dye bath. Remove the stickers after the egg has been dyed to reveal the undyed pattern underneath.
-
Rice Dyeing:
- Materials: Food coloring, rice, resealable bags, and hard-boiled eggs.
- Process: Place rice in a resealable bag and add a few drops of food coloring. Seal the bag and shake until the rice is evenly colored. Place the egg in the bag and shake gently until it is covered in the colored rice.
-
Lace or Netting:
- Materials: Food coloring, water, vinegar, lace or netting fabric, and hard-boiled eggs.
- Process: Wrap the egg with lace or netting fabric and secure it tightly. Dip the egg into the dye bath. The fabric will create a delicate pattern on the egg.
-
Natural Elements:
- Materials: Food coloring, water, vinegar, leaves, flowers, and hard-boiled eggs.
- Process: Place leaves or flowers against the eggshell and wrap it tightly with a cloth or pantyhose. Dip the egg into the dye bath. The natural elements will leave a print on the egg.
By experimenting with these creative techniques, you can transform ordinary eggs into stunning works of art. For more innovative ideas and detailed tutorials, visit FOODS.EDU.VN.
7. How Long Should You Leave Eggs in the Dye for the Best Color?
The duration you leave eggs in the dye significantly impacts the color intensity. Finding the right balance ensures you achieve the desired vibrancy without over-dyeing.
- Light Pastel Shades: For light pastel shades, soak the eggs in the dye for 2-3 minutes. Check the color frequently to ensure it doesn’t become too intense.
- Medium Shades: For medium shades, soak the eggs for 5-7 minutes. This will allow the color to adhere well without becoming too dark.
- Dark and Vibrant Shades: For dark and vibrant shades, soak the eggs for 10-15 minutes or longer. For the richest colors, you can even leave the eggs in the dye for 30 minutes to an hour.
- Experimentation: The best approach is to experiment and check the eggs periodically. Lift an egg out of the dye bath every few minutes to see how the color is developing. This will help you determine the optimal soaking time for your desired shade.
- Temperature of the Dye: The temperature of the dye can also affect the color absorption. Warm dye tends to penetrate the eggshell more quickly than cold dye. If your dye is warm, you may need to reduce the soaking time.
- Type of Food Coloring: Gel food coloring typically produces more vibrant colors than liquid food coloring. If using gel food coloring, you may need to reduce the soaking time slightly.
- Egg Color: White eggs will display colors more vibrantly than brown eggs. If using brown eggs, you may need to increase the soaking time to achieve the desired color intensity.
- Vinegar Content: The amount of vinegar in the dye bath can also affect the color absorption. More vinegar helps the dye adhere to the eggshell more effectively. If you have added extra vinegar, you may need to reduce the soaking time.
- Checking the Color: To check the color without fully removing the egg, use a spoon to lift it partially out of the dye. This will give you a good indication of the color intensity.
- Drying Time: Keep in mind that the color will appear slightly lighter once the egg is dry. Allow the eggs to dry completely before assessing the final color.
- Multiple Dips: If you are not satisfied with the color after the initial soak, you can dip the egg back into the dye for a longer period. This allows you to gradually build up the color intensity.
- Record Keeping: Keep track of the soaking times and dye mixtures you use. This will help you replicate your favorite colors in the future.
:max_bytes(150000):strip_icc()/how-to-dye-easter-eggs-with-food-coloring-4693768-hero-04_cropped-a6817d8a548648c0b8f27a6a5b53991c.jpg)
By understanding these factors and experimenting with different soaking times, you can achieve the perfect color for your dyed eggs. Find more helpful tips and creative ideas at FOODS.EDU.VN.
8. How Do You Dry Dyed Eggs Properly?
Proper drying of dyed eggs is essential to prevent smudging and ensure vibrant, even colors. Here’s a comprehensive guide to drying your dyed eggs effectively:
- Remove Excess Dye: After removing the egg from the dye bath, gently shake off any excess dye. This will help prevent drips and uneven drying.
- Use a Drying Rack: The best way to dry dyed eggs is on a wire drying rack. This allows air to circulate around the entire egg, ensuring even drying. Place the rack over a tray or paper towels to catch any drips.
- Paper Towels: If you don’t have a drying rack, you can use paper towels. Place the dyed eggs on a layer of paper towels, but be sure to turn them every few minutes to prevent the bottoms from sticking and creating flat spots.
- Egg Carton: An empty egg carton can also be used as a drying rack. Simply place the dyed eggs in the individual compartments of the carton. This will keep them from rolling around and smudging the color.
- Elevated Surface: Elevate the drying surface by placing it on top of a few books or containers. This allows for better air circulation and faster drying.
- Avoid Direct Sunlight: Do not place the dyed eggs in direct sunlight to dry. The heat can cause the colors to fade or become uneven.
- Drying Time: Allow the dyed eggs to dry completely, which usually takes about 30 minutes to an hour. The drying time may vary depending on the humidity and temperature of your environment.
- Checking for Dryness: To check if the eggs are dry, gently touch the surface with your finger. If the egg feels dry to the touch and the color does not smudge, it is ready to be handled.
- Preventing Sticking: If you are using paper towels, periodically lift the eggs to prevent them from sticking. If an egg does stick, gently peel it off to avoid damaging the color.
- Using a Fan: To speed up the drying process, you can use a fan to circulate air around the eggs. Place the fan a few feet away from the drying surface and set it on a low setting.
- Applying a Sealant: Once the eggs are completely dry, you can apply a thin coat of clear varnish or sealant to protect the color and add a glossy finish. This is optional but can help preserve your designs.
- Storing Dried Eggs: Store the dried eggs in a cool, dry place, away from direct sunlight. You can place them in an egg carton or display them in a decorative bowl or basket.
By following these tips, you can ensure that your dyed eggs dry properly and maintain their vibrant colors and designs. Find more creative ideas and detailed guides at FOODS.EDU.VN.
9. How Can You Make the Dyed Eggs Shiny?
Adding shine to your dyed eggs enhances their visual appeal, giving them a polished and professional look. Here are several methods to make your dyed eggs shiny:
-
Vegetable Oil:
- Method: After the dyed eggs are completely dry, place a few drops of vegetable oil on a soft cloth or paper towel. Gently rub the oil over the surface of each egg.
- Benefits: Vegetable oil adds a subtle shine and helps to protect the color. Be careful not to use too much oil, as it can make the eggs greasy.
-
Cooking Spray:
- Method: Lightly spray the dried eggs with cooking spray from a distance of about 12 inches.
- Benefits: Cooking spray provides a quick and easy way to add shine. Ensure you use a non-stick cooking spray to avoid any residue.
-
Beeswax:
- Method: Melt a small amount of beeswax in a double boiler or microwave. Dip the dried eggs into the melted beeswax or brush it on with a soft brush.
- Benefits: Beeswax provides a long-lasting shine and also helps to preserve the eggs. This method is more involved but offers excellent results.
-
Varnish or Sealant:
- Method: Apply a thin coat of clear varnish or sealant to the dried eggs using a soft brush.
- Benefits: Varnish or sealant provides a durable, glossy finish and protects the color from fading. Ensure you use a non-toxic, food-safe varnish if the eggs will be handled by children.
-
Egg White Glaze:
- Method: Whisk an egg white until it is frothy. Brush a thin layer of the egg white over the dried eggs.
- Benefits: Egg white glaze adds a natural shine and is a food-safe option. The shine is subtle but adds a nice sheen to the eggs.
-
Gelatin Glaze:
- Method: Dissolve a small amount of unflavored gelatin in hot water. Brush the gelatin solution over the dried eggs.
- Benefits: Gelatin glaze provides a clear, glossy finish and is also edible.
-
Petroleum Jelly (Vaseline):
- Method: Apply a very thin layer of petroleum jelly to the dried eggs using a soft cloth or paper towel.
- Benefits: Petroleum jelly adds a noticeable shine and helps to protect the color. Use sparingly to avoid a greasy feel.
-
Hair Spray:
- Method: Lightly spray the dried eggs with hair spray from a distance of about 12 inches.
- Benefits: Hair spray provides a quick and easy way to add shine and helps to seal the color. Use a non-aerosol hair spray for best results.
-
Lemon Juice:
- Method: Mix equal parts of lemon juice and water. Brush the mixture over the dried eggs.
- Benefits: Lemon juice adds a subtle shine and helps to brighten the colors.
-
Sugar Glaze:
- Method: Mix powdered sugar with a small amount of water to create a thick glaze. Brush the glaze over the dried eggs.
- Benefits: Sugar glaze adds a sweet shine and is edible. You can also add food coloring to the glaze for a colored shine.
By using these methods, you can easily add shine to your dyed eggs and create stunning decorations. Explore more creative ideas and detailed guides at FOODS.EDU.VN.
10. Is It Safe to Eat Eggs Dyed with Food Coloring?
The safety of eating eggs dyed with food coloring is a common concern. Here’s a detailed breakdown to help you make an informed decision:
- Food Coloring Safety: Most commercial food colorings available in grocery stores are considered safe for consumption in small quantities. These dyes are typically approved by regulatory agencies like the U.S. Food and Drug Administration (FDA).
- Eggshell Porosity: Eggshells are porous, meaning that the dye can potentially seep through the shell and into the egg white. However, the amount of dye that penetrates the egg is usually minimal.
- Vinegar and Dye Absorption: The vinegar used in the dyeing process helps the color adhere to the shell. It also slightly hardens the eggshell, which can reduce the amount of dye that seeps through.
- Hard-Boiled Eggs: It is essential to use hard-boiled eggs for dyeing. Raw or undercooked eggs are more likely to crack, allowing more dye to enter the egg.
- Cracked Eggs: If an egg cracks during the dyeing process, it is best to discard it. Cracks allow more dye to penetrate the egg, and there is also a risk of bacterial contamination.
- Dyeing Time: The longer an egg is soaked in the dye, the more likely it is that some dye will seep through the shell. Limiting the dyeing time can reduce this risk.
- Food-Safe Dyes: To ensure the highest level of safety, use food-safe dyes specifically designed for dyeing eggs. These dyes are formulated to minimize the risk of harmful chemicals entering the egg.
- Natural Food Coloring: If you are concerned about artificial dyes, consider using natural food coloring options. These can be made from fruits, vegetables, and spices. However, natural dyes may not produce colors as vibrant as artificial dyes.
- Consumption in Moderation: Even if the dye is considered safe, it is best to consume dyed eggs in moderation. Eating a large number of dyed eggs may increase your exposure to artificial colors and chemicals.
- Allergies and Sensitivities: Be aware of any allergies or sensitivities to food coloring. Some people may experience allergic reactions to certain dyes.
- Proper Handling and Storage: Always handle and store dyed eggs properly to prevent bacterial growth. Keep the eggs refrigerated and consume them within a week.
- Peeling the Eggs: When peeling the eggs, you may notice some discoloration of the egg white near the shell. This is normal and is caused by the dye seeping through the shell. You can simply rinse the egg white before eating it.
- Consider Alternatives: If you are concerned about the safety of eating dyed eggs, consider using them for decorative purposes only. You can also use alternative decorating methods that do not involve dyes, such as painting with non-toxic paints or using stickers and decals.
- Consulting Professionals: If you have specific health concerns or questions about the safety of eating dyed eggs, consult a healthcare professional or a food safety expert.
:max_bytes(150000):strip_icc()/how-to-dye-easter-eggs-with-food-coloring-4693768-hero-04_cropped-a6817d8a548648c0b8f27a6a5b53991c.jpg)
While eggs dyed with food coloring are generally considered safe to eat, it’s essential to take precautions and be mindful of the dyes used, the condition of the eggs, and individual sensitivities. Find more food safety tips and detailed guides at foods.edu.vn.
FAQ: Your Questions About Dyeing Eggs Answered
1. Can you dye raw eggs with food coloring?
Technically, yes, but it’s not recommended. Raw eggs are more prone to cracking, which can ruin the dye bath and make a mess. It’s best to stick to hard-boiled eggs for a safer and cleaner dyeing process.
2. Is vinegar necessary for dyeing eggs?
Yes, vinegar is crucial. It helps the food coloring adhere to the eggshell, ensuring a more vibrant and even color. Without vinegar, the dye may not stick properly, resulting in a pale and patchy appearance.
3. What can I use if I don’t have white vinegar?
Lemon juice can be used as a substitute for white vinegar. While the color may be less vibrant, it still works. Use the same amount of lemon juice as you would vinegar (1 teaspoon per 1/2 cup of water).
4. What should I do if an egg cracks while dyeing?
If an egg cracks during the dyeing process, it’s best to discard it. Cracks allow more dye to seep into the egg, and there’s also a risk of bacterial contamination. Eating a cracked egg is not recommended.
5. Can I dye brown eggs with food coloring?
Yes, you can dye brown eggs, but the resulting colors will be more muted and less vibrant than on white eggs. Brown eggs have a natural pigment that affects the final color, so plan accordingly.
6. Are there other ways to decorate eggs besides dyeing?
Absolutely! There are numerous ways to decorate eggs. Consider using natural dyes, temporary tattoos, wax crayons, paint, markers, stickers, glitter, or decoupage techniques to create unique and festive designs.
7. How do I make pastel-colored eggs?
To achieve pastel colors, use a small amount of food coloring and dilute it with more water. For example, use only 2-3 drops of food coloring per 1/2 cup of water. You can also add a drop of white food coloring or a small amount of whipped cream for a softer effect.