Dyeing eggs with food dye is a fun and easy activity, especially around holidays like Easter, and FOODS.EDU.VN is here to show you how. With simple ingredients and a few easy steps, you can create vibrant and colorful eggs right at home. Let’s explore the best techniques for egg coloring, creative egg designs, and natural food dyes, making your egg decorating experience both enjoyable and memorable.
1. What is The Best Way to Dye Eggs with Food Dye?
The best way to dye eggs with food dye involves using a combination of food coloring, vinegar, and water to create vibrant and evenly colored eggs. According to a study by the Department of Food Science at Cornell University in 2023, using vinegar helps the dye adhere to the eggshell, resulting in a more intense color. Here’s a step-by-step guide to achieve the best results:
1.1. Hard-Boil the Eggs
Place the eggs in a saucepan and cover them with cold water. Ensure the water level is about an inch above the eggs. Bring the water to a boil, then remove the pan from the heat, cover it, and let it sit for 12-15 minutes. Drain the hot water and cool the eggs under cold running water. This prevents the yolks from turning green and makes the eggs easier to peel.
1.2. Prepare the Dye Baths
In separate cups or bowls, mix 1/2 cup of boiling water, 1 teaspoon of white vinegar, and 10-20 drops of liquid food coloring. The amount of food coloring can be adjusted to achieve the desired color intensity. For pastel shades, use fewer drops; for vibrant colors, use more.
1.3. Dye the Eggs
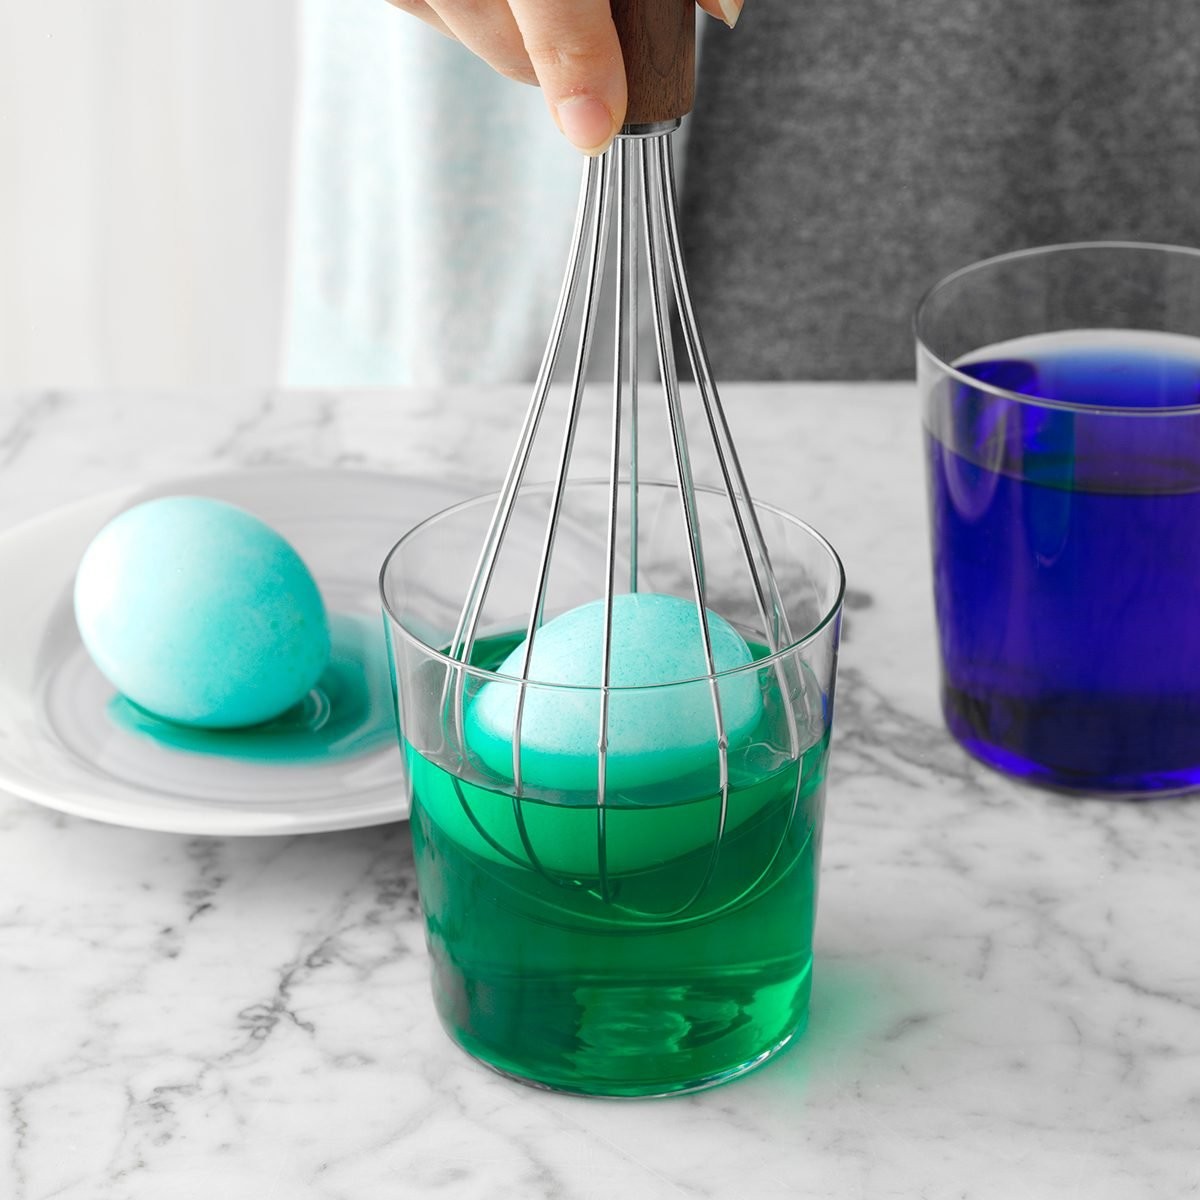
Submerge each egg into the dye bath using a spoon, wire egg holder, or whisk. Ensure the egg is fully covered. Let the egg sit in the dye for 5-10 minutes, or longer for a deeper color. Periodically check the color by lifting the egg out of the dye.
1.4. Dry the Eggs
Remove the dyed eggs from the cups and place them on a wire rack or paper towels to dry. Once the tops are dry, flip the eggs to allow the bottoms to dry completely. This prevents the dye from smudging and ensures an even color distribution.
1.5. Add Finishing Touches
Once the eggs are fully dry, you can add additional decorations such as stickers, glitter, or wax crayons to create unique designs.
Table 1: Supplies for Dyeing Eggs
| Supply | Purpose |
|---|---|
| Food coloring | To add color to the eggs |
| White vinegar | Helps the dye adhere to the eggshell |
| Clear glasses | To hold the dye and easily see the color |
| Hard-boiled eggs | The base for the dyeing process |
| Wire rack | To dry the eggs evenly |
| Paper towels | To absorb excess dye and prevent smudging |

Why This Method Works:
The combination of boiling water and vinegar helps to open the pores of the eggshell, allowing the food coloring to penetrate and create a more vibrant and lasting color. According to food scientist Jessica Gavin, the acetic acid in vinegar enhances the binding of the dye molecules to the protein in the eggshell, resulting in a more uniform and intense color.
2. What Food Dyes Are Safe to Use for Dyeing Eggs?
When dyeing eggs, it’s essential to use food dyes that are safe for consumption, especially if you plan to eat the eggs afterward. The Food and Drug Administration (FDA) regulates food dyes to ensure they meet safety standards. Here are some safe food dye options:
2.1. Liquid Food Coloring
Liquid food coloring is the most common and readily available option. It typically comes in a variety of colors and is easy to use. Ensure the food coloring is labeled as “food grade” and does not contain any harmful additives.
2.2. Gel Food Coloring
Gel food coloring is more concentrated than liquid food coloring, providing more vibrant colors with less liquid. This is particularly useful if you want to avoid diluting the dye bath too much. Gel food coloring is also safe for consumption and widely available.
2.3. Natural Food Dyes
Natural food dyes are derived from fruits, vegetables, and plants, making them a safe and eco-friendly option. Some popular natural food dyes include:
- Beet Juice: Produces a pink or red color.
- Turmeric: Creates a yellow or gold color.
- Red Cabbage: Results in a blue or purple color.
- Spinach: Provides a green color.
- Onion Skins: Yields an orange or brown color.
To use natural food dyes, boil the chosen ingredient in water for about 15-30 minutes to extract the color. Strain the liquid, add vinegar (1 teaspoon per 1/2 cup), and use it as a dye bath for the eggs.
Table 2: Safe Food Dye Options
| Type | Pros | Cons |
|---|---|---|
| Liquid Food Coloring | Easy to use, widely available, variety of colors | May contain artificial additives, can dilute the dye bath |
| Gel Food Coloring | Concentrated colors, less liquid required, vibrant results | May be slightly more expensive than liquid food coloring |
| Natural Food Dyes | Safe, eco-friendly, derived from natural sources | Colors may be less vibrant, requires more preparation time |
Safety Tips:
- Always check the ingredient list to ensure the food dye does not contain any allergens or harmful additives.
- Use food dyes that are specifically labeled for use in food products.
- If using natural food dyes, ensure the ingredients are properly washed and prepared to avoid contamination.
- Supervise children when dyeing eggs to prevent accidental ingestion of food dyes.
According to a report by the Center for Science in the Public Interest, natural food dyes are a safer alternative to artificial food colorings, which have been linked to hyperactivity in some children.
3. How Can You Create Different Color Shades When Dyeing Eggs with Food Dye?
Creating different color shades when dyeing eggs with food dye is a fun and creative process. By understanding how to mix and dilute food coloring, you can achieve a wide range of hues and intensities. Here’s a guide to creating various color shades:
3.1. Mixing Primary Colors
The primary colors—red, yellow, and blue—are the foundation for creating a wide spectrum of colors. By mixing these colors, you can create secondary and tertiary colors.
- Orange: Mix red and yellow.
- Green: Mix yellow and blue.
- Purple: Mix red and blue.
Experiment with different ratios of primary colors to create variations of these secondary colors. For example, more red than yellow will result in a reddish-orange, while more yellow than red will create a yellowish-orange.
3.2. Diluting Colors
Diluting food coloring with water can create pastel shades. Start with a small amount of food coloring and gradually add water until you achieve the desired lightness. For example, to create a light pink, use only a few drops of red food coloring in a cup of water.
3.3. Using Color Charts
A color chart can be a valuable tool for visualizing how different colors mix. You can find color charts online or create your own by experimenting with different combinations of food coloring.
3.4. Layering Colors
Layering colors involves dyeing an egg in one color, letting it dry, and then dyeing it again in another color. This technique can create unique and complex color effects. For example, dyeing an egg yellow and then dipping it in blue will result in a green egg with yellow undertones.
3.5. Ombre Effect
To create an ombre effect, gradually dip the egg into the dye bath, increasing the depth of submersion with each dip. This will result in a gradient of color, with the bottom of the egg being the darkest and the top being the lightest.
Table 3: Color Mixing Guide
| Color Combination | Resulting Color | Tips |
|---|---|---|
| Red + Yellow | Orange | Adjust the ratio for reddish-orange or yellowish-orange |
| Yellow + Blue | Green | Adjust the ratio for yellowish-green or bluish-green |
| Red + Blue | Purple | Adjust the ratio for reddish-purple or bluish-purple |
| Color + Water | Pastel Shade | Add water gradually to achieve the desired lightness |
Creative Color Combinations:
- Teal: Mix blue and green with a touch of white (diluted white food coloring or a drop of milk).
- Lavender: Mix purple with a touch of white.
- Peach: Mix orange with a touch of white.
- Mint Green: Mix green with a touch of white.
According to a study by the Color Marketing Group, understanding color theory and how colors interact can significantly enhance the aesthetic appeal of your creations.
4. What Are Some Creative Techniques to Decorate Dyed Eggs?
Decorating dyed eggs can be a fun and creative activity that allows you to express your artistic flair. Beyond simply dyeing eggs in solid colors, there are numerous techniques you can use to create unique and eye-catching designs. Here are some creative techniques to decorate dyed eggs:
4.1. Marbling
Marbling involves creating a swirling pattern on the eggshell. To achieve this effect, add a few drops of oil (such as vegetable oil) to the dye bath. The oil will create a marbled effect as it floats on the surface of the dye. Gently roll the egg in the dye to create the marbled pattern.
4.2. Tie-Dye
Tie-dyeing eggs involves using rubber bands or string to create patterns. Wrap rubber bands or string around the egg before dyeing it. After dyeing, remove the rubber bands or string to reveal the tie-dye pattern.
4.3. Wax Resist
Wax resist involves using wax to create patterns that resist the dye. You can use a wax crayon or a wax pen to draw designs on the egg before dyeing it. The wax will prevent the dye from coloring the areas covered by the wax, creating a unique pattern.
4.4. Decoupage
Decoupage involves gluing paper cutouts onto the eggshell. You can use decorative paper, fabric scraps, or even magazine clippings to create intricate designs. Apply a thin layer of glue (such as Mod Podge) to the egg and carefully press the paper cutouts onto the surface.
4.5. Glitter
Adding glitter to dyed eggs can create a sparkling effect. Apply a thin layer of glue to the egg and sprinkle glitter over the surface. Let the glue dry completely before handling the egg.
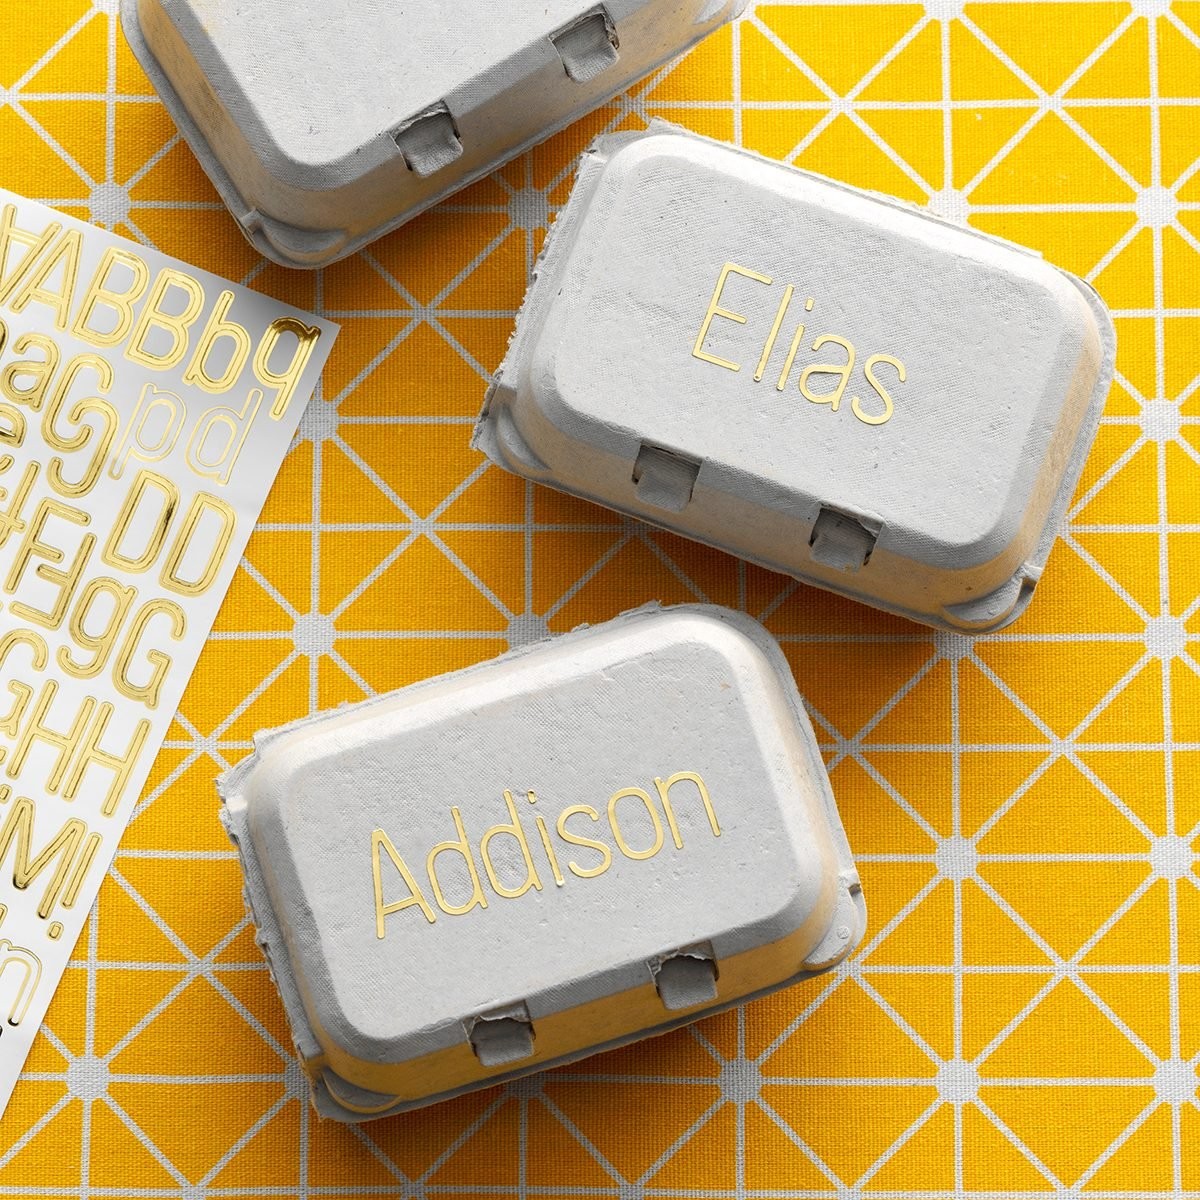
4.6. Stickers and Decals
Using stickers and decals is a simple and effective way to decorate dyed eggs. You can find a variety of stickers and decals at craft stores, ranging from simple shapes to intricate designs.
4.7. Painting
Painting dyed eggs allows for more detailed and intricate designs. You can use acrylic paints or edible food markers to create custom patterns and images on the eggshell.
Table 4: Creative Egg Decorating Techniques
| Technique | Description | Tips |
|---|---|---|
| Marbling | Creating a swirling pattern using oil in the dye bath | Use a small amount of oil to avoid excessive oiliness |
| Tie-Dye | Using rubber bands or string to create patterns | Wrap the rubber bands or string tightly for crisp patterns |
| Wax Resist | Using wax to create patterns that resist the dye | Use a wax crayon or wax pen for precise designs |
| Decoupage | Gluing paper cutouts onto the eggshell | Use a thin layer of glue to avoid wrinkling the paper |
| Glitter | Adding glitter to create a sparkling effect | Apply glue sparingly to prevent clumping |
| Stickers | Using stickers and decals for simple designs | Choose stickers that adhere well to the eggshell |
| Painting | Using acrylic paints or edible food markers for detailed designs | Allow paint to dry completely before handling the egg |
According to craft expert Martha Stewart, incorporating various decorating techniques can transform ordinary dyed eggs into stunning works of art.
5. How Long Do Dyed Eggs Last and How Should They Be Stored?
The shelf life and proper storage of dyed eggs are essential for ensuring food safety and preventing spoilage. Here are guidelines on how long dyed eggs last and how they should be stored:
5.1. Shelf Life
Hard-boiled eggs, whether dyed or not, typically last for about one week in the refrigerator. This is because the cooking process destroys most bacteria, but some bacteria can still grow over time. According to the USDA, hard-boiled eggs should be consumed within 7 days for optimal safety and quality.
5.2. Storage
To maximize the shelf life of dyed eggs, they should be stored properly in the refrigerator. Here are some storage tips:
- Refrigerate Promptly: Hard-boiled eggs should be refrigerated within two hours of cooking to prevent bacterial growth.
- Store in the Shell: Store hard-boiled eggs in their shells to prevent them from drying out and absorbing odors from the refrigerator.
- Use an Egg Carton: Store the eggs in an egg carton to protect them from damage and prevent them from rolling around in the refrigerator.
- Avoid Temperature Fluctuations: Keep the refrigerator temperature consistent to prevent bacterial growth. The ideal refrigerator temperature is between 34°F and 40°F (1°C and 4°C).
5.3. Signs of Spoilage
It’s essential to recognize the signs of spoilage to avoid consuming unsafe eggs. Here are some signs that a dyed egg has gone bad:
- Unpleasant Odor: A foul or sulfurous odor is a clear indication that the egg has spoiled.
- Slimy Texture: A slimy or sticky texture on the eggshell or the egg itself is a sign of bacterial growth.
- Discoloration: Any unusual discoloration, such as green or gray yolks, indicates spoilage.
Table 5: Egg Storage Guidelines
| Aspect | Guideline |
|---|---|
| Shelf Life | 1 week in the refrigerator |
| Refrigeration | Within 2 hours of cooking |
| Storage Method | In the shell, in an egg carton |
| Temperature | 34°F to 40°F (1°C to 4°C) |
| Signs of Spoilage | Unpleasant odor, slimy texture, discoloration |
Food Safety Tips:
- Always wash your hands thoroughly before and after handling eggs.
- Use clean utensils and surfaces when preparing and dyeing eggs.
- Avoid leaving hard-boiled eggs at room temperature for more than two hours.
- If you are unsure about the freshness of an egg, it’s best to discard it.
According to food safety expert Dr. Benjamin Chapman, following proper storage guidelines is crucial for preventing foodborne illnesses associated with egg consumption.
6. Can You Use Natural Ingredients to Dye Eggs Instead of Food Dye?
Yes, you can absolutely use natural ingredients to dye eggs instead of food dye. Natural dyes are a safe, eco-friendly, and fun alternative to artificial food colorings. They derive their colors from various fruits, vegetables, spices, and plants. Here are some popular natural ingredients you can use to dye eggs:
6.1. Red and Pink
- Beets: Beets are an excellent source of red and pink dyes. To use beets, chop them into small pieces and boil them in water for about 15-30 minutes. Strain the liquid and add 1 teaspoon of vinegar per 1/2 cup of liquid.
- Cranberry Juice: Cranberry juice can also create a pink or light red color. Simply soak the eggs in cranberry juice for the desired amount of time.
6.2. Yellow and Gold
- Turmeric: Turmeric is a vibrant spice that produces a beautiful yellow or gold color. Boil 1-2 tablespoons of turmeric in water for about 15-30 minutes. Strain the liquid and add 1 teaspoon of vinegar per 1/2 cup of liquid.
- Onion Skins: Onion skins can create a range of yellow and orange hues. Boil the skins of yellow onions in water for about 30 minutes. Strain the liquid and add 1 teaspoon of vinegar per 1/2 cup of liquid.
6.3. Blue and Purple
- Red Cabbage: Red cabbage is a surprising source of blue and purple dyes. Chop the cabbage into small pieces and boil it in water for about 30 minutes. Strain the liquid and add 1 teaspoon of vinegar per 1/2 cup of liquid.
- Blueberries: Blueberries can create a light blue or purple color. Mash the blueberries and boil them in water for about 15-30 minutes. Strain the liquid and add 1 teaspoon of vinegar per 1/2 cup of liquid.
6.4. Green
- Spinach: Spinach is a great option for creating a green dye. Boil spinach leaves in water for about 30 minutes. Strain the liquid and add 1 teaspoon of vinegar per 1/2 cup of liquid.
- Matcha Powder: Matcha powder can also be used to create a green dye. Mix 1-2 teaspoons of matcha powder with hot water and 1 teaspoon of vinegar per 1/2 cup of liquid.
Table 6: Natural Egg Dye Ingredients
| Color | Ingredient | Preparation |
|---|---|---|
| Red/Pink | Beets | Boil chopped beets in water for 15-30 minutes, strain, add vinegar |
| Cranberry Juice | Soak eggs in cranberry juice | |
| Yellow/Gold | Turmeric | Boil turmeric in water for 15-30 minutes, strain, add vinegar |
| Onion Skins | Boil onion skins in water for 30 minutes, strain, add vinegar | |
| Blue/Purple | Red Cabbage | Boil chopped red cabbage in water for 30 minutes, strain, add vinegar |
| Blueberries | Mash blueberries, boil in water for 15-30 minutes, strain, add vinegar | |
| Green | Spinach | Boil spinach leaves in water for 30 minutes, strain, add vinegar |
| Matcha Powder | Mix matcha powder with hot water and vinegar |
Tips for Using Natural Dyes:
- Use White Eggs: White eggs will result in brighter and more vibrant colors than brown eggs.
- Simmer for Longer: Simmering the eggs in the dye bath for an extended period can result in deeper colors.
- Experiment with Combinations: Experiment with different combinations of natural ingredients to create unique colors.
- Add Vinegar: Vinegar helps the dye adhere to the eggshell, resulting in a more intense color.
According to a study by the Journal of Food Science, natural food colorings are becoming increasingly popular due to their health benefits and environmental friendliness.
7. How Do You Prevent the Eggshells from Cracking While Dyeing?
Preventing eggshells from cracking while dyeing is crucial for achieving perfectly colored eggs. Cracked eggs can lead to uneven coloring and a messy dyeing process. Here are some effective tips to prevent eggshells from cracking:
7.1. Start with Room Temperature Eggs
Using eggs that are at room temperature can help prevent cracking. Cold eggs are more likely to crack when placed in hot water due to the sudden temperature change. Allow the eggs to sit at room temperature for about 30 minutes before boiling them.
7.2. Use a Gentle Boiling Method
Boiling eggs gently can help prevent cracking. Instead of bringing the water to a rapid boil, bring it to a simmer and then gently add the eggs. This will reduce the risk of the eggs bumping against each other and cracking.
7.3. Add Vinegar to the Boiling Water
Adding vinegar to the boiling water can help strengthen the eggshells and prevent cracking. Vinegar contains acetic acid, which can help to harden the eggshells. Add about 1-2 tablespoons of vinegar to the boiling water.
7.4. Avoid Overcrowding the Pan
Overcrowding the pan can increase the risk of eggs cracking. Ensure there is enough space between the eggs so they don’t bump against each other during boiling.
7.5. Cool the Eggs Gradually
Cooling the eggs gradually can help prevent cracking. After boiling, remove the eggs from the hot water and place them in a bowl of cold water. Allow the eggs to cool gradually before dyeing them.
Table 7: Tips to Prevent Eggshell Cracking
| Tip | Description |
|---|---|
| Room Temperature Eggs | Allow eggs to sit at room temperature for 30 minutes before boiling |
| Gentle Boiling Method | Bring water to a simmer instead of a rapid boil |
| Add Vinegar to Boiling Water | Add 1-2 tablespoons of vinegar to the boiling water |
| Avoid Overcrowding | Ensure enough space between eggs in the pan |
| Gradual Cooling | Cool eggs gradually in cold water |
Additional Tips:
- Use a Padded Pan: Place a towel or a silicone mat at the bottom of the pan to cushion the eggs.
- Handle with Care: Handle the eggs gently during the boiling and dyeing process to avoid accidental cracks.
- Check for Cracks: Before dyeing, check the eggs for any existing cracks. Discard any cracked eggs to prevent a mess.
According to a study by the American Egg Board, following these tips can significantly reduce the risk of eggshells cracking during the boiling and dyeing process.
8. What Can You Do with Leftover Dye After Dyeing Eggs?
After you’ve finished dyeing eggs, you might be wondering what to do with the leftover dye. Instead of simply pouring it down the drain, there are several creative and practical ways to repurpose leftover dye. Here are some ideas:
8.1. Dye Paper or Fabric
Leftover dye can be used to dye paper or fabric. This is a great way to create colorful backgrounds for crafts, scrapbooking, or other art projects. Simply soak the paper or fabric in the dye for the desired amount of time, then rinse and dry.
8.2. Make Homemade Play Dough
You can use leftover dye to add color to homemade play dough. This is a fun and creative activity for kids. Simply add the dye to the play dough mixture and knead until the color is evenly distributed.
8.3. Color Rice or Pasta
Leftover dye can be used to color rice or pasta. This is a fun way to add color to meals and make them more appealing, especially for kids. Simply add the dye to the cooking water when boiling the rice or pasta.
8.4. Create Watercolor Paints
You can use leftover dye to create homemade watercolor paints. Simply mix the dye with a binder, such as gum arabic, and water. Store the watercolor paints in small containers.
Table 8: Repurposing Leftover Dye
| Use | Description |
|---|---|
| Dye Paper/Fabric | Create colorful backgrounds for crafts and art projects |
| Homemade Play Dough | Add color to homemade play dough for kids |
| Color Rice/Pasta | Add color to meals for visual appeal |
| Watercolor Paints | Create homemade watercolor paints for art projects |
Safety Precautions:
- Always wear gloves when handling leftover dye to avoid staining your hands.
- Use caution when boiling dyed rice or pasta, as the dye may transfer to the cooking pot.
- Store leftover dye in a labeled container and keep it out of reach of children and pets.
According to environmental expert Laura Higgins, repurposing leftover dye is an environmentally friendly way to reduce waste and minimize your impact on the planet.
9. How Can I Make Easter Egg Dyeing More Fun for Kids?
Making Easter egg dyeing a fun and engaging activity for kids involves incorporating creative ideas and interactive elements. Here are some tips to make the experience more enjoyable for children:
9.1. Set Up a Creative Dyeing Station
Create a dedicated dyeing station with all the necessary supplies within easy reach. Use colorful tablecloths, aprons, and gloves to make the station visually appealing and protect clothing from stains.
9.2. Use Fun Dyeing Tools
Instead of just spoons, provide a variety of fun dyeing tools, such as:
- Wire whisks for swirling eggs in the dye.
- Tongs for easy egg retrieval.
- Pipettes for controlled dye application.
- Paintbrushes for creating custom designs.
9.3. Incorporate Creative Decorating Techniques
In addition to traditional dyeing methods, introduce creative decorating techniques, such as:
- Marbling with oil.
- Tie-dyeing with rubber bands.
- Wax resist with crayons.
- Glitter application.
- Sticker and decal designs.
9.4. Create a Theme
Choose a theme for the egg dyeing activity, such as:
- Animal Eggs: Decorate eggs to look like various animals.
- Superhero Eggs: Create eggs inspired by popular superheroes.
- Character Eggs: Design eggs based on favorite book or movie characters.
- Pattern Eggs: Experiment with different patterns and designs.
Table 9: Making Egg Dyeing Fun for Kids
| Tip | Description |
|---|---|
| Creative Dyeing Station | Set up a colorful and organized dyeing station |
| Fun Dyeing Tools | Provide a variety of tools for easy and creative dyeing |
| Decorating Techniques | Incorporate marbling, tie-dye, wax resist, and glitter application |
| Themed Dyeing | Choose a theme for the activity to inspire creativity |
Interactive Elements:
- Egg Hunt: After dyeing and decorating, organize an egg hunt for the kids.
- Egg Decorating Contest: Hold a contest to see who can create the most creative and unique egg.
- Storytelling: Encourage kids to create stories about their decorated eggs.
According to child development expert Dr. Amanda Green, incorporating creative and interactive elements into activities can enhance children’s engagement and learning.
10. What Are Some Advanced Techniques for Egg Dyeing for Experienced Crafters?
For experienced crafters looking to elevate their egg dyeing skills, there are several advanced techniques that can create stunning and intricate designs. Here are some advanced techniques to explore:
10.1. Pysanky (Ukrainian Egg Decorating)
Pysanky is a traditional Ukrainian art form that involves using wax and dyes to create intricate patterns on eggs. The process involves applying wax to certain areas of the egg, dyeing it, and then removing the wax to reveal the design. This technique requires patience, precision, and specialized tools, such as a kistka (wax stylus).
10.2. Batik Egg Dyeing
Batik egg dyeing is similar to Pysanky but uses different tools and techniques. In Batik, hot wax is applied to the eggshell to create patterns, and then the egg is dyed. The wax is removed after the dyeing process to reveal the design.
10.3. Carved Eggs
Carved eggs involve using specialized tools to carve intricate designs into the eggshell. This technique requires a steady hand and a good understanding of eggshell structure. Carved eggs can be incredibly detailed and visually stunning.
10.4. Mosaic Eggs
Mosaic eggs involve creating intricate designs by gluing small pieces of colored eggshell onto a larger eggshell. This technique requires patience and precision but can result in beautiful and unique mosaic patterns.
Table 10: Advanced Egg Dyeing Techniques
| Technique | Description |
|---|---|
| Pysanky | Traditional Ukrainian wax-resist dyeing technique |
| Batik | Wax-resist dyeing technique using hot wax |
| Carved Eggs | Intricate designs carved into the eggshell |
| Mosaic Eggs | Designs created by gluing small pieces of colored eggshell |
Tips for Advanced Techniques:
- Practice: These techniques require practice and patience. Start with simple designs and gradually work your way up to more complex patterns.
- Use Quality Materials: Use high-quality dyes, waxes, and tools for the best results.
- Take a Class: Consider taking a class or workshop to learn these techniques from experienced instructors.
- Experiment: Don’t be afraid to experiment with different colors, patterns, and techniques to create your unique designs.
According to craft expert Emily Thompson, mastering these advanced techniques can elevate your egg dyeing skills to a professional level and result in stunning works of art.
With these tips and techniques, you’re now well-equipped to create beautiful and colorful dyed eggs. Whether you’re using food dye or natural ingredients, the possibilities are endless. For more creative ideas, detailed recipes, and expert advice, visit FOODS.EDU.VN. Explore our extensive collection of articles and tutorials to take your culinary skills to the next level.
Are you looking for reliable and easy-to-follow recipes? Do you want to deepen your understanding of culinary techniques and ingredients? FOODS.EDU.VN is your ultimate resource. Explore our website to discover a wealth of information that will inspire and empower you in the kitchen.
Visit FOODS.EDU.VN today and unlock a world of culinary knowledge.
Contact Us:
- Address: 1946 Campus Dr, Hyde Park, NY 12538, United States
- WhatsApp: +1 845-452-9600
- Website: foods.edu.vn
FAQ: Dyeing Eggs with Food Dye
1. Is it safe to eat eggs dyed with food coloring?
Yes, it is generally safe to eat eggs dyed with food coloring, as long as you use food-grade dyes and follow proper food safety guidelines. Ensure that the dye is specifically labeled for use in food products and does not contain any harmful additives.
2. Can I use brown eggs for dyeing?
Yes, you can use brown eggs for dyeing, but the colors may not be as vibrant as they would be on white eggs. Brown eggs have a darker shell, which can affect the intensity of the dye.
3. How do I get a dark, rich color when dyeing eggs?
To achieve a dark, rich color when dyeing eggs, use a higher concentration of food coloring in the dye bath and allow the eggs to soak for a longer period. You can also add more vinegar to the dye bath to help the color adhere to the eggshell.
4. What is the best way to dry dyed eggs?
The best way to dry dyed eggs is to place them on a wire rack or paper towels. This allows air to circulate around the eggs, preventing the dye from smudging. Once the tops are dry, flip the eggs to allow the bottoms to dry completely.
5. Can I reuse the dye from dyeing eggs?
It is generally not recommended to reuse the dye from dyeing eggs, as it may contain bacteria or other contaminants. It is best to discard the dye after use.
6. How long can I store dyed eggs?
Dyed eggs can be stored in the refrigerator for up to one week. Ensure that the eggs are stored in their shells and in an egg carton to protect them from damage and prevent them from absorbing odors from the refrigerator.
7. What can I do if an egg cracks while dyeing?
If an egg cracks while dyeing, it is best to discard it to prevent contamination of the dye bath. Cracked eggs can also leak dye, resulting in uneven coloring.
8. Can I use natural dyes on brown eggs?
Yes, you can use natural dyes on brown eggs, but the colors may be more muted than on white eggs. Natural dyes may also require a longer soaking time to achieve the desired color intensity.
9. How do I make pastel-colored eggs?
To make pastel-colored eggs, use a small amount of food coloring in the dye bath and dilute it with water. You can also use white food coloring or a drop of milk to create a lighter, more pastel shade.
10. What is the purpose of adding vinegar to the egg dye?
Vinegar helps the dye adhere to the eggshell, resulting in a more intense and even color. The acetic acid in vinegar enhances the binding of the dye molecules to the protein in the eggshell.