Dyeing eggs with gel food coloring is a fantastic way to create vibrant, beautiful Easter eggs, and FOODS.EDU.VN is here to guide you through the process. This method offers richer, more consistent colors than traditional dyes and opens up a world of creative possibilities. Dive in to discover all the tips and tricks for achieving stunning results and explore further culinary insights on FOODS.EDU.VN with keywords like vibrant colors, creative Easter crafts, and food decoration techniques.
1. What Makes Gel Food Coloring Ideal for Dyeing Eggs?
Gel food coloring stands out as an excellent choice for dyeing eggs due to its highly concentrated pigment, which delivers intense and vibrant colors, and its thicker consistency, which prevents the dye from running or creating a mess. It provides a smooth, even coat, ensuring a professional-looking finish on your Easter eggs.
- Concentrated Color: Gel food coloring’s high pigment concentration ensures vibrant, eye-catching colors on your eggs.
- Consistency: The thicker consistency prevents running and dripping, offering a cleaner and more controlled application.
- Even Coating: Achieve a smooth, even color distribution for a polished, professional look.
- Versatility: Gel food coloring blends easily, allowing you to create custom shades and unique color combinations.
- Long-Lasting: The colors are less likely to fade, keeping your eggs looking beautiful throughout the Easter season.
1.1. What are the Benefits of Using Gel Food Coloring?
Using gel food coloring to dye eggs has several benefits. You’ll get more vibrant colors, better control over the dyeing process, and the ability to create custom shades. According to a study by the Institute of Food Technologists, gel food coloring provides more consistent and intense coloration compared to liquid dyes.
1.2. Are There Any Drawbacks to Consider?
While gel food coloring is fantastic, it can be slightly more expensive than liquid dyes. Also, because it’s so concentrated, a little goes a long way, so you need to be careful not to use too much. However, the results are usually worth the extra cost and effort.
2. What Supplies Do You Need to Dye Eggs With Gel Food Coloring?
Before you begin, gather all the necessary supplies to ensure a smooth and enjoyable dyeing experience. Having everything on hand will streamline the process and help you achieve the best results.
- Hard-Boiled Eggs: Prepare your eggs in advance to ensure they are cool and ready to dye.
- Gel Food Coloring: Select a variety of colors to create vibrant and unique designs.
- White Vinegar: This helps the dye adhere to the eggshell for better color absorption.
- Warm Water: Use warm water to dissolve the gel food coloring effectively.
- Cups or Bowls: These will hold the dye mixtures for easy egg submersion.
- Spoon or Whisk: For stirring and dissolving the gel food coloring.
- Paper Towels: To dry the dyed eggs and prevent smudging.
- Egg Carton or Drying Rack: To allow the eggs to dry evenly.
- Gloves (Optional): Protect your hands from staining.
- Apron (Optional): Protect your clothing from accidental splatters.
2.1. How Do You Prepare Hard-Boiled Eggs for Dyeing?
To prepare hard-boiled eggs for dyeing, place the eggs in a saucepan and cover them with cold water. Bring the water to a rolling boil, then remove the pan from the heat, cover it, and let it sit for 12 minutes. After 12 minutes, drain the hot water and rinse the eggs under cold water until they are cool enough to handle. This method helps prevent the yolks from turning green and makes the eggs easier to peel.
2.2. Where Can You Purchase Gel Food Coloring?
Gel food coloring can be purchased at most craft stores, baking supply stores, and online retailers like Amazon. Popular brands include Wilton, AmeriColor, and Chefmaster. These brands offer a wide range of colors and are known for their high quality and vibrant results.
3. Step-by-Step Guide: How to Dye Eggs With Gel Food Coloring
Follow these detailed steps to achieve beautifully dyed Easter eggs using gel food coloring. Each step is designed to ensure vibrant, consistent, and professional-looking results.
-
Prepare the Dye Solutions:
- In separate cups or bowls, mix ½ cup of warm water with 1 tablespoon of white vinegar.
- Add 3-5 drops of gel food coloring to each cup, depending on the desired intensity.
- Stir well until the gel food coloring is completely dissolved.
-
Dye the Eggs:
- Gently place a hard-boiled egg into each cup of dye.
- Ensure the egg is fully submerged for even coloring.
- Soak the egg for 5-10 minutes, or until the desired shade is achieved.
- For a deeper color, leave the egg in the dye for a longer period.
-
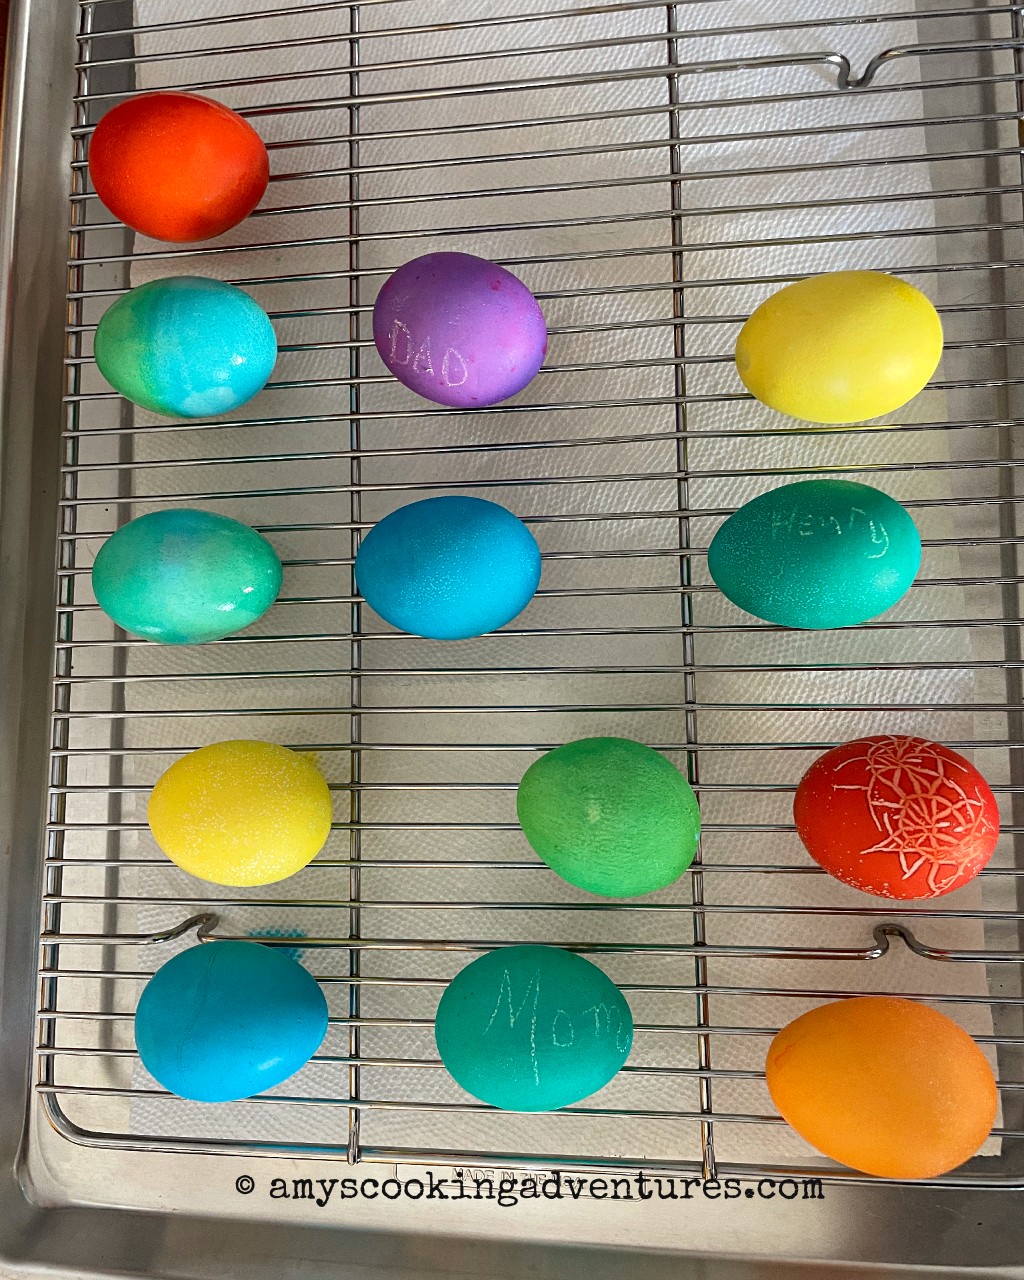
Dry the Eggs:
- Carefully remove the egg from the dye using a spoon.
- Place the egg on a paper towel to dry.
- Gently pat the egg dry to avoid smudging the color.
- Allow the egg to air dry completely on an egg carton or drying rack.
-
Repeat:
- Repeat the process with different colors to create a variety of dyed eggs.
- Experiment with different soaking times to achieve various shades.
- Consider using multiple colors on a single egg for unique designs.
3.1. What is the Ideal Water to Vinegar Ratio?
The ideal water to vinegar ratio is ½ cup of warm water to 1 tablespoon of white vinegar. The vinegar helps the dye adhere to the eggshell, resulting in more vibrant and even coloring.
3.2. How Long Should You Soak the Eggs in the Dye?
You should soak the eggs in the dye for 5-10 minutes, depending on the desired color intensity. For lighter shades, 5 minutes may be sufficient, while darker shades may require up to 10 minutes or longer. Check the eggs periodically to monitor the color development.
4. Creative Techniques: How to Achieve Unique Egg Designs
Unleash your creativity with these innovative techniques for dyeing eggs with gel food coloring. Experiment with different methods to create unique and eye-catching designs that will impress your family and friends.
-
Marbling:
- Swirl different colors of gel food coloring in a shallow dish of water.
- Gently roll the egg in the mixture to create a marbled effect.
- Dry the egg on a paper towel.
-
Ombre:
- Dip the egg into the dye for a short period, gradually increasing the submersion time.
- This creates a gradient effect from light to dark.
- Dry the egg on a paper towel.
-
Drip Dyeing:
- Use a pipette or spoon to drip different colors of gel food coloring onto the egg.
- Tilt the egg to allow the colors to blend and create unique patterns.
- Dry the egg on a paper towel.
-
Tape Designs:
- Apply tape in various shapes and patterns to the egg.
- Dye the egg as usual.
- Remove the tape to reveal the undyed design.
-
Sponge Painting:
- Apply gel food coloring to a sponge.
- Dab the sponge onto the egg to create a textured effect.
- Dry the egg on a paper towel.
4.1. How Can You Create a Marbled Effect?
To create a marbled effect, fill a shallow dish with water and swirl in a few drops of different gel food colors. Gently roll the egg in the mixture, allowing the colors to blend randomly. Remove the egg and let it dry on a paper towel. The result will be a beautiful, marbled design.
4.2. What is the Best Way to Achieve an Ombre Effect?
To achieve an ombre effect, dip the egg into the dye for a short period, such as 1 minute. Gradually increase the submersion time in increments of 1-2 minutes, allowing the color to deepen at each stage. This creates a smooth transition from light to dark, resulting in a stunning ombre effect.
5. Safety Tips: Handling Food Coloring and Eggs
When dyeing eggs with gel food coloring, it’s important to follow safety guidelines to protect yourself and ensure the eggs are safe to eat. Proper handling of food coloring and eggs can prevent staining, contamination, and other potential issues.
-
Wear Gloves:
- Protect your hands from staining by wearing gloves during the dyeing process.
- This also prevents the transfer of oils and bacteria to the eggshells.
-
Protect Surfaces:
- Cover your work surface with a protective layer, such as newspaper or a plastic tablecloth.
- This prevents staining from accidental spills or splatters.
-
Use Food-Safe Dyes:
- Ensure that the gel food coloring you use is food-safe and approved for use in edible products.
- Check the label for certification and safety information.
-
Avoid Cross-Contamination:
- Use separate cups and utensils for each color to prevent cross-contamination.
- This ensures that the colors remain pure and vibrant.
-
Refrigerate Promptly:
- Refrigerate the dyed eggs promptly after they have dried.
- Store them in the refrigerator at a temperature of 40°F (4°C) or below to prevent bacterial growth.
-
Consume Within 7 Days:
- Consume the hard-boiled eggs within 7 days of dyeing to ensure they are safe to eat.
- Discard any eggs that have been left at room temperature for more than 2 hours.
5.1. Is Gel Food Coloring Safe to Eat?
Yes, gel food coloring is generally safe to eat as long as it is labeled as food-safe and used in moderation. Always check the product label for safety information and usage guidelines. According to the Food and Drug Administration (FDA), approved food colorings are safe for consumption when used as directed.
5.2. How Long Do Dyed Eggs Last?
Dyed hard-boiled eggs will last for about one week in the refrigerator. It is important to store them properly at a temperature of 40°F (4°C) or below to prevent bacterial growth. Discard any eggs that have been left at room temperature for more than two hours.
6. Troubleshooting Common Issues When Dyeing Eggs
Even with careful preparation, you may encounter some challenges while dyeing eggs. Here are common issues and practical solutions to help you achieve flawless results.
-
Uneven Color:
- Problem: The color appears patchy or uneven on the eggshell.
- Solution: Ensure the egg is fully submerged in the dye and that the dye is thoroughly mixed. Rotate the egg periodically to ensure even coverage.
-
Fading Color:
- Problem: The color fades after the egg dries.
- Solution: Use a higher concentration of gel food coloring or soak the egg in the dye for a longer period. Adding more vinegar to the dye solution can also help the color adhere better.
-
Streaky Appearance:
- Problem: Streaks or lines appear on the eggshell after dyeing.
- Solution: Gently pat the egg dry with a paper towel instead of rubbing it. Ensure the egg is completely dry before handling it to prevent smudging.
-
Cracked Eggs:
- Problem: Eggs crack during the boiling or dyeing process.
- Solution: Avoid boiling the eggs too vigorously. Instead, bring the water to a gentle boil and then reduce the heat. Allow the eggs to cool gradually after boiling to prevent cracking.
-
Stained Hands:
- Problem: Food coloring stains your hands during the dyeing process.
- Solution: Wear gloves to protect your hands from staining. If staining occurs, wash your hands with soap and water immediately. You can also use a mixture of baking soda and water to help remove stubborn stains.
6.1. Why is the Color Not Vibrant Enough?
If the color is not vibrant enough, try adding more gel food coloring to the dye solution. Also, ensure that you are using warm water, as it helps the dye dissolve and adhere to the eggshell more effectively. Soaking the egg for a longer period can also intensify the color.
6.2. How Do You Prevent the Eggs From Cracking?
To prevent the eggs from cracking, avoid boiling them too vigorously. Bring the water to a gentle boil and then reduce the heat. Adding a teaspoon of vinegar to the water can also help prevent cracking. Allow the eggs to cool gradually after boiling to minimize the risk of cracks.
7. Advanced Techniques: Layering and Painting With Gel Food Coloring
Take your egg dyeing skills to the next level with these advanced techniques. Layering and painting with gel food coloring allow you to create intricate designs and personalized Easter eggs that showcase your artistic flair.
-
Layering Colors:
- Dye the egg in a base color and let it dry completely.
- Apply additional colors in layers using a small brush or sponge.
- Allow each layer to dry before applying the next to prevent bleeding.
- Create depth and dimension by layering different shades of the same color.
-
Painting Designs:
- Use a fine-tipped brush to paint intricate designs onto the egg.
- Mix gel food coloring with a small amount of vodka or clear extract to create a paint-like consistency.
- Create detailed patterns, floral motifs, or personalized messages.
- Allow the paint to dry completely before handling the egg.
-
Using Stencils:
- Cut out stencils from paper or use pre-made stencils.
- Place the stencil on the egg and use a sponge or brush to apply gel food coloring.
- Remove the stencil carefully and allow the design to dry.
- Create precise and intricate patterns with ease.
-
Adding Details With Edible Markers:
- Use edible markers to add fine details and outlines to your designs.
- Create intricate patterns, lettering, or facial features on your eggs.
- Edible markers are available in a variety of colors and tip sizes for precise application.
7.1. What Kind of Brushes Should You Use for Painting?
For painting intricate designs on eggs, use fine-tipped brushes made of synthetic bristles. These brushes provide better control and precision compared to natural bristle brushes. Look for brushes specifically designed for cake decorating, as they are ideal for working with gel food coloring.
7.2. How Can Stencils Help With Egg Decoration?
Stencils can help with egg decoration by providing a precise and easy way to create intricate patterns and designs. Simply place the stencil on the egg and use a sponge or brush to apply gel food coloring. Remove the stencil carefully to reveal the design. Stencils are available in a variety of shapes and sizes, allowing you to create a wide range of patterns.
8. Natural Alternatives: Dyeing Eggs With Natural Food Coloring
If you prefer a more natural approach, you can dye eggs using natural food coloring derived from fruits, vegetables, and spices. These natural dyes offer a safer and eco-friendly alternative to synthetic food coloring.
-
Beet Juice (Pink/Red):
- Boil beets in water and use the strained juice as a dye.
- Soak the eggs in the beet juice for 30 minutes to several hours, depending on the desired intensity.
-
Turmeric (Yellow):
- Add turmeric powder to boiling water and use the strained liquid as a dye.
- Soak the eggs in the turmeric solution for 30 minutes to several hours.
-
Red Cabbage (Blue/Purple):
- Boil chopped red cabbage in water and use the strained juice as a dye.
- Soak the eggs in the cabbage solution for 30 minutes to several hours.
-
Spinach (Green):
- Boil spinach leaves in water and use the strained juice as a dye.
- Soak the eggs in the spinach solution for 30 minutes to several hours.
-
Coffee (Brown):
- Use strong brewed coffee as a dye.
- Soak the eggs in the coffee for 30 minutes to several hours.
8.1. How Do Natural Dyes Compare to Gel Food Coloring?
Natural dyes offer a more subtle and muted color palette compared to the vibrant and intense colors of gel food coloring. Natural dyes are also less predictable, as the color intensity can vary depending on the source and preparation method. However, they are a safer and more eco-friendly option for those who prefer to avoid synthetic additives.
8.2. What are the Advantages of Using Natural Food Coloring?
The advantages of using natural food coloring include:
- Safety: Natural dyes are derived from edible sources and are free from synthetic chemicals.
- Eco-Friendliness: Natural dyes are biodegradable and environmentally sustainable.
- Health Benefits: Some natural dyes, such as turmeric and beet juice, contain antioxidants and other beneficial compounds.
9. Storage Solutions: How to Keep Your Dyed Eggs Fresh
Proper storage is essential to keep your dyed eggs fresh and safe to eat. Following these storage guidelines will help prevent bacterial growth and ensure that your eggs remain in optimal condition for consumption.
-
Refrigerate Promptly:
- Refrigerate the dyed eggs promptly after they have dried.
- Do not leave the eggs at room temperature for more than 2 hours.
-
Store in the Egg Carton:
- Store the dyed eggs in the egg carton to prevent them from rolling around and cracking.
- The egg carton also provides a barrier against odors and flavors from other foods in the refrigerator.
-
Maintain Proper Temperature:
- Store the eggs in the refrigerator at a temperature of 40°F (4°C) or below.
- Use a refrigerator thermometer to monitor the temperature and ensure it stays within the safe range.
-
Avoid Stacking:
- Avoid stacking other items on top of the egg carton to prevent the eggs from cracking.
- Store the egg carton on a shelf where it will not be subject to excessive weight or pressure.
-
Use Within 7 Days:
- Consume the dyed eggs within 7 days of dyeing to ensure they are safe to eat.
- Discard any eggs that have been stored for longer than 7 days, even if they appear to be in good condition.
9.1. How Does Refrigeration Help Preserve Dyed Eggs?
Refrigeration helps preserve dyed eggs by slowing down the growth of bacteria and other microorganisms that can cause spoilage. Maintaining a temperature of 40°F (4°C) or below inhibits the growth of harmful bacteria, such as Salmonella, and extends the shelf life of the eggs.
9.2. What are the Signs of Spoiled Hard-Boiled Eggs?
The signs of spoiled hard-boiled eggs include:
- Unpleasant Odor: A sour or rotten smell.
- Slimy Texture: A sticky or slimy feel on the eggshell or egg white.
- Discoloration: A greenish or grayish discoloration of the egg white or yolk.
- Sulfurous Smell: A strong sulfurous smell when the egg is peeled.
- Floating in Water: If the egg floats in water, it is likely spoiled and should be discarded.
10. Egg Decorating Ideas Beyond Dyeing: Unleash Your Creativity
While dyeing is a classic method for decorating Easter eggs, there are many other creative techniques you can explore to make your eggs truly unique and special.
-
Glitter Eggs:
- Apply a thin layer of glue to the eggshell.
- Sprinkle glitter over the glue and let it dry completely.
- Create dazzling and eye-catching glitter eggs.
-
Washi Tape Eggs:
- Wrap washi tape around the egg in various patterns and designs.
- Create colorful and whimsical washi tape eggs.
- Washi tape is easy to apply and remove, making it a great option for kids.
-
Decoupage Eggs:
- Cut out small images from paper napkins or tissue paper.
- Apply Mod Podge to the eggshell and carefully adhere the images.
- Seal the images with another layer of Mod Podge.
- Create beautiful and intricate decoupage eggs.
-
Embroidery Floss Eggs:
- Wrap embroidery floss around the egg in various colors and patterns.
- Secure the ends of the floss with glue.
- Create textured and colorful embroidery floss eggs.
-
Melted Crayon Eggs:
- Heat the hard-boiled eggs while they are still warm.
- Use crayons to draw designs on the warm eggshells.
- The heat from the egg will melt the crayon, creating unique and vibrant patterns.
10.1. How Can You Make Glitter Eggs?
To make glitter eggs, apply a thin layer of craft glue to the eggshell using a brush. Sprinkle glitter generously over the glue, ensuring that the entire surface is covered. Gently shake off any excess glitter and let the glue dry completely. The result will be dazzling and eye-catching glitter eggs that sparkle and shine.
10.2. What is Decoupage and How Can You Use it to Decorate Eggs?
Decoupage is the art of decorating objects by gluing colored paper cutouts onto them in combination with special paint effects, gold leaf, and other decorative elements. To decorate eggs with decoupage, cut out small images from paper napkins or tissue paper. Apply Mod Podge to the eggshell and carefully adhere the images. Seal the images with another layer of Mod Podge to protect them and create a smooth finish. The result will be beautiful and intricate decoupage eggs.
Dyeing eggs with gel food coloring is a delightful activity that combines creativity, tradition, and fun. Whether you’re aiming for vibrant, single-colored eggs or intricate, multi-layered designs, gel food coloring offers the versatility and intensity needed to bring your vision to life. Remember to prioritize safety by using food-safe dyes and following proper storage guidelines to ensure that your beautifully decorated eggs are safe to enjoy.
Looking for more creative ideas and expert tips for your culinary adventures? Visit FOODS.EDU.VN today and explore a wealth of information on food decoration, cake decorating, and other exciting culinary techniques. Our comprehensive guides and resources will help you elevate your skills and create memorable moments in the kitchen.
Address: 1946 Campus Dr, Hyde Park, NY 12538, United States. Whatsapp: +1 845-452-9600. Website: foods.edu.vn
FAQ: Dyeing Eggs With Gel Food Coloring
1. Can I Use Gel Food Coloring That Is Not Labeled as Food-Safe?
No, it is not recommended to use gel food coloring that is not labeled as food-safe. Non-food-safe dyes may contain harmful chemicals that are not safe for consumption. Always use gel food coloring that is specifically designed for use in edible products.
2. How Can I Lighten a Dye Color That Is Too Dark?
To lighten a dye color that is too dark, add more warm water to the dye solution. This will dilute the concentration of the dye and create a lighter shade. You can also try dipping the egg for a shorter period to achieve a lighter color.
3. What Can I Use Instead of Vinegar in the Dye Solution?
If you don’t have vinegar on hand, you can use lemon juice as a substitute. Lemon juice, like vinegar, helps the dye adhere to the eggshell and create more vibrant colors. Use the same amount of lemon juice as you would vinegar in the dye solution.
4. How Do I Prevent the Dye From Staining My Clothes?
To prevent the dye from staining your clothes, wear an apron or old clothing that you don’t mind getting stained. You can also cover your work surface with a protective layer, such as newspaper or a plastic tablecloth.
5. Can I Use Brown Eggs Instead of White Eggs?
Yes, you can use brown eggs instead of white eggs, but the colors will appear less vibrant. Brown eggs have a darker shell, which can affect the intensity of the dye. If you want to achieve brighter colors, it is best to use white eggs.
6. How Do I Store Leftover Dye Solution?
You can store leftover dye solution in an airtight container in the refrigerator. However, the dye may lose some of its intensity over time, so it is best to use it as soon as possible. Discard any dye solution that shows signs of mold or spoilage.
7. What Is the Best Way to Clean Up Food Coloring Spills?
The best way to clean up food coloring spills is to act quickly. Blot the spill with a clean cloth or paper towel to absorb as much of the dye as possible. Then, wash the area with soap and water. For stubborn stains, you can use a mixture of baking soda and water or a commercial stain remover.
8. How Can I Make My Dyed Eggs Shiny?
To make your dyed eggs shiny, you can apply a thin layer of vegetable oil or cooking spray to the eggshells after they have dried. This will give them a glossy finish and enhance the colors. Be sure to use a light touch to avoid making the eggs greasy.
9. Can I Use Gel Food Coloring to Dye Other Foods?
Yes, you can use gel food coloring to dye other foods, such as cake batter, frosting, and fondant. Gel food coloring is a versatile and effective way to add vibrant colors to a wide range of culinary creations.
10. Is It Safe to Compost the Eggshells After Dyeing?
Yes, it is generally safe to compost the eggshells after dyeing, as long as you have used food-safe dyes. Eggshells are a valuable addition to compost, as they provide calcium and other nutrients that can benefit your garden.