Are you struggling with stubborn, burned food stuck to your pots and pans? Don’t worry, FOODS.EDU.VN is here to help! This guide explores several effective techniques for removing burned food, restoring your cookware to its former glory. We’ll cover everything from pantry staples to specialized cleaning products, providing step-by-step instructions. With these methods, you’ll discover the best approach to rescue your cookware and prevent future mishaps and keep your kitchen spotless, also mastering essential cleaning hacks and simple solutions.
1. What Causes Food to Burn and Stick to Pots?
Understanding why food burns and sticks is the first step in preventing it. So, what makes this happen?
Food sticks to pots and pans due to several factors:
- Inadequate Lubrication: Insufficient oil, butter, or other cooking fats can cause food to directly contact the hot surface, leading to sticking and burning.
- Incorrect Temperature: Cooking at excessively high temperatures can quickly burn food, especially if it’s not stirred or monitored closely.
- Uneven Heat Distribution: Pots and pans with uneven heat distribution can create hot spots that cause localized burning.
- Type of Cookware: Some materials are more prone to sticking than others. For example, stainless steel can be challenging if not used correctly, while non-stick cookware can lose its effectiveness over time.
- Food Composition: Foods high in sugars or starches are more likely to caramelize and burn, especially if they’re not properly hydrated or cooked at a moderate temperature.
- Lack of Moisture: Without enough liquid, food can dry out and burn, particularly in dishes that require simmering or braising.
- Dirty Cookware: Residue from previous cooking sessions can heat up and cause new food to stick and burn more easily.
By understanding these causes, you can take preventive measures such as using enough oil, controlling cooking temperatures, choosing the right cookware, and regularly cleaning your pots and pans. These steps will help you keep your kitchen clean and tidy.
2. What Are the Best Tools for Removing Burned Food?
Having the right tools on hand can make the job of cleaning burned pots much easier and more efficient. Here’s a rundown of essential cleaning tools:
| Tool | Description | Benefits |
|---|---|---|
| Spatulas | Choose from metal, silicone, or wooden spatulas to scrape off loose debris without damaging the pot’s surface. | Effective for removing initial layers of burnt food; silicone and wooden spatulas are gentle on delicate surfaces. |
| Scrub Brushes | Stiff-bristled brushes help to scrub away stubborn residue. Look for brushes with ergonomic handles for a comfortable grip. | Ideal for reaching into corners and crevices; provides leverage for scrubbing without excessive force. |
| Sponges | Non-scratch sponges are great for general cleaning and wiping away loosened debris. Avoid abrasive sponges that can scratch delicate surfaces. | Gentle on surfaces; effective for soaking up cleaning solutions and wiping away residue. |
| Scouring Pads | Use stainless steel or copper scouring pads for tough stains and burnt-on food. Be cautious when using on delicate surfaces to prevent scratches. | Excellent for tackling stubborn stains; provides abrasive power to lift burnt-on food. |
| Rubber Gloves | Protect your hands from harsh chemicals and hot water by wearing rubber gloves during cleaning. | Keeps hands clean and dry; protects skin from irritation and potential burns. |
| Cleaning Cloths | Microfiber cloths are excellent for wiping surfaces clean and drying pots and pans after washing. | Absorbs moisture effectively; leaves surfaces streak-free. |
| Spray Bottles | Use spray bottles to apply cleaning solutions evenly over the affected areas. | Allows for targeted application of cleaning solutions; helps to saturate burnt areas for better cleaning. |
| Toothbrushes | Old toothbrushes are perfect for scrubbing small, hard-to-reach areas around handles and rivets. | Ideal for detail cleaning; reaches into tight spaces where larger tools can’t. |
| Dish Scrapers | Designed specifically for removing stuck-on food, dish scrapers are great for prepping the surface before scrubbing. | Helps to loosen and lift stubborn food particles; prevents excessive scrubbing that can damage cookware. |
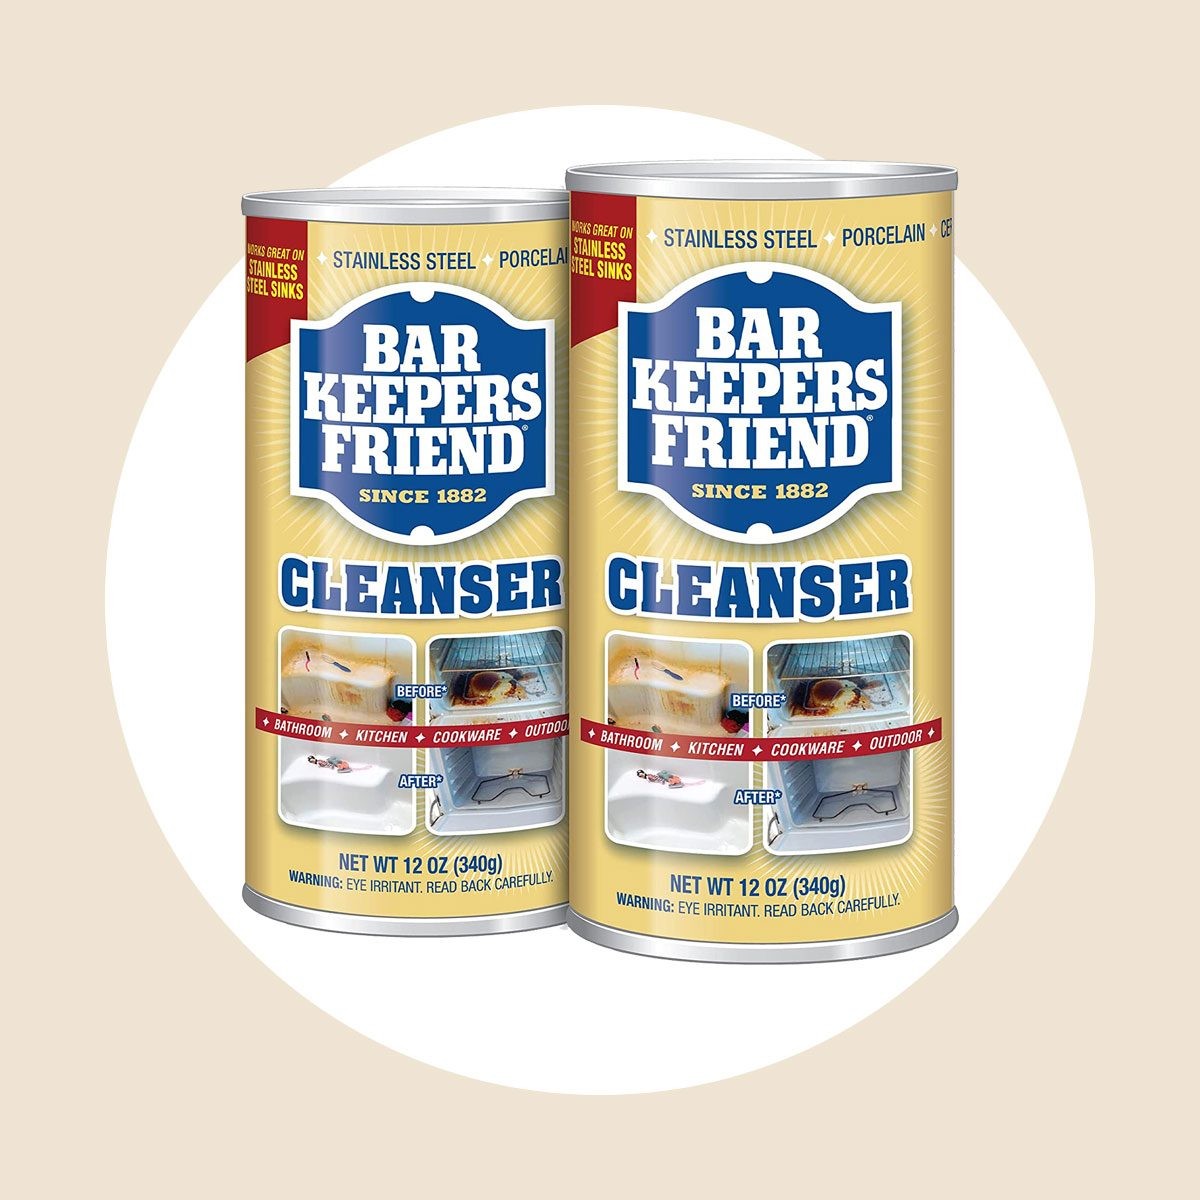
| Bar Keepers Friend | Is a brand of cleaning products that uses oxalic acid as a main ingredient. | Bar Keepers Friend is known for its effectiveness in removing rust, tarnish, and stains from various surfaces including stainless steel, porcelain, ceramic, glass, and more. |

Having these tools in your cleaning arsenal will make the task of removing burned food from pots and pans much more manageable.
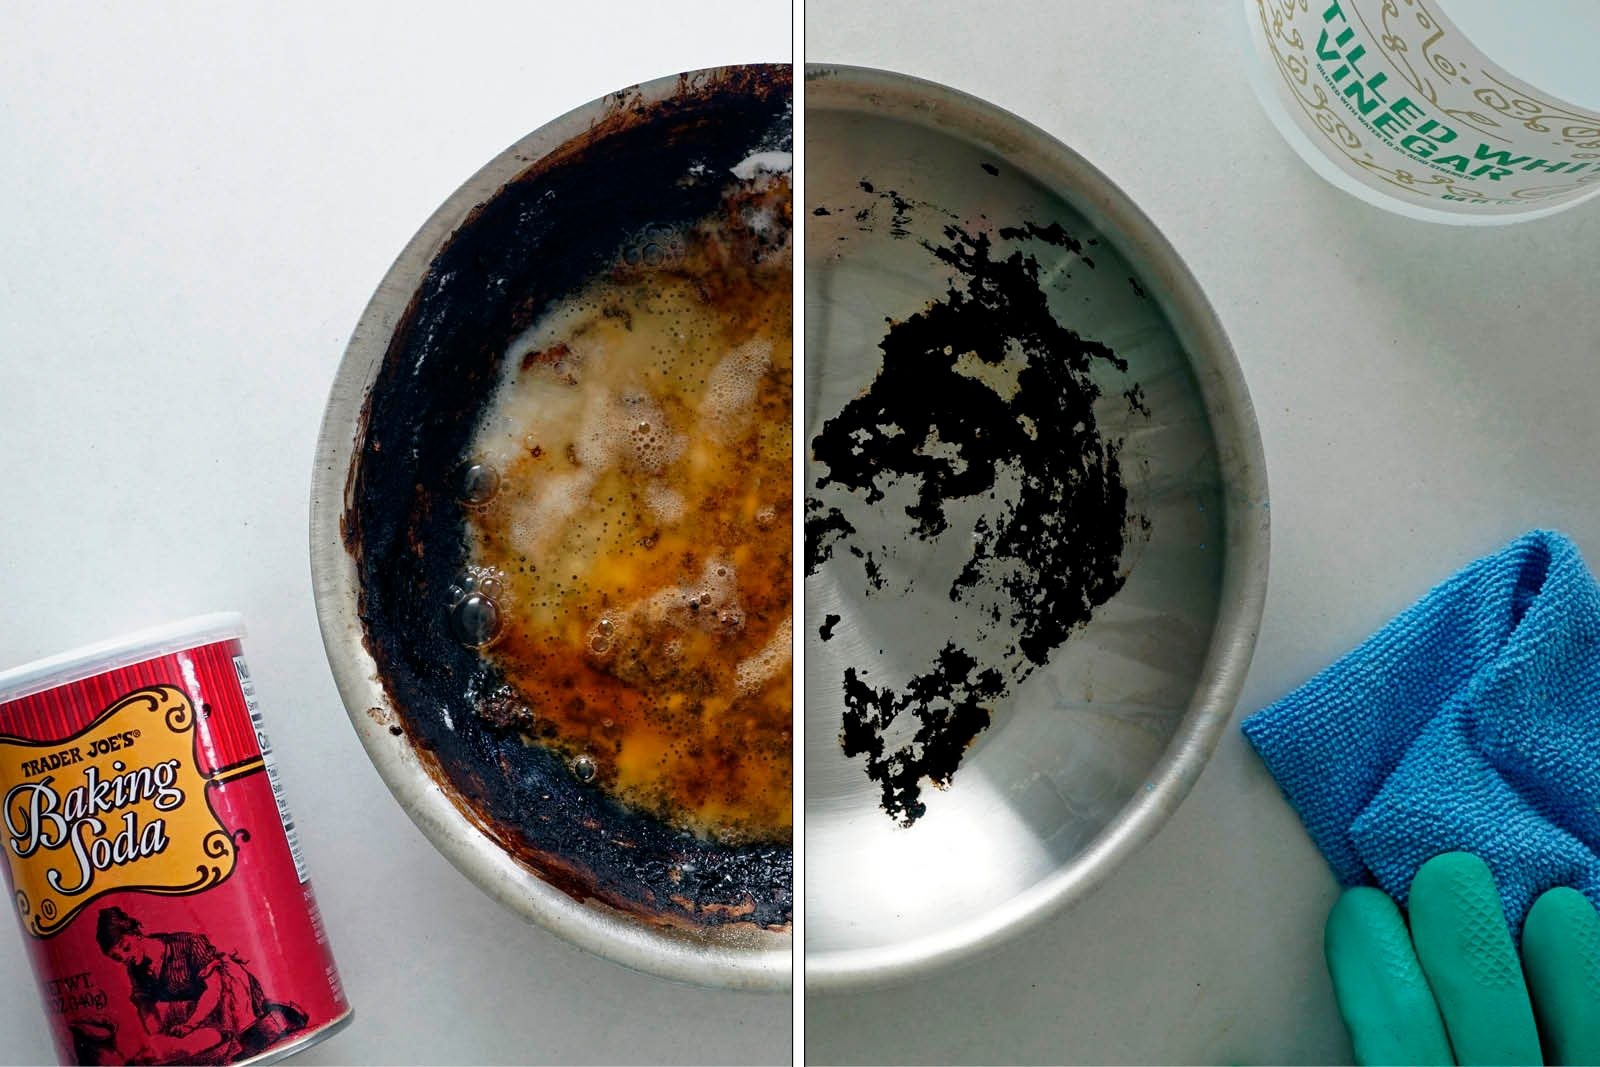
3. How Does Baking Soda and Vinegar Remove Burned Food?
Baking soda and vinegar is a powerful combination for cleaning burned pots and pans. Here’s how this method works:
- Neutralization Reaction: Vinegar (acetic acid) reacts with baking soda (sodium bicarbonate) in a neutralization reaction, producing carbon dioxide gas and water. The fizzing action helps to loosen the burned food particles from the surface of the pot.
- Abrasive Action of Baking Soda: Baking soda is a mild abrasive, which helps to scrub away the loosened debris without scratching the pot’s surface.
- Degreasing Properties: Baking soda has degreasing properties that help to break down grease and oil, making it easier to remove the burned food.
- Odor Neutralization: Baking soda also helps to neutralize odors, which can be particularly useful if the burned food has left a lingering smell.
Step-by-Step Guide:
- Pour Equal Parts Water and Vinegar: Fill the burned pot with equal parts water and white vinegar. Use enough liquid to cover the burned areas.
- Boil the Mixture: Bring the mixture to a boil on the stovetop. The boiling action helps to loosen the burned food particles.
- Add Baking Soda: Remove the pot from the heat and add 2 tablespoons of baking soda. The mixture will fizz as the baking soda reacts with the vinegar.
- Soak: Allow the mixture to soak for at least 30 minutes, or longer for stubborn stains. The longer the soaking time, the easier it will be to remove the burned food.
- Scrub: After soaking, use a non-scratch sponge or scrub brush to scrub away the loosened debris. For tough stains, make a paste of baking soda and water and apply it directly to the affected areas. Let it sit for a few minutes before scrubbing again.
- Rinse and Dry: Rinse the pot thoroughly with warm water and dry it with a clean cloth. Inspect the pot to ensure all burned food has been removed. If necessary, repeat the process or try another cleaning method.
Tips and Tricks:
- For extra cleaning power, add a few drops of dish soap to the mixture before boiling.
- If the burned food is particularly stubborn, try using a wooden spoon or spatula to scrape away the loosened debris before scrubbing.
- To prevent future burns, consider using a diffuser or heat-tamer when cooking delicate foods.
- According to a study by the University of Illinois Extension, baking soda and vinegar are effective for cleaning a variety of household surfaces, including pots and pans.
4. How Effective Are Lemons in Cleaning a Burned Pot?
Lemons are a natural and effective way to clean burned pots and pans. Their acidity helps to break down the burned food particles, making them easier to remove. Here’s how this method works:
- Acidity: Lemons contain citric acid, which is a natural cleaning agent. The acid helps to dissolve the bonds between the burned food and the surface of the pot.
- Deodorizing Properties: Lemons have natural deodorizing properties that can help to remove any lingering odors from the burned food.
- Gentle Cleaning: Lemons are gentle on most surfaces, making them a safe option for cleaning delicate pots and pans.
Step-by-Step Guide:
- Slice Lemons: Cut 2-3 lemons into thick slices.
- Arrange in Pot: Place the lemon slices in the burned pot, covering the affected areas.
- Add Water: Fill the pot with enough water to just barely cover the lemon slices.
- Boil: Place the pot over medium-high heat and bring the lemon water to a boil. Allow it to boil for 5-8 minutes.
- Soak: Remove the pot from the heat and let it soak for at least 30 minutes. The longer the soaking time, the easier it will be to remove the burned food.
- Scrub: After soaking, use a non-scratch sponge or scrub brush to scrub away the loosened debris. The lemon water should have softened the burned food, making it easier to remove.
- Rinse and Dry: Rinse the pot thoroughly with warm water and dry it with a clean cloth. Inspect the pot to ensure all burned food has been removed. If necessary, repeat the process or try another cleaning method.
Tips and Tricks:
- For extra cleaning power, add a tablespoon of salt to the lemon water before boiling.
- If the burned food is particularly stubborn, try using the cut side of a lemon to scrub the affected areas directly.
- To prevent future burns, consider using a lower heat setting and stirring the food more frequently.
- According to a study by the University of California, Berkeley, lemons are effective for cleaning a variety of household surfaces, including pots and pans.
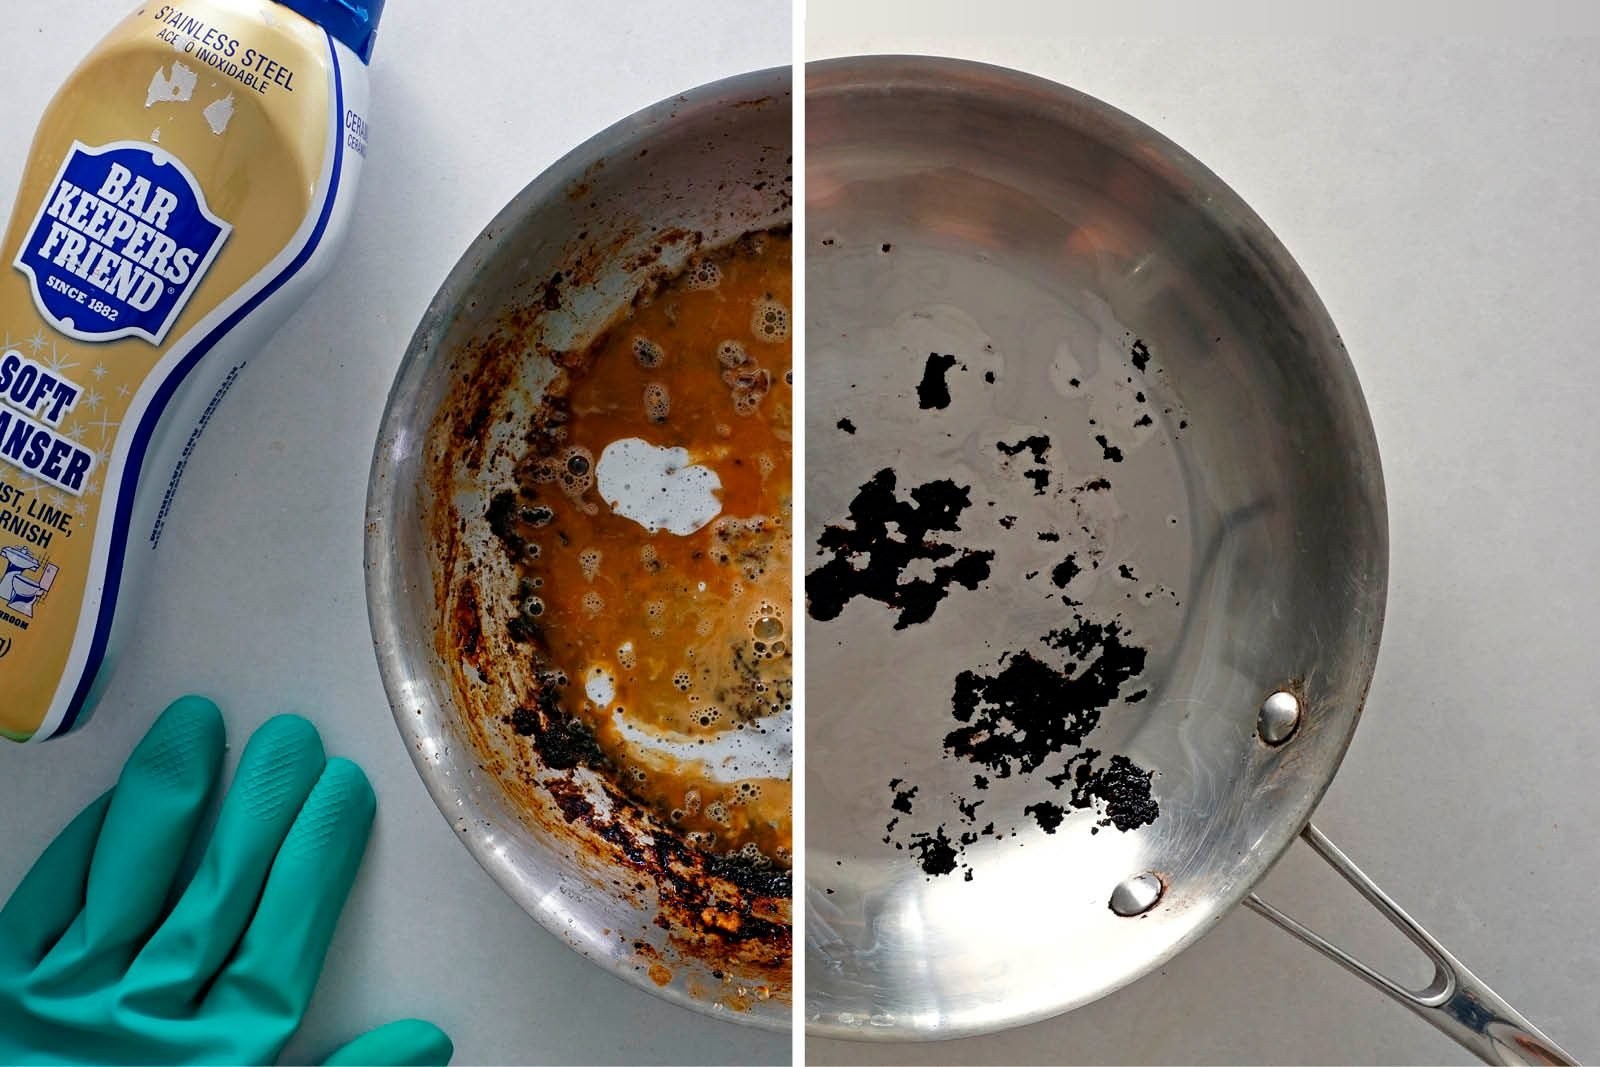
5. Why Is Bar Keepers Friend Effective for Cleaning Burned Cookware?
Bar Keepers Friend is a highly effective cleaning product for removing burned food from cookware. It contains oxalic acid, which breaks down tough stains and grime. Here’s why it works so well:
- Oxalic Acid: The active ingredient, oxalic acid, is a powerful cleaning agent that dissolves rust, tarnish, and stubborn food stains.
- Abrasive Qualities: The fine powder provides a gentle abrasive action that helps to lift burned food particles without causing excessive scratching.
- Versatility: It’s effective on various types of cookware, including stainless steel, ceramic, and porcelain.
- Fast-Acting: Bar Keepers Friend works quickly, often requiring minimal soaking or scrubbing.
Step-by-Step Guide:
- Wet the Pan: Rinse the burned pan with hot water to dampen the surface.
- Create a Paste: Sprinkle Bar Keepers Friend powder onto the wet surface and add a bit more water to create a paste. The paste should be thick enough to cling to the burned areas.
- Apply the Paste: Using a soft sponge or cloth, spread the paste over the burned food residue. Ensure all affected areas are covered.
- Let It Sit: Allow the paste to sit for 1-2 minutes. For heavily burned areas, you can let it sit a bit longer, but don’t allow it to dry completely.
- Scrub Gently: Using a non-abrasive sponge or scrub brush, gently scrub the burned areas. The oxalic acid and abrasive action will help to loosen the burned food particles.
- Rinse Thoroughly: Rinse the pan thoroughly with hot water, ensuring all traces of the cleaning product are removed.
- Dry: Dry the pan with a clean cloth. Inspect the pan to ensure all burned food has been removed. If necessary, repeat the process or try another cleaning method.
Tips and Tricks:
- Always wear rubber gloves when using Bar Keepers Friend to protect your skin from irritation.
- Avoid using Bar Keepers Friend on non-stick surfaces, as it can damage the coating.
- For heavily burned areas, you can use a slightly more abrasive scrub brush, but test a small, inconspicuous area first to ensure it doesn’t scratch the surface.
- According to the Bar Keepers Friend website, their product is safe for use on most kitchen surfaces, but always follow the manufacturer’s instructions.
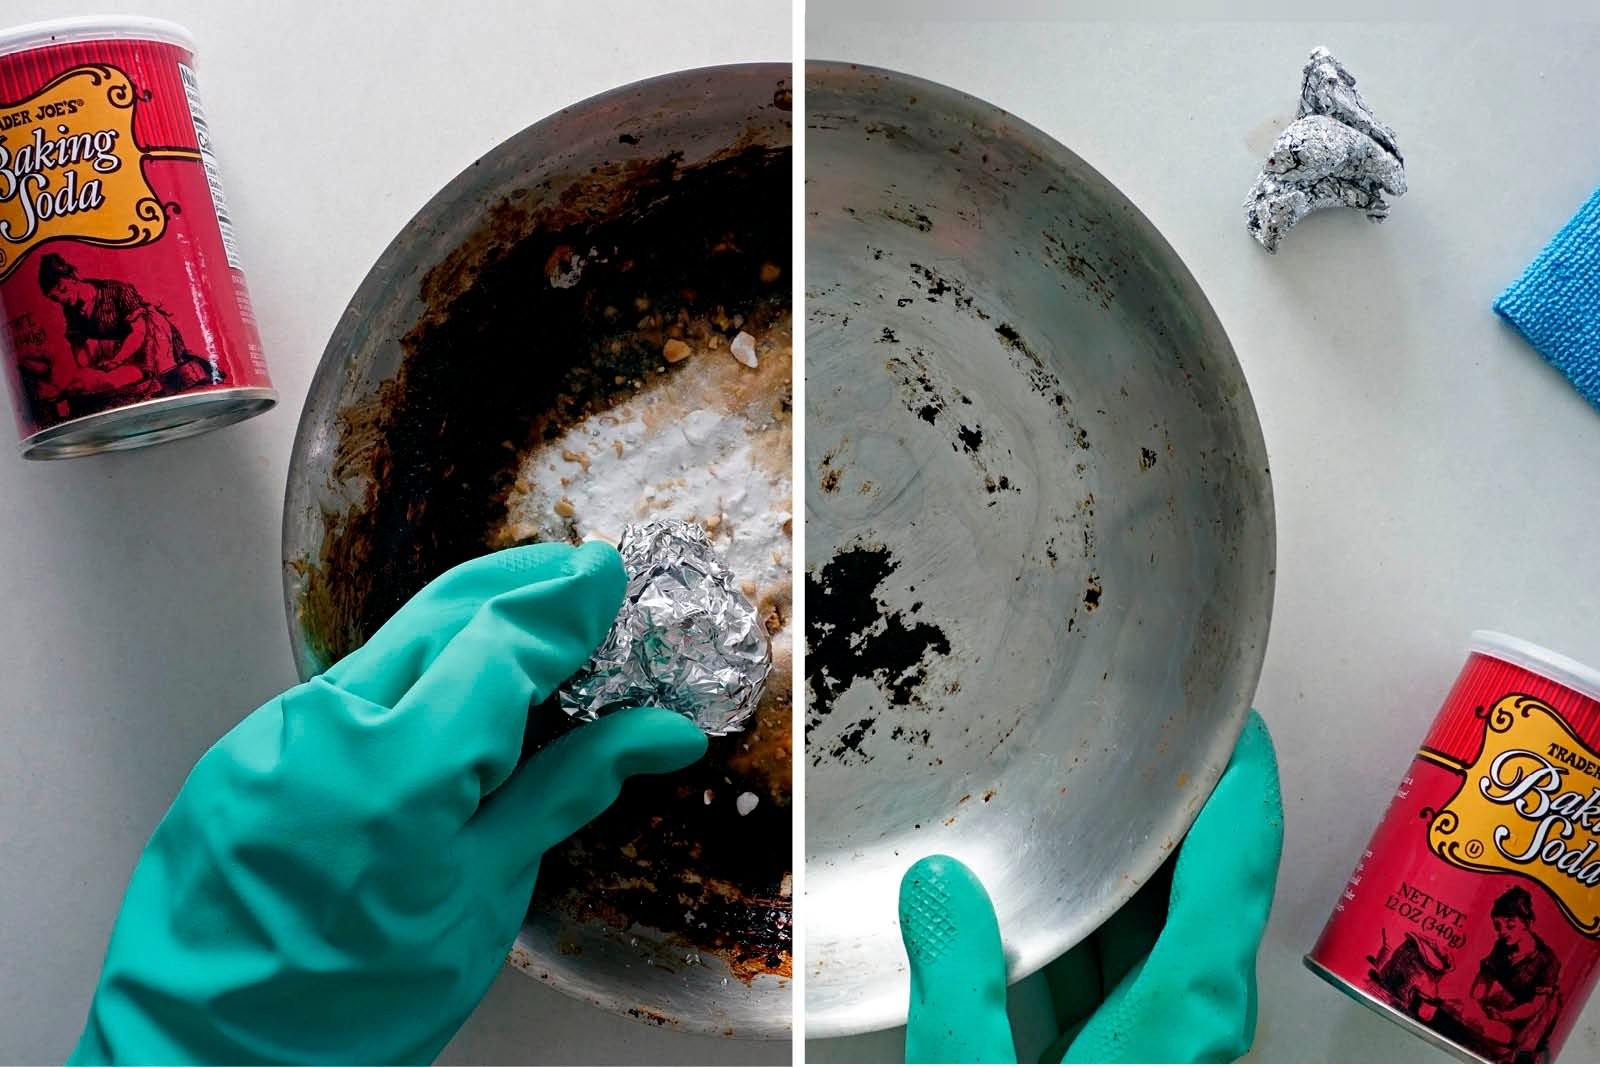
6. How Does Aluminum Foil Help Clean a Burned Pot with Baking Soda?
Using aluminum foil with baking soda is an effective method for cleaning burned pots and pans. The combination of the abrasive nature of aluminum foil and the cleaning power of baking soda makes it a great solution for removing tough, burned food residue.
- Abrasive Action of Aluminum Foil: Aluminum foil has a slightly abrasive surface that helps to scrub away the loosened debris without scratching the pot’s surface.
- Degreasing Properties of Baking Soda: Baking soda has degreasing properties that help to break down grease and oil, making it easier to remove the burned food.
- Neutralization Reaction: When combined with hot water, baking soda creates a mild alkaline solution that helps to neutralize acids and dissolve food particles.
Step-by-Step Guide:
- Rinse the Pot: Rinse the burned pot with hot water to dampen the surface.
- Sprinkle Baking Soda: Sprinkle 2 tablespoons of baking soda generously over the burned areas. Ensure all affected areas are covered.
- Add Water: Add a few teaspoons of hot water back to your pan to form a paste with the baking soda. The paste should be thick enough to cling to the burned areas.
- Crumple Aluminum Foil: Take a sheet of aluminum foil and crumple it into a golf ball-sized piece.
- Scrub: Using the crumpled aluminum foil, begin scrubbing the burned areas. Apply firm pressure and scrub in a circular motion. The aluminum foil will act as an abrasive, helping to lift the burned food particles.
- Rinse: Rinse the pot thoroughly with warm water to remove any remaining baking soda and aluminum foil residue.
- Dry: Dry the pot with a clean cloth. Inspect the pot to ensure all burned food has been removed. If necessary, repeat the process or try another cleaning method.
Tips and Tricks:
- For extra cleaning power, add a few drops of dish soap to the baking soda paste before scrubbing.
- If the burned food is particularly stubborn, try using a wooden spoon or spatula to scrape away the loosened debris before scrubbing with the aluminum foil.
- To prevent future burns, consider using a diffuser or heat-tamer when cooking delicate foods.
- According to a study by the Good Housekeeping Institute, aluminum foil is effective for cleaning a variety of household surfaces, including pots and pans.
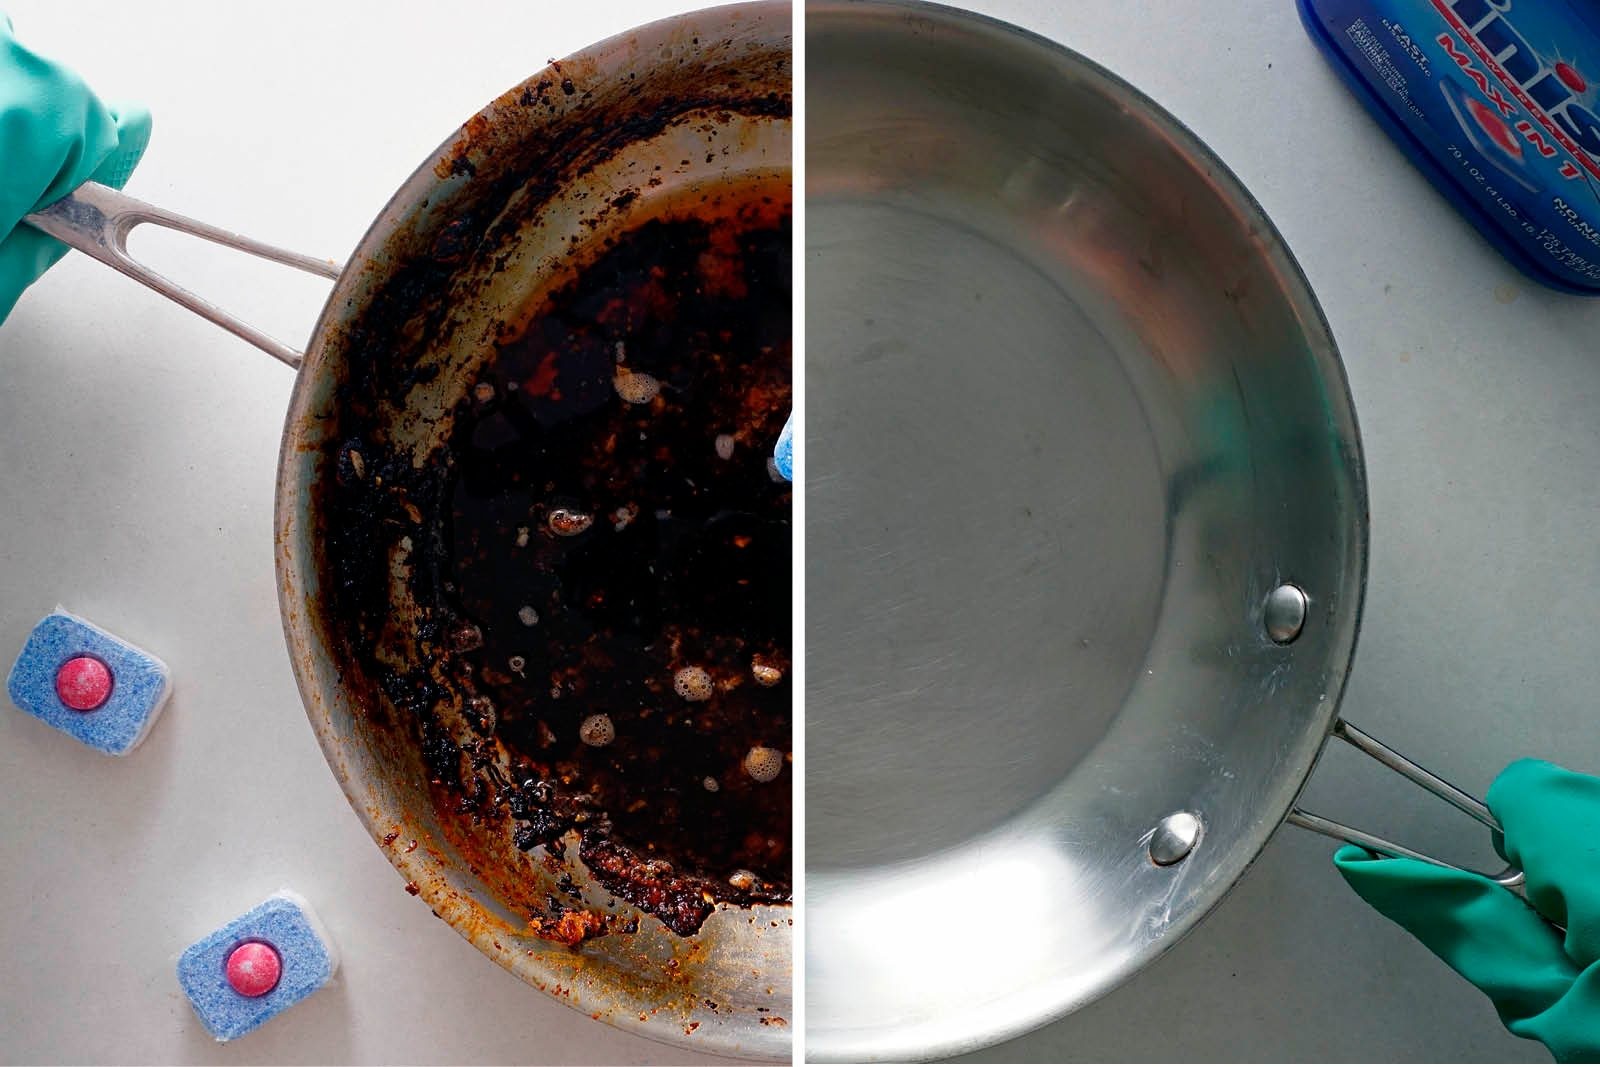
7. How Effective Are Dishwasher Tablets for Cleaning Burned Pots?
Dishwasher tablets can be a surprisingly effective solution for cleaning burned pots and pans. Their powerful cleaning agents break down tough stains and baked-on food, making them a convenient option for stubborn messes.
- Enzymes: Dishwasher tablets contain enzymes that break down food particles, making them easier to remove.
- Bleach or Oxygen Bleach: Many tablets contain bleach or oxygen bleach, which helps to whiten and disinfect the surface of the pot.
- Surfactants: Surfactants help to lift grease and oil, making it easier to remove the burned food.
- Abrasives: Some tablets contain mild abrasives that help to scrub away the loosened debris.
Step-by-Step Guide:
- Rinse the Pot: Rinse the burned pot with hot water to dampen the surface.
- Prepare the Tablet: Take a dishwasher tablet and gently rub it over the burned areas. If the tablet is hard, you can soften it by dipping it in warm water.
- Scrub: Using the dishwasher tablet, scrub the burned areas. Apply firm pressure and scrub in a circular motion. The tablet will gradually dissolve as you scrub.
- Add Water: Add warm water to the pot as you scrub to help dissolve the tablet and loosen the burned food particles.
- Soak (Optional): For tough stains, allow the pot to soak in warm water with the dissolved tablet for 30 minutes.
- Rinse: Rinse the pot thoroughly with warm water to remove any remaining dishwasher tablet residue.
- Dry: Dry the pot with a clean cloth. Inspect the pot to ensure all burned food has been removed. If necessary, repeat the process or try another cleaning method.
Tips and Tricks:
- For extra cleaning power, add a few drops of dish soap to the pot before scrubbing with the dishwasher tablet.
- If the burned food is particularly stubborn, try using a wooden spoon or spatula to scrape away the loosened debris before scrubbing with the dishwasher tablet.
- To prevent future burns, consider using a diffuser or heat-tamer when cooking delicate foods.
- According to a study by the American Cleaning Institute, dishwasher tablets are effective for cleaning a variety of household surfaces, including pots and pans.
8. What Are the Other Methods and Tips for Removing Stubborn Burns?
Here are some additional techniques to tackle those really stubborn burns:
- Boiling Water and Dish Soap:
- Fill the pot with water and add a generous squirt of dish soap.
- Bring the mixture to a boil and let it simmer for 15-20 minutes.
- The hot, soapy water will help loosen the burned food.
- After simmering, scrub the pot with a non-abrasive sponge or brush.
- Dryer Sheets:
- Place a dryer sheet in the burned pot and fill it with warm water.
- Let it soak overnight.
- The chemicals in the dryer sheet will help to break down the burned food.
- In the morning, scrub the pot with a non-abrasive sponge or brush.
- Hydrogen Peroxide and Baking Soda:
- Make a paste of hydrogen peroxide and baking soda.
- Apply the paste to the burned areas and let it sit for 2-3 hours.
- Scrub the pot with a non-abrasive sponge or brush.
- Salt and Water Paste:
- Make a paste of salt and water.
- Apply the paste to the burned areas and let it sit for 30 minutes.
- Scrub the pot with a non-abrasive sponge or brush.
- Coca-Cola:
- Pour Coca-Cola into the burned pot, ensuring it covers the affected areas.
- Let it simmer on low heat for about 30 minutes.
- The acids in Coca-Cola can help to loosen burned food particles.
- After simmering, scrub the pot with a non-abrasive sponge or brush.
- Onion:
- Cut an onion in half and place it in the burned pot.
- Add water and bring to a boil.
- Let it simmer for 20-30 minutes.
- The onion can help to loosen the burned food particles.
- After simmering, scrub the pot with a non-abrasive sponge or brush.
9. How to Prevent Food from Sticking and Burning in the First Place?
Prevention is always better than cure. Here are some effective tips to prevent food from sticking and burning:
- Use Enough Oil or Fat: Ensure there is an adequate amount of oil, butter, or cooking spray in the pan before adding food. This creates a barrier between the food and the hot surface, preventing sticking.
- Control Heat Settings: Cook at the appropriate heat setting for the type of food you are preparing. High heat can cause food to burn quickly, while low heat may not cook food evenly. Use medium or medium-low heat for most cooking tasks.
- Stir Frequently: Stir food regularly, especially when cooking sauces, gravies, or anything with a high sugar content. This prevents food from settling and sticking to the bottom of the pan.
- Use the Right Cookware: Use high-quality cookware with a thick, even base to distribute heat evenly. Non-stick pans are particularly useful for preventing food from sticking.
- Preheat the Pan: Allow the pan to preheat before adding oil or food. A hot pan will help to sear the food and prevent it from sticking.
- Add Food When the Pan Is Hot: Once the pan is preheated, add food in a single layer. Overcrowding the pan can lower the temperature and cause food to steam instead of sear, leading to sticking.
- Don’t Move Food Too Soon: Allow food to cook undisturbed for a few minutes before trying to flip or move it. This gives it time to develop a crust and release from the pan naturally.
- Use Liquids Wisely: Add liquids like broth, wine, or water to the pan to deglaze and prevent food from sticking. This is especially useful when making sauces or gravies.
- Clean Cookware Properly: Clean pots and pans thoroughly after each use to remove any food residue that could cause sticking in the future. Use a non-abrasive sponge or brush to avoid scratching the surface.
10. FAQs About Removing Burned Food Off Pot
-
Why does burnt food stick so stubbornly to pots?
Burnt food sticks because the heat causes the food’s sugars and proteins to bond tightly to the pot’s surface. According to a study in the Journal of Food Science, high heat caramelizes sugars, creating a glue-like substance that’s difficult to remove. -
Can I use metal utensils to scrape off burnt food?
It’s generally not recommended, especially on non-stick or delicate surfaces, as metal utensils can cause scratches. Instead, opt for wooden or silicone utensils. -
How long should I soak a burnt pot before attempting to clean it?
Soaking for at least 30 minutes is recommended. For tougher burns, overnight soaking can be more effective. -
Is it safe to cook in a pot that has been heavily scrubbed?
Yes, as long as you’ve thoroughly rinsed the pot to remove any cleaning residue. However, be cautious of non-stick surfaces that may have been damaged by excessive scrubbing. -
Can baking soda and vinegar damage my pots?
Baking soda and vinegar are generally safe for most pots, including stainless steel and ceramic. However, avoid using them on aluminum pots, as the combination can cause discoloration. -
What’s the best way to clean a cast iron pot with burnt food?
For cast iron, use a combination of coarse salt and a scrub brush. After scrubbing, season the pot with oil and bake it in the oven to maintain its non-stick properties. -
Are there any commercial products specifically designed for cleaning burnt cookware?
Yes, products like Bar Keepers Friend and Easy-Off Oven Cleaner are designed to remove tough stains and burnt food from cookware. Always follow the manufacturer’s instructions. -
How can I prevent food from burning in the first place?
Use low to medium heat, stir food frequently, and ensure there’s enough liquid in the pot. Additionally, using high-quality cookware with even heat distribution can help prevent burning. -
What should I do if the burnt smell lingers after cleaning?
Boil water with lemon slices or vinegar in the pot to neutralize odors. You can also place an open box of baking soda near the pot to absorb lingering smells. -
Is it safe to use oven cleaner on a stovetop pot?
No, oven cleaner is too harsh for stovetop pots and can damage the surface. It’s best to stick to gentler methods like baking soda and vinegar or commercial cookware cleaners.
Conclusion: Get More Culinary Wisdom at FOODS.EDU.VN
Tackling burned food on your pots and pans doesn’t have to be a daunting task. With the right techniques, tools, and a little patience, you can restore your cookware to its former glory and enjoy cooking without the stress of stubborn messes. Remember, prevention is key, so always use the appropriate heat settings, stir food frequently, and ensure there’s enough liquid in the pot.
Want to discover more culinary secrets and kitchen hacks? Visit FOODS.EDU.VN for expert tips, detailed guides, and innovative solutions to all your cooking challenges. From mastering essential cooking techniques to exploring diverse cuisines, our website is your ultimate resource for all things food-related.
For any inquiries, reach out to us at 1946 Campus Dr, Hyde Park, NY 12538, United States, or give us a call on WhatsApp at +1 845-452-9600. Let FOODS.EDU.VN be your trusted companion in the kitchen, helping you create delicious meals and a sparkling clean cooking space. Visit foods.edu.vn today and elevate your culinary journey!