Are you looking for the best way to nourish your baby with wholesome, homemade goodness? How to make baby food stage 1 is simpler than you think, and foods.edu.vn is here to guide you through every step, ensuring your little one receives the freshest, most nutritious start. We’ll explore easy recipes, safety tips, and the best ingredients to support your baby’s healthy development, focusing on organic options and allergen awareness. Discover how to make the most of baby food purees, first food for baby, and baby’s nutritional needs with our guidance.
1. Why Make Your Own Stage 1 Baby Food?
Making your own stage 1 baby food is a wonderful way to ensure your little one gets the best possible nutrition. There are numerous benefits to this approach, from controlling ingredients to saving money. Here’s why so many parents are choosing to make their baby’s first foods at home.
1.1. Control Over Ingredients
When you prepare your baby’s food, you have complete control over what goes into it. You can choose organic, non-GMO ingredients and avoid additives, preservatives, and artificial colors that are often found in commercial baby food. This is especially important if your baby has allergies or sensitivities.
1.2. Cost-Effectiveness
Making your own baby food is significantly cheaper than buying pre-made jars or pouches. Fresh produce, especially when bought in season, is generally more affordable. Plus, you can make large batches and freeze them for later use, saving both time and money.
According to a study by the USDA, homemade baby food can cost as little as half the price of store-bought options. This makes it a budget-friendly choice for families looking to provide the best for their babies without breaking the bank.
1.3. Freshness and Nutrition
Homemade baby food is fresher and retains more nutrients compared to store-bought options that may sit on shelves for extended periods. By preparing the food yourself, you ensure that your baby receives the maximum vitamins and minerals from each ingredient.
Steaming fruits and vegetables, as opposed to boiling, helps retain more of these essential nutrients. Research from the University of California, Davis, shows that steaming preserves up to 50% more vitamins than boiling.
1.4. Introducing a Variety of Flavors
Making your own baby food allows you to introduce your baby to a wide variety of flavors and textures early on. This can help develop their palate and encourage them to be less picky eaters as they grow.
1.5. Bonding Experience
Preparing food for your baby can be a rewarding and bonding experience. Knowing that you are providing your little one with healthy, homemade meals can bring a sense of satisfaction and connection.
1.6. Minimizing Exposure to Allergens
When introducing solids, it’s crucial to monitor your baby for any allergic reactions. Homemade baby food makes this process easier, as you can introduce one ingredient at a time and observe how your baby reacts. This is particularly important for common allergens like dairy, soy, and nuts.
The American Academy of Pediatrics (AAP) recommends introducing allergenic foods early in a baby’s diet, between 4 and 6 months, to reduce the risk of developing allergies. Making your own baby food allows you to control this process and introduce these foods safely.
1.7. Reducing Environmental Impact
Choosing to make your own baby food also reduces your environmental footprint. You avoid the packaging waste associated with store-bought products and can opt for locally sourced, organic produce, supporting sustainable farming practices.
1.8. Tailoring to Baby’s Preferences
Every baby has unique preferences. By making your own baby food, you can tailor the flavors and textures to suit your baby’s individual tastes. If your baby doesn’t like a particular food, you can easily adjust the recipe or try a different ingredient.
1.9. Encouraging Healthy Eating Habits
Introducing your baby to a variety of fresh, wholesome foods from an early age can set the stage for a lifetime of healthy eating habits. By avoiding processed foods and focusing on natural flavors, you help your baby develop a preference for nutritious options.
1.10. Boosting Immune System
Homemade baby food, rich in vitamins and minerals, can help boost your baby’s immune system. Nutrients like Vitamin C, Vitamin A, and zinc, found in many fruits and vegetables, are essential for building a strong defense against illness.
By making your own stage 1 baby food, you are not just feeding your baby; you are investing in their long-term health and well-being. This approach allows you to provide the best possible start, ensuring your little one receives the nutrition they need to thrive.
2. When to Start Stage 1 Baby Food?
Knowing when to start your baby on solid foods is a crucial decision. Typically, pediatricians recommend introducing stage 1 baby food around 6 months of age. However, it’s essential to look for specific developmental signs that indicate your baby is ready.
2.1. Developmental Readiness
The American Academy of Pediatrics (AAP) suggests that babies are typically ready for solid foods around 6 months old. However, every baby develops at their own pace. Look for these signs of readiness:
- Sitting Upright: Your baby should be able to sit upright with minimal support.
- Head Control: They should have good head and neck control.
- Interest in Food: Showing curiosity about what you’re eating and reaching for food.
- Tongue-Thrust Reflex: The tongue-thrust reflex (pushing food out of the mouth) should be diminished.
- Opening Mouth for Spoon: Willingness to open their mouth when a spoon approaches.
2.2. Nutritional Needs
Breast milk or formula provides all the necessary nutrients for the first six months. After this, babies need additional nutrients like iron and zinc, which are not sufficiently supplied by breast milk or formula alone.
2.3. Consultation with Pediatrician
Always consult with your pediatrician before introducing solid foods. They can provide personalized advice based on your baby’s individual needs and developmental progress.
2.4. Starting Slow
When you begin, introduce one new food at a time and wait 3-5 days before introducing another. This helps you identify any potential allergic reactions or sensitivities.
2.5. First Foods to Introduce
Good first foods for stage 1 baby food include:
- Single-Ingredient Purees: Such as avocado, sweet potato, butternut squash, and carrots.
- Iron-Fortified Cereal: Mixed with breast milk or formula.
2.6. Avoiding Certain Foods
Avoid giving babies honey before their first birthday due to the risk of botulism. Also, be cautious with common allergens like cow’s milk, eggs, peanuts, tree nuts, soy, wheat, fish, and shellfish.
2.7. Gradual Increase in Texture
Start with smooth purees and gradually increase the texture as your baby gets used to eating solids. This helps them develop their chewing and swallowing skills.
2.8. Monitoring for Allergies
Watch for signs of allergic reactions such as:
- Rash
- Hives
- Swelling
- Vomiting
- Diarrhea
- Difficulty Breathing
If you notice any of these symptoms, stop feeding the new food immediately and consult with your pediatrician.
2.9. Establishing Healthy Eating Habits
Introducing a variety of flavors and textures early on can help establish healthy eating habits. Offer a mix of fruits, vegetables, and iron-rich foods to ensure a balanced diet.
2.10. Adjusting to Baby’s Pace
Some babies take to solid foods quickly, while others need more time to adjust. Be patient and let your baby guide the pace. If they refuse a particular food, try again later or offer something else.
Starting stage 1 baby food is an exciting milestone. By following these guidelines and consulting with your pediatrician, you can ensure a smooth and healthy transition to solid foods.
3. Essential Equipment for Making Stage 1 Baby Food
Having the right equipment can make the process of making stage 1 baby food much easier and more efficient. Here’s a list of essential items you’ll need:
3.1. Steamer Basket
A steamer basket is ideal for cooking fruits and vegetables, as it helps retain more nutrients compared to boiling. Steaming is a gentle method that preserves the vitamins and minerals in the food.
3.2. Food Processor or Blender
A good food processor or blender is essential for creating smooth purees. High-powered blenders like Vitamix or Blendtec work well, but even a basic food processor can get the job done.
3.3. Immersion Blender
An immersion blender, also known as a stick blender, is great for making small batches of baby food. It’s easy to use and clean, making it a convenient option for quick purees.
3.4. Storage Containers
You’ll need containers to store your homemade baby food. Small, BPA-free containers with airtight lids are ideal. You can also use ice cube trays to freeze individual portions.
3.5. Ice Cube Trays
Using ice cube trays to freeze baby food is a great way to portion out servings. Once the cubes are frozen, you can transfer them to a freezer bag for longer storage.
3.6. Cutting Board and Knives
A good cutting board and a set of sharp knives are essential for preparing fruits and vegetables. Make sure to use separate cutting boards for raw meats and produce to avoid cross-contamination.
3.7. Vegetable Peeler
A vegetable peeler makes it easy to peel fruits and vegetables quickly and efficiently.
3.8. Measuring Cups and Spoons
Accurate measuring cups and spoons are important for following recipes and ensuring consistent results.
3.9. Bowls
You’ll need a set of mixing bowls for preparing and combining ingredients.
3.10. Spatulas and Spoons
Spatulas and spoons are useful for stirring, scraping, and serving baby food.
3.11. Baby Food Maker
A baby food maker is an all-in-one appliance that steams and purees food. While not essential, it can be a convenient option for those who want a streamlined process.
3.12. Labels and Markers
Use labels and markers to date and label your baby food containers. This helps you keep track of when the food was made and what it contains.
3.13. High Chair
A high chair is essential for feeding your baby comfortably and safely.
3.14. Soft-Tipped Spoons
Soft-tipped spoons are gentle on your baby’s gums and make feeding more comfortable.
3.15. Bibs
Bibs are a must-have for catching spills and keeping your baby’s clothes clean during mealtime.
Having these essential items on hand will make the process of making stage 1 baby food much smoother and more enjoyable.
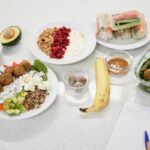
4. Stage 1 Baby Food Recipes: Simple and Nutritious
Creating stage 1 baby food doesn’t have to be complicated. Here are several simple and nutritious recipes to get you started, ensuring your baby receives a well-rounded introduction to solid foods.
4.1. Avocado Puree
Avocado is a great first food because it’s packed with healthy fats and is easy to digest.
Ingredients:
- 1 ripe avocado
Instructions:
- Cut the avocado in half, remove the pit, and scoop out the flesh.
- Mash with a fork or blend in a food processor until smooth.
- Add breast milk or formula to thin the puree if needed.
4.2. Sweet Potato Puree
Sweet potatoes are rich in Vitamin A and fiber, making them a nutritious choice for baby food.
Ingredients:
- 1 sweet potato
Instructions:
- Preheat oven to 400°F (200°C).
- Wash and pierce the sweet potato several times with a fork.
- Bake for 45-60 minutes, or until soft.
- Let cool, then scoop out the flesh and blend until smooth.
- Add breast milk or formula to thin the puree if needed.
4.3. Butternut Squash Puree
Butternut squash is another excellent source of Vitamin A and antioxidants.
Ingredients:
- 1 butternut squash
Instructions:
- Preheat oven to 400°F (200°C).
- Cut the squash in half, remove the seeds, and place face down on a baking sheet.
- Bake for 45-60 minutes, or until soft.
- Let cool, then scoop out the flesh and blend until smooth.
- Add breast milk or formula to thin the puree if needed.
4.4. Carrot Puree
Carrots are packed with beta-carotene, which is converted to Vitamin A in the body.
Ingredients:
- 4-5 carrots, peeled and chopped
Instructions:
- Steam the carrots until tender, about 10-15 minutes.
- Blend until smooth.
- Add breast milk or formula to thin the puree if needed.
4.5. Apple Puree
Apples are a good source of fiber and Vitamin C.
Ingredients:
- 2 apples, peeled, cored, and chopped
Instructions:
- Steam the apples until tender, about 8-10 minutes.
- Blend until smooth.
- Add breast milk or formula to thin the puree if needed.
4.6. Pear Puree
Pears are gentle on the stomach and provide essential nutrients.
Ingredients:
- 2 pears, peeled, cored, and chopped
Instructions:
- Steam the pears until tender, about 8-10 minutes.
- Blend until smooth.
- Add breast milk or formula to thin the puree if needed.
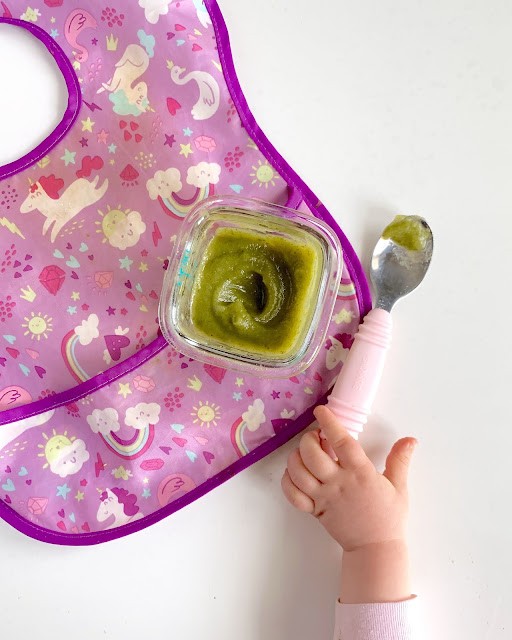
4.7. Green Pea Puree
Green peas are a good source of protein and fiber.
Ingredients:
- 1 cup frozen peas
Instructions:
- Steam the peas until tender, about 5-7 minutes.
- Blend until smooth.
- Add breast milk or formula to thin the puree if needed.
4.8. Banana Puree
Bananas are easy to digest and a good source of potassium.
Ingredients:
- 1 ripe banana
Instructions:
- Mash the banana with a fork until smooth.
- Add breast milk or formula to thin the puree if needed.
4.9. Peach Puree
Peaches are rich in vitamins and have a naturally sweet flavor that babies love.
Ingredients:
- 2 peaches, peeled, pitted, and chopped
Instructions:
- Steam the peaches until tender, about 5-7 minutes.
- Blend until smooth.
- Add breast milk or formula to thin the puree if needed.
4.10. Prune Puree
Prunes can help relieve constipation and are a good source of fiber.
Ingredients:
- 1 cup pitted prunes
Instructions:
- Steam the prunes until tender, about 8-10 minutes.
- Blend until smooth.
- Add breast milk or formula to thin the puree if needed.
These simple recipes provide a variety of flavors and nutrients for your baby’s first foods. Remember to introduce one new food at a time and watch for any signs of allergic reactions. Enjoy this exciting stage of introducing your baby to the world of solid foods.
5. Step-by-Step Guide to Making Stage 1 Baby Food
Making stage 1 baby food at home is a straightforward process. Here’s a detailed, step-by-step guide to help you create nutritious and delicious meals for your little one.
5.1. Choosing the Right Ingredients
Select fresh, high-quality ingredients. Opt for organic produce whenever possible to minimize exposure to pesticides. Consider seasonal fruits and vegetables for the best flavor and nutritional value.
5.2. Washing and Preparing Produce
Thoroughly wash all fruits and vegetables under running water. Use a vegetable brush to scrub the skin of root vegetables like carrots and sweet potatoes. Peel the produce if necessary.
5.3. Cutting Produce into Uniform Pieces
Cut the fruits and vegetables into small, uniform pieces. This ensures even cooking and easier blending.
5.4. Cooking Methods: Steaming
Steaming is the preferred method for cooking baby food because it retains more nutrients than boiling.
- Fill a saucepan with 1-2 inches of water and bring to a boil.
- Place the chopped produce in a steamer basket.
- Cover the saucepan and steam until the produce is tender (usually 8-15 minutes, depending on the vegetable).
5.5. Cooking Methods: Roasting
Roasting brings out the natural sweetness of vegetables like sweet potatoes and butternut squash.
- Preheat oven to 400°F (200°C).
- Place the chopped or halved produce on a baking sheet lined with parchment paper.
- Roast until tender (usually 30-60 minutes, depending on the vegetable).
5.6. Cooking Methods: Boiling
If steaming isn’t possible, boiling is an alternative. However, be aware that some nutrients may be lost in the water.
- Place the chopped produce in a saucepan and cover with water.
- Bring to a boil and cook until tender (usually 10-20 minutes, depending on the vegetable).
- Drain the water after cooking.
5.7. Pureeing the Cooked Produce
- Transfer the cooked produce to a food processor, blender, or use an immersion blender.
- Blend until smooth.
- Add breast milk, formula, or water to achieve the desired consistency.
5.8. Checking for Consistency
The puree should be smooth and free of lumps. If necessary, strain the puree through a fine-mesh sieve to remove any small pieces.
5.9. Cooling the Puree
Allow the puree to cool completely before storing.
5.10. Storing the Puree
- Store the puree in airtight containers in the refrigerator for up to 3 days.
- For longer storage, freeze the puree in ice cube trays. Once frozen, transfer the cubes to a freezer bag. Frozen baby food can be stored for up to 3 months.
5.11. Labeling and Dating
Label each container with the date and contents to keep track of freshness.
5.12. Thawing and Reheating
- Thaw frozen baby food in the refrigerator overnight.
- Reheat in the microwave or on the stovetop until warm.
- Always check the temperature before feeding your baby to ensure it is not too hot.
5.13. Introducing New Foods
Introduce one new food at a time and wait 3-5 days before introducing another. This helps you identify any potential allergic reactions.
5.14. Monitoring for Allergies
Watch for signs of allergic reactions such as rash, hives, swelling, vomiting, diarrhea, or difficulty breathing. If you notice any of these symptoms, stop feeding the new food immediately and consult with your pediatrician.
5.15. Adjusting to Baby’s Preferences
Every baby has unique preferences. Be patient and adjust the flavors and textures to suit your baby’s individual tastes.
By following these step-by-step instructions, you can confidently make nutritious and delicious stage 1 baby food at home, ensuring your little one gets the best possible start.
6. Food Safety Tips for Homemade Baby Food
Ensuring the safety of your homemade baby food is paramount. Here are essential food safety tips to follow when preparing, storing, and serving your baby’s meals, guaranteeing a healthy and safe start to solid foods.
6.1. Wash Hands Thoroughly
Always wash your hands with soap and water for at least 20 seconds before handling food.
6.2. Clean and Sanitize Equipment
Ensure all equipment, including cutting boards, knives, blenders, and containers, are clean and sanitized before use.
6.3. Use Separate Cutting Boards
Use separate cutting boards for raw meats and produce to avoid cross-contamination.
6.4. Cook Food to the Correct Temperature
Cook all foods to the correct internal temperature to kill harmful bacteria. Use a food thermometer to ensure accuracy.
6.5. Avoid Raw or Undercooked Foods
Avoid giving babies raw or undercooked foods, including meat, poultry, fish, and eggs.
6.6. Store Food Properly
Store homemade baby food in airtight containers in the refrigerator for up to 3 days.
6.7. Freeze Food Promptly
Freeze baby food promptly to prevent bacterial growth. Divide the food into small portions using ice cube trays for easy thawing.
6.8. Thaw Food Safely
Thaw frozen baby food in the refrigerator overnight or use the microwave on the defrost setting.
6.9. Reheat Food Thoroughly
Reheat baby food thoroughly to an internal temperature of 165°F (74°C).
6.10. Check Food Temperature Before Serving
Always check the temperature of the food before feeding your baby to ensure it is not too hot.
6.11. Avoid Double Dipping
Avoid double dipping the spoon into the baby food container to prevent contamination.
6.12. Discard Leftovers
Discard any uneaten baby food after feeding to prevent bacterial growth.
6.13. Be Aware of Allergens
Introduce new foods one at a time and watch for any signs of allergic reactions.
6.14. Avoid Honey
Avoid giving babies honey before their first birthday due to the risk of botulism.
6.15. Avoid Added Salt and Sugar
Do not add salt or sugar to baby food. Babies do not need these additives, and they can be harmful to their health.
6.16. Purchase Safe and Reliable Baby Food Products
Ensure that any commercial baby food products you purchase are from reputable brands and have not been recalled.
6.17. Check Expiration Dates
Always check the expiration dates on commercial baby food products before using them.
6.18. Avoid Foods with High Nitrate Levels
Limit foods with high nitrate levels, such as spinach, beets, and green beans, especially for babies under 6 months.
6.19. Follow Safe Handling Instructions
Follow all safe handling instructions provided by manufacturers of baby food products.
6.20. Stay Informed
Stay informed about the latest food safety guidelines and recommendations from reputable sources such as the FDA and the CDC.
By following these food safety tips, you can ensure that your homemade baby food is safe, nutritious, and beneficial for your baby’s health and development.
7. Addressing Common Concerns and Myths About Stage 1 Baby Food
When it comes to feeding your baby, it’s natural to have questions and concerns. Let’s address some common myths and provide clear, evidence-based answers to help you make informed decisions.
7.1. Myth: Babies Need Cereal as Their First Food
Fact: While iron-fortified cereal was once a standard recommendation, it’s not a necessity. Babies can start with a variety of pureed fruits, vegetables, or meats as long as they are developmentally ready. The American Academy of Pediatrics (AAP) emphasizes the importance of iron-rich foods but does not specify that cereal must be the first food.
7.2. Concern: Allergies
Fact: Many parents worry about allergies. Current guidelines suggest introducing allergenic foods early in a baby’s diet, between 4 and 6 months, to potentially reduce the risk of developing allergies. Introduce one new food at a time and wait 3-5 days before introducing another to monitor for reactions. Common allergens include milk, eggs, peanuts, tree nuts, soy, wheat, fish, and shellfish.
7.3. Myth: Homemade Baby Food is Too Time-Consuming
Fact: Making baby food can be quick and easy, especially when you prepare large batches and freeze them. Simple purees like avocado or banana require minimal preparation time. With proper planning, homemade baby food can be a convenient option.
7.4. Concern: Nutrient Deficiency
Fact: To ensure your baby gets all the necessary nutrients, offer a variety of fruits, vegetables, and protein sources. If you have concerns about nutrient deficiencies, consult with your pediatrician or a registered dietitian.
7.5. Myth: Babies Only Need Sweet Foods
Fact: While babies may naturally prefer sweet tastes, it’s important to introduce a variety of flavors, including savory and bitter. This can help develop their palate and prevent picky eating later on.
7.6. Concern: Gagging
Fact: Gagging is a normal reflex that helps prevent choking. It’s different from choking, which is a more serious situation where the airway is blocked. Start with smooth purees and gradually increase the texture as your baby gets used to eating solids.
7.7. Myth: Organic Food is Not Necessary
Fact: While organic food may be more expensive, it can reduce your baby’s exposure to pesticides. If you can afford it, organic is a good choice. If not, wash conventional produce thoroughly.
7.8. Concern: Constipation
Fact: Some babies experience constipation when starting solid foods. Ensure your baby gets enough fiber by offering purees like prunes, pears, and sweet potatoes. Adequate hydration is also important.
7.9. Myth: Babies Need Teeth to Start Solid Foods
Fact: Babies do not need teeth to start solid foods. They can mash purees with their gums. Teeth are more important for later stages when they start eating more textured foods.
7.10. Concern: How Much Food to Give
Fact: Start with small amounts, such as 1-2 tablespoons, and gradually increase as your baby gets used to eating solids. Pay attention to their cues of hunger and fullness. Don’t force them to eat if they are not interested.
7.11. Myth: All Babies Should Start Solids at 6 Months
Fact: While 6 months is a general guideline, every baby is different. Look for signs of readiness, such as good head control, the ability to sit upright, and interest in food. Consult with your pediatrician for personalized advice.
7.12. Concern: Food Texture
Fact: Start with smooth, lump-free purees. As your baby gets more comfortable, gradually increase the texture to mashed or finely chopped foods. This helps them develop their chewing and swallowing skills.
7.13. Myth: Store-Bought Baby Food is Just as Good as Homemade
Fact: While store-bought baby food can be convenient, homemade baby food allows you to control the ingredients and avoid additives and preservatives. It can also be more cost-effective.
7.14. Concern: Iron Intake
Fact: Iron is crucial for your baby’s development. Offer iron-rich foods like pureed meats, beans, and iron-fortified cereal. Breast milk or formula should still be a primary source of nutrition.
7.15. Myth: Water is Unnecessary
Fact: Once babies start eating solid foods, they need additional hydration. Offer small amounts of water throughout the day, especially if they are constipated.
By addressing these common concerns and myths, you can approach stage 1 baby food with confidence, knowing you are making informed decisions for your baby’s health and well-being.
8. Delicious Combinations for Stage 1 Baby Food
Once your baby has tried a few single-ingredient purees and you’ve ruled out any allergies, you can start experimenting with delicious combinations. Combining flavors can introduce your baby to a wider range of tastes and textures, making mealtime more exciting. Here are some nutritious and tasty combinations to try:
8.1. Apple and Cinnamon
A classic combination that is both comforting and nutritious.
Ingredients:
- 1/2 cup apple puree
- Pinch of cinnamon
Instructions:
- Combine the apple puree and cinnamon.
- Mix well and serve.
8.2. Sweet Potato and Apple
A naturally sweet and vitamin-rich combination.
Ingredients:
- 1/2 cup sweet potato puree
- 1/2 cup apple puree
Instructions:
- Combine the sweet potato and apple purees.
- Mix well and serve.
8.3. Carrot and Pea
A balanced combination of sweetness and savory flavors.
Ingredients:
- 1/2 cup carrot puree
- 1/2 cup pea puree
Instructions:
- Combine the carrot and pea purees.
- Mix well and serve.
8.4. Avocado and Banana
A creamy and nutritious combination packed with healthy fats and potassium.
Ingredients:
- 1/2 avocado, mashed
- 1/2 banana, mashed
Instructions:
- Combine the mashed avocado and banana.
- Mix well and serve.
8.5. Pear and Prune
A gentle combination that can help with constipation.
Ingredients:
- 1/2 cup pear puree
- 1/2 cup prune puree
Instructions:
- Combine the pear and prune purees.
- Mix well and serve.
8.6. Butternut Squash and Apple
A cozy combination that’s perfect for fall.
Ingredients:
- 1/2 cup butternut squash puree
- 1/2 cup apple puree
Instructions:
- Combine the butternut squash and apple purees.
- Mix well and serve.
8.7. Green Bean and Potato
A mild and nutritious combination that’s easy to digest.
Ingredients:
- 1/2 cup green bean puree
- 1/2 cup potato puree
Instructions:
- Combine the green bean and potato purees.
- Mix well and serve.
8.8. Peach and Carrot
A sweet and vibrant combination that’s rich in vitamins.
Ingredients:
- 1/2 cup peach puree
- 1/2 cup carrot puree
Instructions:
- Combine the peach and carrot purees.
- Mix well and serve.
8.9. Mango and Avocado
A tropical combination that’s packed with flavor and nutrients.
Ingredients:
- 1/2 cup mango puree
- 1/2 avocado, mashed
Instructions:
- Combine the mango puree and mashed avocado.
- Mix well and serve.
8.10. Zucchini and Pear
A mild and hydrating combination that’s easy on the tummy.
Ingredients:
- 1/2 cup zucchini puree
- 1/2 cup pear puree
Instructions:
- Combine the zucchini and pear purees.
- Mix well and serve.
These combinations are just a starting point. Feel free to experiment with different flavors and textures to find what your baby enjoys the most. Remember to introduce new combinations gradually and watch for any signs of allergic reactions.
9. How to Introduce Allergens Safely in Stage 1 Baby Food
Introducing allergens early in your baby’s diet is now recommended by pediatricians to help reduce the risk of developing food allergies. Here’s how to do it safely and effectively in stage 1 baby food.
9.1. Understand the Guidelines
The American Academy of Pediatrics (AAP) recommends introducing allergenic foods as early as 4 to 6 months of age. However, ensure your baby is developmentally ready for solids before introducing allergens.
9.2. Choose Common Allergens
Start with common allergens such as:
- Peanut
- Egg
- Cow’s milk
- Tree nuts (almonds, walnuts, cashews)
- Soy
- Wheat
- Fish (salmon, cod)
- Shellfish (shrimp, crab)
9.3. Introduce One Allergen at a Time
Introduce one new allergen every 2-3 days. This allows you to monitor your baby for any allergic reactions.
9.4. Start with Small Amounts
Begin with a small amount of the allergen, such as 1/4 to 1/2 teaspoon.