Making flesh-colored frosting with food coloring can be easily done, and FOODS.EDU.VN provides you with the expert guidance you need to achieve the perfect skin tone hues for your creative baking projects. From selecting the right food colorings to mastering the mixing techniques, this comprehensive guide ensures your cookies, cakes, and cupcakes reflect the beautiful diversity of skin tones. Discover the secrets to creating realistic and inclusive designs with various skin tone icing shades, flesh-tone buttercream, and human skin color icing to impress your friends, family, and customers.
1. Why Is It Important to Learn How to Make Flesh Colored Frosting With Food Coloring?
Learning how to make flesh-colored frosting with food coloring is crucial for creating inclusive and representative designs in your baking. According to a study by the American Psychological Association, representation in media and products positively impacts self-esteem and identity formation, especially in children. By offering a range of skin tone options in your edible creations, you contribute to a more inclusive and accepting environment. This skill allows you to customize your baked goods for themed parties, character-based desserts, and personalized gifts, showcasing your creativity and attention to detail. With flesh-tone buttercream, human skin color icing, and various skin tone icing shades, you can ensure your treats reflect the beautiful diversity of people.
2. What Food Colorings Are Best for Creating Flesh-Colored Frosting?
The best food colorings for creating flesh-colored frosting typically include a combination of brown, red, yellow, and sometimes a touch of black. Gel food colorings are highly recommended because they are more concentrated and provide richer, more consistent colors than liquid options. AmeriColor, Wilton, and Chefmaster are popular brands known for their quality and wide range of colors. Here’s a breakdown of essential colors and how they contribute to different skin tones:
- Brown: Provides the base depth and warmth for most skin tones.
- Red: Adds a rosy undertone and helps create natural-looking hues.
- Yellow: Brightens the frosting and contributes to lighter skin tones.
- Black: Use sparingly to deepen the shade and add subtle shadows for realism.
According to professional cake decorator Liz Marek, “Gel colors are the way to go for achieving true-to-life skin tones. They blend seamlessly and won’t water down your frosting.”
3. What Are the Basic Steps for Mixing Flesh-Colored Frosting?
Mixing flesh-colored frosting involves a careful, incremental approach to achieve the desired shade. Start with a base of white buttercream and gradually add small amounts of your chosen gel food colorings. Here’s a step-by-step guide:
- Prepare Your Buttercream: Begin with a batch of white buttercream frosting. Make sure it’s smooth and at room temperature for easier mixing.
- Start with Brown: Add a tiny amount of brown gel food coloring using a toothpick. Mix well until the color is evenly distributed.
- Introduce Red and Yellow: Add a smaller amount of red gel food coloring than brown, followed by an even smaller amount of yellow. Mix thoroughly after each addition.
- Adjust the Shade: Evaluate the color and adjust as needed. If the frosting is too pale, add more brown or red. If it’s too dark, add a small amount of white buttercream to lighten it.
- Fine-Tune with Black (Optional): For deeper skin tones, add a minuscule amount of black gel food coloring. Be extremely cautious, as black can quickly overpower the other colors.
- Let the Color Develop: Once you’ve achieved a close match, cover the bowl and let the frosting sit for about 30 minutes. The color will deepen over time, allowing you to make final adjustments.
According to pastry chef Duff Goldman, “Patience is key when mixing skin tones. Add color gradually and let it develop to avoid overshooting your target shade.”
4. How Can You Achieve Different Skin Tones With Food Coloring?
Achieving different skin tones requires varying the ratios of your base colors and understanding the undertones you want to create. Here are some guidelines for different skin tones:
- Fair Skin: Use a base of white buttercream with a very small amount of yellow and a touch of pink. The ratio should be predominantly yellow with a hint of red.
- Light Skin: Start with a white buttercream base, adding a bit of brown, a touch of yellow, and a hint of red. Adjust the proportions to match the desired lightness.
- Medium Skin: Combine brown, red, and yellow in roughly equal proportions to create a warm, balanced tone.
- Olive Skin: Mix brown, yellow, and a tiny amount of green to achieve the characteristic undertones. According to color theory expert Dr. Maya Garcia from the University of Fine Arts, green neutralizes redness and adds depth to the olive complexion.
- Dark Skin: Use a higher proportion of brown, with smaller amounts of red and black. Adjust the black carefully to avoid making the frosting look gray or muddy.
| Skin Tone | Base Color | Additional Colors | Tips |
|---|---|---|---|
| Fair | White | Yellow, Pink | Use very small amounts to avoid overpowering the base. |
| Light | White | Brown, Yellow, Red | Start with a small amount of brown and adjust with yellow and red to get the desired tone. |
| Medium | White | Brown, Red, Yellow | Aim for a balanced mix of the three colors. |
| Olive | White | Brown, Yellow, Green | Add a tiny amount of green to neutralize redness. |
| Dark | White | Brown, Red, Black | Use black sparingly and mix thoroughly to avoid a gray or muddy appearance. |
5. How Do You Create a Skin Tone Icing Color Chart?
Creating a skin tone icing color chart is a great way to document your recipes and have a reference for future baking projects. Here’s how to make one:
- Prepare a Base: Start with a large batch of white buttercream frosting.
- Divide and Conquer: Divide the frosting into several small bowls, one for each skin tone you want to create.
- Mix Your Colors: Use the color combinations and ratios discussed earlier to mix different skin tones in each bowl.
- Document Your Ratios: Write down the exact amounts of each food coloring you use for each bowl. This will help you recreate the colors later.
- Create Swatches: Spread a small amount of each frosting onto a piece of parchment paper or a color chart template. Label each swatch with its corresponding color combination.
- Photograph Your Chart: Take a well-lit photo of your color chart for easy reference. You can also store the actual chart in a binder for future use.
According to graphic designer Emily Carter, “Creating a physical or digital color chart is invaluable for consistent results. It eliminates guesswork and saves time in the long run.”
6. Can You Use Natural Food Colorings for Flesh-Colored Frosting?
Yes, you can use natural food colorings for flesh-colored frosting, but the results may vary in intensity and hue compared to gel food colorings. Natural options include:
- Beetroot Powder: Provides a natural red or pink hue.
- Turmeric Powder: Adds a yellow or golden tone.
- Cocoa Powder: Creates a brown or chocolatey color.
- Activated Charcoal: Use sparingly for a gray or black tint.
To use natural food colorings:
- Start Small: Add small amounts of the natural coloring to your white buttercream base.
- Mix Thoroughly: Ensure the powder is fully incorporated to avoid a grainy texture.
- Adjust as Needed: Add more coloring to deepen the shade, or add white buttercream to lighten it.
- Consider the Flavor: Be aware that some natural colorings may affect the flavor of your frosting, so taste and adjust accordingly.
According to nutritionist Sarah Johnson, “Natural food colorings are a great way to avoid artificial additives, but they may not provide the same vibrant colors as synthetic options.”
7. How Do You Prevent Your Flesh-Colored Frosting From Looking Muddy?
Preventing your flesh-colored frosting from looking muddy involves careful color selection and incremental mixing. Here are some tips:
- Use High-Quality Gel Colors: Gel colors provide consistent and concentrated hues, reducing the risk of muddy results.
- Start with a Clean Base: Ensure your white buttercream is pure white, without any yellow or gray undertones.
- Add Colors Gradually: Add food colorings in small increments, mixing thoroughly after each addition.
- Avoid Overmixing: Overmixing can cause colors to blend too much, resulting in a muddy appearance.
- Consider Undertones: Pay attention to the undertones of your skin tone references. Use yellow for warm tones, pink for cool tones, and green for olive tones.
According to cake artist Jessica Pedemont, “The key to clear, vibrant skin tones is to build your colors gradually and avoid overmixing. Less is often more.”
8. What Are Some Common Mistakes to Avoid When Making Flesh-Colored Frosting?
Several common mistakes can lead to unsatisfactory results when making flesh-colored frosting. Avoiding these pitfalls can help you achieve professional-looking results:
- Adding Too Much Color at Once: This can quickly lead to an overly intense or muddy color that is difficult to correct.
- Using Low-Quality Food Coloring: Inexpensive liquid food colorings can produce inconsistent and faded colors.
- Overmixing the Frosting: Overmixing can change the texture of the frosting and cause the colors to blend unevenly.
- Not Allowing the Color to Develop: Food coloring deepens over time, so not allowing the frosting to sit and develop can lead to under-coloring.
- Ignoring Undertones: Failing to consider undertones can result in skin tones that look unnatural or flat.
According to baking expert Paul Hollywood, “Precision and patience are crucial in baking, especially when it comes to coloring. Take your time and pay attention to detail.”
9. How Do You Store Flesh-Colored Frosting?
Proper storage is essential to maintain the color and consistency of your flesh-colored frosting. Here are some guidelines:
- Airtight Container: Store the frosting in an airtight container to prevent it from drying out or absorbing odors.
- Room Temperature: If you plan to use the frosting within a few hours, you can store it at room temperature.
- Refrigeration: For longer storage (up to a week), refrigerate the frosting. Bring it to room temperature and re-whip it before using.
- Freezing: For extended storage (up to three months), freeze the frosting. Thaw it in the refrigerator overnight and re-whip it before using.
According to food safety expert Dr. Lisa Willett from Cornell University, proper storage prevents bacterial growth and maintains the quality of your frosting.
10. How Can FOODS.EDU.VN Help You Master Flesh-Colored Frosting?
FOODS.EDU.VN is your ultimate resource for mastering the art of creating flesh-colored frosting. Our comprehensive guides, expert tips, and detailed tutorials provide you with the knowledge and skills to achieve perfect skin tone hues for all your baking projects. Whether you’re a beginner or an experienced baker, our platform offers valuable insights into color mixing techniques, ingredient selection, and design inspiration. Explore our extensive library of articles and videos to elevate your baking skills and create inclusive, beautiful treats.
FOODS.EDU.VN provides in-depth recipes, step-by-step instructions, and troubleshooting advice to help you perfect your flesh-colored frosting. Dive into the world of cake decorating with confidence, knowing that FOODS.EDU.VN is your trusted partner in culinary education. For personalized assistance and to explore more baking tips, visit us at 1946 Campus Dr, Hyde Park, NY 12538, United States. Contact us via WhatsApp at +1 845-452-9600 or visit our website at FOODS.EDU.VN to discover a wealth of culinary knowledge.
11. What Are Some Creative Applications for Flesh-Colored Frosting?
Flesh-colored frosting can be used in a variety of creative baking applications, adding a personal and inclusive touch to your desserts. Here are some ideas:
- Character Cakes: Create cakes featuring characters with diverse skin tones, reflecting the beauty of different ethnicities.
- Portrait Cookies: Design cookies that resemble friends and family members, capturing their unique skin tones and features.
- Themed Cupcakes: Bake cupcakes for special events, such as diversity celebrations or cultural festivals, using flesh-colored frosting to represent different backgrounds.
- Educational Projects: Use flesh-colored frosting in school projects to teach children about diversity and inclusion through baking.
According to social studies teacher Maria Rodriguez, incorporating baking projects into the curriculum can promote cultural awareness and understanding among students.
12. How Do You Ensure Your Flesh-Colored Frosting Is Vegan?
Creating vegan flesh-colored frosting requires substituting traditional dairy ingredients with plant-based alternatives. Here’s how to make a delicious vegan buttercream:
- Vegan Butter: Use a high-quality vegan butter alternative, such as Miyoko’s Kitchen Cultured Vegan Butter or Melt Organic Vegan Butter.
- Vegan Shortening: Combine vegan butter with vegan shortening to create a stable and creamy base.
- Powdered Sugar: Use organic powdered sugar to ensure it’s vegan-friendly.
- Plant-Based Milk: Use almond milk, soy milk, or oat milk to adjust the consistency of the frosting.
- Vegan Food Coloring: Ensure that your food coloring is vegan by checking the ingredient list for animal-derived products like carmine or gelatin.
According to vegan chef Chloe Coscarelli, “Vegan baking is all about finding the right substitutions. With a few simple tweaks, you can create delicious and ethical desserts.”
13. What Are Some Tips for Achieving a Smooth Finish With Flesh-Colored Frosting?
Achieving a smooth finish with flesh-colored frosting requires attention to detail and the right techniques. Here are some tips:
- Use a Crumb Coat: Apply a thin layer of frosting to the cake or cupcakes to seal in any crumbs before adding the final layer.
- Chill the Cake: Chilling the cake or cupcakes before frosting can help the frosting adhere better and create a smoother surface.
- Use a Palette Knife or Offset Spatula: These tools allow you to spread the frosting evenly and create smooth, professional-looking finishes.
- Warm the Spatula: Dipping the spatula in warm water and drying it before each stroke can help smooth the frosting.
- Practice the “Hot Knife” Technique: Use a hot knife or spatula to melt the surface of the frosting slightly, creating a super-smooth finish.
According to professional baker Kerry Vincent, “A smooth finish is all about technique and patience. Practice makes perfect.”
14. How Can You Incorporate Flesh-Colored Frosting Into 3D Cake Designs?
Flesh-colored frosting is an excellent choice for creating realistic 3D cake designs. Here are some tips for incorporating it into your creations:
- Sculpting with Fondant: Use fondant to sculpt the basic shape of your design, then cover it with flesh-colored frosting to add realistic details.
- Piping Details: Use a piping bag to add fine details, such as facial features or clothing, with different shades of flesh-colored frosting.
- Airbrushing: Use an airbrush to add subtle shading and highlights to the frosting, creating depth and dimension.
- Edible Markers: Use edible markers to draw fine lines and details onto the frosting, such as wrinkles or hair strands.
According to 3D cake artist Mike McCarey, “Flesh-colored frosting is essential for creating realistic and lifelike cake designs. It allows you to capture the nuances of human features and expressions.”
15. What Are the Latest Trends in Using Flesh-Colored Frosting?
The latest trends in using flesh-colored frosting focus on inclusivity, representation, and artistic expression. Here are some emerging trends:
- Hyper-Realistic Designs: Bakers are creating incredibly realistic portraits and sculptures using flesh-colored frosting, pushing the boundaries of cake artistry.
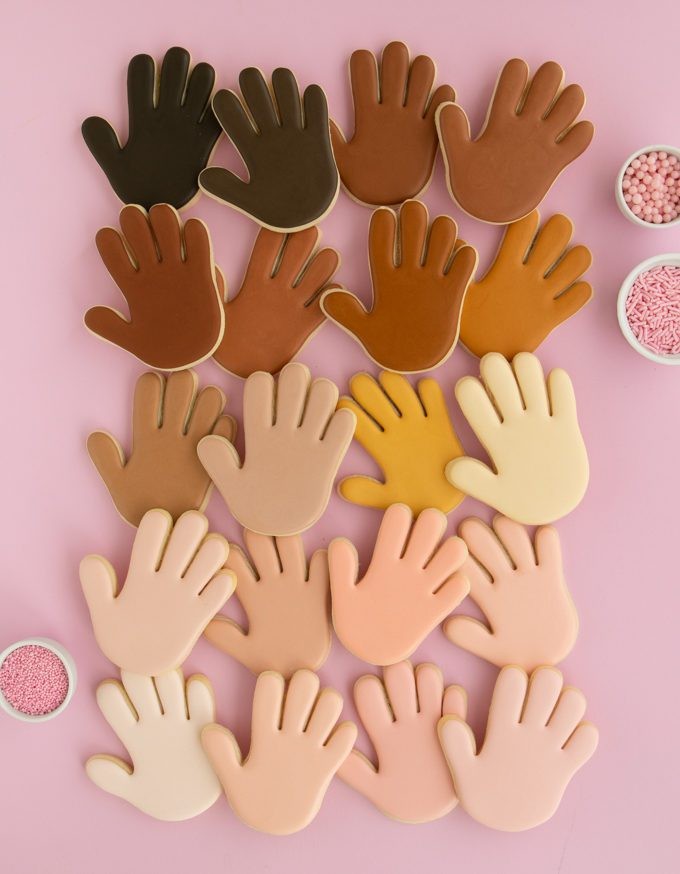
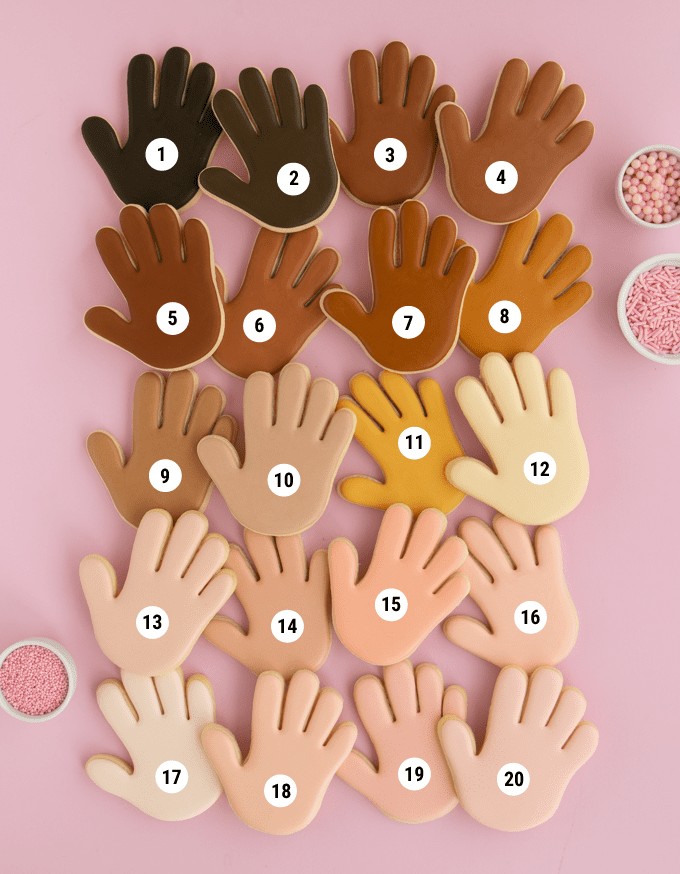
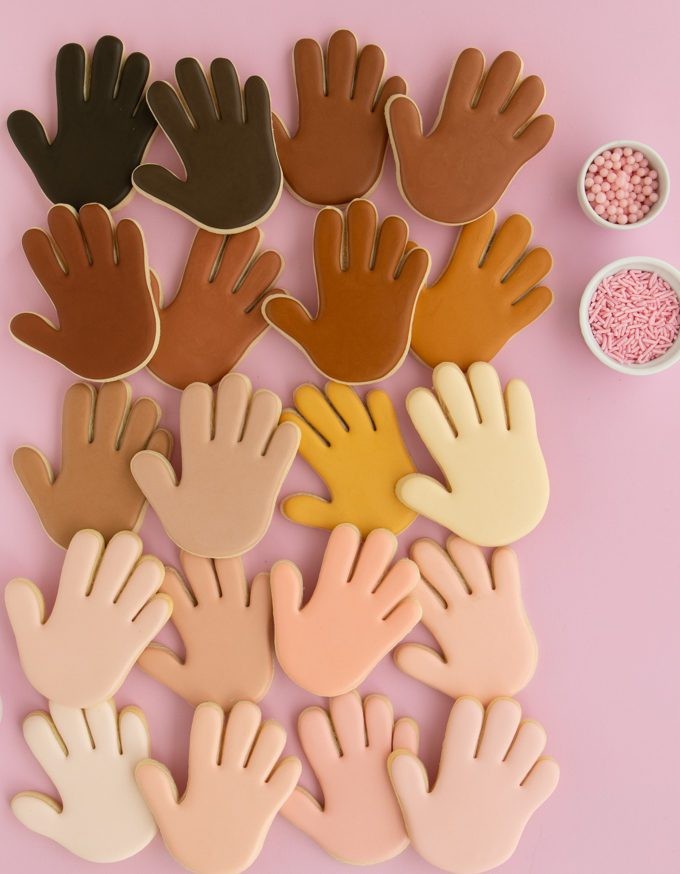
- Diverse Skin Tones: There is a growing emphasis on representing a wide range of skin tones in baking, celebrating diversity and inclusivity.
- Customizable Options: Bakers are offering customizable skin tone options for their customers, allowing them to create personalized and meaningful desserts.
- Educational Workshops: Workshops and tutorials are teaching bakers how to mix and use flesh-colored frosting to create inclusive and representative designs.
According to trend analyst Jane McGregor from the Culinary Institute of America, “The use of flesh-colored frosting is evolving from a novelty to a powerful tool for promoting inclusivity and artistic expression in baking.”
16. How Do You Deal With Color Fading in Flesh-Colored Frosting?
Color fading in flesh-colored frosting can be a common issue, especially when using certain types of food coloring or exposing the frosting to light. Here are some tips to minimize fading:
- Use Gel Food Coloring: Gel colors are more resistant to fading than liquid colors.
- Avoid Direct Sunlight: Store cakes and cupcakes with flesh-colored frosting away from direct sunlight, as UV rays can cause the colors to fade.
- Use Color Protectant Sprays: Some bakers use edible color protectant sprays to seal in the color and prevent fading.
- Refrigerate or Freeze: Refrigerating or freezing the frosting can help preserve the color for longer periods.
According to color preservation expert Dr. Henry Lewis from the National Institute for Food Science, protecting food coloring from light and heat is crucial for maintaining its vibrancy.
17. Can You Mix Flesh-Colored Frosting in Advance?
Yes, you can mix flesh-colored frosting in advance, but there are a few things to keep in mind to ensure the color and consistency remain optimal:
- Store Properly: Store the frosting in an airtight container to prevent it from drying out or absorbing odors.
- Refrigerate or Freeze: Refrigerate the frosting if you plan to use it within a week, or freeze it for longer storage.
- Allow Time to Thaw: If frozen, thaw the frosting in the refrigerator overnight before using.
- Re-Whip: Before using, bring the frosting to room temperature and re-whip it to restore its smooth and creamy texture.
According to food preparation expert Martha Stewart, “Proper planning and storage are essential for successful baking. Mixing frosting in advance can save time and reduce stress.”
18. How Do You Choose the Right Consistency for Your Flesh-Colored Frosting?
Choosing the right consistency for your flesh-colored frosting depends on its intended use. Here are some guidelines:
- Piping: For piping intricate designs, use a thicker consistency that holds its shape well.
- Spreading: For spreading frosting on cakes or cupcakes, use a medium consistency that is easy to spread and smooth.
- Filling: For filling cakes or cupcakes, use a thinner consistency that is easy to pour and spread evenly.
According to pastry chef Jacques Torres, “Consistency is key to achieving professional-looking results. Adjust the amount of liquid in your frosting to achieve the desired texture.”
19. What Are Some Common Additives to Enhance Flesh-Colored Frosting?
Several additives can enhance the flavor, texture, and appearance of your flesh-colored frosting. Here are some popular options:
- Extracts: Add vanilla extract, almond extract, or other flavor extracts to enhance the taste of the frosting.
- Citrus Zest: Add lemon zest, orange zest, or lime zest to add a bright, citrusy flavor.
- Salt: Add a pinch of salt to balance the sweetness of the frosting.
- Cream Cheese: Add cream cheese to create a tangy and creamy frosting.
- Meringue Powder: Add meringue powder to stabilize the frosting and create a smoother texture.
According to flavor expert Dr. Ari Weinzweig from Zingerman’s Delicatessen, experimenting with different flavors and additives can create unique and memorable desserts.
20. How Can You Troubleshoot Common Flesh-Colored Frosting Problems?
Even with careful preparation, problems can sometimes arise when making flesh-colored frosting. Here are some common issues and how to troubleshoot them:
- Frosting Is Too Dark: Add small amounts of white buttercream to lighten the color.
- Frosting Is Too Light: Add small amounts of the appropriate food coloring to deepen the shade.
- Frosting Is Grainy: Ensure that the powdered sugar is fully dissolved and that the ingredients are properly emulsified.
- Frosting Is Too Runny: Add more powdered sugar to thicken the frosting.
- Frosting Is Too Stiff: Add small amounts of liquid, such as milk or water, to thin the frosting.
- Frosting Has an Artificial Taste: Use high-quality ingredients and avoid adding too much artificial flavoring.
According to baking instructor Rose Levy Beranbaum, “Troubleshooting is a crucial skill for any baker. With practice and patience, you can overcome any baking challenge.”
Interested in learning more about the art of creating stunning desserts? Visit FOODS.EDU.VN today! Our detailed guides and expert tips will help you master the art of baking and decorating. Whether you’re looking to perfect your skin tone icing shades, create show-stopping character cakes, or simply explore new culinary techniques, FOODS.EDU.VN has everything you need to succeed. Visit us at 1946 Campus Dr, Hyde Park, NY 12538, United States, contact us via WhatsApp at +1 845-452-9600, or explore our website at FOODS.EDU.VN.
FAQ: Mastering Flesh-Colored Frosting
1. What is the best type of frosting to use for creating flesh tones?
The best type of frosting to use for creating flesh tones is a smooth, white buttercream. American buttercream, Swiss meringue buttercream, or vegan buttercream alternatives work well. These provide a neutral base that allows the food coloring to blend seamlessly, resulting in a consistent and natural-looking color.
2. How much food coloring should I use to achieve the right skin tone?
The amount of food coloring needed varies depending on the desired skin tone. Start with a small amount of brown gel food coloring, followed by a touch of red and yellow. Add the colors gradually, mixing well after each addition, until you achieve the desired shade. Remember, it’s easier to add more color than to remove it.
3. Can I use liquid food coloring instead of gel food coloring?
While you can use liquid food coloring, gel food coloring is highly recommended for creating flesh tones. Gel colors are more concentrated and provide richer, more consistent colors than liquid options. Liquid food coloring can also change the consistency of your frosting, making it too runny.
4. How do I prevent my flesh-colored frosting from tasting artificial?
To prevent your flesh-colored frosting from tasting artificial, use high-quality food coloring and avoid adding too much artificial flavoring. Natural extracts like vanilla or almond can enhance the taste without overpowering the other flavors. Also, adding a pinch of salt can balance the sweetness and enhance the overall flavor profile.
5. What if my frosting becomes too dark after adding food coloring?
If your frosting becomes too dark after adding food coloring, add small amounts of white buttercream to lighten the color. Mix well after each addition until you achieve the desired shade. Be patient and add the white buttercream gradually to avoid over-correcting.
6. How do I make my frosting smoother for a professional finish?
To achieve a smoother frosting for a professional finish, start with a crumb coat to seal in any crumbs before adding the final layer. Chill the cake or cupcakes before frosting to help the frosting adhere better. Use a palette knife or offset spatula to spread the frosting evenly, and warm the spatula in warm water before each stroke to help smooth the frosting.
7. Can I use natural food colorings for flesh-colored frosting?
Yes, you can use natural food colorings for flesh-colored frosting, but the results may vary in intensity and hue compared to gel food colorings. Natural options include beetroot powder for red, turmeric powder for yellow, and cocoa powder for brown. Be aware that some natural colorings may affect the flavor of your frosting.
8. How do I store leftover flesh-colored frosting?
Store leftover flesh-colored frosting in an airtight container in the refrigerator for up to a week, or in the freezer for up to three months. Before using, thaw the frosting in the refrigerator overnight, bring it to room temperature, and re-whip it to restore its smooth and creamy texture.
9. What are some creative uses for flesh-colored frosting?
Creative uses for flesh-colored frosting include creating character cakes with diverse skin tones, designing portrait cookies that resemble friends and family members, and baking cupcakes for special events that celebrate diversity and inclusion. You can also use flesh-colored frosting in educational projects to teach children about different cultures and backgrounds.
10. How can I learn more about making and decorating with flesh-colored frosting?
To learn more about making and decorating with flesh-colored frosting, explore the comprehensive guides, expert tips, and detailed tutorials available at FOODS.EDU.VN. Our platform provides valuable insights into color mixing techniques, ingredient selection, and design inspiration to help you elevate your baking skills and create inclusive, beautiful treats.
By following these guidelines and tips, you can master the art of creating flesh-colored frosting and bring your baking creations to life with realistic and inclusive designs. Remember to experiment, practice, and have fun with your baking projects! And don’t forget to visit foods.edu.vn for more expert advice and culinary inspiration.