Making food coloring at home is easier than you think, offering vibrant, natural alternatives to store-bought options. At FOODS.EDU.VN, we’ll guide you through creating stunning shades using fruits, vegetables, and spices. Discover the art of homemade food coloring and elevate your culinary creations with natural food dyes and organic food color alternatives, ensuring beautiful, safe, and delicious results.
1. Understanding the Basics of Homemade Food Coloring
1.1. What Is Food Coloring and Why Make It at Home?
Food coloring is any dye, pigment, or substance that imparts color when it is added to food or drink. Commercial food colorings are often synthetic and can contain additives that some people prefer to avoid. Making food coloring at home allows you to control the ingredients, using natural sources like fruits, vegetables, and spices, ensuring a safer and more wholesome option. According to a study by the Center for Science in the Public Interest, some artificial food dyes may pose health risks, further highlighting the benefits of natural alternatives.
1.2. Key Ingredients for Natural Food Coloring
Creating natural food coloring involves extracting color from various food sources. Here are some popular ingredients and the colors they produce:
- Red: Beets, raspberries, pomegranate juice
- Orange: Carrots, sweet potatoes, pumpkin
- Yellow: Turmeric, saffron, calendula flowers
- Green: Spinach, kale, matcha powder
- Blue: Red cabbage (with baking soda)
- Purple: Blueberries, purple sweet potatoes
- Brown: Coffee, cocoa powder, tea
- Black: Activated charcoal, squid ink
1.3. What are the Pros and Cons of Natural Food Coloring?
| Pros | Cons |
|---|---|
| Natural and free from synthetic additives | Colors may not be as vibrant as commercial dyes |
| Adds subtle flavors | Some ingredients can alter the taste of the final product |
| Environmentally friendly | Requires more preparation and may have a shorter shelf life |
2. Essential Techniques for Making Food Coloring
2.1. Powder vs. Liquid: Choosing the Right Base
When making homemade food coloring, you can opt for either a powder or a liquid base. Each has its own advantages and is suitable for different applications.
- Powder Base: This is often the easiest method, as powders are already concentrated and dissolve readily. You can buy powdered fruits and vegetables or make your own by dehydrating and grinding them. Examples include beet powder, carrot powder, and spinach powder.
- Liquid Base: This involves extracting color from fresh ingredients by juicing, pureeing, or infusing them in water. The liquid is then reduced to concentrate the color. Examples include beet juice, carrot puree, and saffron-infused water.
2.2. How to Make Powdered Food Coloring?
Making powdered food coloring is a simple and effective way to achieve vibrant, natural colors for your culinary creations. This method involves dehydrating fruits, vegetables, or spices and then grinding them into a fine powder. Here’s a detailed guide:
- Select Your Ingredients: Choose fresh, high-quality fruits, vegetables, or spices based on the color you want to achieve. Some popular choices include:
- Red: Beets, raspberries, strawberries
- Orange: Carrots, sweet potatoes, pumpkin
- Yellow: Turmeric
- Green: Spinach, kale
- Purple: Blueberries, purple sweet potatoes
- Prepare the Ingredients:
- Wash the fruits or vegetables thoroughly to remove any dirt or residue.
- Peel the fruits or vegetables if necessary (e.g., carrots, beets, sweet potatoes).
- Slice the ingredients into thin, uniform pieces. This ensures even and faster drying. For berries, you can leave them whole or halve them.
- Dehydrate the Ingredients:
- Using a Dehydrator: Arrange the sliced ingredients in a single layer on the dehydrator trays, ensuring they are not overlapping. Set the dehydrator to the appropriate temperature (usually around 135°F or 57°C) and dry for 6-12 hours, or until the pieces are completely dry and brittle. The drying time may vary depending on the ingredient and the dehydrator model.
- Using an Oven: Preheat your oven to the lowest possible temperature (usually around 170°F or 77°C). Place the sliced ingredients in a single layer on a baking sheet lined with parchment paper. Leave the oven door slightly ajar to allow moisture to escape. Dry for 2-4 hours, checking frequently to ensure the ingredients don’t burn. They should be completely dry and brittle when done.
- Grind the Dehydrated Ingredients:
- Once the ingredients are fully dried and cooled, transfer them to a high-speed blender, food processor, or spice grinder.
- Grind the dried pieces until they form a fine, consistent powder. This may take a few minutes, depending on the equipment.
- If you notice any larger pieces, sift the powder through a fine-mesh sieve and re-grind the larger particles.
- Store the Powdered Food Coloring:
- Transfer the powdered food coloring to an airtight container.
- Store the container in a cool, dark, and dry place to maintain the color and prevent moisture absorption. Properly stored, powdered food coloring can last for several months.
2.3. How to Make Liquid Food Coloring?
Making liquid food coloring involves extracting color from fresh ingredients and concentrating it into a potent liquid form. Here’s how to do it:
- Choose Your Ingredients: Select fresh, high-quality fruits, vegetables, or spices based on the color you want to achieve. Some popular choices include:
- Red: Beets, raspberries, pomegranate juice
- Orange: Carrots, sweet potatoes, pumpkin
- Yellow: Turmeric, saffron
- Green: Spinach, kale
- Blue: Red cabbage
- Purple: Blueberries, purple sweet potatoes
- Prepare the Ingredients:
- Wash the fruits or vegetables thoroughly.
- Chop the ingredients into small pieces to help release their color more effectively.
- Extract the Color:
- Juicing: If you have a juicer, this is the most efficient method. Simply juice the ingredients to extract the liquid.
- Pureeing: For softer fruits and vegetables like berries or cooked sweet potatoes, you can puree them using a blender or food processor. Add a small amount of water if necessary to help the blending process. Strain the puree through a fine-mesh sieve or cheesecloth to remove any solids.
- Simmering: Place the chopped ingredients in a saucepan and add just enough water to cover them. Bring the mixture to a simmer over medium heat. Cook for about 15-30 minutes, or until the water has taken on a rich color. Remove from heat and let it cool slightly. Strain the liquid through a fine-mesh sieve or cheesecloth, discarding the solids.
- Reduce the Liquid:
- Pour the extracted liquid back into a clean saucepan.
- Bring the liquid to a gentle simmer over low heat.
- Allow the liquid to reduce slowly, which concentrates the color. This may take 30-60 minutes, depending on the quantity of liquid. Stir occasionally to prevent sticking and burning.
- Reduce the liquid until you have about 1/4 cup of concentrated color. The consistency should be slightly thicker than water.
- Cool and Store:
- Remove the saucepan from the heat and allow the liquid food coloring to cool completely.
- Transfer the cooled liquid to a clean, airtight container, such as a small glass jar or dropper bottle.
- Store the liquid food coloring in the refrigerator. It should last for about 1-2 weeks.
2.4. Concentrating the Color: Reduction and Infusion
To achieve vibrant colors, it’s crucial to concentrate your homemade food coloring.
- Reduction: This involves simmering the liquid base to evaporate excess water, intensifying the color. For example, reduce beet juice or blueberry puree until you have a concentrated, deeply colored liquid.
- Infusion: This method is ideal for ingredients like saffron, where the color needs to be extracted. Steep the ingredient in warm water, then strain and reduce the liquid to concentrate the color.
2.5. What Role Does Heat Play in Making Food Coloring?
Heat can significantly impact the color of natural food colorings. While it’s useful for extracting and concentrating color, excessive heat can degrade certain pigments, leading to duller or brownish hues.
- Extraction: Gentle simmering helps release color from ingredients like beets and red cabbage.
- Reduction: Low heat is essential for evaporating water without damaging the color.
- Application: Be mindful of using natural food colorings in baked goods, as high temperatures can alter the color.
2.6. What if I Combine Colors?
| Color Combination | Result |
|---|---|
| Red + Yellow | Orange |
| Red + Blue | Purple |
| Yellow + Blue | Green |
| Red + Yellow + Blue | Brown or Gray |
3. Step-by-Step Recipes for Homemade Food Coloring
3.1. Making Red Food Coloring from Beets
Beets are an excellent source for vibrant red food coloring. Here’s how to make it:
Ingredients:
- 2 medium beets, peeled and chopped
- 1 cup water
Instructions:
- Place the chopped beets and water in a saucepan.
- Bring to a simmer over medium heat and cook for 20-30 minutes, or until the beets are soft and the water is deeply colored.
- Strain the liquid through a fine-mesh sieve, discarding the beets.
- Return the liquid to the saucepan and simmer over low heat until reduced to about 1/4 cup.
- Let it cool completely before storing in an airtight container in the refrigerator.
3.2. Using the FOODS.EDU.VN approach to make orange food coloring from carrots
Carrots provide a lovely orange hue for your culinary creations. Here’s the FOODS.EDU.VN approved method:
Ingredients:
- 2 large carrots, peeled and chopped
- 1 cup water
Instructions:
- Place the chopped carrots and water in a saucepan.
- Bring to a simmer over medium heat and cook for 20-30 minutes, or until the carrots are soft and the water is vibrantly colored.
- Strain the liquid through a fine-mesh sieve, discarding the carrots.
- Return the liquid to the saucepan and simmer over low heat until reduced to about 1/4 cup.
- Let it cool completely before storing in an airtight container in the refrigerator.
3.3. Achieving Yellow Food Coloring with Turmeric
Turmeric is a potent spice that creates a bright yellow food coloring.
Ingredients:
- 1 tablespoon turmeric powder
- 1/2 cup water
Instructions:
- In a small saucepan, combine turmeric powder and water.
- Bring to a simmer over low heat and cook for 5-10 minutes, stirring constantly.
- Let it cool completely. The turmeric will settle, so stir well before using.
- Store in an airtight container in the refrigerator.
3.4. Creating Green Food Coloring with Spinach
Spinach offers a natural way to achieve a green hue, perfect for icings and frostings.
Ingredients:
- 2 cups fresh spinach leaves
- 1/2 cup water
Instructions:
- Place the spinach and water in a blender and blend until smooth.
- Pour the mixture into a saucepan and simmer over low heat for 10-15 minutes, or until the liquid is reduced and concentrated.
- Strain the liquid through a fine-mesh sieve, discarding the spinach pulp.
- Let it cool completely before storing in an airtight container in the refrigerator.
3.5. How to Make Blue Food Coloring From Red Cabbage
Red cabbage, when combined with baking soda, produces a stunning blue food coloring.
Ingredients:
- 2 cups shredded red cabbage
- 1 1/2 cups water
- 1/4 teaspoon baking soda
Instructions:
- Place the shredded red cabbage and water in a saucepan.
- Bring to a simmer over medium heat and cook for 15-20 minutes, or until the water is deeply colored.
- Strain the liquid through a fine-mesh sieve, discarding the cabbage.
- Return the liquid to the saucepan and stir in the baking soda. The color will change from purple to blue.
- Let it cool completely before storing in an airtight container in the refrigerator.
3.6. Get Creative With Purple Food Coloring Using Blueberries
Blueberries are a delicious way to create a vibrant purple food coloring.
Ingredients:
- 2 cups fresh blueberries
- 1/4 cup water
Instructions:
- Place the blueberries and water in a saucepan.
- Bring to a simmer over medium heat and cook for 15-20 minutes, or until the berries have burst and released their color.
- Mash the berries with a potato masher, then strain the liquid through a fine-mesh sieve, discarding the solids.
- Return the liquid to the saucepan and simmer over low heat until reduced to about 1/4 cup.
- Let it cool completely before storing in an airtight container in the refrigerator.
3.7. Achieve Brown Food Coloring with Coffee
Ingredients:
- 1/2 cup strong brewed coffee
Instructions:
- Brew a strong batch of coffee using your preferred method.
- Pour the coffee into a saucepan.
- Simmer over low heat until reduced to about 2 tablespoons, creating a concentrated coffee extract.
- Let it cool completely before storing in an airtight container in the refrigerator.
3.8. How to Make Black Food Coloring From Activated Charcoal
Ingredients:
- 1 tablespoon activated charcoal powder
Instructions:
- In a small bowl, mix the activated charcoal powder with 1 teaspoon of water to form a paste.
- Mix well until the paste is smooth and consistent.
- Add this paste to your frosting or batter, mixing thoroughly until you achieve the desired shade of black.
4. Tips for Using Natural Food Coloring
4.1. Adjusting Color Intensity
Natural food colorings are typically less intense than commercial dyes. To achieve deeper shades:
- Use more coloring: Add more of the natural food coloring to your recipe, keeping in mind it may affect the flavor or consistency.
- Concentrate the color: Reduce liquid bases further to intensify the color.
- Layer colors: Apply multiple layers of colored frosting or icing to build up the color.
4.2. Balancing Flavor and Color
Since natural food colorings come from real food ingredients, they can impact the flavor of your dish.
- Choose complementary flavors: Use ingredients that complement the flavor of your recipe. For example, cocoa powder for brown coloring in chocolate desserts.
- Use small amounts: Start with small amounts of coloring and gradually add more until you achieve the desired shade.
- Consider the application: Some ingredients, like spinach, may be better suited for savory dishes, while others, like berries, are ideal for sweet treats.
4.3. How Does Acidity Affect Food Coloring?
| Food Coloring | Effect of Acid | Effect of Alkali |
|---|---|---|
| Anthocyanins (Red Cabbage, Blueberries) | Turns redder in acidic conditions (e.g., vinegar, lemon juice). | Turns bluer or greenish in alkaline conditions (e.g., baking soda). |
| Betalains (Beets) | Maintains color in slightly acidic conditions. Can turn brownish in alkaline conditions. | Color may fade or shift towards purple. |
| Curcuminoids (Turmeric) | Maintains color in acidic conditions. Turns reddish-brown in alkaline conditions. | Turns more vibrant yellow in acidic conditions. |
4.4. Storing Homemade Food Coloring
Proper storage is crucial to maintaining the quality and color of your homemade food coloring.
- Refrigerate: Store liquid food colorings in airtight containers in the refrigerator. They typically last for 1-2 weeks.
- Freeze: For longer storage, freeze liquid food colorings in ice cube trays. Once frozen, transfer the cubes to a freezer bag for up to 2-3 months.
- Powdered: Store powdered food colorings in airtight containers in a cool, dark, and dry place. They can last for several months.
4.5. How to Use Natural Food Coloring in Frosting?
When using natural food colorings in frosting, it’s best to add the color in small amounts gradually until you achieve the color you want. Keep in mind that you can add more powdered coloring than liquid coloring without affecting the recipe.
4.6. Troubleshooting Common Issues
- Color Fading: To prevent color fading, avoid exposing natural food colorings to high heat or direct sunlight.
- Inconsistent Results: Ensure you use consistent measurements and high-quality ingredients for reliable results.
- Unwanted Flavors: Choose ingredients that complement your recipe and use small amounts of coloring to minimize flavor changes.
5. Creative Applications of Homemade Food Coloring
5.1. Royal Icing and Cookie Decoration
Natural food colorings are perfect for tinting royal icing, which is commonly used to decorate cookies. The key is to add the color in small amounts until you achieve the desired shade.
Recipe for Royal Icing:
Ingredients:
- 4 cups confectioners’ sugar, sifted
- 3 tablespoons meringue powder
- 6 tablespoons warm water
Instructions:
- In a large bowl, combine the confectioners’ sugar and meringue powder.
- Add the warm water and mix on low speed until a smooth, glossy icing forms.
- Divide the icing into separate bowls and add your natural food coloring to each bowl, mixing well until the color is evenly distributed.
- Use the royal icing to decorate cookies, cakes, and other desserts.
5.2. Cake and Cupcake Frosting
Use natural food colorings to add vibrant hues to your cake and cupcake frostings. Whether it’s buttercream, cream cheese frosting, or whipped cream, homemade food colorings can transform your desserts.
Recipe for Buttercream Frosting:
Ingredients:
- 1 cup (2 sticks) unsalted butter, softened
- 4 cups confectioners’ sugar
- 1/4 cup milk
- 1 teaspoon vanilla extract
- Natural food coloring
Instructions:
- In a large bowl, beat the softened butter until smooth and creamy.
- Gradually add the confectioners’ sugar, one cup at a time, beating well after each addition.
- Add the milk and vanilla extract and beat until the frosting is light and fluffy.
- Divide the frosting into separate bowls and add your natural food coloring to each bowl, mixing well until the color is evenly distributed.
- Use the buttercream frosting to decorate cakes, cupcakes, and other desserts.
5.3. Where Can I find Vegan Options?
| Color | Vegan Source |
|---|---|
| Red | Beet juice or powder, pomegranate juice |
| Orange | Carrot juice or powder, sweet potato puree |
| Yellow | Turmeric powder, saffron infusion |
| Green | Spinach juice or powder, matcha powder |
| Blue | Red cabbage extract with baking soda |
| Purple | Blueberry juice or puree, purple sweet potato puree |
| Brown | Coffee extract, cocoa powder |
| Black | Activated charcoal powder (ensure it is derived from plant-based sources) |
5.4. Ice Cream and Frozen Desserts
Natural food colorings can also be used to add color to ice cream, sorbet, and other frozen desserts. They provide a fun and natural way to create colorful treats.
Recipe for Vanilla Ice Cream:
Ingredients:
- 2 cups heavy cream
- 1 cup whole milk
- 3/4 cup granulated sugar
- 1 vanilla bean, split and scraped (optional)
- Natural food coloring
Instructions:
- In a saucepan, combine the heavy cream, whole milk, and granulated sugar.
- Add the vanilla bean and seeds, if using.
- Heat the mixture over medium heat, stirring until the sugar is dissolved and the mixture is warm but not boiling.
- Remove from heat and let it cool completely.
- Strain the mixture to remove the vanilla bean.
- Pour the mixture into an ice cream maker and churn according to the manufacturer’s instructions.
- During the last few minutes of churning, add your natural food coloring, mixing well until the color is evenly distributed.
- Transfer the ice cream to an airtight container and freeze for at least 2-3 hours before serving.
5.5. Beverages and Cocktails
Elevate your beverages and cocktails with natural food colorings. From vibrant lemonades to colorful cocktails, homemade food colorings add a touch of natural beauty.
Recipe for Homemade Lemonade:
Ingredients:
- 1 cup fresh lemon juice
- 1 cup granulated sugar
- 4 cups water
- Natural food coloring
Instructions:
- In a saucepan, combine the lemon juice, sugar, and 1 cup of water.
- Heat the mixture over medium heat, stirring until the sugar is dissolved.
- Remove from heat and let it cool completely.
- Stir in the remaining 3 cups of water.
- Add your natural food coloring, mixing well until the color is evenly distributed.
- Serve the lemonade over ice and garnish with lemon slices and fresh herbs.
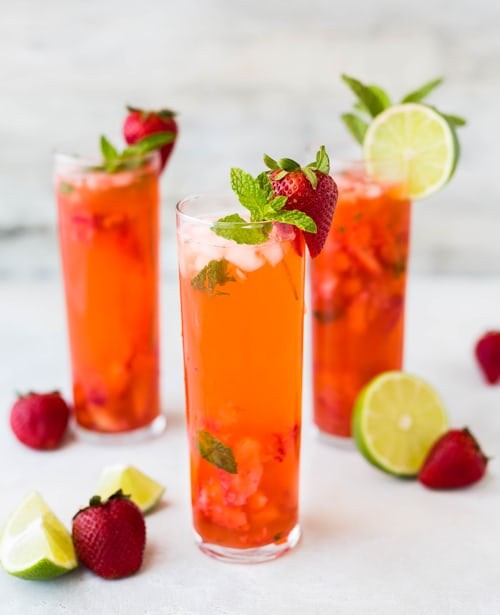 Vibrant homemade lemonade colored with natural food coloring
6. Advanced Tips and Tricks
6.1. How to Get Different Shades Using PH Levels
| Ingredient | Original Color | Acidic (Lemon Juice) | Alkaline (Baking Soda) |
|---|---|---|---|
| Red Cabbage | Purple | Reddish-Pink | Blue/Green |
| Beet Juice | Red | Brighter Red | Purple/Brown |
| Turmeric | Yellow | No Change | Orange/Red |
| Blueberries | Purple | Reddish-Purple | Blue/Green |
6.2. What are Some Alternative Sweeteners?
| Sweetener | Notes |
|---|---|
| Honey | Adds a distinct flavor; not vegan. |
| Maple Syrup | Adds a caramel-like flavor; use pure maple syrup. |
| Agave Nectar | Sweeter than sugar; use sparingly. |
| Stevia | Zero-calorie; can have a slight aftertaste. |
| Erythritol | Sugar alcohol; can have a cooling effect. |
6.3. How Can I Make My Colors Last Longer?
| Method | Description |
|---|---|
| Use Color Stabilizers | Add a small amount of vinegar or lemon juice to acidic colors like beet or blueberry to help stabilize the pigment. |
| Avoid Overheating | When using natural colors in baking, try to avoid high temperatures, as they can cause the colors to fade or change. |
| Store Properly | Keep colored foods away from direct sunlight and extreme temperatures to prevent color degradation. |
| Use Concentrated Forms | Using concentrated color extracts or powders can help achieve deeper colors that are less prone to fading. |
| Protect from Oxidation | Antioxidants like Vitamin C (ascorbic acid) can help protect natural pigments from oxidation, which can cause browning or fading. |
6.4. What are Some Unexpected Sources of Natural Food Coloring?
| Ingredient | Color | How to Use |
|---|---|---|
| Blackberries | Deep Purple | Simmer and strain for juice. |
| Hibiscus Flowers | Vibrant Red | Steep in hot water for tea, then reduce. |
| Butterfly Pea Flower | Vibrant Blue | Steep in hot water for tea, can change to purple with lemon. |
| Spirulina | Blue-Green | Use powder form sparingly. |
| Avocado | Pale Green | Use puree in frostings or creams. |
7. Addressing Common Misconceptions
7.1. Natural Food Coloring Is Always Better
While natural food coloring is often a healthier choice due to the absence of synthetic additives, it’s important to consider the potential for flavor changes and the possibility of allergens. Always check the ingredient list and be mindful of any sensitivities.
7.2. Homemade Food Coloring Is Difficult to Make
Making food coloring at home is surprisingly simple and requires minimal equipment. With a few basic ingredients and some patience, you can create stunning, natural colors for your culinary creations.
7.3. Natural Colors Are Always Dull
While natural food colorings may not be as intense as commercial dyes, they can still produce vibrant and beautiful colors. The key is to use high-quality ingredients, concentrate the colors properly, and adjust your expectations.
8. Resources and Further Reading
8.1. What Books Can I read?
| Book | Author | Description |
|---|---|---|
| “The Artful Baker: Extraordinary Desserts That Look as Amazing as They Taste” | Cenk Sonmezsoy | Features recipes with natural colors and stunning presentation. |
| “Color Me Vegan: Maximize Your Plant-Based Palette and Revolutionize Your Kitchen” | Colleen Patrick-Goudreau | Focuses on using colorful plant-based ingredients for vegan cooking. |
| “Vegan Desserts: Simple Vegan Baking Recipes” | Katy Beskow | Includes recipes for vegan desserts that utilize natural food colorings. |
| “The Natural Colors Cookbook: Healthy, Plant-Based Recipes That Showcase the Beauty of Natural Ingredients” | Annika M. Zawadzki | Explores the use of natural colors in healthy, plant-based dishes. |
| “Alternative Baker: Reinventing Dessert with Gluten-Free Grains and Flours” | Alanna Taylor-Tobin | Offers gluten-free baking recipes using natural ingredients and colors. |
8.2. What Websites and Blogs Can I Follow?
| Website/Blog | Focus |
|---|---|
| FOODS.EDU.VN | Comprehensive culinary knowledge, recipes, and expert tips. |
| Food52 | Recipes, cooking tips, and articles on food culture. |
| Serious Eats | In-depth culinary guides, recipes, and science-based cooking advice. |
| Minimalist Baker | Simple, plant-based recipes with beautiful photography. |
| Oh She Glows | Vegan recipes and healthy living inspiration. |
8.3. What are Some Online Courses and Tutorials I Can Take?
| Platform | Course/Tutorial |
|---|---|
| Skillshare | Various cooking and baking courses with natural coloring techniques. |
| YouTube | Numerous tutorials on making and using natural food coloring. |
| Coursera | Culinary arts courses with sections on food presentation and coloring. |
| Udemy | Baking and pastry courses that cover natural food coloring methods. |
| Creativebug | Craft and cooking classes, including cake decorating with natural colors. |
9. Case Studies and Examples
9.1. A Baker’s Success Story
Sarah, a local baker, started using natural food colorings after learning about the potential health risks of synthetic dyes. She experimented with beet juice for red velvet cupcakes, turmeric for lemon cakes, and spinach for green macarons. Her customers loved the vibrant colors and the subtle, natural flavors, leading to a significant increase in her bakery’s popularity.
9.2. A Family’s Healthier Celebrations
The Johnson family decided to switch to natural food colorings for their children’s birthday parties. They made colorful frostings using blueberries, carrots, and spinach, creating fun and healthy treats that the kids adored. The parents felt good about avoiding artificial additives and providing their children with wholesome food.
9.3. A Chef’s Experiment With Squid Ink
Chef Ramirez, known for his innovative dishes, began using squid ink to create black pasta and risotto. The unique flavor and dramatic color added a sophisticated touch to his menu, attracting adventurous diners and rave reviews.
10. Frequently Asked Questions (FAQ)
10.1. Can I mix different natural food colorings to create new colors?
Yes, you can mix different natural food colorings to create new colors. For example, mixing red beet juice with yellow turmeric can create an orange hue.
10.2. How do I prevent natural food coloring from fading during baking?
To prevent fading, avoid high temperatures and add a small amount of an acid like lemon juice to help stabilize the color.
10.3. What is the best way to achieve a vibrant red color naturally?
Beet juice is excellent for achieving a vibrant red color. Reduce the juice to concentrate the color and add it to your recipe.
10.4. Can I use frozen fruits and vegetables to make food coloring?
Yes, you can use frozen fruits and vegetables. Thaw them first and follow the same process as with fresh ingredients.
10.5. How much natural food coloring should I use in a recipe?
Start with a small amount (1/2 teaspoon) and gradually add more until you achieve the desired color. Keep in mind that too much can affect the flavor and consistency.
10.6. Are there any natural black food coloring alternatives to activated charcoal?
Squid ink is a natural alternative to activated charcoal. It adds a unique flavor and a deep black color to dishes.
10.7. How do I make natural food coloring without a juicer?
You can simmer or puree the ingredients, then strain the liquid to extract the color.
10.8. What are the best natural food coloring options for vegan baking?
Beet juice, carrot juice, spinach juice, turmeric, and red cabbage extract are all excellent vegan options.
10.9. How do I adjust the pH level to change the color of natural food coloring?
Adding an acid like lemon juice will make colors like beet juice redder, while adding an alkali like baking soda will turn red cabbage extract blue.
10.10. What is the shelf life of homemade natural food coloring?
Homemade natural food coloring typically lasts for 1-2 weeks in the refrigerator or 2-3 months in the freezer.
We hope this comprehensive guide inspires you to create your own natural food colorings and elevate your culinary creations. For more in-depth recipes, expert tips, and a wealth of culinary knowledge, be sure to visit FOODS.EDU.VN. Our team of culinary experts provides reliable and easy-to-follow guides that cater to all skill levels. Whether you’re looking to master a specific technique or explore new cuisines, FOODS.EDU.VN is your go-to resource for all things food.
Ready to explore the world of natural food coloring and elevate your culinary skills? Visit FOODS.EDU.VN today and unlock a treasure trove of recipes, tips, and expert advice! Our comprehensive guides make it easy to create stunning, delicious dishes that are sure to impress.
For additional questions or inquiries, feel free to contact us:
Address: 1946 Campus Dr, Hyde Park, NY 12538, United States
Whatsapp: +1 845-452-9600
Website: FOODS.EDU.VN
Join us at foods.edu.vn and embark on a flavorful journey of culinary discovery. Let’s create, learn, and celebrate the art of food together!