Making purée baby food at home is a fantastic way to nourish your little one with fresh, wholesome ingredients. FOODS.EDU.VN is here to guide you through each simple step to ensure your baby gets the best start in life. Discover how to create delicious and healthy meals, explore essential equipment, master safe storage techniques, and more.
1. What Equipment Do I Need to Make Purée Baby Food?
To start making purée baby food, you’ll need a few key pieces of equipment. These tools will help you achieve the perfect consistency and ensure your baby enjoys every bite. Here’s a breakdown of essential and helpful items:
-
Blender or Food Processor: A high-speed blender or food processor is crucial for creating smooth purées. These appliances can quickly turn cooked fruits, vegetables, and meats into a silky texture perfect for babies.
-
Steamer Basket: Steaming vegetables helps retain their nutrients and natural flavors. A steamer basket that fits inside a pot is an excellent tool for gently cooking ingredients.
-
Pots and Pans: Use high-quality pots and pans for cooking ingredients. Stainless steel or non-toxic cookware ensures no harmful chemicals leach into the food.
-
Ice Cube Trays or Small Containers: These are perfect for portioning and freezing baby food. Opt for BPA-free options to ensure your baby’s safety.
-
Spatulas and Spoons: Use these for stirring and transferring food. Silicone spatulas are heat-resistant and easy to clean.
-
Knife and Cutting Board: A sharp knife and a clean cutting board are essential for prepping fruits and vegetables.
-
Baby Food Maker (Optional): An all-in-one baby food maker steams and purées food in one device, saving you time and effort.
According to a study by the University of Maine, using the right tools can significantly reduce preparation time and improve the nutritional content of homemade baby food.
Here’s a table summarizing the necessary equipment:
| Equipment | Purpose | Notes |
|---|---|---|
| Blender/Food Processor | Puréeing cooked ingredients into a smooth consistency | High-speed models work best; ensure they are easy to clean. |
| Steamer Basket | Gently cooking vegetables to retain nutrients | Fits inside a pot; choose stainless steel or silicone options. |
| Pots and Pans | Cooking ingredients | Stainless steel or non-toxic cookware recommended. |
| Ice Cube Trays | Portioning and freezing baby food | BPA-free options are essential for safety. |
| Spatulas/Spoons | Stirring and transferring food | Silicone spatulas are heat-resistant and easy to clean. |
| Knife/Cutting Board | Preparing fruits and vegetables | A sharp knife and clean cutting board are essential. |
| Baby Food Maker | Steaming and puréeing food in one device (optional but convenient) | Saves time and effort; look for models with multiple settings. |
2. What Are The Best Ingredients For Making Purée Baby Food?
Choosing the right ingredients is crucial for making nutritious and delicious purée baby food. Here are some of the best options, along with their benefits:
-
Sweet Potatoes: Rich in vitamin A and fiber, sweet potatoes are naturally sweet and easy to digest. They are also packed with antioxidants, which support your baby’s immune system.
-
Carrots: Another excellent source of vitamin A, carrots are also rich in beta-carotene. They have a mild flavor that most babies enjoy and can help support healthy vision.
-
Avocados: Creamy and full of healthy fats, avocados are great for brain development. They are easy to purée and require no cooking, making them a convenient option.
-
Bananas: Soft, sweet, and easy to digest, bananas are a good source of potassium and fiber. They are perfect for introducing your baby to new textures and flavors.
-
Apples: When cooked and puréed, apples provide essential vitamins and fiber. They are a gentle introduction to fruit and can be mixed with other ingredients for added flavor.
-
Pears: Similar to apples, pears are mild and easy to digest. They are a good source of vitamin C and fiber, making them a healthy choice for your baby.
-
Peas: Packed with vitamins and fiber, peas are a great vegetable to introduce early on. They have a naturally sweet flavor that many babies enjoy.
-
Green Beans: Another excellent source of vitamins and fiber, green beans are easy to steam and purée. They have a mild flavor that pairs well with other vegetables.
According to the American Academy of Pediatrics, introducing a variety of fruits and vegetables early on can help develop your baby’s palate and prevent picky eating habits later in life.
Here’s a table that summarizes these ingredients:
| Ingredient | Benefits | Preparation Tips |
|---|---|---|
| Sweet Potatoes | Rich in vitamin A, fiber, and antioxidants | Steam or bake until soft; peel before puréeing. |
| Carrots | Excellent source of vitamin A and beta-carotene | Steam or boil until tender; peel before puréeing. |
| Avocados | Creamy texture, full of healthy fats for brain development | No cooking required; simply mash or purée. |
| Bananas | Soft, sweet, and easy to digest; good source of potassium and fiber | Peel and mash or purée. |
| Apples | Source of vitamins and fiber; gentle introduction to fruit | Cook until soft, peel, and purée. |
| Pears | Mild and easy to digest; good source of vitamin C and fiber | Cook until soft, peel, and purée. |
| Peas | Packed with vitamins and fiber | Steam or boil until tender; purée. |
| Green Beans | Excellent source of vitamins and fiber | Steam or boil until tender; purée. |
3. How Do You Steam Vegetables Perfectly For Purée Baby Food?
Steaming is a gentle and effective way to cook vegetables for baby food, preserving their nutrients and natural flavors. Here’s a detailed guide on how to steam vegetables perfectly:
-
Prepare the Vegetables: Wash the vegetables thoroughly and peel them if necessary. Cut them into small, uniform pieces to ensure even cooking.
-
Set Up the Steamer: Fill a pot with about an inch of water and place a steamer basket inside. Make sure the water level is below the bottom of the basket to prevent the vegetables from boiling.
-
Add the Vegetables: Place the cut vegetables in the steamer basket, ensuring they are evenly distributed.
-
Steam the Vegetables: Cover the pot with a lid and bring the water to a boil. Reduce the heat to medium and steam the vegetables until they are tender. The cooking time will vary depending on the vegetable:
- Carrots: 8-10 minutes
- Sweet Potatoes: 10-12 minutes
- Peas: 3-5 minutes
- Green Beans: 5-7 minutes
-
Check for Doneness: To check if the vegetables are done, pierce them with a fork. They should be easily pierced and soft.
-
Cool the Vegetables: Once the vegetables are cooked, remove the steamer basket from the pot and let them cool slightly before puréeing.
Steaming helps retain water-soluble vitamins like vitamin C and B vitamins, which can be lost when boiling vegetables directly in water, according to research from the University of California, Davis.
Here’s a table outlining steaming times for common vegetables:
| Vegetable | Preparation | Steaming Time (Minutes) | Check for Doneness |
|---|---|---|---|
| Carrots | Wash, peel, and cut into small pieces | 8-10 | Easily pierced with a fork and soft |
| Sweet Potatoes | Wash, peel, and cut into small pieces | 10-12 | Easily pierced with a fork and soft |
| Peas | Wash | 3-5 | Tender and easily mashed |
| Green Beans | Wash and trim | 5-7 | Tender and easily bent |
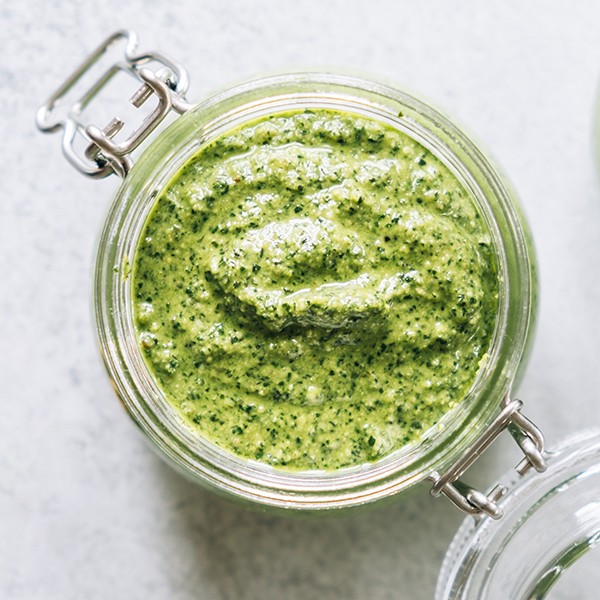
4. How To Purée Fruits And Vegetables For Baby Food?
Puréeing fruits and vegetables is a simple process that transforms cooked ingredients into a smooth, easily digestible meal for your baby. Here’s how to do it:
-
Cook the Ingredients: Steam, bake, or boil the fruits and vegetables until they are soft and tender. Make sure they are cool enough to handle before puréeing.
-
Prepare the Blender or Food Processor: Ensure your blender or food processor is clean and ready to use.
-
Add the Ingredients: Place the cooked fruits or vegetables into the blender or food processor. Start with a small amount to avoid overloading the appliance.
-
Add Liquid (If Necessary): If the mixture is too thick, add a small amount of water, breast milk, or formula to achieve the desired consistency. Start with 1-2 tablespoons and add more as needed.
-
Purée the Mixture: Blend or process the ingredients until they are smooth. This may take a few minutes, depending on the appliance and the ingredients.
-
Check the Consistency: Once the mixture is smooth, check the consistency. It should be free of lumps and easy for your baby to swallow. If necessary, purée for a longer time or add more liquid.
-
Strain (Optional): For a super-smooth purée, you can strain the mixture through a fine-mesh sieve. This is especially helpful for fibrous vegetables like green beans.
According to the World Health Organization, the ideal consistency for baby food purées is smooth and lump-free, making it easier for babies to swallow and digest.
Here’s a step-by-step guide in table format:
| Step | Action | Tips |
|---|---|---|
| 1. Cook Ingredients | Steam, bake, or boil fruits and vegetables until soft and tender. | Ensure ingredients are cool enough to handle before puréeing. |
| 2. Prepare Appliance | Ensure your blender or food processor is clean and ready to use. | |
| 3. Add Ingredients | Place the cooked fruits or vegetables into the blender or food processor. | Start with a small amount to avoid overloading the appliance. |
| 4. Add Liquid | If the mixture is too thick, add a small amount of water, breast milk, or formula. | Start with 1-2 tablespoons and add more as needed. |
| 5. Purée the Mixture | Blend or process the ingredients until they are smooth. | This may take a few minutes, depending on the appliance and the ingredients. |
| 6. Check Consistency | Once the mixture is smooth, check the consistency. It should be free of lumps and easy for your baby to swallow. | If necessary, purée for a longer time or add more liquid. |
| 7. Strain (Optional) | For a super-smooth purée, strain the mixture through a fine-mesh sieve. | This is especially helpful for fibrous vegetables like green beans. |
5. What Are Some Great Homemade Baby Food Recipes?
Creating homemade baby food allows you to control the ingredients and ensure your baby gets the best nutrition. Here are a few simple and delicious recipes to get you started:
Sweet Potato Purée
- Ingredients: 1 medium sweet potato
- Instructions:
- Wash and peel the sweet potato.
- Cut it into small cubes.
- Steam the sweet potato for 10-12 minutes, or until tender.
- Place the cooked sweet potato in a blender or food processor.
- Purée until smooth, adding water or breast milk as needed to reach the desired consistency.
Avocado Purée
- Ingredients: 1 ripe avocado
- Instructions:
- Cut the avocado in half and remove the pit.
- Scoop out the flesh and place it in a bowl.
- Mash the avocado with a fork until smooth.
- Add a little breast milk or formula if needed to achieve a smoother consistency.
Apple Purée
- Ingredients: 2 apples
- Instructions:
- Wash, peel, and core the apples.
- Cut the apples into small pieces.
- Steam or boil the apples for 8-10 minutes, or until soft.
- Place the cooked apples in a blender or food processor.
- Purée until smooth, adding water or breast milk as needed to reach the desired consistency.
Pea Purée
- Ingredients: 1 cup of peas (fresh or frozen)
- Instructions:
- Steam or boil the peas for 3-5 minutes, or until tender.
- Place the cooked peas in a blender or food processor.
- Purée until smooth, adding water or breast milk as needed to reach the desired consistency.
These recipes are easy to customize with various combinations and ingredients as your baby grows and develops their palate. The University of Maine Extension recommends introducing single-ingredient purées first to identify any potential allergies.
Here’s a recipe table for quick reference:
| Recipe | Ingredients | Instructions |
|---|---|---|
| Sweet Potato Purée | 1 medium sweet potato | 1. Wash, peel, and cube sweet potato. 2. Steam until tender. 3. Purée until smooth, adding liquid as needed. |
| Avocado Purée | 1 ripe avocado | 1. Cut, pit, and scoop out avocado. 2. Mash with a fork until smooth. 3. Add liquid if needed. |
| Apple Purée | 2 apples | 1. Wash, peel, core, and cube apples. 2. Steam or boil until soft. 3. Purée until smooth, adding liquid as needed. |
| Pea Purée | 1 cup of peas (fresh or frozen) | 1. Steam or boil peas until tender. 2. Purée until smooth, adding liquid as needed. |
6. How Can I Safely Store Homemade Purée Baby Food?
Proper storage of homemade baby food is essential to ensure its safety and nutritional value. Here’s a guide to storing purées correctly:
-
Refrigeration: Homemade baby food can be stored in the refrigerator for 1-2 days. Use airtight containers to prevent contamination and maintain freshness.
-
Freezing: For longer storage, freezing is an excellent option. You can freeze purées in ice cube trays or small, freezer-safe containers for up to 2 months.
- Ice Cube Trays: Spoon the purée into ice cube trays and freeze until solid. Once frozen, transfer the cubes to a freezer bag or container. This allows you to thaw only the amount you need.
- Freezer-Safe Containers: Fill small, freezer-safe containers with the purée, leaving some space at the top for expansion. Label each container with the date and contents.
-
Thawing: Thaw frozen baby food in the refrigerator overnight or use the defrost setting on your microwave. Ensure the food is heated evenly and reaches a safe temperature before serving.
-
Avoid Refreezing: Once thawed, do not refreeze baby food. Discard any leftovers to prevent bacterial growth.
-
Labeling: Always label containers with the date and contents to keep track of freshness and avoid confusion.
The USDA recommends using frozen baby food within 2 months for optimal quality and safety.
Here’s a table summarizing the best practices for storing baby food:
| Storage Method | Duration | Container Type | Tips |
|---|---|---|---|
| Refrigeration | 1-2 days | Airtight containers | Store immediately after preparation; keep at or below 40°F (4°C). |
| Freezing | Up to 2 months | Ice cube trays or freezer-safe containers | Freeze in single servings; leave space for expansion; label with date and contents. |
| Thawing | Refrigerator or microwave | Thaw overnight in the refrigerator or use the microwave’s defrost setting; heat evenly before serving. |
7. How To Introduce New Foods And Avoid Allergies?
Introducing new foods to your baby is an exciting milestone, but it’s essential to do it carefully to identify any potential allergies. Here’s a step-by-step guide:
-
Start with Single-Ingredient Purées: Begin by introducing one new food at a time. This makes it easier to identify the source of any allergic reactions.
-
Wait 3-5 Days Between New Foods: After introducing a new food, wait 3-5 days before introducing another. This allows you to monitor your baby for any signs of an allergic reaction.
-
Look for Signs of an Allergic Reaction: Common signs of an allergic reaction include rash, hives, swelling, vomiting, diarrhea, and difficulty breathing. If you notice any of these symptoms, stop feeding the new food and consult your pediatrician.
-
Introduce Common Allergens Early: It’s now recommended to introduce common allergens like peanuts, eggs, and dairy early in your baby’s diet, typically around 6 months of age. This can help reduce the risk of developing allergies later in life.
-
Consult Your Pediatrician: Always consult your pediatrician before introducing solid foods, especially if you have a family history of allergies.
According to the American Academy of Pediatrics, early introduction of allergenic foods can help prevent allergies. However, it’s crucial to follow a gradual approach and monitor your baby closely.
Here’s a table summarizing the steps for introducing new foods:
| Step | Action | Reason |
|---|---|---|
| 1. Start with Single-Ingredient Purées | Introduce one new food at a time | Easier to identify the source of any allergic reactions |
| 2. Wait 3-5 Days Between New Foods | Monitor your baby for any signs of an allergic reaction | Allows time to observe and identify any adverse reactions |
| 3. Look for Signs of Allergic Reaction | Rash, hives, swelling, vomiting, diarrhea, difficulty breathing | Prompt identification allows for immediate action |
| 4. Introduce Common Allergens Early | Peanuts, eggs, dairy around 6 months | May help reduce the risk of developing allergies later in life |
| 5. Consult Your Pediatrician | Discuss with your pediatrician before introducing solid foods, especially with family history of allergies | Provides personalized guidance based on your baby’s health and risk factors |
8. Can I Use Frozen Fruits And Vegetables For Baby Food?
Yes, you can absolutely use frozen fruits and vegetables for baby food. Frozen produce can be just as nutritious, if not more so, than fresh produce because it is often frozen shortly after harvesting, preserving its vitamins and minerals. Here’s what you need to know:
-
Nutritional Value: Frozen fruits and vegetables retain their nutritional value because they are typically frozen at their peak ripeness. According to a study by the University of Georgia, frozen produce can sometimes have higher levels of certain vitamins than fresh produce that has been stored for several days.
-
Convenience: Frozen fruits and vegetables are convenient because they are pre-cut and ready to use, saving you time and effort in preparation.
-
Availability: Frozen produce is available year-round, regardless of the season, making it a reliable option for making baby food.
-
Safety: Ensure that the frozen fruits and vegetables are plain, without added salt, sugar, or sauces. Look for options with no added ingredients.
-
Preparation: Thaw frozen fruits and vegetables before cooking and puréeing. You can steam, boil, or microwave them until they are tender.
Using frozen produce can be a great way to ensure your baby gets a variety of fruits and vegetables, even when they are not in season.
Here’s a table summarizing the benefits of using frozen fruits and vegetables:
| Benefit | Description |
|---|---|
| Nutritional Value | Frozen produce retains vitamins and minerals because it is frozen shortly after harvesting. |
| Convenience | Pre-cut and ready to use, saving preparation time. |
| Availability | Available year-round, regardless of the season. |
| Safety | Ensure no added salt, sugar, or sauces; choose plain options. |
9. How Do I Ensure My Baby Gets Enough Iron?
Iron is crucial for your baby’s growth and development, especially for brain development and preventing anemia. Here’s how to ensure your baby gets enough iron in their diet:
-
Iron-Fortified Cereals: Start with iron-fortified single-grain cereals as one of the first foods. These cereals are designed to provide a significant source of iron for babies.
-
Meat and Poultry: Introduce meats and poultry early in your baby’s diet. These are excellent sources of heme iron, which is more easily absorbed by the body.
-
Legumes: Beans, lentils, and other legumes are good sources of iron. Combine them with vitamin C-rich foods to enhance iron absorption.
-
Dark Green Vegetables: Spinach, kale, and other dark green vegetables contain iron, although it is non-heme iron and not as easily absorbed as heme iron.
-
Vitamin C: Serve iron-rich foods with foods high in vitamin C, such as citrus fruits, strawberries, and tomatoes, to improve iron absorption.
-
Breast Milk and Formula: Continue to provide breast milk or iron-fortified formula as a primary source of nutrition during the first year.
According to the National Institutes of Health, iron deficiency is common in infants and young children, so it’s essential to prioritize iron-rich foods in their diet.
Here’s a table summarizing iron-rich food sources:
| Food Source | Type of Iron | Tips for Enhancing Absorption |
|---|---|---|
| Iron-Fortified Cereals | Fortified | Start with single-grain options; follow package instructions. |
| Meat and Poultry | Heme | Introduce early; trim excess fat. |
| Legumes | Non-Heme | Combine with vitamin C-rich foods. |
| Dark Green Vegetables | Non-Heme | Combine with vitamin C-rich foods; cook thoroughly. |
10. What Are Some Common Mistakes To Avoid When Making Baby Food?
Making homemade baby food is a rewarding experience, but it’s essential to be aware of common mistakes to ensure your baby’s safety and health. Here are some pitfalls to avoid:
-
Adding Salt or Sugar: Babies don’t need added salt or sugar in their food. These additives can be harmful to their developing kidneys and can create unhealthy taste preferences.
-
Using Honey for Babies Under One Year: Honey can contain botulism spores, which can be dangerous for babies under one year of age.
-
Not Washing Produce Thoroughly: Always wash fruits and vegetables thoroughly to remove pesticides and bacteria.
-
Overcooking Vegetables: Overcooking vegetables can destroy their nutrients. Steam or cook them until they are just tender.
-
Not Cooling Food Properly Before Storing: Allow cooked food to cool completely before storing it in the refrigerator or freezer. This prevents condensation and bacterial growth.
-
Refreezing Thawed Food: Never refreeze thawed baby food. This can increase the risk of bacterial contamination.
-
Ignoring Potential Allergies: Introduce new foods one at a time and watch for any signs of an allergic reaction.
-
Using Unpasteurized Dairy Products: Ensure all dairy products, such as cheese and yogurt, are pasteurized to avoid harmful bacteria.
By avoiding these common mistakes, you can ensure that the baby food you make at home is safe, nutritious, and delicious for your little one.
Here’s a table summarizing common mistakes to avoid:
| Mistake | Reason | Solution |
|---|---|---|
| Adding Salt or Sugar | Harmful to developing kidneys; creates unhealthy taste preferences | Avoid adding salt or sugar; use natural flavors. |
| Using Honey for Babies Under One Year | Contains botulism spores, dangerous for infants | Do not give honey to babies under one year of age. |
| Not Washing Produce Thoroughly | Risk of pesticide and bacteria contamination | Wash fruits and vegetables thoroughly. |
| Overcooking Vegetables | Destroys nutrients | Steam or cook until just tender. |
| Not Cooling Food Properly Before Storing | Promotes condensation and bacterial growth | Allow food to cool completely before storing. |
| Refreezing Thawed Food | Increases risk of bacterial contamination | Never refreeze thawed baby food. |
| Ignoring Potential Allergies | Can lead to undetected allergic reactions | Introduce new foods one at a time and watch for any signs of an allergic reaction. |
| Using Unpasteurized Dairy Products | Risk of harmful bacteria | Ensure all dairy products are pasteurized. |
Creating purée baby food at home is a wonderful way to provide your little one with the best nutrition. Remember to use the right equipment, choose nutritious ingredients, and follow safe storage practices. By avoiding common mistakes and introducing new foods carefully, you can ensure your baby enjoys a healthy and delicious start to life.
For more in-depth information, tips, and recipes, visit FOODS.EDU.VN. Unlock a treasure trove of culinary knowledge, from understanding essential nutrients to mastering advanced cooking techniques. Whether you’re looking for simple meal ideas or detailed guides on specific ingredients, FOODS.EDU.VN has everything you need to nourish your family.
Explore our extensive library of articles and discover how to make every meal a delightful and nutritious experience. Don’t miss out – start your culinary journey with FOODS.EDU.VN today.
Contact us for any further assistance or inquiries:
Address: 1946 Campus Dr, Hyde Park, NY 12538, United States
Whatsapp: +1 845-452-9600
Website: foods.edu.vn
Frequently Asked Questions (FAQ) About Making Purée Baby Food
1. At What Age Can I Start Giving My Baby Purée Food?
Most pediatricians recommend starting solid foods, including purées, around 6 months of age. However, it’s essential to look for signs of readiness, such as good head control, the ability to sit up with support, and interest in food.
2. Can I Use A Regular Blender For Making Baby Food?
Yes, you can use a regular blender or food processor to make baby food. Ensure the appliance is clean and capable of creating a smooth purée. High-speed blenders often work best.
3. How Do I Thin Out Baby Food That Is Too Thick?
If the baby food is too thick, you can add small amounts of water, breast milk, or formula until you reach the desired consistency.
4. How Long Can I Store Homemade Baby Food In The Refrigerator?
Homemade baby food can be stored in the refrigerator for 1-2 days in airtight containers.
5. Can I Freeze Homemade Baby Food?
Yes, you can freeze homemade baby food for up to 2 months. Use ice cube trays or small, freezer-safe containers for easy portioning.
6. How Do I Thaw Frozen Baby Food?
Thaw frozen baby food in the refrigerator overnight or use the defrost setting on your microwave. Ensure the food is heated evenly before serving.
7. What Are The Best First Foods To Introduce To My Baby?
Good first foods include single-grain iron-fortified cereals, sweet potato, avocado, banana, and cooked and puréed fruits and vegetables.
8. How Do I Know If My Baby Is Allergic To A New Food?
Introduce new foods one at a time and watch for any signs of an allergic reaction, such as rash, hives, swelling, vomiting, or diarrhea. Consult your pediatrician if you suspect an allergy.
9. Is It Okay To Use Frozen Vegetables For Baby Food?
Yes, frozen vegetables are a nutritious and convenient option for making baby food. They are often frozen at their peak ripeness, preserving their vitamins and minerals.
10. Should I Add Salt Or Sugar To My Baby’s Food?
No, you should not add salt or sugar to your baby’s food. Babies don’t need these additives, and they can be harmful to their developing kidneys.