Taking great food photos can be simple with the right knowledge and tools. At FOODS.EDU.VN, we’re dedicated to helping you master the art of food photography, whether you’re a beginner or a seasoned pro by enhancing your visual storytelling, boosting your brand appeal, and capturing the essence of culinary artistry. Start today and transform your food photography journey.
1. What Are The Essential Tips For Taking Great Food Photos?
Taking great food photos involves mastering light, composition, and styling. Always use natural light, experiment with angles, and minimize clutter to highlight the food’s best features.
Capturing appealing food photos doesn’t have to be complicated. Here are essential tips to transform your food photography and make your dishes look irresistibly delicious:
- Embrace Natural Light: The golden rule is to always use natural light. Avoid overhead lights, lamps, and built-in flashes, as they can create harsh shadows and unflattering tones. Natural light enhances colors and textures, making your food look more appetizing.
- Find the Best Light Source: Don’t limit yourself to your kitchen. Explore different areas in your home to find the best natural light. Morning light might be perfect in your bedroom, while afternoon light could be ideal in your living room. Adjust your location based on the time of day to capture the most flattering light.
- Experiment with Angles: Different foods look best from different angles. Pizza often looks great from above, while burgers shine from the side, and drinks can be captivating at a 45-degree angle. Move around your plate, take shots from various perspectives, and choose the angle that best highlights the food’s unique qualities.
- Minimize Clutter: Keep your focus on the food by removing unnecessary items from the frame. A distracting spoon, napkin, or busy background can detract from the main subject. Ensure the food remains the star of the photo by simplifying the composition. However, avoid zooming in too closely, as viewers should still be able to identify the dish.
- Add Visual Interest with Props: While minimizing clutter is important, strategic use of props can enhance your photos. Choose props that complement the food’s style and color palette. Simple elements like wooden boards, linens, or utensils can add texture and depth to your images without overwhelming the main subject.
- Use the Right Camera Settings: Mastering your camera settings is key to capturing high-quality food photos. Adjust aperture, shutter speed, and ISO to achieve the perfect exposure and depth of field. Understanding these settings allows you to control the light and focus, resulting in professional-looking images.
- Edit Your Photos: Post-processing is essential for bringing out the best in your food photos. Use editing software to adjust brightness, contrast, and color balance. Subtle tweaks can make a significant difference, enhancing the visual appeal of your dishes.
By following these tips, you can elevate your food photography and create images that are not only visually stunning but also truly capture the deliciousness of your culinary creations. For more in-depth guidance and expert techniques, visit FOODS.EDU.VN, where you’ll find a wealth of resources to help you master the art of food photography.
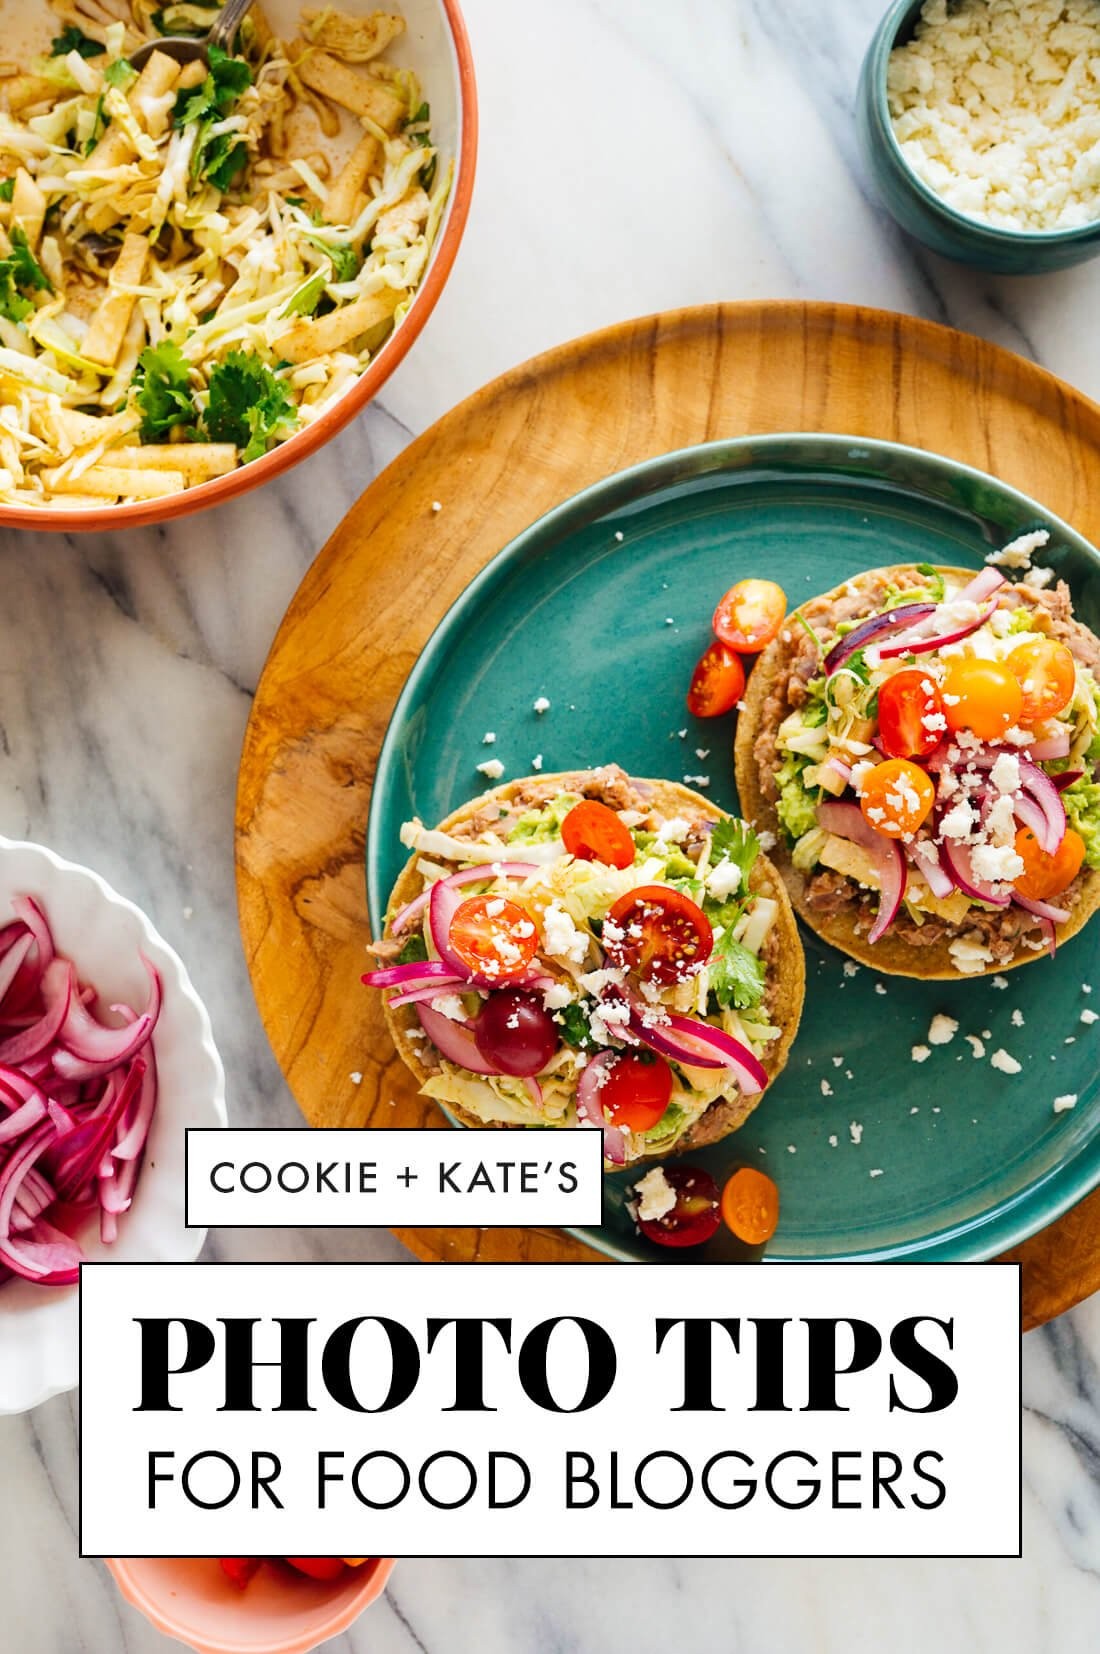 Food Photography Tips for Food Bloggers
2. How Can I Troubleshoot Common Food Photography Issues?
Address common issues like blurry photos by using a tripod or faster shutter speed. Correct color imbalances with white balance tools in editing software. Enhance overall appeal by adjusting contrast and sharpness in post-processing.
Encountering issues in food photography is common, but addressing them can significantly improve your results. Here are some solutions for common problems:
- Blurry Photos: Blurry photos are typically caused by camera shake. Here’s how to fix it:
- Hold Your Camera Steady: Easier said than done, but practice makes perfect.
- Use a Tripod: A tripod keeps your camera completely still while shooting. Use a remote shutter release to avoid any movement.
- Increase Shutter Speed: A faster shutter speed reduces motion blur. To achieve this, open up your aperture (lower f-number) and/or move to an area with more light.
- Raise ISO: Increasing ISO makes your camera more sensitive to light, but be cautious as higher ISO can reduce image quality by introducing noise.
- Inaccurate Colors: If your food photos show colors that are not true to life (e.g., too blue, yellow, pink, or green), the issue is with your white balance.
- Use White Balance Tools: Adjust the white balance settings in your editing software to correct the colors. Setting the correct white balance can make the colors come alive.
- Shoot in RAW Format: Shooting in RAW provides more flexibility in adjusting color balance during post-processing. RAW files retain more information than JPEGs, allowing for finer adjustments without losing quality.
- Photos Lack “Pop”: Professional food photos often have a certain “pop” that makes them stand out. Here’s how to achieve this:
- Use a Lens with Narrow Depth of Field: Lenses with wider apertures (lower f-numbers) allow you to narrow the depth of field, highlighting the subject while blurring the background.
- Edit Contrast, Levels, and Sharpness: Use photography software to tweak these settings. A few minor adjustments can significantly enhance the photo’s visual appeal.
- Add Subtle Shadows: Shadows can add depth and dimension to your food photos, making them more visually interesting.
Addressing these common issues can transform your food photography from amateur to professional-looking. Remember, practice and experimentation are key to mastering these techniques. For more detailed guidance and advanced tips, visit FOODS.EDU.VN, where you’ll find resources to help you take your food photography to the next level.
3. What Are The Best Cameras For Food Photography?
DSLR cameras offer full control over exposure and focal length, making them ideal for food photography. Brands like Nikon and Canon provide excellent options. Consider buying the camera body and lens separately for optimal results.
Choosing the right camera is a crucial step in elevating your food photography. While a basic point-and-shoot camera can suffice initially, upgrading to a more advanced system offers greater control and quality. Here’s what to consider:
- Point-and-Shoot Cameras: These cameras are easy to use and can be a good starting point.
- Macro Setting: Use the macro setting for close-up shots of food.
- User Manual: Consult the user manual to understand the camera’s capabilities and settings.
- Practice: Experiment with different settings and lighting conditions to improve your skills.
- DSLR (Digital Single-Lens Reflex) Cameras: A DSLR camera provides full control over exposure and focal length, making it a worthwhile investment.
- Control: Offers manual control over settings like aperture, shutter speed, and ISO.
- Interchangeable Lenses: Allows you to use different lenses for various shooting scenarios.
- Investment: Upgrading your camera every few years can help you stay current with technological advancements.
- Nikon Z6: A high-performance mirrorless camera, is a popular choice among food photographers.
- Nikon vs. Canon DSLRs: The differences between Nikon and Canon DSLRs are minimal, especially in comparable models.
- Comparable Quality: Both brands produce photos of similar quality.
- Price Range: Choose the best camera available within your budget.
- User-Friendliness: Visit a local photography store to try out different models. Choose the one that feels most comfortable and user-friendly in your hand.
- Camera Body and Lens: It’s often better to buy the camera body and lens separately.
- Lens Impact: The lens you use has a more significant impact on your photos than the DSLR itself.
- Flexibility: Buying separately allows you to choose a lens specifically designed for food photography.
By carefully considering these factors, you can select a camera that meets your needs and helps you capture stunning food photos. For more recommendations and detailed reviews, visit FOODS.EDU.VN, where you’ll find expert advice to guide you in your camera selection process.
4. What Are The Best Lenses For Capturing Delicious Food Photos?
Fixed lenses, such as 35mm or 50mm, are excellent for food photography due to their compactness and wider apertures. These lenses offer greater control over depth of field and perform well in various shooting conditions.
Selecting the right lens is essential for capturing mouthwatering food photos. Fixed lenses are a favorite among food photographers due to their superior quality and performance. Here’s why:
- Fixed Lenses: These lenses do not zoom, requiring you to physically move closer or farther from the subject.
- Compactness: Generally smaller and lighter than zoom lenses.
- Affordability: Often cheaper than zoom lenses.
- Speed: Offer wider apertures, providing more control over depth of field and flexibility in various shooting conditions.
- 35mm Lens: Ideal for cropped format cameras.
- Sharp Photos: Produces sharper images compared to some 50mm lenses.
- Overhead Shots: Easy to use for overhead shots of food on a table.
- 50mm Lens: A popular choice for full-frame cameras.
- Nikon Nikkor Z 50mm f1.8 Lens: Specifically designed for Nikon’s Z-format cameras.
- Nikon 50mm f1.4 Lens: An excellent alternative for other full-format Nikon cameras.
- Nikon 50mm f1.8G Lens: A slightly more affordable option that still delivers great quality.
The focal length you choose depends on your camera format. A 35mm lens on a cropped format camera effectively acts like a 50mm lens on a full-frame camera.
By choosing the right lens, you can significantly enhance the quality and visual appeal of your food photos. For more detailed comparisons and recommendations, visit FOODS.EDU.VN, where you’ll find expert advice to help you select the perfect lens for your food photography needs.
5. What Other Equipment Is Beneficial For Food Photography?
Reflectors and diffusers help manage light and shadows, while a quality tripod ensures stability and sharpness. These tools enhance your control over the final image.
Beyond cameras and lenses, several other pieces of equipment can significantly enhance your food photography. Here’s a rundown of essential gear:
- Reflectors and Diffusers: These tools help you manage light and shadows, creating a more balanced and appealing image.
- White Foam Boards: Use cheap white foam boards to bounce light back onto the plate and reduce shadows.
- Black Foam Boards: Use black foam boards to bring out more shadows and add depth.
- Sheer White Fabric: Hang sheer white fabric over a window to soften the lighting source.
- Quality Tripod: A tripod provides stability, ensuring sharp and high-quality photos, especially in low-light conditions.
- Stability: Reduces camera shake, resulting in clearer images.
- Control: Gives you greater control over your camera settings.
- Manfrotto Studio Pro Triman Tripod: A sturdy tripod designed for studio use.
- Sturdy Arm: Allows you to shoot overhead, providing a unique perspective.
- Manfrotto 131D Side Arm: A reliable option for overhead shots.
- Tripod Head: This component connects your camera to the tripod and allows you to adjust the camera’s position.
- Manfrotto 322RC2 Joystick Head Short: Easier to adjust than other tripod heads, featuring a single trigger instead of multiple knobs.
Investing in these additional pieces of equipment can elevate your food photography, giving you greater control over lighting, stability, and composition. For more detailed recommendations and reviews, visit FOODS.EDU.VN, where you’ll find expert advice to help you choose the right gear for your needs.
6. What Photography Software Do You Recommend For Enhancing Food Photos?
Adobe Lightroom is highly recommended for organizing and editing digital photos. Its user-friendly interface and exceptional control over exposure adjustments make it an invaluable tool for enhancing food photography.
Choosing the right photography software is crucial for enhancing your food photos. Here’s a recommended option:
- Adobe Lightroom: This software is ideal for organizing and editing digital photos.
- Organization: Helps keep your files organized and easy to find.
- Exposure Adjustments: Provides exceptional control over exposure adjustments.
- Cost-Effective: Significantly less expensive than Photoshop.
Adobe Lightroom is an invaluable tool for food photographers, offering a user-friendly interface and powerful editing capabilities. For more detailed tutorials and tips on using Lightroom, visit FOODS.EDU.VN, where you’ll find resources to help you master photo editing.
7. What Photography Books Would Help Improve My Skills?
“Pinch of Yum Tasty Food Photography eBook” by Lindsey of Pinch of Yum offers practical advice, including videos, on camera settings, composition, lighting, and editing. “Understanding Exposure” by Brian Peterson provides fundamental photography principles applicable to various situations.
Enhance your food photography skills with these recommended books:
- Pinch of Yum Tasty Food Photography eBook: This eBook by Lindsey of Pinch of Yum is a comprehensive guide to food photography.
- Technical Advice: Provides technical camera setting advice.
- Composition Tips: Offers tips on composition.
- Lighting Tips: Includes advice on lighting.
- Props and Setup: Details props and setup.
- Photo Editing and Workflow: Covers photo editing and workflow tips.
- Videos: Includes videos of Lindsey shooting and editing photos.
- Understanding Exposure by Brian Peterson: This book is essential for understanding the fundamentals of photography.
- Photography Principles: Teaches principles applicable to all photography situations.
These books offer valuable insights and practical advice to help you improve your food photography skills. For more recommendations and detailed reviews, visit FOODS.EDU.VN, where you’ll find expert advice to guide you in your learning journey.
8. Where Are The Best Places To Buy Props For Food Photography?
Explore thrift stores, Etsy, and eBay for unique and vintage props. Retailers like Crate and Barrel, West Elm, and Amazon also offer a wide variety of new props and cooking tools.
Finding the right props can significantly enhance your food photos. Here’s where to look:
- Consider Your Style: Before shopping, define your photography style to avoid wasting money on irrelevant props.
- Inspiration: Look to your wardrobe, décor, and Pinterest boards for clues.
- Patterns: Are you drawn to bright and colorful patterns, or clean lines and muted tones?
- Items at Home: You likely already have items at home that can serve as great props.
- Creativity: Get creative with what you have.
- Vintage Handkerchiefs: Can make fun napkins.
- Well-Worn Baking Sheets: Can serve as an interesting background.
- Thrift Stores and Family Kitchens: These locations can yield some of your favorite finds.
- Etsy and eBay: These platforms are treasure troves for unique, handmade, or vintage food photo props.
- Retail Stores: Numerous retailers offer new props and useful cooking tools.
- Crate and Barrel
- West Elm
- CB2
- Williams-Sonoma
- Sur la Table
- Anthropologie
- Target
- Amazon
By exploring these resources, you can find the perfect props to elevate your food photography. For more tips on prop selection and styling, visit FOODS.EDU.VN, where you’ll find expert advice to guide you in creating stunning food photos.
9. How Can I Use Reflectors And Diffusers To Improve Lighting In Food Photography?
Reflectors bounce light onto the subject to reduce shadows, while diffusers soften the light, creating a more even and flattering illumination. Experiment with both to achieve the desired lighting effect.
Using reflectors and diffusers can significantly improve the lighting in your food photos. Here’s how:
- Reflectors: Reflectors are used to bounce light back onto the subject, reducing shadows and brightening the overall image.
- Positioning: Place the reflector opposite the light source to bounce light onto the shadowed areas of the food.
- Materials: Common materials include white foam boards, silver reflectors, and gold reflectors. White foam boards provide a soft, neutral light, while silver reflectors offer a brighter, more specular reflection. Gold reflectors add warmth to the image.
- Diffusers: Diffusers soften the light, creating a more even and flattering illumination.
- Positioning: Place the diffuser between the light source and the subject to soften the light and reduce harsh shadows.
- Materials: Common materials include sheer white fabric, tracing paper, and commercial diffusers. Sheer white fabric is an affordable and versatile option.
Experiment with different placements and materials to achieve the desired lighting effect. Combining reflectors and diffusers can create balanced and visually appealing food photos. For more in-depth techniques and tutorials, visit FOODS.EDU.VN, where you’ll find resources to help you master the art of lighting in food photography.
10. What Are Some Advanced Techniques For Food Photography?
Advanced techniques include mastering depth of field, using creative compositions, and employing advanced editing techniques such as color grading and retouching. Continuous learning and experimentation are key.
Elevate your food photography with these advanced techniques:
- Mastering Depth of Field: Depth of field refers to the area of the image that is in focus.
- Aperture: Use a wide aperture (low f-number) to create a shallow depth of field, blurring the background and highlighting the subject.
- Focus: Precisely focus on the most important part of the dish to draw the viewer’s eye.
- Creative Compositions: Composition involves arranging the elements within the frame to create a visually appealing image.
- Rule of Thirds: Divide the frame into nine equal parts and place key elements along these lines or at their intersections.
- Leading Lines: Use lines to guide the viewer’s eye through the image.
- Symmetry: Create balance and harmony by using symmetrical arrangements.
- Advanced Editing Techniques: Post-processing can significantly enhance your food photos.
- Color Grading: Adjust the colors in the image to create a specific mood or style.
- Retouching: Remove blemishes or distractions to create a cleaner, more polished image.
- Sharpening: Enhance the details in the image to make it look sharper and more defined.
By mastering these advanced techniques, you can take your food photography to the next level. Continuous learning and experimentation are key to refining your skills and developing your unique style. For more advanced tips and tutorials, visit FOODS.EDU.VN, where you’ll find resources to help you become a food photography expert.
Taking amazing food photos is within your reach, and FOODS.EDU.VN is here to help. By understanding the basics of lighting, composition, and equipment, and by continuously practicing and experimenting, you can create stunning images that capture the deliciousness of your culinary creations. Whether you’re a food blogger, a home cook, or a professional chef, the art of food photography can enhance your visual storytelling, boost your brand appeal, and capture the essence of culinary artistry.
Ready to take your food photography skills to the next level? Visit FOODS.EDU.VN today to explore our comprehensive collection of articles, tutorials, and resources. From mastering camera settings to discovering the best props, we’ve got everything you need to create mouthwatering images that will leave your audience craving more.
Contact Us:
- Address: 1946 Campus Dr, Hyde Park, NY 12538, United States
- WhatsApp: +1 845-452-9600
- Website: foods.edu.vn