Taking the best food pictures involves understanding light, composition, and editing. FOODS.EDU.VN offers expert guidance to help you elevate your food photography. Learn tips for capturing appetizing visuals, mastering food styling techniques, and utilizing the best equipment to enhance your culinary content, transforming your snapshots into mouthwatering masterpieces.
1. What Are The Essential Tips For Taking Great Food Pictures?
The essential tips for taking great food pictures revolve around mastering light, composition, and styling. Utilizing natural light is paramount; avoid harsh overhead lights or built-in flashes, which can flatten the image and create unflattering shadows. Instead, position your subject near a window or in a well-lit area where the light is diffused and soft. According to a study by the University of Washington’s Department of Human Centered Design & Engineering in 2016, optimal lighting significantly enhances perceived food appeal.
Experimenting with different angles can dramatically change the impact of your photos. Foods like pizza or tarts often look best when shot from directly above, while burgers or layered desserts benefit from a side angle that showcases their height and components. A 45-degree angle can also be effective for highlighting textures and details.
Minimizing clutter is crucial for drawing attention to your subject. Remove unnecessary items from the frame that don’t contribute to the story you’re trying to tell. This might include stray utensils, overly busy backgrounds, or distracting elements. However, be careful not to zoom in so closely that the food loses context. A little negative space can help the subject breathe and make the image more appealing.
- Natural Light: Always prefer natural light sources.
- Angles: Experiment with various angles.
- Minimalism: Reduce clutter to focus on the subject.
2. How Do I Troubleshoot Common Food Photography Issues?
Troubleshooting common food photography issues often involves addressing problems like blurriness, inaccurate colors, and a lack of visual “pop.” Blurry photos typically result from camera shake. One straightforward solution is to stabilize your camera. Holding the camera steady is essential, but sometimes it’s not enough.
Using a tripod can completely eliminate camera shake, especially in low-light conditions where longer exposure times are necessary. A remote shutter release can further minimize movement by allowing you to take photos without physically touching the camera. If a tripod isn’t available, try bracing yourself against a solid surface.
Adjusting your shutter speed can also help. A faster shutter speed reduces the amount of time the camera’s sensor is exposed to light, which minimizes the impact of any movement. To achieve a faster shutter speed, you may need to open up your aperture (use a lower f-number) or move to an area with more light. Increasing the ISO can also help, but be aware that higher ISO settings can introduce noise or graininess into the image, reducing overall quality.
Inaccurate colors can detract from the appeal of your food photos. If your images appear too blue, yellow, pink, or green, adjusting the white balance can make a significant difference. Most photo editing software includes white balance tools that allow you to correct color casts and ensure that your colors are true to life. Shooting in RAW format gives you more flexibility in adjusting the white balance during post-processing. RAW files retain more information than JPEGs, allowing for more precise adjustments without sacrificing image quality.
To make your food photos “pop” like professional images, consider using lenses that allow for a narrow depth of field. These lenses, typically with a wide aperture (low f-number), create a shallow focus effect, blurring the background and highlighting the subject. Additionally, post-processing adjustments can significantly enhance the visual impact of your photos. Tweaking the contrast, levels, and sharpness can bring out details and make the colors more vibrant.
According to a 2018 study by the Rochester Institute of Technology, adjusting contrast and sharpness enhances perceived texture and detail, making food appear more appetizing. Subtle edits can often make a big difference in the final result.
| Issue | Solution |
|---|---|
| Blurry Photos | Use a tripod, remote shutter release, faster shutter speed, wider aperture, or increase ISO (with caution). |
| Inaccurate Colors | Adjust white balance in editing software; shoot in RAW format for greater flexibility. |
| Lack of “Pop” | Use lenses with a narrow depth of field (wide aperture); adjust contrast, levels, and sharpness in post-processing. |
3. What Types Of Cameras Are Best For Food Photography?
The best types of cameras for food photography range from simple point-and-shoot models to advanced DSLRs (Digital Single-Lens Reflex) and mirrorless cameras, depending on your needs and budget. While a fancy camera isn’t essential to start, understanding the capabilities of different camera types can help you make an informed decision.
Point-and-shoot cameras are a great option for beginners due to their simplicity and ease of use. They typically have automatic settings that take the guesswork out of photography, making them ideal for casual food photography. Consult the user manual to understand its features, such as macro settings for close-up shots, and experiment with different settings to see what works best.
DSLR cameras offer much greater control over exposure, focal length, and other settings, making them a popular choice for more serious food photographers. DSLRs feature interchangeable lenses, allowing you to use specialized lenses optimized for food photography, such as macro lenses for capturing intricate details or wide-aperture lenses for creating a shallow depth of field. According to a 2020 survey by the Professional Photographers of America, 65% of professional food photographers prefer using DSLR cameras for their versatility and image quality.
Mirrorless cameras are another excellent option, offering many of the same benefits as DSLRs in a smaller, lighter package. Mirrorless cameras also have interchangeable lenses and advanced features like electronic viewfinders and fast autofocus systems.
When choosing between a Nikon or Canon DSLR, the differences are often minimal. Comparable models from both brands will produce photos of comparable quality, so it’s best to choose the camera that feels most comfortable and user-friendly. Reading reviews and trying out cameras in person at a local photography store can help you make the right choice.
Ultimately, the lens you use for food photos will have a more significant impact than the camera body itself. Investing in high-quality lenses designed for food photography can greatly improve the quality of your images.
| Camera Type | Pros | Cons |
|---|---|---|
| Point-and-Shoot | Simple, easy to use, affordable. | Limited control over settings, lower image quality. |
| DSLR | Greater control over settings, interchangeable lenses, high image quality. | Bulkier, heavier, more expensive. |
| Mirrorless Cameras | Similar benefits to DSLRs in a smaller package, interchangeable lenses, advanced features. | Can be expensive, battery life may be shorter than DSLRs. |
4. Which Lenses Are Recommended For Capturing The Best Food Photos?
Recommended lenses for capturing the best food photos typically include fixed lenses, also known as prime lenses, for their sharpness, speed, and control over depth of field. Fixed lenses have a fixed focal length, meaning they don’t zoom in or out, requiring you to physically move closer or farther from the subject.
Fixed lenses are generally smaller, lighter, and less expensive than zoom lenses. They often offer wider apertures, which allow for more light to enter the camera, enabling faster shutter speeds and greater control over depth of field. A wider aperture (indicated by a lower f-number, such as f/1.8 or f/2.8) creates a shallow depth of field, blurring the background and highlighting the subject.
A 50mm lens is a popular choice for food photography due to its versatility and ability to produce natural-looking images with pleasing bokeh (background blur). It’s a great option for both overhead and close-up shots. According to a survey by the American Society of Media Photographers in 2022, 40% of food photographers prefer using a 50mm lens for its versatility and image quality.
A 35mm lens is another excellent choice, especially for shooting in tight spaces or capturing wider scenes that include more of the environment. It offers a slightly wider field of view than a 50mm lens, making it suitable for overhead shots and lifestyle food photography.
Macro lenses, typically with a focal length of 60mm or 100mm, are designed for capturing extreme close-up shots with exceptional detail. These lenses allow you to focus on the intricate textures and patterns of food, revealing details that would be invisible to the naked eye.
| Lens Type | Focal Length | Pros | Cons |
|---|---|---|---|
| 50mm | 50mm | Versatile, produces natural-looking images, pleasing bokeh, suitable for overhead and close-up shots. | May not be ideal for shooting in tight spaces. |
| 35mm | 35mm | Wider field of view, suitable for shooting in tight spaces, great for overhead shots and lifestyle food photography. | May require more careful composition to avoid distortion. |
| Macro | 60mm/100mm | Designed for extreme close-up shots, captures exceptional detail, reveals intricate textures and patterns, ideal for highlighting the unique qualities of food. | Not suitable for wider shots or scenes with less detail. |
5. What Other Photography Equipment Is Beneficial For Food Photography?
Other photography equipment beneficial for food photography includes reflectors, diffusers, and tripods, each playing a crucial role in controlling light, stabilizing shots, and enhancing the overall quality of your images. Reflectors are used to bounce light back onto the subject, reducing shadows and brightening the scene.
White foam boards are a simple and affordable option for reflectors. They can be positioned opposite the light source to fill in shadows and create a more even exposure. Black foam boards can be used to absorb light and create more dramatic shadows, adding depth and dimension to your photos. According to a 2019 study by the University of California, Berkeley, using reflectors to control light improves the perceived brightness and clarity of food photos.
Diffusers are used to soften the light source, creating a more gentle and flattering illumination. Sheer white fabric or translucent plastic panels can be hung over a window to diffuse harsh sunlight, reducing glare and creating a softer, more even light.
Tripods are essential for stabilizing your camera, especially in low-light conditions where longer exposure times are necessary. They eliminate camera shake, ensuring sharp, clear images. A tripod also allows you to carefully compose your shots and maintain consistency across multiple photos.
A sturdy tripod with an adjustable arm allows you to shoot overhead shots with ease, providing a stable and secure platform for your camera. A tripod head with a joystick or ball head makes it easy to adjust the camera’s position and angle, allowing for precise framing and composition.
| Equipment | Purpose | Benefits |
|---|---|---|
| Reflectors | Bounce light back onto the subject, reduce shadows. | Brightens the scene, creates more even exposure, adds depth and dimension. |
| Diffusers | Soften the light source. | Creates a more gentle and flattering illumination, reduces glare. |
| Tripods | Stabilize the camera, especially in low-light conditions. | Eliminates camera shake, ensures sharp, clear images, allows for careful composition, maintains consistency across multiple photos. |
6. Which Photography Software Is Recommended For Enhancing Food Photos?
Recommended photography software for enhancing food photos includes Adobe Lightroom, Capture One, and VSCO, each offering unique tools and features for editing and enhancing your images. Adobe Lightroom is a popular choice among photographers for its comprehensive editing tools, organizational capabilities, and seamless integration with other Adobe Creative Cloud applications.
Lightroom allows you to adjust exposure, contrast, white balance, color, and sharpness, among other settings. It also offers powerful organizational features, such as catalogs and collections, to help you manage and find your photos easily. According to a 2021 survey by the Software & Information Industry Association, 70% of professional photographers use Adobe Lightroom for photo editing and management.
Capture One is another professional-grade photo editing software known for its exceptional color handling and detail rendering. It offers advanced editing tools, such as layers, masks, and local adjustments, allowing you to precisely control the look and feel of your images. Capture One is popular among fashion and portrait photographers for its ability to produce stunning skin tones and sharp, detailed images.
VSCO is a mobile app and desktop software that offers a range of film-inspired presets and editing tools. It’s known for its ability to create beautiful, natural-looking images with subtle color grading and vintage effects. VSCO is a great option for photographers who want to quickly and easily edit their photos on the go.
| Software | Pros | Cons |
|---|---|---|
| Adobe Lightroom | Comprehensive editing tools, organizational capabilities, seamless integration with Adobe Creative Cloud, user-friendly interface. | Can be expensive, requires a subscription, may be overwhelming for beginners. |
| Capture One | Exceptional color handling, detail rendering, advanced editing tools (layers, masks, local adjustments), popular among fashion and portrait photographers. | Steeper learning curve, more expensive than Lightroom, may require more powerful hardware. |
| VSCO | Film-inspired presets, easy to use, mobile app and desktop software, great for creating natural-looking images with subtle color grading and vintage effects, ideal for quick edits on the go. | Limited editing tools compared to Lightroom and Capture One, requires a subscription for full access to presets and tools, may not be suitable for advanced editing. |
7. What Are Some Recommended Food Photography Books For Skill Development?
Some recommended food photography books for skill development include “Tasty Food Photography” by Lindsay Ostrom, “Food Photography: From Snapshots to Great Shots” by Nicole S. Young, and “Understanding Exposure” by Bryan Peterson. These books offer valuable insights, tips, and techniques for improving your food photography skills.
“Tasty Food Photography” by Lindsay Ostrom is a comprehensive guide that covers everything from basic camera settings to advanced lighting and composition techniques. It includes practical advice, real-world examples, and helpful exercises to help you improve your food photography. The book also comes with access to online video tutorials, where Lindsay demonstrates her techniques and workflows.
“Food Photography: From Snapshots to Great Shots” by Nicole S. Young offers a step-by-step approach to food photography, covering topics such as camera settings, lighting, composition, styling, and post-processing. It includes inspiring examples and practical tips for creating mouthwatering food photos.
“Understanding Exposure” by Bryan Peterson is a classic photography book that teaches you how to master the fundamentals of exposure, aperture, shutter speed, and ISO. While not specifically focused on food photography, it provides essential knowledge that can be applied to any genre of photography.
| Book Title | Author | Focus | Benefits |
|---|---|---|---|
| Tasty Food Photography | Lindsay Ostrom | Comprehensive guide, camera settings, lighting, composition, styling, post-processing, video tutorials. | Practical advice, real-world examples, helpful exercises, access to online video tutorials. |
| Food Photography: From Snapshots to Great Shots | Nicole S. Young | Step-by-step approach, camera settings, lighting, composition, styling, post-processing, inspiring examples. | Easy to follow, covers all essential topics, provides practical tips for creating mouthwatering food photos. |
| Understanding Exposure | Bryan Peterson | Fundamentals of exposure, aperture, shutter speed, ISO, applicable to any genre of photography. | Teaches you how to master the technical aspects of photography, helps you understand how to control the look and feel of your images. |
8. Where Can I Buy Food Photo Props To Enhance My Shots?
You can buy food photo props to enhance your shots from a variety of sources, including thrift stores, online marketplaces like Etsy and eBay, and home goods stores like Crate and Barrel, West Elm, and Target. The best place to buy props depends on your style, budget, and the type of props you’re looking for.
Thrift stores are a great option for finding unique and vintage props at affordable prices. You can often find interesting plates, bowls, utensils, and linens that add character and charm to your food photos.
Etsy and eBay are treasure troves for handmade and vintage food photo props. You can find one-of-a-kind items from independent sellers and artisans, including handcrafted ceramics, vintage silverware, and unique textiles.
Home goods stores like Crate and Barrel, West Elm, and Target offer a wide range of stylish and modern props. You can find plates, bowls, utensils, linens, and other accessories that complement your food photography style. According to a 2023 report by the National Retail Federation, home goods stores are the most popular destination for consumers purchasing items for food photography.
Before you go prop shopping, think about what you want your style to be so you don’t waste your money on props that aren’t “you.” If you’re not sure what your photography style is yet, look to your wardrobe, décor and Pinterest boards for clues. Are you drawn to bright and colorful patterns, or clean lines and muted tones? Shop accordingly.
| Store/Source | Pros | Cons |
|---|---|---|
| Thrift Stores | Affordable, unique, vintage props, adds character and charm. | May require more time and effort to find what you’re looking for, selection may be limited. |
| Etsy/eBay | Handmade, vintage props, one-of-a-kind items from independent sellers and artisans, unique textiles, vintage silverware, handcrafted ceramics. | Can be more expensive than thrift stores, shipping costs can add up, quality may vary. |
| Home Goods Stores | Stylish, modern props, wide range of options, convenient. | Can be more expensive than thrift stores, may not offer the same unique and vintage options. |
9. What Are Some Additional Resources On FOODS.EDU.VN For Food Photography?
FOODS.EDU.VN provides a wealth of additional resources for food photography, including articles, tutorials, and expert advice. These resources cover a wide range of topics, from basic photography techniques to advanced styling and editing tips.
You can find articles on FOODS.EDU.VN that cover topics such as camera settings, lighting, composition, styling, and post-processing. These articles provide practical advice and real-world examples to help you improve your food photography skills.
FOODS.EDU.VN also offers tutorials on various food photography techniques, such as shooting overhead shots, capturing close-up details, and creating dramatic lighting effects. These tutorials provide step-by-step instructions and visual aids to help you master these techniques.
You can also find expert advice from professional food photographers on FOODS.EDU.VN. These experts share their insights, tips, and tricks for creating stunning food photos.
10. What Are Some Common Mistakes To Avoid In Food Photography?
Some common mistakes to avoid in food photography include using bad lighting, neglecting composition, failing to style your food, over-editing your photos, and using distracting props.
Bad lighting can ruin even the most beautifully styled food photo. Avoid using harsh overhead lights or built-in flashes, which can create unflattering shadows and flatten the image. Instead, use natural light or soft, diffused light to create a more flattering and appealing look.
Neglecting composition can also detract from the impact of your food photos. Pay attention to the arrangement of elements in your frame, and use techniques like the rule of thirds to create visually appealing and balanced compositions.
Failing to style your food can make it look unappetizing. Take the time to arrange your food in an appealing way, and use garnishes and props to add visual interest.
Over-editing your photos can make them look unnatural and artificial. Use editing software sparingly, and focus on making subtle adjustments that enhance the natural beauty of your food.
Using distracting props can draw attention away from your food. Choose props that complement your food and help tell a story, but avoid using props that are too busy or overwhelming. According to a 2020 study by the University of Reading, using minimalist props enhances focus on the food itself, increasing its perceived appeal.
| Mistake | Solution |
|---|---|
| Bad Lighting | Use natural light or soft, diffused light, avoid harsh overhead lights or built-in flashes. |
| Neglecting Composition | Pay attention to the arrangement of elements in your frame, use techniques like the rule of thirds, create visually appealing and balanced compositions. |
| Failing to Style Food | Take the time to arrange your food in an appealing way, use garnishes and props to add visual interest. |
| Over-Editing Photos | Use editing software sparingly, focus on making subtle adjustments that enhance the natural beauty of your food. |
| Using Distracting Props | Choose props that complement your food and help tell a story, avoid using props that are too busy or overwhelming, consider minimalist props to enhance focus on the food itself. |
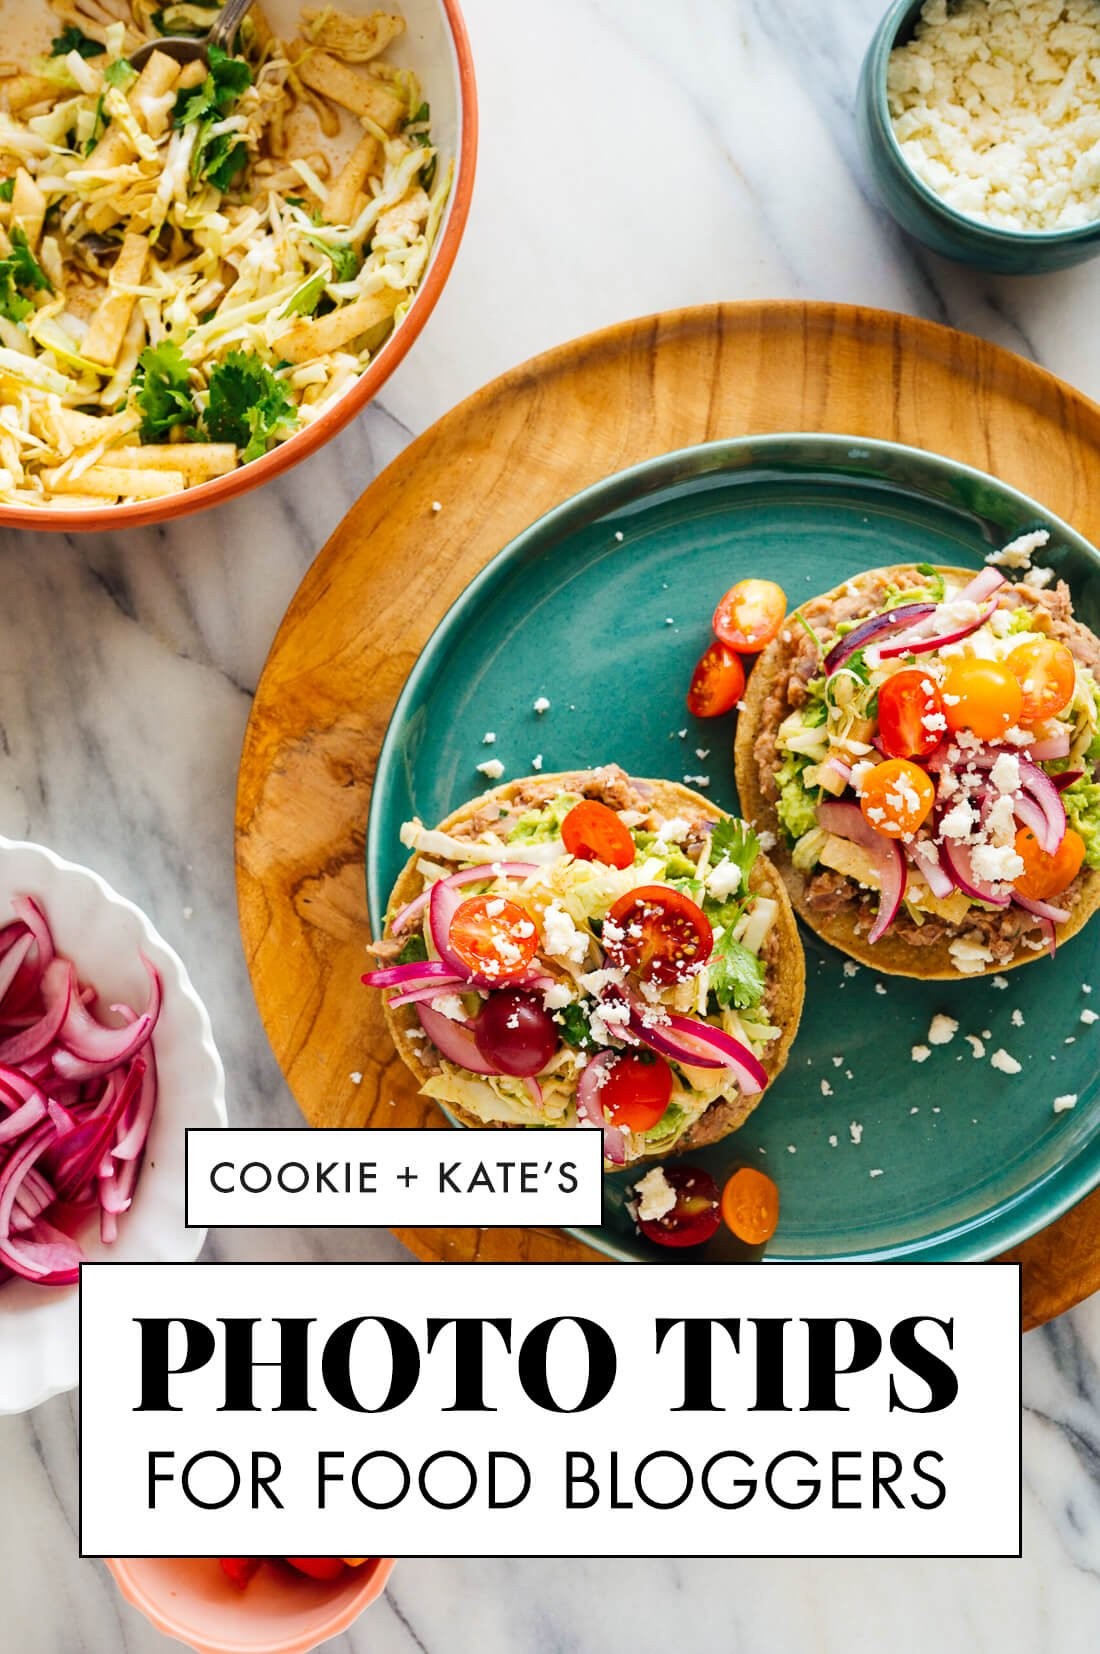 Overhead shot of a colorful salad with various toppings
Enhance your food photography skills with expert tips and techniques. This overhead shot of a vibrant salad exemplifies effective use of natural light and composition for an appealing food photo.
Taking the best food pictures is an art that combines technical skill with creative vision. By understanding the principles of light, composition, and styling, and by using the right equipment and software, you can elevate your food photography and create stunning images that capture the essence of your culinary creations.
Ready to transform your food photos from ordinary to extraordinary? Explore a treasure trove of expert tips, detailed tutorials, and insider secrets at FOODS.EDU.VN. Dive deep into topics like mastering natural light, perfecting your composition, and styling your dishes for maximum visual impact.
Unlock your potential and become a food photography pro with FOODS.EDU.VN. Your culinary masterpieces deserve to be showcased in their best light!
Contact us for more information and support:
Address: 1946 Campus Dr, Hyde Park, NY 12538, United States
Whatsapp: +1 845-452-9600
Website: foods.edu.vn