Dyeing eggs with food coloring is a fantastic activity, and at FOODS.EDU.VN, we’ll show you how to elevate this tradition with ease, turning ordinary eggs into vibrant, colorful masterpieces. Forget expensive kits; with simple ingredients like food dye and vinegar, you can create a spectrum of hues. Discover amazing egg dyeing techniques and achieve vibrant shades, adding an extra touch of delight to your creations with expert guidance from FOODS.EDU.VN.
1. Essential Supplies for Egg Dyeing Adventures
Embark on a colorful journey of egg dyeing with these easily accessible supplies. Gather your ingredients and prepare for a creative experience that will transform ordinary eggs into vibrant works of art. Let’s dive in and explore each component needed for this delightful activity.
- Eggs: Select either white or brown eggs, depending on your color preferences. Hard-boil them beforehand to make them safe for handling, especially when working with children.
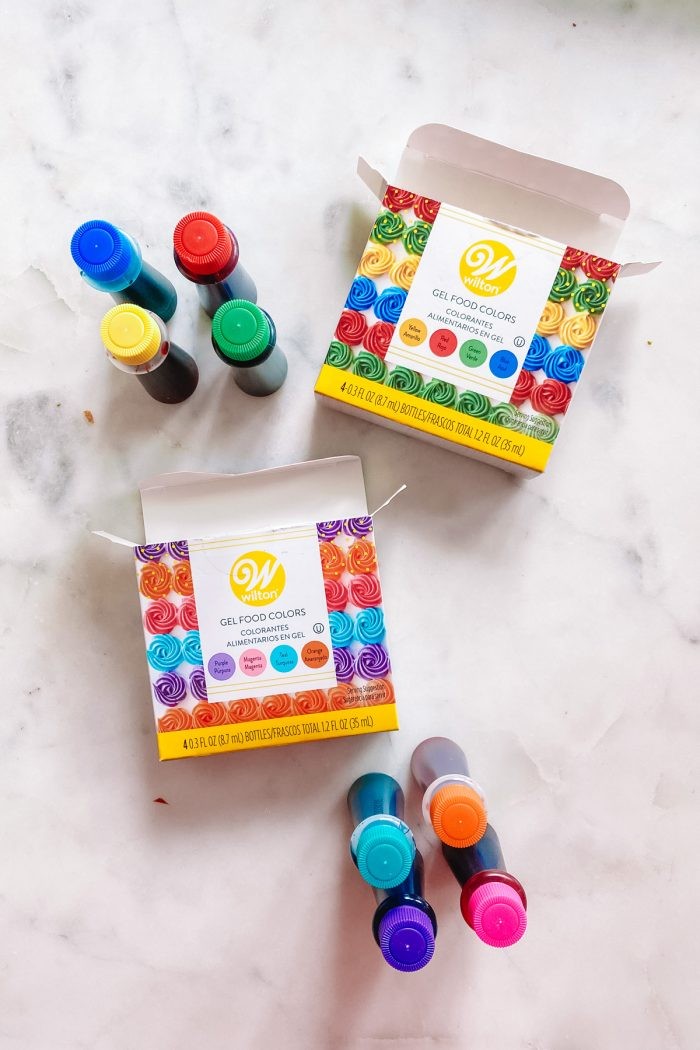
- Food Coloring: Opt for liquid food coloring or gel-based options. A variety of colors will expand your creative palette, allowing for unique and vibrant designs. FOODS.EDU.VN suggests using gel food coloring for richer, more consistent results.
- Vinegar: Standard white vinegar from your pantry acts as a mordant, helping the dye adhere to the eggshell. You’ll need approximately 1 teaspoon per dye color.
- Hot Water: Warm water is essential for dissolving the food coloring and creating an even dye solution. About 1/2 cup per dye color is sufficient.
- Containers: Gather glasses, bowls, or cups to hold your dye solutions. Ensure they are clean and readily accessible to prevent any color contamination.
- Utensils: A slotted spoon or whisk will help you carefully lower eggs into the dye and remove them without damaging the shells. These tools ensure a smooth and controlled dyeing process.
2. Choosing the Right Food Coloring for Egg Dyeing
Selecting the appropriate food coloring is crucial for achieving vibrant and long-lasting results. At FOODS.EDU.VN, we understand the importance of quality ingredients in culinary arts, including the art of egg dyeing. To ensure your Easter eggs turn out spectacularly, let’s explore the different types of food coloring and their impact on the dyeing process.
- Liquid Food Coloring: This readily available option is ideal for achieving soft and pastel shades on your Easter eggs. Widely found in most grocery stores, liquid food coloring offers convenience and affordability, making it a popular choice for both novice and experienced egg decorators. However, it’s essential to note that the colors may not be as intense as those achieved with gel-based alternatives.
- Gel Food Coloring: For those seeking richer, more vibrant hues, gel food coloring is the preferred choice. With its concentrated formula, gel food coloring delivers intense color payoff, allowing you to create deep and saturated shades on your Easter eggs. Gel food coloring is a favorite among professional chefs and avid home cooks alike.
- Natural Food Coloring: Explore the vibrant world of natural food coloring derived from plant-based sources such as beets, spinach, and turmeric. Unlock a rainbow of earthy tones and create stunning Easter eggs with a wholesome twist. Dive into this colorful realm and infuse your creations with the goodness of nature’s palette.
- Things to Avoid: Gel food coloring in small white tubes should be avoided due to not dissolving well in water.
3. Preparing Eggs for Dyeing: Hard Boiling Techniques
Achieving the perfect hard-boiled egg is an essential step in preparing your Easter eggs for dyeing. At FOODS.EDU.VN, we’ve perfected the art of hard boiling to ensure your eggs are cooked just right – firm enough to hold their shape, yet tender enough to avoid any rubbery texture. Follow our tried-and-true method for foolproof results every time.
- Place Eggs in a Saucepan: Gently arrange a dozen eggs at the bottom of a large saucepan, ensuring they are in a single layer to promote even cooking.
- Cover with Water: Add cold water to the saucepan, ensuring the eggs are fully submerged by at least an inch of water.
- Bring to a Boil: Place the saucepan over medium heat and bring the water to a rolling boil.
- Remove from Heat: Once boiling, immediately remove the saucepan from the heat and cover it with a lid.
- Let Sit: Allow the eggs to sit in the hot water, covered, for 10-12 minutes. This gentle cooking method ensures the eggs cook evenly without overcooking.
- Rinse or Soak in Cool Water: After the designated time, carefully drain the hot water from the saucepan and rinse the eggs under cool running water. Alternatively, you can soak the eggs in a bowl of ice water to halt the cooking process and prevent any further hardening of the yolks.
- Vinegar Rinse: If you have the time, dipping the eggs in a diluted vinegar rinse before dyeing them can help the dye adhere better and more evenly.
4. Step-by-Step Guide to Dyeing Easter Eggs with Food Coloring
Transform ordinary eggs into vibrant works of art with our simple, step-by-step guide to dyeing Easter eggs using food coloring. Whether you’re a seasoned egg decorator or a first-time enthusiast, our expert tips and techniques will help you achieve stunning results that will impress family and friends alike.
- Prepare Dye Solutions: In separate cups or bowls, combine ½ cup of hot water with 1 teaspoon of white vinegar. This mixture helps the dye adhere to the eggshell.
- Add Food Coloring: Add desired food coloring to each cup, following the color formulas provided. Stir well to ensure the color is evenly distributed.
- Submerge Eggs in Dye: Carefully lower each egg into a cup of dye, ensuring it is fully submerged. Allow the eggs to soak in the dye for the recommended time.
- Remove Eggs: After soaking, carefully remove the eggs from the dye using a slotted spoon or tongs.
- Dry the Eggs: Place the dyed eggs on a drying rack or an upside-down egg carton to dry completely. This prevents the dye from pooling on one side of the egg, resulting in an uneven color finish.
5. Expert Tips for Achieving the Perfect Egg Dye
Unlock the secrets to egg dyeing perfection with these expert tips from FOODS.EDU.VN. From achieving vibrant hues to creating stunning designs, our tips will elevate your egg dyeing game and impress everyone who beholds your colorful creations.
- Start with White Eggs: For the most vibrant and true-to-color results, begin with white eggs. White eggs provide a blank canvas that allows the colors to pop and shine.
- Use Hot Water: Hot water helps the dye dissolve more effectively, resulting in a smoother and more even color distribution.
- Add Vinegar: Vinegar acts as a mordant, helping the dye adhere to the eggshell. Be sure to add the recommended amount of vinegar to each dye solution for optimal results.
- Soak Eggs Thoroughly: Allow the eggs to soak in the dye for the recommended time, or longer for deeper, more intense colors.
- Experiment with Colors: Don’t be afraid to mix and match food coloring to create custom shades. Experimenting with different color combinations can lead to surprisingly beautiful and unique results.
6. Can You Dye Brown Eggs? Exploring the Possibilities
Discover the possibilities of dyeing brown eggs and unlock a world of rich, earthy tones. At FOODS.EDU.VN, we encourage experimentation and creativity in the kitchen, and dyeing brown eggs is no exception. While the results may differ from dyeing white eggs, brown eggs offer a unique canvas for creating stunning and unexpected color effects.
- Embrace Jewel Tones: Brown eggs tend to absorb dye differently than white eggs, resulting in deeper, more saturated colors. Embrace this characteristic and experiment with jewel-toned dyes such as emerald green, sapphire blue, and ruby red for a luxurious and sophisticated look.
- Consider the Base Hue: Keep in mind that brown eggs come in a variety of shades, ranging from light tan to deep chocolate. The base hue of the egg will influence the final color result, so choose your dyes accordingly.
- Check Frequently: When dyeing brown eggs, it’s essential to check the color development frequently, as the dye may absorb more quickly than it would on white eggs.
- Create Ombre Effects: Experiment with creating ombre effects on brown eggs by gradually dipping the egg into the dye and removing it at intervals. This technique results in a gradient of color that adds depth and visual interest to your dyed eggs.
7. Unlocking a Rainbow: Color Formulas for Dyeing Eggs
Embark on a colorful journey with these exclusive color formulas from FOODS.EDU.VN, meticulously crafted to help you achieve a rainbow of stunning hues on your Easter eggs. Whether you’re aiming for soft pastels or bold primaries, our color formulas will guide you every step of the way.
7.1. Pinks and Purples
- Bubblegum: Achieve a delicate bubblegum pink by soaking the egg in 5 drops of pink food coloring for 30 seconds or less.
- Fuchsia: Create a vibrant fuchsia hue by soaking the egg in 5 drops of pink food coloring for 3 minutes.
- Lilac: Blend pink and purple to achieve a soft lilac shade by soaking the egg in 5 drops of pink and 5 drops of purple food coloring for 30 seconds or less.
- Orchid: Combine pink and purple for a rich orchid tone by soaking the egg in 5 drops of pink and 5 drops of purple food coloring for 3 minutes.
- Ultraviolet: Immerse your eggs in 5 drops of purple food coloring for 3 minutes to get a UV shade.
- Grape: Immerse your eggs in 10 drops of purple food coloring for 5 minutes to get a rich grape shade.
- Lavender: Immerse your eggs in 5 drops of purple food coloring for 30 seconds or less to get a nice lavender shade.
7.2. Blues
- Periwinkle: Combine blue and purple for a whimsical periwinkle shade by soaking the egg in 5 drops of blue and 5 drops of purple food coloring for 30 seconds or less.
- Cornflower: Create a classic cornflower blue by soaking the egg in 5 drops of blue and 5 drops of purple food coloring for 3 minutes.
- Cobalt: Achieve a deep cobalt blue by soaking the egg in 5 drops of blue and 5 drops of purple food coloring for 5 minutes.
- Navy (Brown Egg): For a rich navy blue on brown eggs, soak the egg in 5 drops of blue and 5 drops of purple food coloring for 5 minutes.
- Sky: Immerse your eggs in 5 drops of blue food coloring for 3 minutes to get a sky blue shade.
- Robin’s Egg: Immerse your eggs in 5 drops of teal food coloring for 30 seconds or less to get a robin’s egg blue shade.
- Aqua: Immerse your eggs in 5 drops of blue food coloring for 30 seconds or less to get a soft aqua shade.
- Turquoise: Immerse your eggs in 5 drops of teal food coloring for 3 minutes to get a vivid turquoise shade.
- Peacock (Brown Egg): For a rich peacock blue on brown eggs, soak the egg in 5 drops of blue food coloring for 5 minutes.
7.3. Greens
- Mint: Immerse your eggs in 5 drops of teal + 3 drops of green food coloring for 30 seconds or less to get a mint shade.
- Teal: Immerse your eggs in 5 drops of teal + 3 drops of green food coloring for 3 minutes to get a teal shade.
- Emerald: Immerse your eggs in 10 drops of teal + 10 drops of green food coloring for 3 minutes to get an emerald shade.
- Shamrock: Immerse your eggs in 5 drops of teal + 10 drops of green food coloring for 3 minutes to get a shamrock shade.
7.4. Yellows
- Butter: Combine yellow and green for a creamy butter yellow by soaking the egg in 10 drops of yellow and 3 drops of green food coloring for 30 seconds or less.
- Sunshine: Combine yellow and green for a warm sunshine yellow by soaking the egg in 10 drops of yellow and 3 drops of green food coloring for 3 minutes.
- Daffodil: Immerse your eggs in 5 drops of yellow food coloring for 30 seconds or less to get a soft daffodil shade.
- Marigold: Immerse your eggs in 5 drops of yellow food coloring for 3 minutes to get a vivid marigold shade.
7.5. Oranges
- Peach: Immerse your eggs in 5 drops of orange food coloring for 30 seconds or less to get a soft peach shade.
- Creamsicle: Immerse your eggs in 5 drops of orange food coloring for 3 minutes to get a vivid creamsicle shade.
- Tangerine: Immerse your eggs in 5 drops of orange + 5 drops of yellow food coloring for 3 minutes to get a tangerine shade.
- Mustard (Brown Egg): For a brown mustard shade on brown eggs, soak the egg in 10 drops of yellow and 3 drops of green food coloring for 5 minutes.
7.6. Reds
- Salmon: Combine yellow and red for a delicate salmon hue by soaking the egg in 10 drops of yellow and 5 drops of red food coloring for 30 seconds or less.
- Coral: Immerse your eggs in 10 drops of orange + 5 drops of red food coloring for 3 minutes to get a coral shade.
- Rust (Brown Egg): For a brown rust shade on brown eggs, soak the egg in 10 drops of orange + 5 drops of red food coloring for 5 minutes.
7.7. Pinks
- Watermelon: Immerse your eggs in 5 drops of red food coloring for 30 seconds or less to get a watermelon shade.
- Candy Apple: Immerse your eggs in 10 drops of red + 5 drops of yellow food coloring for 5 minutes to get a candy apple shade.
- Neon: Immerse your eggs in 5 drops of red + 5 drops of pink food coloring for 3 minutes to get a neon shade.
- Berry (Brown Egg): For a brown berry shade on brown eggs, soak the egg in 5 drops of pink food coloring for 3 minutes.
- Wine (Brown Egg): For a brown wine shade on brown eggs, soak the egg in 5 drops of pink + 5 drops of purple food coloring for 5 minutes.
8. Innovative Techniques for Drying Dyed Eggs Evenly
Drying dyed eggs evenly can be a challenge, but with the right techniques, you can achieve flawless results every time. FOODS.EDU.VN is here to share innovative methods for drying your dyed eggs, ensuring they maintain their vibrant colors and smooth finish.
- Gently Patting Down with a Rag: Patting down the eggs gently with a clean rag is a quick and efficient way to remove excess dye and promote even drying.
- Cooling Rack: Place the dyed eggs on a cooling rack, allowing air to circulate around them. This method helps prevent pooling and ensures even drying on all sides.
- Toothpick “Stand”: Create a makeshift “stand” by sticking toothpicks into a piece of styrofoam and placing the eggs in-between the toothpicks. This elevated position allows air to circulate freely around the eggs, promoting even drying.
- Upside Down Egg Carton: Flip an egg carton upside down and use the spaces in the carton to dry your eggs. While not as effective as other methods, this technique can still help prevent pooling and promote even drying.
9. Creative Ideas for Using Your Beautifully Dyed Eggs
Now that you’ve dyed a batch of stunning Easter eggs, it’s time to showcase your creativity and incorporate them into your holiday celebrations. FOODS.EDU.VN presents a variety of creative ideas for using your beautifully dyed eggs, from festive decorations to delicious culinary creations.
- Easter Brunch Board: Arrange your dyed eggs on a festive Easter brunch board, complete with Italian Easter breads, fresh fruits, cheeses, and other delectable treats.
- Centerpieces: Use your dyed eggs to create eye-catching centerpieces for your Easter table.
- Egg Hunt: Hide your dyed eggs in the yard or around the house for a classic Easter egg hunt.
- Egg Salad: Use your dyed eggs to prepare a classic egg salad.
- Deviled Eggs: Transform your dyed eggs into elegant deviled eggs, perfect for serving as appetizers at your Easter gathering.
10. Other Creative Ways to Decorate Easter Eggs
Expand your artistic horizons with these alternative methods for decorating Easter eggs, as suggested by FOODS.EDU.VN. From painting to temporary tattoos to sprinkles, there’s no limit to the creative possibilities when it comes to decorating Easter eggs.
- Paint: Use acrylic paints to create intricate designs, patterns, and illustrations on your Easter eggs.
- Temporary Tattoos: Apply temporary tattoos to your Easter eggs for a quick and easy way to add fun and festive designs.
- Sprinkles: Coat your Easter eggs in glue and then roll them in sprinkles for a sweet and colorful treat.
- Washi Tape: Wrap strips of washi tape around your Easter eggs to create geometric patterns and colorful designs.
11. Safety Precautions for Dyeing Eggs with Food Coloring
Before you begin dyeing Easter eggs with food coloring, it’s essential to review a few safety precautions to ensure a fun and worry-free experience. At FOODS.EDU.VN, we prioritize safety in the kitchen, and we want to ensure that your Easter egg dyeing session is both creative and safe.
- Use Food-Safe Dyes: Always use food-safe dyes specifically designed for coloring eggs. Avoid using non-food-grade dyes, as they may contain harmful chemicals that could contaminate the eggs.
- Protect Surfaces: Cover your work surfaces with newspaper or plastic tablecloths to protect them from dye stains. Food coloring can easily stain countertops and other surfaces, so it’s essential to take precautions to prevent any unwanted messes.
- Wear Gloves: Wear gloves to protect your hands from dye stains. Food coloring can temporarily stain the skin, so wearing gloves will help keep your hands clean and free from discoloration.
- Supervise Children: Supervise children closely when dyeing eggs with food coloring. Young children may be tempted to taste the dye, so it’s essential to keep a watchful eye on them and ensure they understand the importance of not ingesting the dye.
- Wash Hands Thoroughly: Wash your hands thoroughly with soap and water after handling food coloring. This will help remove any residual dye from your skin and prevent it from transferring to other surfaces.
12. Troubleshooting Common Egg Dyeing Problems
Even with the best intentions, egg dyeing can sometimes present a few challenges. At FOODS.EDU.VN, we’re here to help you troubleshoot common egg dyeing problems and ensure that your Easter egg decorating experience is smooth and successful.
- Uneven Color: If your eggs are coming out with uneven color, it could be due to several factors. Ensure that the eggs are clean and free from any residue before dyeing. Also, make sure the dye solution is well-mixed and that the eggs are fully submerged during the dyeing process.
- Faded Color: If your dyed eggs are fading over time, it could be due to exposure to light or air. Store your dyed eggs in a cool, dark place to help preserve their color.
- Cracked Eggs: If your eggs are cracking during the dyeing process, it could be due to temperature fluctuations. Be sure to handle the eggs gently and avoid sudden changes in temperature.
- Dye Stains: If you’re getting dye stains on your hands or surfaces, act quickly to clean them up. Use soap and water to remove dye from your skin, and use a household cleaner to remove dye from surfaces.
13. The History and Cultural Significance of Egg Dyeing
Delve into the fascinating history and cultural significance of egg dyeing, a tradition that dates back centuries and spans across numerous cultures. At FOODS.EDU.VN, we celebrate the rich tapestry of culinary traditions from around the world, and egg dyeing is no exception.
- Ancient Origins: The tradition of egg dyeing can be traced back to ancient civilizations, where eggs were often seen as symbols of fertility, rebirth, and new life.
- Religious Significance: In Christianity, eggs are often associated with the resurrection of Jesus Christ, and dyeing eggs has become a popular Easter tradition.
- Cultural Variations: Different cultures around the world have their own unique traditions and techniques for dyeing eggs.
- Modern Interpretations: Today, egg dyeing remains a beloved tradition, with people of all ages participating in the fun and creative activity.
14. Frequently Asked Questions (FAQs) About Egg Dyeing with Food Coloring
Here are some frequently asked questions about dyeing eggs with food coloring, answered by the experts at FOODS.EDU.VN.
- Can I use expired food coloring to dye eggs?
- While expired food coloring may still be safe to use, it may not produce the same vibrant colors as fresh food coloring.
- How long do dyed eggs last?
- Dyed eggs can last for up to a week if stored properly in the refrigerator.
- Can I eat the dyed eggs?
- Yes, you can eat the dyed eggs, as long as you use food-safe dyes and handle the eggs properly.
- How do I prevent the dye from cracking the eggs?
- Avoid sudden changes in temperature and handle the eggs gently during the dyeing process to prevent cracking.
- Can I dye eggs with natural food coloring?
- Yes, you can dye eggs with natural food coloring derived from plant-based sources such as beets, spinach, and turmeric.
- What is the best way to store dyed eggs?
- Store dyed eggs in the refrigerator in an airtight container to maintain their freshness and color.
- Can I use brown eggs instead of white eggs for dyeing?
- Yes, you can use brown eggs, but keep in mind that the colors may appear differently on brown eggs than on white eggs.
- How can I make the colors more vibrant?
- Add more food coloring to the dye solution and allow the eggs to soak for a longer period of time to achieve more vibrant colors.
- What is the purpose of adding vinegar to the dye solution?
- Vinegar acts as a mordant, helping the dye adhere to the eggshell and creating more vibrant colors.
- Is it safe for children to participate in egg dyeing?
- Yes, it is safe for children to participate in egg dyeing, but adult supervision is recommended to ensure that they handle the eggs and dyes safely.
15. Discover More Culinary Arts at FOODS.EDU.VN
Ready to elevate your culinary skills and embark on a journey of gastronomic discovery? At FOODS.EDU.VN, we offer a treasure trove of recipes, tips, and techniques to help you unleash your inner chef and create culinary masterpieces that will delight your senses and impress your loved ones.
Whether you’re a seasoned home cook or a novice in the kitchen, our user-friendly website provides access to a wealth of information and resources to help you master the art of cooking and explore the diverse world of culinary arts.
From classic recipes to innovative creations, FOODS.EDU.VN offers something for every taste and skill level. Discover new flavors, experiment with different cuisines, and unlock your culinary potential with our expert guidance and inspiration.
Visit FOODS.EDU.VN today and discover a world of culinary possibilities waiting to be explored. Let us be your trusted companion on your journey to culinary excellence.
(Address: 1946 Campus Dr, Hyde Park, NY 12538, United States. Whatsapp: +1 845-452-9600. Website: FOODS.EDU.VN)
Unlock your culinary potential and embark on a journey of flavors with foods.edu.vn! Our website is a treasure trove of recipes, tips, and techniques, waiting to be explored. Don’t miss out on the opportunity to elevate your cooking skills and create culinary masterpieces that will delight your senses. Visit us today and discover a world of gastronomic possibilities!