Are you looking for the right vacuum seal bags to use with your FoodSaver? At FOODS.EDU.VN, we understand the importance of finding the perfect match for your vacuum sealing needs. You can use FoodSaver bags, Ziploc vacuum seal bags with an adapter, and generic vacuum seal bags that are compatible in size and material with your FoodSaver machine, ensuring optimal freshness and preservation.
Choosing the right vacuum seal bags ensures your food stays fresh longer and prevents freezer burn. Let’s explore compatible options like FoodSaver bags, Ziploc with adapters, and generic alternatives, plus how to make the best choice for your preservation needs, all while enhancing your culinary journey with FOODS.EDU.VN!
1. Understanding Vacuum Sealing and Its Importance
1.1. What is Vacuum Sealing?
Vacuum sealing is the process of removing air from a package prior to sealing. This method significantly extends the shelf life of food by preventing oxidation and the growth of bacteria and mold. According to a study by the USDA, vacuum-sealed foods can last up to three times longer than those stored in regular packaging.
1.2. Benefits of Vacuum Sealing for Food Preservation
Vacuum sealing offers numerous benefits, including:
- Extended Shelf Life: Vacuum sealing significantly extends the shelf life of various foods. For example, vacuum-sealed meat can last up to 2-3 years in the freezer, compared to 6-12 months with traditional packaging, according to the National Center for Home Food Preservation.
- Prevention of Freezer Burn: By removing air, vacuum sealing prevents freezer burn, which dehydrates food surfaces and degrades quality.
- Protection Against Bacteria and Mold: Removing oxygen inhibits the growth of aerobic bacteria and mold, preserving food safety and quality.
- Preservation of Flavor and Nutrients: Vacuum sealing helps retain the flavor, texture, and nutritional value of foods by minimizing oxidation and moisture loss.
- Efficient Storage: Vacuum-sealed packages take up less space in the refrigerator or freezer compared to bulky containers.
1.3. How Vacuum Sealing Works
Vacuum sealing machines work by creating a tight seal around food, removing air from the bag, and preventing air from re-entering. The vacuum sealing process typically involves the following steps:
- Preparation: Place the food item in a vacuum seal bag.
- Positioning: Insert the open end of the bag into the vacuum sealing machine.
- Vacuuming: The machine removes air from the bag, creating a tight seal around the food.
- Sealing: The machine heat-seals the bag, preventing air from re-entering.
1.4. Different Types of Vacuum Sealing Machines
There are two primary types of vacuum sealing machines:
- External Vacuum Sealers: These machines are more common for home use. They clamp the open end of the bag, remove the air, and then seal the bag.
- Chamber Vacuum Sealers: These are typically used in commercial settings. The entire bag is placed inside a chamber where air is removed before sealing, allowing for better vacuum and sealing of liquids.
2. Understanding FoodSaver Machines
2.1. What is a FoodSaver Machine?
A FoodSaver machine is a vacuum sealing appliance designed for home use. It removes air from specially designed bags and seals them to preserve food freshness. FoodSaver machines are popular for extending the shelf life of food, preventing freezer burn, and preserving flavor.
2.2. Key Features of FoodSaver Machines
FoodSaver machines come with various features that enhance their functionality and convenience:
- Automatic Operation: Many models offer automatic vacuuming and sealing with a single touch.
- Built-in Bag Storage and Cutter: Some machines have integrated storage for bag rolls and a cutter for custom-sized bags.
- Moist/Dry Food Settings: These settings adjust the sealing process based on the moisture content of the food.
- Accessory Port: This allows you to vacuum seal canisters and jars using special attachments.
- Pulse Function: This feature provides more control over the vacuum process for delicate foods.
2.3. Benefits of Using a FoodSaver Machine
Using a FoodSaver machine offers several advantages for food preservation:
- Extended Food Freshness: By removing air, FoodSaver machines significantly extend the freshness of food, reducing waste and saving money.
- Prevention of Freezer Burn: Vacuum sealing prevents freezer burn, ensuring that frozen foods retain their quality and flavor.
- Protection Against Spoilage: Removing air inhibits the growth of bacteria and mold, keeping food safe for longer.
- Cost Savings: By preserving food longer, FoodSaver machines help reduce food waste and lower grocery bills.
- Convenient Storage: Vacuum-sealed packages are compact and easy to store, maximizing space in your refrigerator or freezer.
2.4. Popular FoodSaver Models
Some popular FoodSaver models include:
- FoodSaver FM2000: A basic and affordable model ideal for beginners.
- FoodSaver V4400: A fully automatic model with a built-in bag roll storage and cutter.
- FoodSaver FM5200: A premium model with advanced features like a retractable handheld sealer.
- FoodSaver VS3180: Compact and versatile, suitable for small kitchens.
3. Types of Vacuum Seal Bags
3.1. FoodSaver Bags
FoodSaver bags are specifically designed for use with FoodSaver machines. They are made from multi-layer materials that provide an airtight seal and protect food from freezer burn and spoilage.
- Pros:
- Designed specifically for FoodSaver machines
- Made from durable, multi-layer materials
- Available in various sizes and styles
- Cons:
- Can be more expensive than generic alternatives
- May not be compatible with other vacuum sealing systems
3.2. Generic Vacuum Seal Bags
Generic vacuum seal bags are designed to work with various vacuum sealing machines, including FoodSaver. These bags often offer a more affordable alternative to brand-name bags.
- Pros:
- Generally more affordable than brand-name bags
- Available in various sizes and materials
- Compatible with multiple vacuum sealing machines
- Cons:
- Quality can vary significantly between brands
- May not provide as tight of a seal as brand-name bags
- Potential for compatibility issues with some machines
3.3. Ziploc Vacuum Seal Bags
Ziploc vacuum seal bags use a hand pump to remove air, creating a vacuum seal. While they are not directly compatible with FoodSaver machines, they can be used with an adapter.
- Pros:
- Reusable and easy to clean
- Ideal for short-term storage
- Convenient for travel and on-the-go use
- Cons:
- Requires a separate hand pump
- Not as effective as machine-sealed bags for long-term storage
- May require an adapter for use with FoodSaver machines
3.4. Other Specialized Vacuum Seal Bags
Specialized vacuum seal bags cater to specific needs, such as:
- Sous Vide Bags: Designed to withstand high temperatures for sous vide cooking.
- Embossed Bags: Feature channels that aid in air removal during vacuum sealing.
- Mylar Bags: Provide superior protection against light, moisture, and oxygen, ideal for long-term storage.
- Stand-Up Pouches: Offer convenient storage and display options.
4. What Vacuum Seal Bags Can I Use With FoodSaver?
4.1. Compatibility Considerations
When selecting vacuum seal bags for your FoodSaver machine, consider the following compatibility factors:
- Bag Width: Ensure the bag width is compatible with your FoodSaver machine’s sealing bar.
- Bag Material: Choose bags made from multi-layer materials designed for vacuum sealing.
- Embossed vs. Non-Embossed: Embossed bags work better with external clamp machines.
- Thickness: Thicker bags offer better protection against punctures and freezer burn.
4.2. Using FoodSaver Bags with FoodSaver Machines
FoodSaver bags are specifically designed for optimal performance with FoodSaver machines. They ensure a secure seal and reliable vacuum.
- Benefits:
- Guaranteed compatibility
- Optimal sealing performance
- Durable construction
- Considerations:
- Higher cost compared to generic alternatives
4.3. Using Generic Vacuum Seal Bags with FoodSaver Machines
Generic vacuum seal bags can be a cost-effective alternative to FoodSaver bags. However, ensure they meet the following criteria:
- Compatibility: Check that the bag width is compatible with your FoodSaver machine.
- Material Quality: Choose bags made from multi-layer, BPA-free materials.
- Customer Reviews: Read reviews to assess the bag’s sealing performance and durability.
4.4. Using Ziploc Vacuum Seal Bags with FoodSaver Machines
While Ziploc vacuum seal bags are not directly compatible with FoodSaver machines, you can use them with an adapter.
- Benefits:
- Reusable and easy to clean
- Convenient for short-term storage
- Considerations:
- Requires a separate hand pump and adapter
- May not provide as strong of a vacuum seal as dedicated vacuum sealing bags
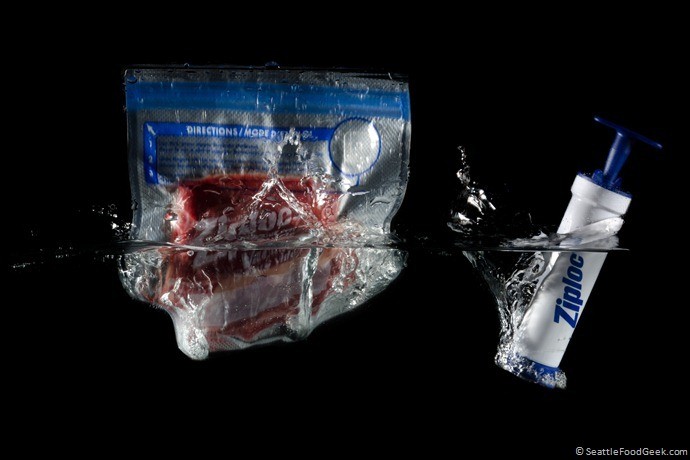 Ziploc vacuum bagsClose-up of Ziploc vacuum seal bags showing the valve and pump mechanism for removing air efficiently.
4.5. Step-by-Step Guide: Using Ziploc Bags with an Adapter
- Prepare the Bag: Place the food item in the Ziploc vacuum seal bag and seal the top.
- Attach the Adapter: Connect the adapter to the valve on the Ziploc bag.
- Vacuum the Bag: Use the FoodSaver machine’s accessory port to vacuum the bag using the adapter.
- Seal the Bag: Once the air is removed, detach the adapter and ensure the bag is properly sealed.
5. Factors to Consider When Choosing Vacuum Seal Bags
5.1. Material Quality
The quality of the vacuum seal bag material is crucial for effective food preservation. Look for bags made from multi-layer materials that are BPA-free and food-safe.
- Multi-Layer Construction: Provides a barrier against oxygen and moisture.
- BPA-Free: Ensures the bags are safe for food contact.
- Food-Grade Materials: Complies with food safety standards.
5.2. Bag Thickness
Thicker bags offer better protection against punctures and freezer burn. Consider the thickness of the bag based on the type of food you are sealing and the duration of storage.
- Standard Thickness: Suitable for general food storage.
- Heavy-Duty Thickness: Ideal for sharp or bony foods and long-term storage.
5.3. Bag Size and Dimensions
Choose bag sizes that are appropriate for the amount of food you are sealing. Too much excess bag material can make sealing more difficult and waste bag material.
- Quart-Sized Bags: Perfect for individual portions and small items.
- Gallon-Sized Bags: Ideal for larger cuts of meat, vegetables, and bulk items.
- Rolls: Offer flexibility to create custom-sized bags for odd-shaped items.
5.4. Embossed vs. Non-Embossed Bags
Embossed bags have channels that help remove air during vacuum sealing, making them more effective for use with external clamp machines. Non-embossed bags are typically used with chamber vacuum sealers.
- Embossed Bags:
- Better air removal with external clamp machines
- Ideal for home use
- Non-Embossed Bags:
- Best for chamber vacuum sealers
- Smoother surface
5.5. Cost-Effectiveness
Consider the cost per bag when choosing vacuum seal bags. While FoodSaver bags offer guaranteed compatibility, generic alternatives can provide significant cost savings.
- Compare Prices: Check the cost per bag for different brands and types of bags.
- Bulk Purchases: Buying in bulk can often reduce the cost per bag.
- Reusable Options: Ziploc vacuum seal bags and some specialized bags can be reused, providing additional cost savings.
6. How to Properly Use Vacuum Seal Bags with a FoodSaver Machine
6.1. Preparing Food for Vacuum Sealing
Proper preparation is essential for effective vacuum sealing. Follow these steps to prepare your food:
- Cool Food: Allow hot foods to cool completely before sealing to prevent steam from interfering with the sealing process.
- Dry Food: Pat dry any excess moisture from food items to ensure a better seal.
- Pre-Freeze Soft Foods: Soft foods like berries can be pre-frozen to prevent them from being crushed during vacuum sealing.
- Cut Food into Appropriate Sizes: Cut large items into smaller, manageable portions for easier storage and use.
6.2. Sealing Process
Follow these steps to properly seal vacuum seal bags with a FoodSaver machine:
- Insert the Bag: Place the open end of the bag into the FoodSaver machine, ensuring it is properly aligned with the sealing bar.
- Close and Lock the Lid: Close the lid of the FoodSaver machine and lock it into place.
- Select the Appropriate Setting: Choose the appropriate setting for the type of food you are sealing (e.g., moist or dry).
- Start the Vacuum and Seal Process: Press the start button to begin the vacuum and seal process. The machine will remove air from the bag and then heat-seal it.
- Release the Lid: Once the sealing process is complete, release the lid and remove the sealed bag.
6.3. Tips for Achieving a Strong Seal
- Ensure the Sealing Strip is Clean: Wipe the sealing strip of the FoodSaver machine clean before each use to remove any food particles or debris.
- Avoid Overfilling the Bag: Leave enough space at the top of the bag to allow for proper sealing.
- Use the Correct Bag Size: Choose a bag size that is appropriate for the amount of food you are sealing.
- Check the Seal: After sealing, check the seal to ensure it is airtight and secure. If the seal is weak, reseal the bag.
6.4. Common Mistakes to Avoid
- Sealing Warm Food: Sealing warm food can create condensation inside the bag, which can affect the quality of the seal.
- Overfilling the Bag: Overfilling the bag can prevent the machine from properly sealing.
- Using Damaged Bags: Using damaged bags can compromise the seal and lead to food spoilage.
- Ignoring the Moisture Content: Failing to adjust the settings for moist or dry foods can result in a weak seal.
7. Storing Vacuum Sealed Foods
7.1. Proper Storage Techniques
Proper storage is essential to maximize the benefits of vacuum sealing. Follow these tips for storing vacuum-sealed foods:
- Refrigeration: Store vacuum-sealed foods in the refrigerator at or below 40°F (4°C).
- Freezing: Freeze vacuum-sealed foods at or below 0°F (-18°C) for long-term storage.
- Labeling: Label each bag with the date and contents to keep track of storage times.
- Organization: Organize your refrigerator and freezer to ensure proper air circulation and easy access to vacuum-sealed foods.
7.2. Shelf Life of Vacuum Sealed Foods
Vacuum sealing can significantly extend the shelf life of various foods:
- Meat and Poultry: Vacuum-sealed meat and poultry can last up to 2-3 years in the freezer, compared to 6-12 months with traditional packaging.
- Fruits and Vegetables: Vacuum-sealed fruits and vegetables can last up to 1-2 years in the freezer, compared to 8-12 months with traditional packaging.
- Cheese: Vacuum-sealed cheese can last up to 6-8 months in the refrigerator, compared to 1-2 months with traditional packaging.
- Dry Goods: Vacuum-sealed dry goods like rice, pasta, and flour can last up to 1-2 years in the pantry, compared to 6-12 months with traditional packaging.
7.3. Thawing Vacuum Sealed Foods
Follow these guidelines for thawing vacuum-sealed foods safely:
- Refrigerator Thawing: Thaw vacuum-sealed foods in the refrigerator for the best quality and safety.
- Cold Water Thawing: If you need to thaw food quickly, submerge the vacuum-sealed bag in cold water, changing the water every 30 minutes.
- Microwave Thawing: Use the microwave to thaw food quickly, but be sure to cook it immediately after thawing.
- Avoid Room Temperature Thawing: Never thaw vacuum-sealed foods at room temperature, as this can promote bacterial growth.
7.4. Signs of Spoilage in Vacuum Sealed Foods
Even with vacuum sealing, foods can still spoil. Watch out for these signs of spoilage:
- Unpleasant Odor: A foul or unusual odor indicates spoilage.
- Discoloration: Changes in color can indicate spoilage.
- Slimy Texture: A slimy texture suggests bacterial growth.
- Bulging Bag: A bulging bag indicates gas production, which is a sign of spoilage.
8. Maintaining Your FoodSaver Machine
8.1. Cleaning Your FoodSaver Machine
Regular cleaning is essential to keep your FoodSaver machine in good working condition. Follow these steps to clean your machine:
- Unplug the Machine: Always unplug the FoodSaver machine before cleaning.
- Wipe the Exterior: Wipe the exterior of the machine with a damp cloth.
- Clean the Sealing Strip: Use a soft, damp cloth to clean the sealing strip, removing any food particles or debris.
- Empty the Drip Tray: Empty the drip tray after each use to prevent bacterial growth.
- Dry the Machine: Allow the machine to dry completely before storing it.
8.2. Troubleshooting Common Issues
Here are some common issues and how to troubleshoot them:
- Machine Not Sealing:
- Check the power cord and outlet.
- Ensure the bag is properly inserted.
- Clean the sealing strip.
- Weak Seal:
- Use the correct setting for moist or dry foods.
- Ensure the bag is not overfilled.
- Check for any damage to the bag.
- Machine Not Vacuuming:
- Ensure the lid is properly locked.
- Check for any blockages in the vacuum port.
- Replace the gasket if necessary.
8.3. Replacing Parts
Over time, some parts of your FoodSaver machine may need to be replaced. Common replacement parts include:
- Sealing Strip: Replace the sealing strip if it becomes worn or damaged.
- Gasket: Replace the gasket if it becomes cracked or brittle.
- Vacuum Port: Replace the vacuum port if it becomes blocked or damaged.
8.4. Extending the Life of Your FoodSaver Machine
Follow these tips to extend the life of your FoodSaver machine:
- Regular Cleaning: Clean the machine after each use to prevent buildup of food particles and debris.
- Proper Storage: Store the machine in a cool, dry place when not in use.
- Avoid Overuse: Avoid using the machine excessively, as this can wear out the components more quickly.
- Use Recommended Bags: Use FoodSaver bags or compatible generic bags to ensure optimal performance and prevent damage to the machine.
9. Creative Uses for Vacuum Sealing
9.1. Sous Vide Cooking
Vacuum sealing is essential for sous vide cooking, where food is sealed in a bag and cooked in a water bath at a precise temperature.
- Benefits:
- Ensures even cooking.
- Preserves moisture and flavor.
- Prevents food from floating.
- Tips:
- Use high-quality sous vide bags.
- Ensure all air is removed from the bag.
- Follow recommended cooking times and temperatures.
9.2. Marinating Foods
Vacuum sealing can accelerate the marinating process by forcing the marinade into the food.
- Benefits:
- Faster marinating times.
- Enhanced flavor penetration.
- More even distribution of marinade.
- Tips:
- Use a marinade that is compatible with vacuum sealing.
- Marinate food in the refrigerator.
- Avoid over-marinating, as this can make the food mushy.
9.3. Protecting Non-Food Items
Vacuum sealing can also be used to protect non-food items from moisture, dust, and air.
- Examples:
- Photographs and documents.
- Jewelry and collectibles.
- Emergency supplies.
- Benefits:
- Long-term protection.
- Space-saving storage.
- Prevention of damage.
9.4. Organizing and Storing
Vacuum sealing can help organize and store various items efficiently.
- Examples:
- Clothing and linens.
- Travel essentials.
- Seasonal decorations.
- Benefits:
- Reduced space.
- Protection from dust and moisture.
- Easy identification of contents.
10. Frequently Asked Questions (FAQ) About Vacuum Seal Bags and FoodSaver
10.1. Can I use any vacuum seal bags with a FoodSaver machine?
While FoodSaver bags are designed for optimal performance, you can use generic vacuum seal bags as long as they are compatible in size and material. Ensure they are made from multi-layer, BPA-free materials and fit the sealing bar of your FoodSaver machine.
10.2. Are Ziploc vacuum seal bags compatible with FoodSaver machines?
Ziploc vacuum seal bags are not directly compatible, but they can be used with an adapter that connects to the FoodSaver machine’s accessory port. This allows you to vacuum seal Ziploc bags using your FoodSaver machine.
10.3. How do I choose the right size vacuum seal bag?
Select a bag size that is appropriate for the amount of food you are sealing. Too much excess bag material can make sealing difficult and waste bag material. Quart-sized bags are great for individual portions, while gallon-sized bags are ideal for larger cuts of meat and vegetables.
10.4. What is the difference between embossed and non-embossed vacuum seal bags?
Embossed bags have channels that help remove air during vacuum sealing, making them more effective for use with external clamp machines like FoodSaver. Non-embossed bags are typically used with chamber vacuum sealers.
10.5. How do I prevent freezer burn when using vacuum seal bags?
To prevent freezer burn, ensure that all air is removed from the bag during the vacuum sealing process. Use high-quality, multi-layer bags and store food at or below 0°F (-18°C).
10.6. Can I reuse vacuum seal bags?
Some vacuum seal bags, like Ziploc vacuum seal bags, can be reused. However, it’s important to wash and dry them thoroughly before reuse. Avoid reusing bags that have contained raw meat, poultry, or fish to prevent contamination.
10.7. How long can I store vacuum-sealed food in the freezer?
Vacuum-sealed meat and poultry can last up to 2-3 years in the freezer, while fruits and vegetables can last up to 1-2 years. Properly stored vacuum-sealed food maintains its quality and flavor for significantly longer than traditionally packaged food.
10.8. What are the signs of spoilage in vacuum-sealed food?
Signs of spoilage include an unpleasant odor, discoloration, a slimy texture, and a bulging bag. If you notice any of these signs, discard the food immediately.
10.9. How do I clean my FoodSaver machine?
Unplug the machine and wipe the exterior with a damp cloth. Clean the sealing strip with a soft, damp cloth and empty the drip tray after each use. Allow the machine to dry completely before storing it.
10.10. What do I do if my FoodSaver machine is not sealing properly?
Check the power cord and outlet, ensure the bag is properly inserted, and clean the sealing strip. Use the correct setting for moist or dry foods and check for any damage to the bag. If the problem persists, consult the FoodSaver machine’s user manual or contact customer support.
Choosing the right vacuum seal bags for your FoodSaver machine ensures optimal food preservation and helps reduce waste. Whether you opt for FoodSaver bags, generic alternatives, or Ziploc bags with an adapter, understanding the compatibility factors and proper usage techniques will help you maximize the benefits of vacuum sealing.
Ready to elevate your culinary skills and preserve your food like a pro? Dive deeper into the world of vacuum sealing with FOODS.EDU.VN! Discover expert tips, detailed guides, and innovative techniques to transform your kitchen experience. Visit FOODS.EDU.VN today and unlock a treasure trove of culinary knowledge! Our location is 1946 Campus Dr, Hyde Park, NY 12538, United States. You can reach us via Whatsapp: +1 845-452-9600. Or visit our website: foods.edu.vn