Are you looking to create stunning grey icing for your cakes, cupcakes, or cookies? How Do You Make Grey Icing With Food Coloring is a common question, and at FOODS.EDU.VN, we’re here to provide you with all the expert tips and techniques you need. Whether you’re aiming for a delicate dove grey or a deep charcoal, mastering the art of grey icing is easier than you think. This guide covers everything from selecting the right food coloring to achieving the perfect shade and consistency, ensuring your desserts look as fantastic as they taste.
1. Understanding the Basics of Grey Icing
Creating grey icing might seem simple, but there’s more to it than just mixing colors. The base of your icing, the type of food coloring you use, and the mixing technique all play crucial roles in the final result. Let’s delve into these foundational aspects to ensure you start on the right foot.
1.1. The Importance of a Good Icing Base
The foundation of any great icing is the base recipe. The most common types of icing suitable for coloring include:
-
American Buttercream: This is a classic choice, known for its sweetness and ease of preparation. It’s made from butter, powdered sugar, and a liquid (usually milk or cream).
-
Swiss Meringue Buttercream: This option is less sweet and has a silky-smooth texture, making it ideal for intricate designs and a more refined taste.
-
Cream Cheese Frosting: Its tangy flavor pairs wonderfully with many desserts and provides a unique twist compared to traditional buttercream.
-
Royal Icing: Perfect for decorating cookies, this icing dries hard and provides a smooth canvas for detailed work.
Choosing the right base depends on the dessert you’re making and your personal preference for taste and texture. At FOODS.EDU.VN, we offer a variety of base recipes to suit every need.
1.2. Selecting the Right Food Coloring
The type of food coloring you choose can significantly impact the final shade and consistency of your grey icing. Here’s a breakdown of the most common types:
-
Gel Food Coloring: Highly concentrated, gel colors provide vibrant hues without adding excess liquid, making them ideal for buttercream and other icings where consistency is crucial.
-
Liquid Food Coloring: More readily available, liquid colors can be used, but they tend to be less concentrated. You might need to use more to achieve the desired shade, potentially affecting the icing’s consistency.
-
Powdered Food Coloring: This type offers intense color without altering the icing’s moisture content, making it a great option for delicate recipes.
Gel food coloring is often preferred for its potency and minimal impact on consistency. However, each type has its place depending on the specific requirements of your recipe.
1.3. The Color Wheel and Grey Tones
Understanding the color wheel is essential for creating the perfect grey icing. Grey is essentially a neutral color, achieved by mixing complementary colors or by diluting black food coloring.
- Mixing complementary colors like red and green, or blue and orange, will create a brown base. Adding a small amount of this brown to white icing will give you a natural grey tone.
- Black food coloring is the most straightforward method for achieving grey. However, it’s crucial to use it sparingly to avoid a dark, unappetizing color.
At FOODS.EDU.VN, you can find in-depth articles and tutorials on color theory to enhance your decorating skills.
2. Step-by-Step Guide: How to Make Grey Icing
Now that you understand the basics, let’s walk through the process of creating beautiful grey icing.
2.1. Gathering Your Ingredients and Tools
Before you start, make sure you have all the necessary ingredients and tools:
- Your chosen icing base (buttercream, Swiss meringue, cream cheese, or royal icing)
- Gel food coloring (black, and possibly complementary colors)
- Mixing bowls
- Spatulas
- Measuring spoons
- Stand mixer or hand mixer
- Piping bags and tips (optional, for decorating)
Having everything ready will streamline the process and ensure a smooth experience.
2.2. Preparing the Icing Base
Start by preparing your icing base according to your chosen recipe. Ensure that all ingredients are properly measured and mixed to achieve the desired consistency. For buttercream, make sure your butter is softened but not melted. Overmixing can lead to a grainy texture, so mix until just combined.
2.3. Adding Food Coloring
This is where the magic happens. To achieve a perfect grey, follow these steps:
-
Start Small: Add a tiny amount of black gel food coloring to your icing. Remember, it’s easier to add more color than to remove it.
-
Mix Thoroughly: Use your mixer to blend the color evenly into the icing. Scrape down the sides of the bowl to ensure no streaks remain.
-
Assess the Shade: Check the color under natural light. If it’s too light, add another tiny amount of black food coloring and mix again.
-
Adjust as Needed: If you want a warmer grey, consider adding a tiny drop of brown or a mix of complementary colors to neutralize the black.
-
Achieve the Perfect Hue: Continue adding color in small increments until you reach your desired shade of grey.
2.4. Adjusting Consistency
Food coloring can sometimes alter the consistency of your icing. If your icing becomes too thin, add a tablespoon of powdered sugar at a time until it thickens. If it’s too thick, add a tiny amount of milk or cream to thin it out. Mix well after each addition to ensure a smooth and even texture.
2.5. Testing and Refining
Before you start decorating, test your icing by piping a small amount onto a plate or piece of parchment paper. This allows you to see the true color and consistency. Make any final adjustments as needed to ensure your icing is perfect for your project.
2.6. Alternative Methods for Achieving Grey Icing
While black food coloring is the most common method, there are alternative techniques you can use:
-
Cocoa Powder: Adding a small amount of unsweetened cocoa powder can create a natural, warm grey.
-
Activated Charcoal: This food-grade powder provides a deep grey or black color with a very small amount, ensuring minimal impact on taste and consistency.
-
Combining Colors: Mixing complementary colors (like red and green) can create a brown base. Adding a tiny amount of this mixture to your white icing results in a unique, natural grey.
3. Troubleshooting Common Issues
Even with the best instructions, you might encounter some challenges. Here are solutions to common problems when making grey icing.
3.1. Icing is Too Dark
If your icing turns out too dark, don’t panic. You can lighten it by adding more of your icing base (without any color). Mix well until you achieve a lighter shade. This method works best if you haven’t added too much black food coloring initially.
3.2. Icing is Too Runny
Runny icing can be frustrating. To fix this, add powdered sugar one tablespoon at a time, mixing well after each addition. Continue until you reach the desired consistency. Avoid adding too much at once to prevent the icing from becoming too sweet or stiff.
3.3. Icing is Too Stiff
If your icing is too stiff, it will be difficult to pipe and spread. Add a small amount of liquid (milk or cream) one half teaspoon at a time, mixing well after each addition. Be careful not to add too much liquid, as this can make the icing too runny.
3.4. Streaky Color
Streaky color indicates that the food coloring hasn’t been fully incorporated. Continue mixing until the color is uniform. Scraping down the sides of the bowl regularly can help ensure that all the icing is evenly colored.
3.5. Bitter Taste
Using too much black gel food coloring can sometimes result in a slightly bitter taste. To counteract this, add a drop of vanilla extract or a pinch of salt to balance the flavor.
4. Creative Uses for Grey Icing
Grey icing isn’t just for Halloween or gloomy days. It’s a versatile color that can be used in a variety of creative ways.
4.1. Elegant Wedding Cakes
Grey icing can add a touch of sophistication and elegance to wedding cakes. Paired with delicate floral accents or metallic details, a grey cake can be a stunning centerpiece.
4.2. Modern Birthday Cakes
For a modern twist on birthday cakes, use grey icing as a backdrop for bold, colorful decorations. This creates a striking contrast that’s both stylish and fun.
4.3. Themed Cupcakes
Grey icing is perfect for themed cupcakes. Whether you’re creating a cityscape, a stormy sky, or “The Grey Stuff” inspired by Beauty and the Beast, grey icing provides the ideal canvas.
4.4. Cookies with Character
Use grey royal icing to decorate cookies with intricate designs. Grey can add depth and dimension to your creations, making them stand out.
4.5. Combining with Other Colors
Grey pairs well with many colors. Consider using grey as a neutral base and adding pops of color with sprinkles, edible glitter, or other decorations.
5. Expert Tips for Perfect Grey Icing
To take your grey icing to the next level, here are some expert tips from the professionals at FOODS.EDU.VN:
5.1. Use High-Quality Ingredients
The quality of your ingredients directly impacts the taste and texture of your icing. Use high-quality butter, sugar, and flavorings for the best results.
5.2. Soften Butter Properly
Softened butter should be at room temperature but still hold its shape. If the butter is too soft or melted, it can affect the consistency of your icing.
5.3. Sift Powdered Sugar
Sifting powdered sugar before adding it to your icing helps prevent lumps and ensures a smooth texture.
5.4. Mix on Low Speed
When adding powdered sugar, start mixing on low speed to prevent a cloud of sugar from forming. Gradually increase the speed as the sugar is incorporated.
5.5. Avoid Overmixing
Overmixing can cause your icing to become too airy or grainy. Mix until just combined, and avoid beating for extended periods.
5.6. Store Properly
Store leftover icing in an airtight container in the refrigerator. When ready to use, bring it to room temperature and remix until smooth.
6. The Science Behind Perfect Icing
Creating perfect icing involves understanding some basic scientific principles. The interaction of ingredients, the effect of temperature, and the role of mixing all play a part in the final outcome.
6.1. The Role of Fat
Fat, typically in the form of butter, provides richness and stability to icing. It also contributes to the smooth, creamy texture. The amount and type of fat used can affect the icing’s consistency and flavor.
6.2. The Importance of Sugar
Sugar not only sweetens the icing but also helps to create structure. Powdered sugar, with its fine texture, dissolves easily and contributes to a smooth, non-grainy icing.
6.3. The Effect of Liquid
Liquid, such as milk or cream, is used to adjust the consistency of the icing. Adding too much liquid can make the icing runny, while not enough liquid can make it too stiff.
6.4. The Impact of Temperature
Temperature plays a critical role in icing. Butter that is too warm can cause the icing to separate, while butter that is too cold can make it difficult to mix. Room temperature ingredients generally yield the best results.
6.5. The Chemistry of Color
Food coloring works by dispersing pigments throughout the icing. Gel colors are preferred because they are highly concentrated and don’t add excess liquid. Understanding how different colors interact can help you achieve the perfect shade.
7. Mastering Different Shades of Grey
Achieving the perfect grey is about more than just adding black food coloring. Here’s how to create a range of grey shades to suit any occasion:
7.1. Light Grey (Dove Grey)
To create a light grey, start with a small amount of black gel food coloring. Mix thoroughly and assess the color. Add more white icing base to lighten the shade if needed.
7.2. Medium Grey
For a medium grey, gradually add black food coloring until you reach the desired depth. Remember to mix well after each addition to ensure an even color.
7.3. Dark Grey (Charcoal Grey)
Creating a dark grey requires more black food coloring. Add it in small increments, mixing thoroughly, until you achieve a rich, deep shade. Be careful not to add too much, as this can affect the taste.
7.4. Warm Grey
To create a warm grey, add a tiny drop of brown or a mix of complementary colors to your icing. This will neutralize the black and create a softer, more inviting shade.
7.5. Cool Grey
For a cool grey, add a tiny drop of blue or purple food coloring to your icing. This will create a more modern, sophisticated shade.
8. Incorporating Flavors into Grey Icing
While the color is important, flavor is equally crucial. Here are some ideas for incorporating delicious flavors into your grey icing:
8.1. Vanilla Bean
Adding vanilla bean paste or extract enhances the sweetness and adds a rich, aromatic flavor to your icing.
8.2. Chocolate
Cocoa powder or melted chocolate can be added to create a delicious chocolate-flavored grey icing. Adjust the amount to achieve your desired level of chocolate intensity.
8.3. Coffee
A teaspoon of instant coffee or espresso powder can add a subtle coffee flavor to your icing, perfect for pairing with chocolate or vanilla cakes.
8.4. Citrus
A touch of lemon or orange zest can brighten the flavor of your icing and add a refreshing twist.
8.5. Extracts and Emulsions
Experiment with different extracts and emulsions, such as almond, peppermint, or raspberry, to create unique and exciting flavor combinations.
9. Food Safety Considerations
When working with food coloring, it’s important to consider food safety. Here are some guidelines to follow:
9.1. Use Food-Grade Coloring
Always use food-grade coloring that is specifically designed for use in food products. Avoid using craft paints or other non-food-safe materials.
9.2. Check Expiration Dates
Ensure that your food coloring is not expired. Expired food coloring may not provide the desired color and could potentially be harmful.
9.3. Store Properly
Store food coloring in a cool, dry place, away from direct sunlight. This will help to maintain its quality and prevent spoilage.
9.4. Avoid Cross-Contamination
Use clean utensils and bowls when working with food coloring to avoid cross-contamination.
9.5. Be Mindful of Allergies
If you are making icing for someone with allergies, be mindful of the ingredients in your food coloring. Some food colorings may contain allergens such as soy or nuts.
10. The Latest Trends in Icing Decoration
Stay ahead of the curve with the latest trends in icing decoration. Here are some exciting ideas to inspire your next creation:
10.1. Ombre Icing
Create a stunning ombre effect by graduating from light grey to dark grey. This technique adds depth and dimension to your cakes and cupcakes.
10.2. Textured Icing
Use different piping tips and techniques to create textured icing designs. This adds visual interest and tactile appeal to your desserts.
10.3. Metallic Accents
Incorporate metallic accents, such as edible gold or silver leaf, to add a touch of glamour to your grey icing.
10.4. Watercolor Icing
Create a watercolor effect by lightly brushing diluted food coloring onto your grey icing. This technique is perfect for creating artistic and unique designs.
10.5. Geode Cakes
Create a geode effect by carving a cavity into your cake and filling it with sugar crystals and edible glitter. This technique adds a dramatic and eye-catching element to your desserts.
11. Tools and Equipment for Advanced Icing Techniques
To master advanced icing techniques, you’ll need the right tools and equipment. Here are some essentials:
11.1. Piping Bags and Tips
Piping bags and tips are essential for creating intricate icing designs. Invest in a variety of tips to experiment with different patterns and textures.
11.2. Offset Spatulas
Offset spatulas are perfect for smoothing icing and creating clean, even surfaces.
11.3. Turntables
A turntable makes it easier to decorate cakes and create smooth, even layers of icing.
11.4. Airbrush Systems
Airbrush systems allow you to apply food coloring evenly and create stunning gradients and effects.
11.5. Fondant Smoothers
Fondant smoothers are essential for creating smooth, flawless fondant surfaces.
12. Grey Icing Recipes from Around the World
Explore different grey icing recipes from around the world and discover new flavor combinations and techniques.
12.1. French Grey Buttercream
This recipe uses a traditional French buttercream base, known for its rich flavor and smooth texture. Add a touch of grey food coloring for an elegant twist.
12.2. Italian Meringue Grey Icing
Italian meringue buttercream is lighter and less sweet than American buttercream. Add a hint of grey for a sophisticated look.
12.3. Japanese Grey Bean Paste Icing
In Japan, bean paste is often used in desserts. Create a unique grey icing by incorporating grey-colored bean paste into your buttercream.
12.4. Mexican Cajeta Grey Frosting
Cajeta, a caramelized goat’s milk confection, can be added to your icing for a rich, dulce de leche flavor with a subtle grey hue.
12.5. Middle Eastern Rosewater Grey Icing
Infuse your grey icing with rosewater for a delicate, floral flavor that’s perfect for Middle Eastern-inspired desserts.
13. Interview with a Professional Pastry Chef
We spoke with Chef Emily Thompson, a renowned pastry chef, about her tips and tricks for creating perfect grey icing.
Interviewer: What’s your secret to achieving the perfect shade of grey?
Chef Emily: “The key is to start with a small amount of black gel food coloring and gradually add more until you reach the desired shade. It’s always easier to add more color than to remove it.”
Interviewer: What are some common mistakes people make when creating grey icing?
Chef Emily: “One common mistake is adding too much black food coloring at once, which can result in a bitter taste. Another mistake is not mixing the color thoroughly, which can lead to streaky icing.”
Interviewer: What are some creative ways to use grey icing?
Chef Emily: “Grey icing is incredibly versatile. I love using it as a backdrop for bold, colorful decorations or creating elegant ombre effects. It’s also perfect for themed desserts, such as cityscapes or stormy skies.”
Interviewer: Any final tips for our readers?
Chef Emily: “Don’t be afraid to experiment with different flavors and techniques. The most important thing is to have fun and let your creativity shine.”
14. Case Studies: Successful Grey Icing Projects
Let’s examine some case studies of successful grey icing projects to inspire your next creation.
14.1. The Elegant Grey Wedding Cake
A pastry chef created a stunning grey wedding cake with delicate sugar flowers and metallic accents. The grey icing provided a sophisticated backdrop for the intricate details, resulting in a truly memorable cake.
14.2. The Modern Grey Birthday Cupcakes
A home baker created modern grey birthday cupcakes with bold, colorful sprinkles and edible glitter. The grey icing provided a stylish contrast to the vibrant decorations, making the cupcakes a hit with guests.
14.3. The Themed Grey Cookie Collection
A cookie artist created a collection of themed grey cookies, featuring cityscapes, animals, and geometric patterns. The grey royal icing allowed for intricate details and added depth to the designs.
15. Grey Icing and Food Pairings
Grey icing, with its neutral tone, can be paired with a variety of flavors to create delightful desserts. The key is to balance the visual appeal of the grey with complementary tastes that enhance the overall experience.
15.1. Chocolate Cake with Grey Icing
The rich, intense flavor of chocolate cake is beautifully complemented by a smooth grey buttercream. The neutral tone of the icing doesn’t compete with the chocolate but instead offers a sophisticated backdrop.
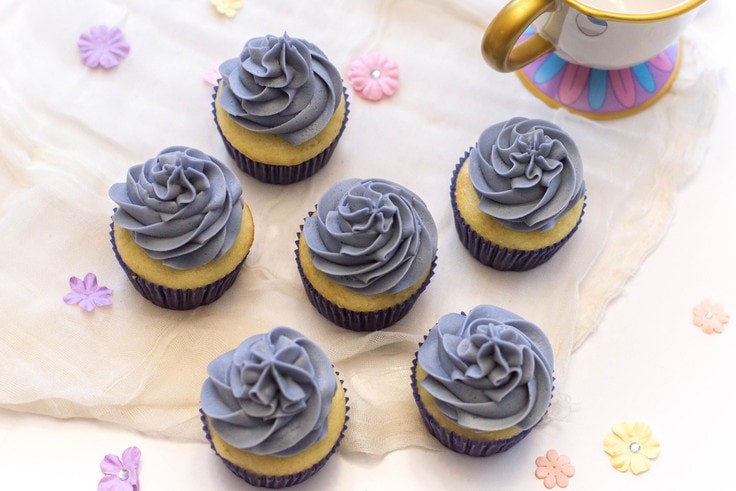
15.2. Vanilla Cupcakes with Grey Icing and Lavender Sprinkles
Vanilla cupcakes get an elegant upgrade with grey icing. Adding a sprinkle of lavender not only introduces a delicate floral aroma but also adds a pop of color that enhances the overall presentation.
15.3. Lemon Bars with Grey Royal Icing
The tartness of lemon bars is balanced by the sweetness of a grey royal icing. This combination is visually striking and offers a refreshing contrast in flavors.
15.4. Red Velvet Cake with Grey Cream Cheese Frosting
The deep red hue of red velvet cake paired with grey cream cheese frosting creates a visually stunning and delicious combination. The tanginess of the cream cheese complements the cake’s subtle cocoa flavor.
15.5. Spice Cake with Grey Maple Icing
The warm spices in a spice cake are enhanced by a grey maple icing. The maple adds a hint of caramel sweetness and complements the earthy tones of the spices.
16. Grey Icing and Seasonal Celebrations
Grey icing isn’t just for special occasions; it can be adapted to fit various seasonal celebrations. Here are a few ideas to inspire you:
16.1. Halloween
Grey icing is a natural fit for Halloween. Use it to create spooky spiderwebs, ghostly figures, or eerie graveyard scenes on cupcakes and cakes.
16.2. Winter Holidays
Embrace the winter season with grey icing adorned with silver or white sprinkles. Create a snowy landscape on a cake or decorate cookies with delicate grey snowflakes.
16.3. Easter
Pair grey icing with pastel colors for a sophisticated Easter treat. Decorate cupcakes with grey icing and top them with pastel-colored candies or edible flowers.
16.4. Thanksgiving
Use grey icing to create elegant pumpkin or leaf designs on pies and cakes. Add a touch of gold leaf for a luxurious Thanksgiving dessert.
16.5. Fourth of July
Combine grey icing with red, white, and blue accents for a patriotic dessert. Create grey-striped cakes or cupcakes and decorate them with stars and stripes.
17. DIY Grey Icing Kits
For those who prefer convenience, creating a DIY grey icing kit can be a fun and practical project.
17.1. Assembling the Kit
Include all the necessary ingredients in pre-measured quantities: powdered sugar, butter powder (for shelf stability), vanilla extract, and a small container of black gel food coloring.
17.2. Adding Instructions
Provide a clear and concise instruction card. Include tips on achieving different shades of grey and troubleshooting common issues.
17.3. Packaging
Package the kit in an attractive, airtight container. Add a ribbon or label for a personal touch.
17.4. Gifting Options
DIY grey icing kits make excellent gifts for baking enthusiasts. Consider adding extras like piping bags, decorating tips, or a small recipe book.
17.5. Customization
Allow customers to customize their kits with different flavors or colors. Offer options like chocolate, lemon, or almond extract to personalize the icing.
18. Community Spotlight: Grey Icing Creations
Let’s showcase some outstanding grey icing creations from our FOODS.EDU.VN community.
18.1. @BakeMyDay
“I created this elegant grey wedding cake using Swiss meringue buttercream and a touch of silver leaf. The grey provided a stunning backdrop for the delicate sugar flowers.”
18.2. @SweetTreatsBySarah
“These modern grey birthday cupcakes were a hit at my daughter’s party. I used a combination of black and white sprinkles to create a fun and stylish design.”
18.3. @CookieCreations
“I love using grey royal icing to decorate cookies with intricate designs. This cityscape cookie collection was inspired by my recent trip to New York.”
18.4. @HomeBakingAdventures
“I experimented with ombre icing on this cake and I love how it turned out. The graduation from light grey to dark grey added depth and dimension to the design.”
18.5. @DessertDreams
“These Halloween-themed cupcakes were a spooky success. I used grey icing to create spiderwebs and ghostly figures, and they were a big hit with the kids.”
19. Sustainability and Ethical Considerations
When creating grey icing, it’s important to consider sustainability and ethical sourcing of ingredients.
19.1. Sustainable Sugar
Choose powdered sugar that is sourced from sustainable farms. Look for certifications like Fair Trade or organic.
19.2. Ethical Butter
Select butter from dairies that prioritize animal welfare and sustainable farming practices.
19.3. Natural Food Coloring
Opt for natural food coloring made from plant-based sources. Avoid artificial dyes that may be harmful to the environment or human health.
19.4. Eco-Friendly Packaging
Use eco-friendly packaging for your icing and desserts. Choose biodegradable or compostable materials whenever possible.
19.5. Reducing Waste
Minimize waste by accurately measuring ingredients and storing leftovers properly. Compost food scraps and recycle packaging materials.
20. Future Trends in Grey Icing
As the culinary world continues to evolve, here are some future trends to watch out for in the realm of grey icing.
20.1. Hyper-Realistic Designs
Expect to see more hyper-realistic grey icing designs that mimic textures, patterns, and objects with incredible detail.
20.2. Interactive Icing
Interactive icing that changes color or texture in response to temperature or light will become more popular.
20.3. 3D-Printed Icing
3D-printed icing will allow for the creation of complex and intricate designs that are impossible to achieve by hand.
20.4. Personalized Icing
Personalized icing that incorporates custom messages, images, or patterns will become more common.
20.5. Functional Icing
Functional icing that provides nutritional benefits or health-enhancing properties will emerge as a new trend.
21. Gray Icing: Adapting to Dietary Needs
Creating gray icing that caters to various dietary needs ensures that everyone can enjoy delicious and visually appealing desserts. Here are some tips for adapting your gray icing recipe to accommodate common dietary restrictions:
21.1. Vegan Gray Icing
- Substitute Butter: Use vegan butter alternatives made from plant-based oils like coconut, shea, or olive oil. Ensure it’s unsalted and has a similar consistency to dairy butter.
- Replace Milk: Use plant-based milk such as almond, soy, oat, or coconut milk. Opt for unsweetened varieties to control the sweetness of the icing.
- Vegan Food Coloring: Ensure your black gel food coloring is vegan-friendly, as some may contain animal-derived ingredients.
21.2. Gluten-Free Gray Icing
- Check Powdered Sugar: Most powdered sugar is gluten-free, but always check the label to ensure there are no added ingredients that contain gluten.
- Use Gluten-Free Extracts: If adding extracts like vanilla or almond, verify that they are certified gluten-free.
21.3. Dairy-Free Gray Icing
- Dairy-Free Butter: Use dairy-free butter alternatives, ensuring they are free from milk-derived ingredients.
- Replace Milk: Use dairy-free milk alternatives like almond, soy, oat, or coconut milk.
21.4. Sugar-Free Gray Icing
- Sugar Substitutes: Use sugar substitutes like erythritol, stevia, or monk fruit sweetener. Ensure they are finely ground to avoid a grainy texture in the icing.
- Adjust Liquid: Sugar substitutes may affect the consistency of the icing, so adjust the amount of liquid accordingly.
21.5. Nut-Free Gray Icing
- Nut-Free Milk: Use nut-free milk alternatives like soy, oat, or coconut milk.
- Check Extracts: Ensure any extracts used are nut-free, as some may contain nut-derived ingredients.
22. Storing and Transporting Gray Icing Creations
Proper storage and transportation are crucial to maintaining the appearance and flavor of your gray icing creations. Here are some tips to ensure your desserts arrive in perfect condition:
22.1. Storing Icing
- Airtight Containers: Store leftover gray icing in airtight containers to prevent it from drying out or absorbing odors from the refrigerator.
- Refrigeration: Refrigerate icing for up to one week. Allow it to come to room temperature before using, and remix until smooth.
- Freezing: For longer storage, freeze icing for up to three months. Thaw it in the refrigerator overnight and remix thoroughly before using.
22.2. Storing Decorated Desserts
- Cakes: Store decorated cakes in airtight containers or cake boxes. Refrigerate if the icing contains perishable ingredients like cream cheese.
- Cupcakes: Store decorated cupcakes in airtight containers or cupcake carriers. Avoid stacking them to prevent damage to the icing.
- Cookies: Store decorated cookies in airtight containers at room temperature. Avoid stacking them to prevent breakage.
22.3. Transporting Desserts
- Use Proper Carriers: Use cake carriers, cupcake carriers, or cookie boxes to transport your desserts safely.
- Non-Slip Mats: Place non-slip mats in the bottom of the carrier to prevent the desserts from sliding during transport.
- Temperature Control: Maintain a consistent temperature during transport. Avoid exposing desserts to extreme heat or cold.
- Secure Packaging: Ensure that the packaging is secure and that the desserts are well-protected from bumps and vibrations.
23. Resources and Further Learning
To continue your journey in mastering the art of gray icing, here are some valuable resources for further learning:
23.1. Online Courses
- FOODS.EDU.VN: Offers a wide range of online courses on cake decorating, icing techniques, and dessert design.
- Skillshare: Provides classes on buttercream techniques, food coloring, and cake decorating.
- Craftsy: Features courses on advanced icing techniques, sugar art, and cake design.
23.2. Books
- “The Artful Baker” by Cenk Debem
- “Modern Cake” by Lily Jones
- “Layered” by Tessa Huff
23.3. Websites and Blogs
- FOODS.EDU.VN: Provides a wealth of information on ingredients, techniques, and recipes for icing and cake decorating.
- Sally’s Baking Addiction: Offers detailed recipes and tutorials on baking and decorating.
- Preppy Kitchen: Features recipes, decorating tips, and videos for creating stunning desserts.
23.4. Social Media
- Instagram: Follow cake decorators, pastry chefs, and baking enthusiasts for inspiration and ideas.
- Pinterest: Create boards to collect recipes, decorating tips, and design ideas.
- YouTube: Watch video tutorials on icing techniques, decorating tips, and cake design.
24. Frequently Asked Questions (FAQs)
1. Can I use liquid food coloring instead of gel?
While you can, gel food coloring is highly recommended. It’s more concentrated, so you’ll need less, and it won’t affect the consistency of your icing as much as liquid food coloring might.
2. How do I prevent my grey icing from tasting bitter?
Start with a tiny amount of black gel food coloring and add more gradually. Overusing black food coloring can sometimes lead to a bitter taste. Adding a drop of vanilla extract or a pinch of salt can also help balance the flavor.
3. What’s the best way to store leftover grey icing?
Store leftover icing in an airtight container in the refrigerator for up to a week. When you’re ready to use it, bring it to room temperature and remix until smooth.
4. Can I freeze grey icing?
Yes, you can freeze it for up to three months. Thaw it in the refrigerator overnight and remix thoroughly before using.
5. How do I fix icing that’s too runny?
Add powdered sugar one tablespoon at a time, mixing well after each addition, until you reach the desired consistency.
6. My icing is too stiff. What should I do?
Add a small amount of milk or cream one half teaspoon at a time, mixing well after each addition, until you reach the desired consistency.
7. Can I use cocoa powder to make grey icing?
Yes, adding a small amount of unsweetened cocoa powder can create a natural, warm grey. Start with a small amount and add more until you achieve the desired shade.
8. What’s the best icing base for coloring grey?
American buttercream, Swiss meringue buttercream, cream cheese frosting, and royal icing all work well. Choose the base that best suits your taste and the dessert you’re making.
9. How can I achieve a light grey (dove grey) color?
Start with a small amount of black gel food coloring and mix thoroughly. If the color is too dark, add more of your white icing base to lighten it.
10. Is it possible to create a warm grey shade?
Yes, add a tiny drop of brown or a mix of complementary colors to your icing to neutralize the black and create a softer, warmer shade.
We at FOODS.EDU.VN believe that creating beautiful grey icing is an art form that combines technique, creativity, and a bit of science. By following our comprehensive guide, you’ll be well-equipped to create stunning desserts that impress both visually and gastronomically.
Conclusion: Elevate Your Desserts with Perfect Grey Icing
Mastering how do you make grey icing with food coloring opens up a world of creative possibilities for your desserts. Whether you’re aiming for elegant sophistication or modern flair, the perfect shade of grey can elevate your creations to new heights. Remember to choose high-quality ingredients, follow our step-by-step guide, and don’t be afraid to experiment with flavors and techniques.
Ready to explore more advanced techniques and recipes? Visit FOODS.EDU.VN today for a wealth of information on all things culinary. From detailed tutorials to expert tips, we’re here to help you unleash your inner pastry chef.
Unlock your culinary potential with FOODS.EDU.VN! Explore our extensive collection of recipes, tutorials, and expert advice. Visit our website at foods.edu.vn or contact us at 1946 Campus Dr, Hyde Park, NY 12538, United States, or Whatsapp: +1 845-452-9600. Let’s create something amazing together!