Dehydrating food at home is a cost-effective alternative to purchasing pre-packaged dehydrated snacks. With the right tools and a bit of know-how, you can easily create your own delicious and healthy treats, from fruit leather to dried vegetables. This guide provides a step-by-step process on how to use a food dehydrator effectively.
10 Steps to Using a Food Dehydrator
Food dehydrators work by circulating warm air around food, removing moisture and preserving it. The process is relatively straightforward, but understanding the key steps ensures optimal results.
#1 Choose Your Foods Wisely
Selecting the right foods is the first crucial step. Many foods are suitable for dehydration, including:
- Fruits: Tropical fruits, citrus fruits, apples, bananas, berries
- Vegetables: Kale, herbs, tomatoes, mushrooms, peppers
- Proteins: Lean meats, lean fish, legumes
However, avoid dehydrating foods with high fat content such as avocados, high-fat meats, or olives. Fat doesn’t evaporate during dehydration, leading to premature spoilage.
#2 Prepare Your Food and Work Area
Maintaining a clean environment is vital to prevent bacterial contamination. Before you begin:
- Thoroughly clean all surfaces, equipment, and utensils.
- Wash your hands meticulously.
- Consider wearing clean gloves during food preparation.
- Wash produce with an antibacterial vegetable cleaner.
- Dry ingredients on clean paper towels.
Alt text: Washing vegetables in a kitchen sink, preparing them for dehydration.
If dehydrating fish or meat, cook it to the USDA-recommended minimum internal temperature to eliminate bacteria: 145°F for fish, 160°F for beef, and 165°F for poultry.
#3 Slice Evenly
Uniform slices are essential for consistent dehydration. Cut your food into thin, even pieces to ensure they dehydrate at the same rate. Aim for similar size and thickness across all pieces.
#4 Pretreat as Needed
Pretreating helps fruits and vegetables retain their color, flavor, and texture. It can also extend shelf life and shorten rehydration time. Common pretreatment methods include:
- Fruits: Soak in lemon juice or ascorbic acid solution to prevent browning.
- Citrus: Immerse in fruit juice to enhance flavor and color.
- Vegetables: Steam or blanch to preserve vibrancy. Pretreating is most beneficial for tough vegetables like broccoli, potatoes, or Brussels sprouts that are not typically eaten raw.
Alt text: Apple slices soaking in lemon juice as a pretreatment to prevent browning before dehydration.
Pro Tip: If using frozen vegetables, you can skip blanching as they’ve already been blanched before freezing.
#5 Season Lightly
Seasoning before dehydrating can enhance the flavor. Remember that flavors will concentrate as the food loses moisture, so use salt, sugar, or spices sparingly.
#6 Arrange Food on Trays
Distribute the prepared food evenly on the dehydrator trays, ensuring no pieces overlap. Overcrowding hinders proper moisture removal.
#7 Select the Correct Settings
Different foods require varying temperatures and dehydration times based on their moisture content. Meats, for example, typically need higher temperatures than vegetables. Refer to your dehydrator’s manual for specific guidelines and recommended settings for different food types.
:max_bytes(150000):strip_icc():format(webp)/Simply-Recipes-Dehydrating-Food-Lead-3-4b3649a4e71748a499ba9213011a677d.jpg)
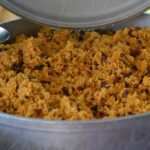
Alt text: A fully loaded food dehydrator with various fruits and vegetables sliced and arranged on trays, ready to start the dehydration process.
Avoiding Case Hardening
Case hardening occurs when the dehydrator temperature is too high. The food’s outer layer hardens quickly, trapping moisture inside and potentially causing spoilage.
To prevent case hardening:
- Preheat your dehydrator.
- Cut food into smaller pieces.
- Dehydrate similar items requiring the same temperature together.
#8 Start the Dehydrator
Once the trays are loaded and settings are selected, start the dehydrator. Although many dehydrators have automatic shut-off features, it’s wise to check the food’s progress periodically.
The food is ready when it’s approximately 95% dehydrated, feeling hard and crunchy. If any softness, stickiness, or sponginess is present, return the tray to the dehydrator for additional time.
Pro Tip: To test moisture content, place the food in a lidded glass jar. If the jar fogs up immediately, the food needs more dehydration.
#9 Cool to Room Temperature
After dehydration, allow the food to cool to room temperature. This prevents condensation inside storage containers.
#10 Store Properly
Correct storage is key to extending the shelf life of dehydrated foods:
- Use airtight containers.
- Vacuum-seal for longer storage periods.
- Store away from moisture, heat, and light.
Properly stored dehydrated food can last for months or even years. Vacuum-sealed items with oxygen absorbers can last the longest.
Note: Avoid freezing dehydrated food, as it can introduce moisture back into the container, shortening its shelf life.
Conclusion
Mastering How Do You Use A Food Dehydrator opens a world of possibilities for creating healthy, delicious, and long-lasting snacks. By following these steps and understanding the principles of dehydration, you can enjoy the benefits of homemade dehydrated food for years to come.