Dyeing fabric opens up a world of possibilities, transforming plain materials into vibrant creations. While commercial dyes are widely available, using food dye offers a surprisingly effective and accessible alternative, particularly for protein fibers like wool and silk. This guide will explore the process of How To Dye Clothes With Food Dye, offering a detailed look at its advantages, limitations, and step-by-step instructions for achieving beautiful and lasting results.
Understanding the Basics of Dyeing with Food Dye
In the past, natural dyes derived from plants, insects, and minerals were the primary means of coloring fabrics. While these methods have historical significance, food dyes provide a modern, convenient option. Keep in mind that dyeing, in general, involves immersing the fabric at different stages in the process, but dyeing the cloth after it is woven is the most common approach. Food dyes, while not traditional, offer a practical method for coloring protein fibers.
The Pros and Cons of Using Food Dye for Fabric
Before diving into the dyeing process, it’s important to weigh the advantages and disadvantages of using food dye compared to commercial alternatives.
Advantages:
- Excellent results on protein fibers: Food dye works exceptionally well on wool and silk, even feathers.
- Cost-effective: Food dye is significantly cheaper than commercial dyes.
- Widely available: You can find food dye in most supermarkets.
- Easy to mix: You can create a wide spectrum of colors by easily mixing food dyes.
- Food-safe and odorless: Food dye is safe to handle and doesn’t produce harsh smells, allowing you to use regular cooking equipment.
- Easy cleanup: Splashes wash out of clothing easily (if made of cotton, linen, or synthetics).
- Lightfastness: Food dye appears to be as resistant to fading as commercial dyes.
Disadvantages:
- Limited fiber compatibility: Food dye is not effective on linen, cotton, or synthetics. While you might get pale tinges of color, the results are typically underwhelming.
- Uneven dyeing on mixed fabrics: If your fabric is a blend, only the wool or silk component will dye, resulting in a flecked or mottled appearance.
- Temperature sensitivity: The dyeing process requires precise temperature control and must be done on a stovetop, limiting the size of fabric you can dye at once.
- Inability to conceal imperfections: Food dye will not cover existing stains or fade marks on fabric.
The process described below focuses on dyeing lengths of fabric, but the same technique can be applied to yarn or entire garments if your pot is large enough.
Essential Equipment for Dyeing Clothes with Food Dye
To successfully dye fabric with food dye, you’ll need the following equipment:
-
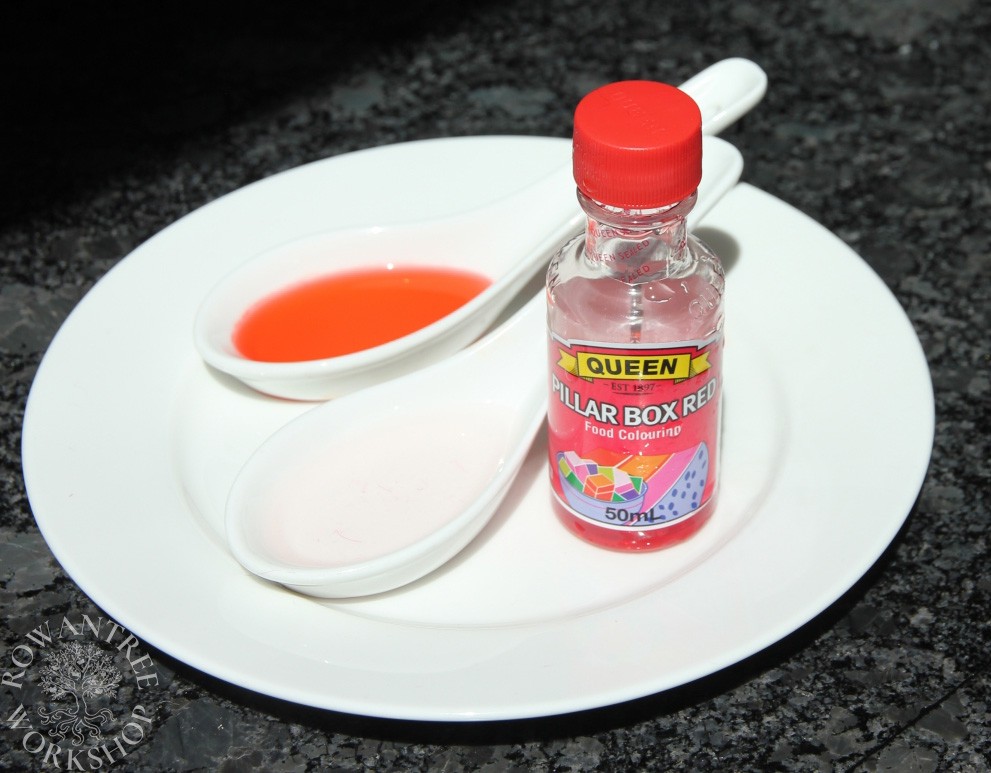
Liquid food dye: Opt for liquid food dye for even results. Avoid paste, gel, oil, or powder food dyes, as they are difficult to dissolve evenly.
-
Heat source: A stovetop or similar heat source with easy temperature control.
-
Pot: A stainless steel pot large enough for the fabric to move freely. A 15-liter stockpot can accommodate up to 1.5 meters of medium-weight wool.
-
Tub: A tub large enough for pre-mordanting the fabric.
-
Thermometer: An immersion or instant-read thermometer for accurate temperature monitoring.
-
Rubber gloves: To protect your hands from the dye.
-
Large wooden spoon: For stirring the fabric gently.
-
Tongs: For safely removing the fabric from the dyebath.
-
Large jug: If dyeing multiple lengths of fabric.
-
Bucket/bowl: For transferring wet fabric.
-
White vinegar: Used as a mordant to help the dye bind to the fabric.
Project Planning for Successful Dyeing
Careful planning is essential for achieving your desired results.
Color Selection
The starting color and composition of your fabric will influence the final color. The dye will add to the fabric’s existing color, not replace it entirely. For mixed fabrics, the dye will only adhere to the wool or silk fibers, creating a mottled effect.
Food dyes are available in a limited color palette, but you can create custom colors by mixing them. It’s best to blend the dyes directly in the dyebath. If dyeing in batches, maintain consistent temperatures for each batch to ensure uniform color.
Experiment with color combinations by mixing drops of each dye on a white plate with water. Remember that the color of your fabric will affect the final result.
Test Run
Before dyeing your entire project, conduct a test run on a small fabric swatch. This will help you assess the dye’s behavior with your fabric and make any necessary adjustments.
Cut a 20cm square of fabric and follow the entire dyeing process, including washing, pre-mordanting, and dyeing. For the test, use 20 drops (1ml) of dye in 500ml of water with a teaspoon of vinegar.
Fabric Preparation
Pre-wash your fabric to remove any finishes that might prevent the dye from adhering properly. If dyeing large lengths of fabric, cut them into smaller pieces that fit comfortably in your pot.
Consider the layout of your garment pieces when cutting the fabric. Aim for manageable sizes that allow for easy dyeing without wasting fabric.
The Dyeing Process: A Step-by-Step Guide
Start the dyeing process the day before you plan to dye your fabric.
Pre-Mordanting
- Cut your pre-washed fabric into suitable lengths.
- Fill a bucket or tub with enough cold water to cover the fabric.
- Add ½ cup of vinegar for a bucket or 1-2 cups for a large tub and mix well.
- Immerse the fabric completely, ensuring no air bubbles are trapped. Soak overnight.
Even saturation is crucial for uniform dyeing. Any dry areas will not absorb the dye properly.
Dye Bath Preparation
- Fill your dyepot with hot water, leaving room for the fabric. Turn on the heat.
- Add approximately 50ml of vinegar and a bottle of dye (or the required amount and colors).
- Remove the fabric from the mordant bath and drain.
- When the temperature reaches 60°C, gently add one piece of fabric to the pot, avoiding air bubbles.
- Keep the fabric moving gently, expelling any trapped air, but avoid compressing it.
- Raise the temperature to 80-82°C. The fabric will absorb the dye, and the water will become clearer as the colors fix.
- Once the water is clear, remove the pot from the heat (or reduce the heat).
- Remove the fabric and rinse it in cool water. Minimal dye should be released into the water. If excessive dye is released, you may have used too much dye.
Washing and Drying
- Wash the fabric as you would normally wash the garment to remove any remaining dye. For silk, re-wash in lukewarm water using a dedicated silk wash or mild shampoo, then rinse thoroughly. Add a splash of vinegar to the rinse water to restore the sheen.
- Dry the fabric. If line drying is not possible, use a tumble dryer with caution, as it can shrink and felt woolen fabric.
Dyeing Additional Lengths of Fabric
To dye additional lengths of fabric using the same dyebath:
- Remove 1-2 liters of water from the dyebath and replace it with cold water to lower the temperature below 60°C.
- Add more dye and vinegar, stirring thoroughly.
- Add the next length of fabric.
- Raise the temperature again, stirring as described above, until the water runs clear and the fabric is dyed.
- Remove the fabric, rinse, and repeat as needed.
Overdyeing
If you need to adjust the color, you can overdye the fabric using the same process. Remember that colors are additive. If you have washed the fabric, pre-mordant it again before overdyeing. When overdyeing multiple lengths, match the volume of dye and temperature for each batch.
Dyeing Wool Felt Hat Bodies
You can also use this method to dye wool felt hat bodies, such as capelines, flares, and hoods. (It should also work for fur felts, but this hasn’t been tested.)
- Test the dye on a sliver cut from the edge, as colors are additive.
- Block the hat immediately after dyeing, as the felt is already hot and wet. Prepare your block before you begin.
- If you plan to stiffen the hat with a water-soluble stiffener (e.g., hide glue), soak and prepare the size before you start.
- Soak the hat blank overnight in a bucket with vinegar. Ensure the brim doesn’t trap air bubbles; weigh it down if necessary.
- Fill the pot with water at 40-50°C and add dye (50ml per large blank) and vinegar, then add the hat blank (start dyeing at a cooler temperature).
- Move the hat blank in the water and turn it over occasionally.
- Check on the progress. You may need to stop the process earlier if the original dye starts to leak into the water (70°C should be sufficient).
Without Blocking
Remove the hat blank and rinse well in cold water, then squeeze gently to remove excess water. Place it on a hatform or similar round-topped stand.
Blocking the Hat
- Wear rubber gloves to protect your hands from any dye that may come off.
- Rinse well in hot water (50-70°C).
- If using water-soluble stiffener, brush it on and work it in well (or use it on the block).
- Pull the hat onto your block as usual, working the felt gently.
- Pin, band, or weight the hat as usual.
- Dry for a day on the block (or until it feels dry), then remove and dry it upside down to ensure the inside of the crown is completely dry.
- Trim as usual.
Dyeing Feathers
You can also dye feathers using food dye.
You’ll need a pan long enough for the feathers to lie flat, such as a baking pan or fish kettle.
- Wash the feather in warm water with liquid soap (or mild shampoo), swishing it gently. Hold the blunt end of the quill and pull it through your fingers to squeeze out the soap. Rinse in clean water and repeat until all the soap is gone.
- Soak the feather overnight in water with vinegar.
- Add enough water and dye (2ml may be enough for one feather) and move the feathers gently until dyed, checking the temperature as described above.
- Remove the feather and rinse well in cool water.
- Hang the feather with the vanes down to dry, ideally in a breeze (or use a fan or hair dryer on low). To curl the feather, dry it while holding it upright.
Conclusion
Dyeing clothes with food dye is a rewarding and cost-effective way to revitalize fabrics and create unique pieces. By understanding the process, carefully planning your project, and following the steps outlined in this guide, you can achieve beautiful, lasting results on protein fibers like wool and silk. Remember to prioritize safety, experiment with colors, and most importantly, have fun with the process!