Dyeing eggs with food coloring is a simple yet rewarding activity that can bring joy to people of all ages. At FOODS.EDU.VN, we believe in making culinary adventures accessible and enjoyable for everyone, and this guide on how to dye eggs with food coloring is no exception. Discover the secrets to creating vibrant, colorful Easter eggs using simple ingredients and techniques, enhancing your egg decorating expertise. This guide offers everything from basic dying tips to creative coloring ideas, and alternative dying methods.
1. Understanding the Basics of Egg Dyeing with Food Coloring
Dyeing eggs is a tradition with roots stretching back centuries, and using food coloring is a modern, convenient twist. The practice of egg decoration, particularly around springtime festivals, symbolizes new life and rebirth. Transforming plain eggs into colorful masterpieces is not only enjoyable but also a way to connect with cultural heritage. Let’s explore the supplies needed for the dyeing process.
1.1 Gathering Your Supplies
Before you start, gather all the necessary supplies to ensure a smooth and enjoyable egg-dyeing experience. Here’s a checklist:
| Item | Description |
|---|---|
| Eggs | White eggs are ideal for vibrant colors; brown eggs will produce more muted tones. |
| Food Coloring | Gel, liquid, or natural food colorings can be used to achieve desired shades. |
| White Vinegar | Helps the dye adhere to the eggshell by breaking down the protein on the shell’s surface. |
| Hot Water | Essential for dissolving the food coloring and creating the dye bath. |
| Cups or Bowls | Use heat-safe containers, preferably clear, to easily see the dye color. |
| Spoons or Whisks | For gently submerging and removing eggs from the dye. |
| Paper Towels | To dry the dyed eggs and protect your work surface from spills. |
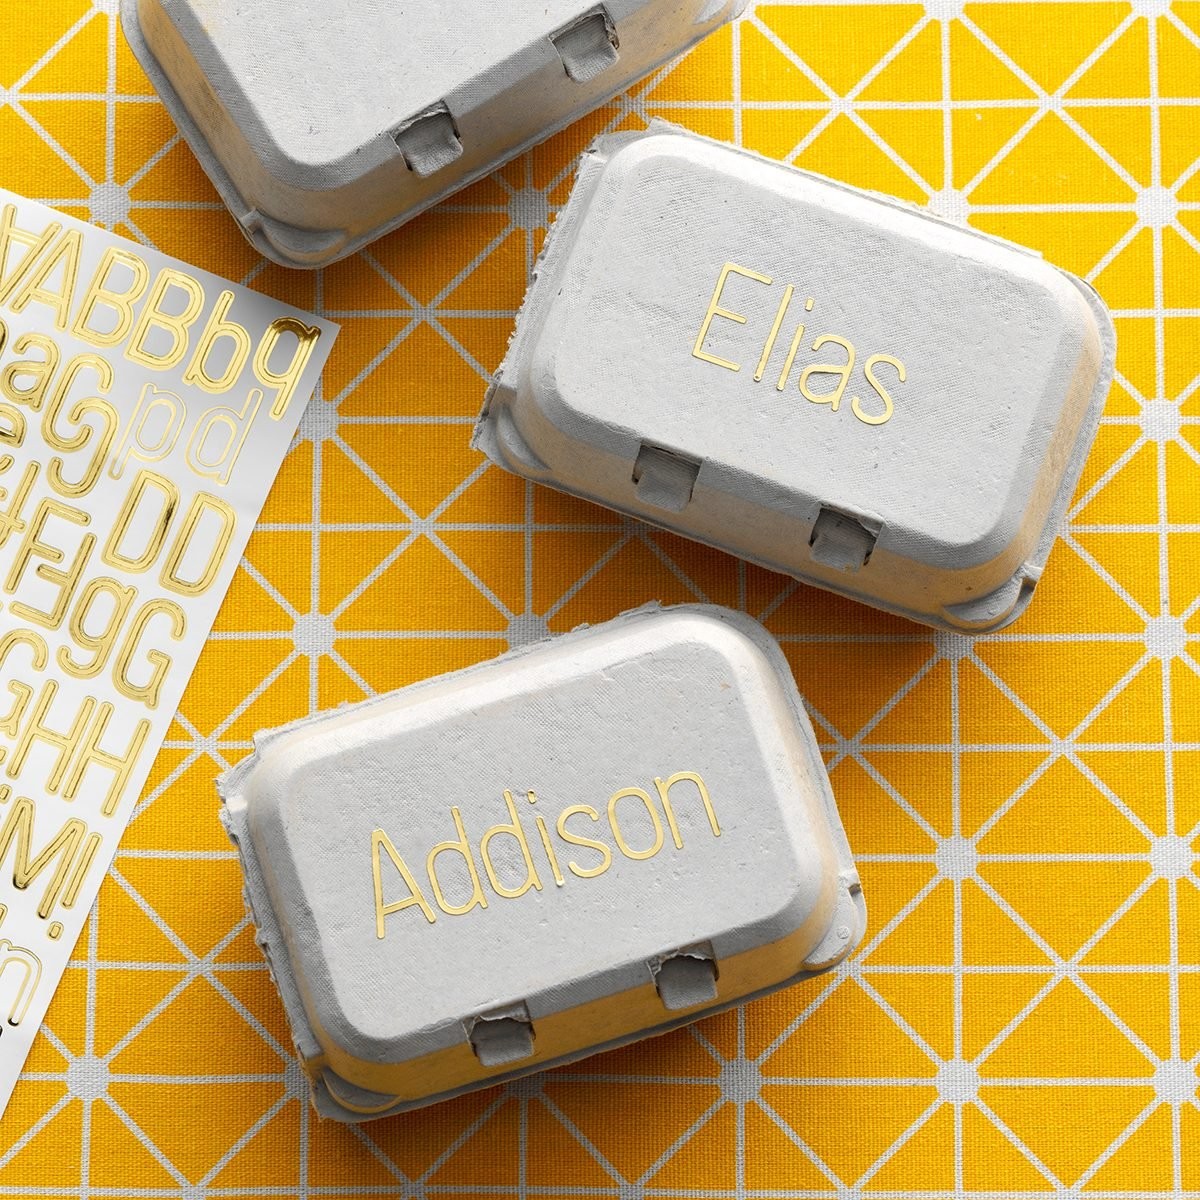
| Egg Carton or Drying Rack | To allow the eggs to dry evenly without smudging the colors. |
| Optional: Gloves | To prevent staining your hands. |


1.2 Preparing the Eggs
The first step is to prepare your eggs. Hard-boiling them is crucial not only for safety but also for preventing messes. According to the USDA, hard-boiled eggs can be stored in the refrigerator for up to one week. To hard-boil your eggs, follow these steps:
- Place the eggs in a saucepan and cover them with cold water. Ensure the water level is about an inch above the eggs.
- Bring the water to a rolling boil over medium-high heat.
- Once boiling, remove the pan from the heat, cover it, and let it sit for 12-15 minutes.
- Drain the hot water and immediately run cold water over the eggs to stop the cooking process. This also makes the eggs easier to peel later.
1.3 Creating the Dye Solution
Creating the perfect dye solution is essential for achieving vibrant and consistent colors. The basic recipe involves combining hot water, vinegar, and food coloring. Here’s a step-by-step guide:
- Gather Your Materials: For each color you want to create, you’ll need ½ cup of boiling water, 1 teaspoon of white vinegar, and liquid food coloring.
- Mix the Solution: In a heat-safe cup or bowl, combine the boiling water and white vinegar. The vinegar helps the dye adhere to the eggshell.
- Add Food Coloring: Add 10-20 drops of liquid food coloring to the water and vinegar mixture. The more drops you add, the more intense the color will be. Start with a smaller amount and add more as needed to achieve your desired shade.
- Stir Well: Use a spoon or whisk to thoroughly mix the solution until the color is evenly distributed.
Experimenting with color mixing can lead to unique and beautiful results. Here are some basic color combinations:
- Red + Yellow: Orange
- Red + Blue: Purple
- Yellow + Blue: Green
Feel free to adjust the ratios to create different shades and hues. For example, adding more red to a red and blue mixture will result in a warmer purple, while adding more blue will create a cooler, more violet color.
1.4 The Dyeing Process
Now, it’s time for the fun part: dyeing the eggs. Here’s how to do it:
- Protect Your Workspace: Cover your work area with newspaper or a plastic tablecloth to protect it from dye spills.
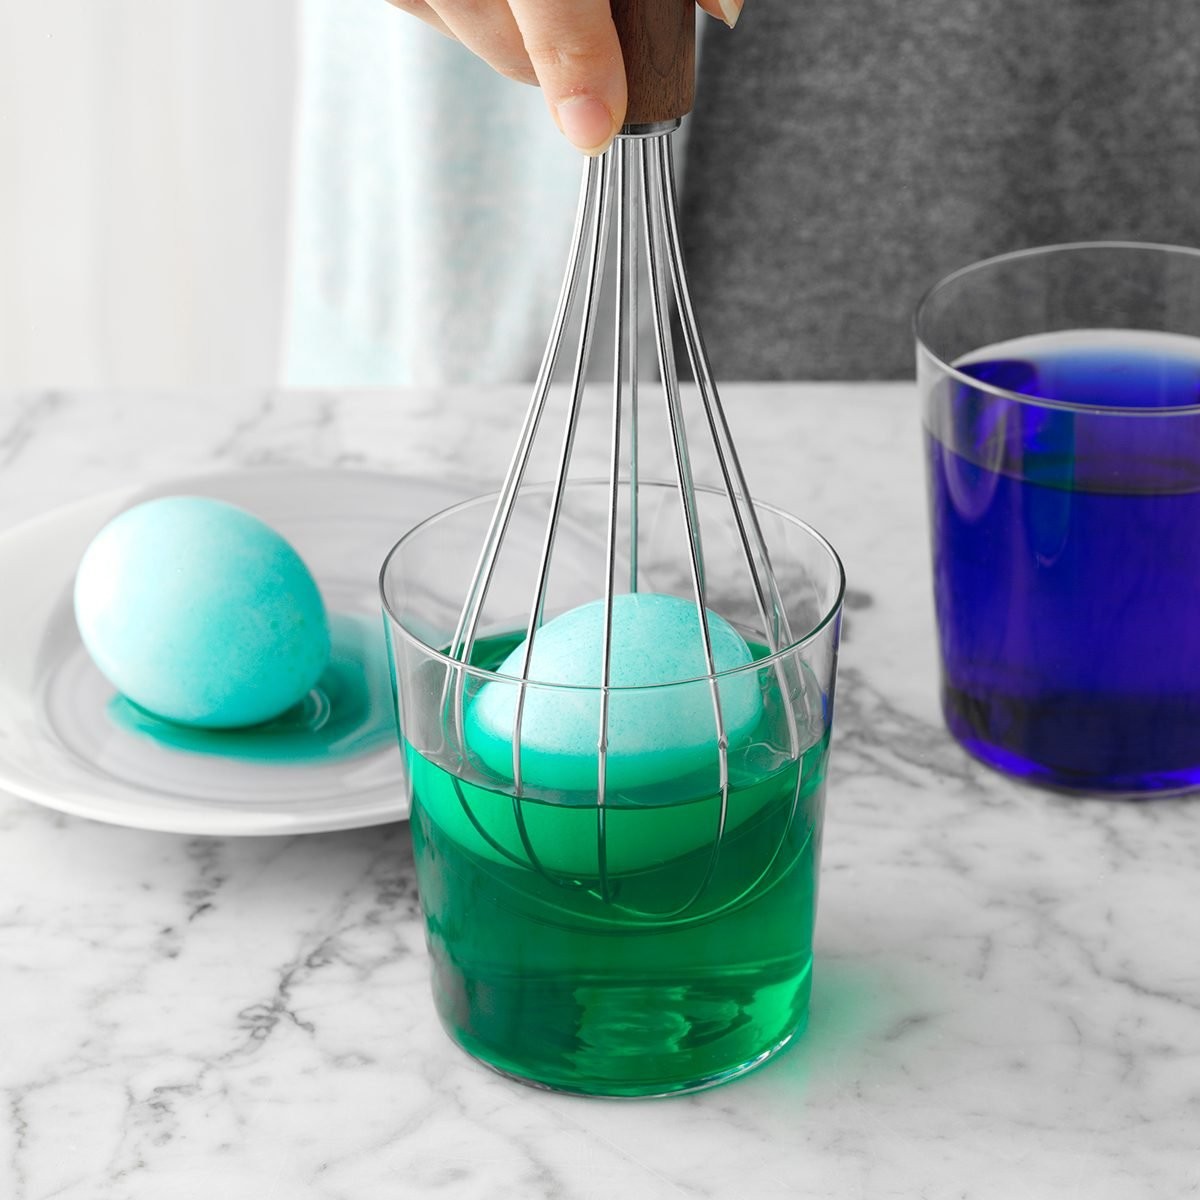
- Submerge the Eggs: Gently lower the hard-boiled eggs into the dye solution using a spoon, whisk, or egg dipper. Make sure the eggs are fully submerged to ensure even coloring.
- Soak the Eggs: Leave the eggs in the dye for 5-10 minutes, or longer for more vibrant colors. You can check the color intensity periodically by lifting an egg out of the dye with a spoon.
- Remove and Dry: Once the eggs have reached the desired color, carefully remove them from the dye and place them on a paper towel or drying rack. Allow the eggs to dry completely before handling them to prevent smudging the colors.
- Cooling the Eggs: After dyeing, let the eggs cool completely before storing them in the refrigerator. This prevents condensation, which can cause the dye to run.
1.5 Drying and Storing the Eggs
Proper drying and storage are crucial for preserving your beautifully dyed eggs. Here are some tips to ensure they stay vibrant and safe to eat:
- Drying the Eggs: After removing the eggs from the dye, place them on a wire rack or paper towel-lined surface to dry. Ensure the eggs are not touching each other to prevent smudging.
- Air Drying: Allow the eggs to air dry completely. This may take several hours, depending on the humidity. You can speed up the process by using a fan to circulate air around the eggs.
- Storing the Eggs: Once the eggs are completely dry, store them in the refrigerator in an egg carton or airtight container. Hard-boiled eggs can be stored in the refrigerator for up to one week, according to the USDA.
- Handling Precautions: When handling the dyed eggs, wash your hands thoroughly to prevent transferring dye to other surfaces or foods.
- Avoiding Direct Sunlight: Store the dyed eggs away from direct sunlight to prevent the colors from fading.
2. Creative Egg Dyeing Techniques with Food Coloring
Once you’ve mastered the basics, you can explore various creative techniques to elevate your egg-dyeing game. Experiment with different methods and designs to create unique and personalized Easter eggs.
2.1 Marbling Effect
Creating a marbling effect on your eggs adds a touch of elegance and uniqueness. This technique involves using oil to create swirling patterns on the eggshell. Here’s how to achieve the marbling effect:
- Prepare the Dye: Follow the basic dye recipe, mixing hot water, vinegar, and food coloring in separate cups.
- Add Oil: In a separate bowl, add a few drops of cooking oil (such as vegetable or olive oil) to a small amount of water.
- Create Swirls: Gently swirl the oil and water mixture with a toothpick or fork to create marbled patterns.
- Dip the Eggs: Dip the hard-boiled eggs into the dye solution for a few seconds, then immediately dip them into the oil and water mixture. The oil will resist the dye, creating a marbled effect on the eggshell.
- Dry the Eggs: Remove the eggs from the oil and water mixture and place them on a paper towel-lined surface to dry.
2.2 Ombre Eggs
Ombre eggs feature a gradient of color, transitioning from light to dark. This technique creates a visually stunning effect that is sure to impress. Here’s how to make ombre eggs:
- Prepare the Dye: Follow the basic dye recipe, mixing hot water, vinegar, and food coloring in a cup.
- Dip Gradually: Dip the hard-boiled egg into the dye solution for a short period (e.g., 1 minute) to achieve a light shade.
- Increase Immersion Time: Gradually increase the immersion time with each dip to create darker shades. For example, dip the egg again for 2 minutes, then 3 minutes, and so on.
- Dry the Eggs: Remove the egg from the dye and place it on a paper towel-lined surface to dry.
2.3 Using Rubber Bands or Tape for Patterns
Creating patterns with rubber bands or tape is a simple yet effective way to add designs to your Easter eggs. This technique involves applying rubber bands or tape to the eggshell before dyeing, creating masked areas that remain undyed. Here’s how to use rubber bands or tape for patterns:
- Apply Rubber Bands or Tape: Wrap rubber bands or tape around the hard-boiled eggs in various patterns, such as stripes, zigzags, or geometric shapes.
- Dye the Eggs: Dip the eggs into the dye solution and leave them for the desired amount of time.
- Remove Rubber Bands or Tape: Once the eggs have reached the desired color, remove the rubber bands or tape. The areas covered by the rubber bands or tape will remain undyed, creating a patterned effect.
- Dry the Eggs: Place the eggs on a paper towel-lined surface to dry completely.
2.4 Splatter Paint Eggs
Splatter paint eggs are fun and whimsical, perfect for adding a playful touch to your Easter decorations. This technique involves splattering different colors of dye onto the eggshell to create a vibrant and abstract design. Here’s how to make splatter paint eggs:
- Prepare the Dye: Follow the basic dye recipe, mixing hot water, vinegar, and food coloring in separate cups.
- Splatter the Dye: Dip a paintbrush or toothbrush into the dye solution and splatter it onto the hard-boiled eggs. Use different colors to create a vibrant and dynamic design.
- Dry the Eggs: Place the eggs on a paper towel-lined surface to dry completely.
2.5 Natural Dyes
For a more natural approach, you can use ingredients like turmeric, beets, or red cabbage to dye your eggs. Natural dyes offer a unique palette of colors and are a great alternative to artificial food coloring. Here are some examples:
- Turmeric: Produces a vibrant yellow color. Boil eggs with 2 tablespoons of turmeric powder for 30 minutes.
- Beets: Creates a beautiful pink or red hue. Boil eggs in beet juice for 30 minutes.
- Red Cabbage: Results in a blue or purple color, depending on the pH level. Boil eggs in red cabbage water for 30 minutes.
- Onion Skins: Yields a range of orange and brown tones. Boil eggs with onion skins for 30 minutes.
- Spinach: Produces a pale green color. Boil eggs in spinach water for 30 minutes.
3. Advanced Tips for Egg Dyeing with Food Coloring
To take your egg-dyeing skills to the next level, consider these advanced tips that will help you achieve professional-looking results.
3.1 Achieving Deeper, More Vibrant Colors
To achieve deeper, more vibrant colors, try these tips:
- Use Gel Food Coloring: Gel food coloring is more concentrated than liquid food coloring, resulting in richer and more intense colors.
- Add More Food Coloring: Increase the amount of food coloring in the dye solution to achieve a more saturated color.
- Soak Longer: Leave the eggs in the dye solution for a longer period to allow the color to fully absorb into the eggshell.
- Use White Eggs: White eggs provide a blank canvas for the dye, allowing the colors to appear brighter and more vibrant.
- Pre-Soak in Vinegar: Before dyeing, soak the eggs in a solution of water and vinegar for about 30 minutes. This helps to open the pores of the eggshell, allowing the dye to penetrate more easily.
3.2 Preventing Cracks
Cracking eggs during the dyeing process can be frustrating. Here are some tips to prevent cracks:
- Use Room Temperature Eggs: Allow the eggs to come to room temperature before boiling them. This reduces the thermal shock that can cause cracks.
- Add Vinegar to the Boiling Water: Adding a tablespoon of vinegar to the boiling water can help strengthen the eggshells and prevent them from cracking.
- Avoid Overcrowding: Do not overcrowd the saucepan when boiling the eggs. Give the eggs enough space to move around without bumping into each other.
- Use a Gentle Simmer: Instead of a rolling boil, use a gentle simmer to cook the eggs. This reduces the risk of the eggs cracking due to excessive movement.
3.3 Creating Two-Toned Eggs
Creating two-toned eggs involves dyeing different parts of the egg in different colors, resulting in a visually appealing contrast. Here’s how to create two-toned eggs:
- Dye One Half: Dip one half of the hard-boiled egg into the dye solution and leave it for the desired amount of time.
- Dry the Dyed Half: Remove the egg from the dye and allow the dyed half to dry completely.
- Dye the Other Half: Dip the other half of the egg into a different color of dye and leave it for the desired amount of time.
- Dry the Second Half: Remove the egg from the dye and allow the second half to dry completely.
3.4 Using Stencils
Using stencils is a precise way to create intricate designs on your Easter eggs. This technique involves applying a stencil to the eggshell before dyeing, creating masked areas that remain undyed. Here’s how to use stencils:
- Apply the Stencil: Attach the stencil to the hard-boiled egg using tape or adhesive spray.
- Dye the Eggs: Dip the eggs into the dye solution and leave them for the desired amount of time.
- Remove the Stencil: Once the eggs have reached the desired color, remove the stencil. The area covered by the stencil will remain undyed, creating a patterned effect.
- Dry the Eggs: Place the eggs on a paper towel-lined surface to dry completely.
3.5 Food-Safe Markers
Food-safe markers can be used to draw intricate designs or write messages on your dyed eggs. These markers are made with edible ink and are safe to use on food items. Here’s how to use food-safe markers:
- Dye the Eggs: Dye the hard-boiled eggs using your preferred method.
- Dry the Eggs: Allow the eggs to dry completely before drawing on them with the food-safe markers.
- Draw Designs: Use the food-safe markers to draw designs, write messages, or add intricate details to the dyed eggs.
4. Safety and Storage Considerations
Ensuring the safety and proper storage of your dyed eggs is crucial, especially if you plan to eat them. Follow these guidelines to avoid any potential health risks.
4.1 Is It Safe to Eat Dyed Eggs?
Yes, it is generally safe to eat dyed eggs as long as you follow these precautions:
- Use Food-Safe Dyes: Only use food-safe dyes and markers that are specifically designed for use on food items.
- Avoid Cracked Eggs: Do not dye or eat eggs that have cracks in the shell, as bacteria can enter the egg and cause illness.
- Refrigerate Promptly: Refrigerate the dyed eggs within two hours of dyeing to prevent bacterial growth.
- Handle with Clean Hands: Wash your hands thoroughly before handling the dyed eggs to prevent contamination.
- Discard After One Week: Hard-boiled eggs, including dyed eggs, should be discarded after one week, according to the USDA.
4.2 Storing Dyed Eggs
Proper storage is essential for maintaining the quality and safety of your dyed eggs. Follow these tips:
- Refrigerate in Egg Carton: Store the dyed eggs in the refrigerator in an egg carton or airtight container.
- Avoid Temperature Fluctuations: Keep the eggs in a consistent temperature environment to prevent condensation, which can cause the dye to run.
- Do Not Freeze: Do not freeze hard-boiled eggs, as freezing can alter the texture and make them unappetizing.
- Use Within One Week: Consume the dyed eggs within one week to ensure optimal freshness and safety.
- Label and Date: Label the egg carton or container with the date of dyeing to keep track of how long the eggs have been stored.
4.3 Handling Precautions
Follow these handling precautions to prevent contamination and ensure the safety of your dyed eggs:
- Wash Hands: Wash your hands thoroughly with soap and water before and after handling the dyed eggs.
- Use Clean Utensils: Use clean utensils when handling the dyed eggs to prevent cross-contamination.
- Avoid Cross-Contamination: Keep the dyed eggs separate from raw foods to prevent cross-contamination.
- Clean Work Surfaces: Clean and sanitize your work surfaces before and after dyeing the eggs.
- Avoid Prolonged Exposure: Avoid leaving the dyed eggs at room temperature for more than two hours, as this can promote bacterial growth.
5. Troubleshooting Common Issues
Even with careful preparation, you may encounter some common issues while dyeing eggs. Here are some troubleshooting tips to help you overcome these challenges.
5.1 Uneven Color
If you notice that the color on your dyed eggs is uneven, try these solutions:
- Ensure Full Submersion: Make sure the eggs are fully submerged in the dye solution to ensure even coloring.
- Rotate Eggs: Rotate the eggs periodically while they are in the dye solution to ensure all sides are evenly exposed.
- Use a Deeper Container: Use a deeper container to ensure the eggs are fully submerged in the dye solution.
- Add More Dye: Add more food coloring to the dye solution to increase the color intensity.
5.2 Fading Colors
Fading colors can be disappointing, but here are some tips to prevent it:
- Use Vinegar: Vinegar helps the dye adhere to the eggshell. Make sure to add the recommended amount of vinegar to the dye solution.
- Avoid Direct Sunlight: Store the dyed eggs away from direct sunlight to prevent the colors from fading.
- Use Gel Food Coloring: Gel food coloring is more resistant to fading than liquid food coloring.
- Apply a Sealant: After dyeing and drying the eggs, apply a thin layer of food-safe sealant to protect the colors from fading.
5.3 Smudging
Smudging can occur if the dyed eggs are not properly dried before handling. Here’s how to prevent smudging:
- Allow Complete Drying: Allow the dyed eggs to dry completely before handling them.
- Use a Drying Rack: Use a drying rack to allow air to circulate around the eggs, promoting faster and more even drying.
- Avoid Overcrowding: Avoid overcrowding the drying surface, as this can prevent air from circulating and cause smudging.
- Handle with Care: Handle the dyed eggs with care to avoid smudging the colors.
5.4 Cracked Eggs
Cracked eggs can ruin the dyeing process. Here’s what to do if an egg cracks:
- Discard Cracked Eggs: Discard any eggs that crack during the boiling or dyeing process, as bacteria can enter the egg and cause illness.
- Clean Up Spills: Clean up any spills immediately to prevent the dye from staining surfaces.
- Use a Backup Egg: Have backup eggs on hand in case some of them crack.
- Adjust Boiling Technique: Adjust your boiling technique to prevent further cracking, such as using room temperature eggs and a gentle simmer.
6. Delicious Ways to Use Your Dyed Eggs
After you’ve dyed your eggs, don’t let them go to waste. There are many delicious ways to use hard-boiled eggs in your favorite recipes.
6.1 Deviled Eggs
Deviled eggs are a classic appetizer that is perfect for Easter gatherings. Here’s a simple recipe:
- Peel the Eggs: Peel the hard-boiled eggs and slice them in half lengthwise.
- Remove Yolks: Remove the yolks and place them in a bowl.
- Mash Yolks: Mash the yolks with mayonnaise, mustard, vinegar, salt, and pepper.
- Fill Egg Whites: Fill the egg whites with the yolk mixture.
- Garnish: Garnish with paprika or fresh herbs.
6.2 Egg Salad Sandwiches
Egg salad sandwiches are a quick and easy lunch option that is perfect for using up dyed eggs. Here’s how to make them:
- Chop the Eggs: Chop the hard-boiled eggs into small pieces.
- Mix Ingredients: Mix the chopped eggs with mayonnaise, celery, onion, salt, and pepper.
- Spread on Bread: Spread the egg salad on bread and enjoy.
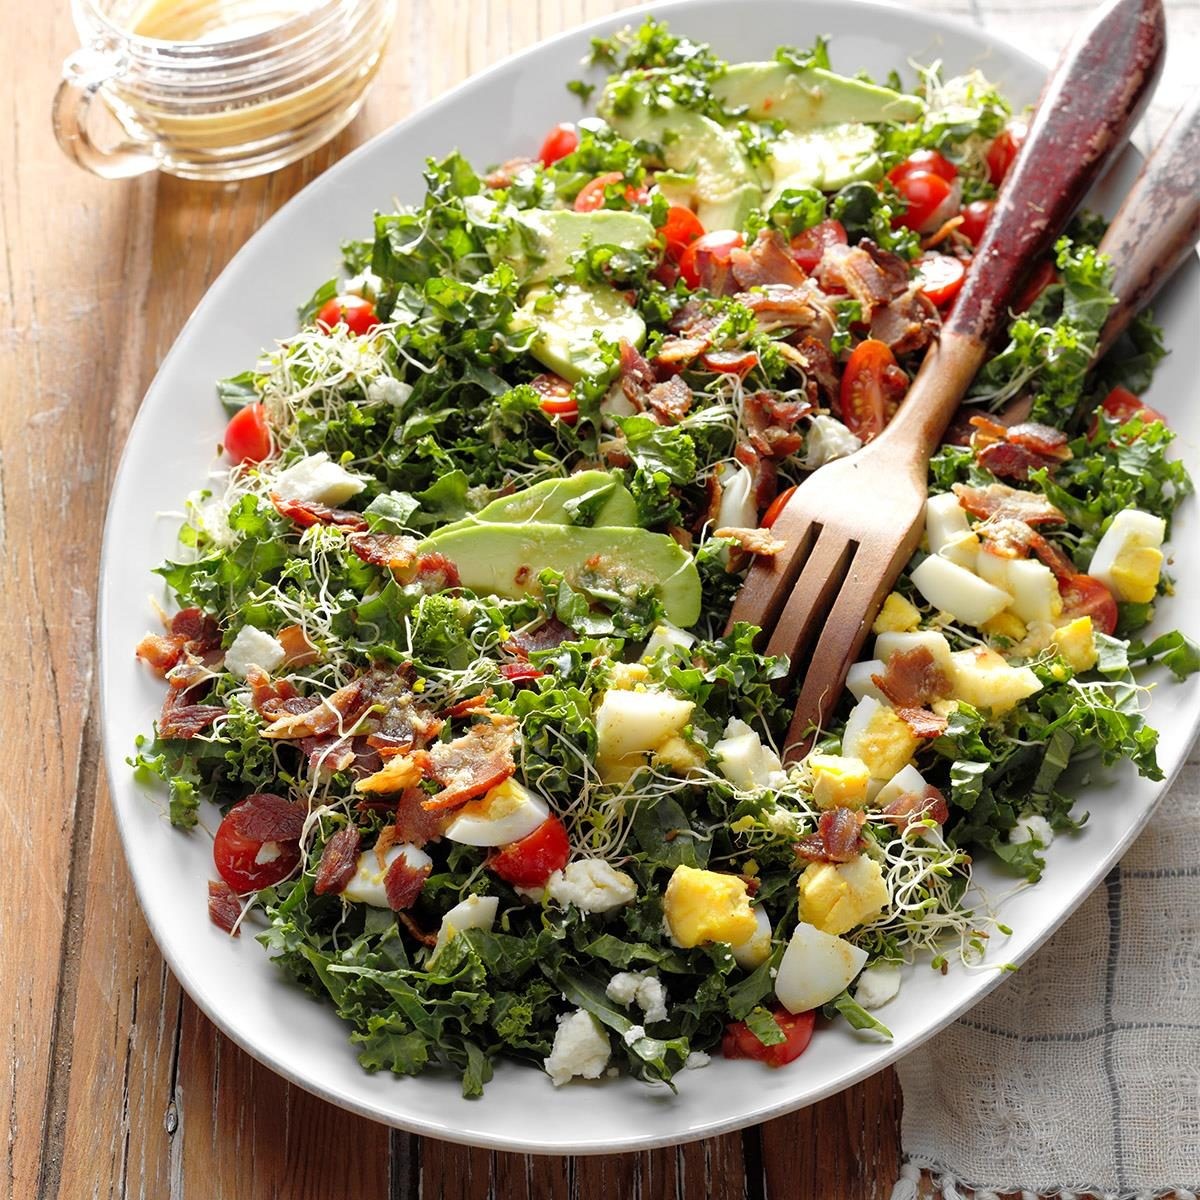
6.3 Cobb Salad
Cobb salad is a hearty and nutritious salad that is perfect for a light meal. Here’s how to make it:
- Chop Ingredients: Chop lettuce, tomatoes, cucumber, avocado, bacon, chicken, and hard-boiled eggs.
- Arrange Ingredients: Arrange the ingredients on a plate or in a bowl.
- Add Dressing: Add your favorite salad dressing and enjoy.
6.4 Nicoise Salad
Nicoise salad is a classic French salad that is perfect for a sophisticated lunch or dinner. Here’s how to make it:
- Arrange Ingredients: Arrange lettuce, tomatoes, green beans, potatoes, olives, tuna, and hard-boiled eggs on a plate.
- Add Dressing: Drizzle with olive oil and vinegar.
- Season: Season with salt and pepper.
6.5 Scotch Eggs
Scotch eggs are a delicious and indulgent snack that is perfect for a special occasion. Here’s how to make them:
- Wrap Eggs in Sausage: Wrap hard-boiled eggs in sausage meat.
- Coat in Breadcrumbs: Coat the sausage-wrapped eggs in breadcrumbs.
- Deep Fry or Bake: Deep fry or bake the eggs until the sausage is cooked through.
- Serve: Serve hot or cold.
7. Beyond Easter: Year-Round Egg Dyeing Fun
While dyeing eggs is often associated with Easter, the fun doesn’t have to stop there. Egg dyeing can be a creative and enjoyable activity year-round.
7.1 Themed Egg Decorating
Consider dyeing eggs for different holidays or events. For Halloween, you can dye eggs in spooky colors like black, orange, and purple. For Christmas, use festive colors like red, green, and gold. You can also dye eggs to match the colors of your favorite sports team or to celebrate a special occasion like a birthday or anniversary.
7.2 Educational Activities
Egg dyeing can be a fun and educational activity for children. You can teach them about colors, patterns, and art techniques while they create their own unique designs. It’s also a great way to encourage creativity and imagination.
7.3 Decorative Purposes
Dyed eggs can be used for decorative purposes around the house. You can display them in a bowl or basket as a centerpiece, or use them to create a colorful garland or wreath. You can also use them to decorate your garden or outdoor space.
7.4 Parties and Celebrations
Dyed eggs can be a fun and festive addition to parties and celebrations. You can use them as party favors, table decorations, or as part of a scavenger hunt. You can also incorporate them into games and activities, such as egg races or egg tosses.
7.5 Creative Gift Giving
Dyed eggs can be a creative and personalized gift for friends and family. You can dye eggs in their favorite colors or decorate them with designs that reflect their interests. You can also create a custom egg dyeing kit for them to enjoy.
8. FAQ About Dyeing Eggs with Food Coloring
Here are some frequently asked questions about dyeing eggs with food coloring:
- Can I use expired food coloring? It’s best to use food coloring that is not expired to ensure vibrant and consistent colors.
- How long do dyed eggs last? Dyed eggs can last up to one week in the refrigerator.
- Can I dye brown eggs? Yes, you can dye brown eggs, but the colors will be more muted.
- What if I don’t have vinegar? Vinegar helps the dye adhere to the eggshell. If you don’t have vinegar, you can try using lemon juice as a substitute.
- Can I use natural food coloring? Yes, you can use natural food coloring for a more natural approach.
- How do I prevent the dye from staining my hands? Wear gloves to prevent the dye from staining your hands.
- Can I eat the dyed eggs? Yes, you can eat the dyed eggs as long as you use food-safe dyes and follow proper safety precautions.
- How do I get a pastel color? To achieve a pastel color, use less food coloring in the dye solution.
- How do I make the colors more vibrant? To make the colors more vibrant, use gel food coloring and soak the eggs for a longer period.
- What can I do with leftover dyed eggs? You can use leftover dyed eggs to make deviled eggs, egg salad sandwiches, or Cobb salad.
9. The Expertise of FOODS.EDU.VN in Culinary Arts
At FOODS.EDU.VN, we are passionate about providing you with the knowledge and skills you need to excel in the culinary arts. Our website offers a wide range of resources, including recipes, tutorials, and articles on various food-related topics. Whether you’re a beginner or an experienced cook, you’ll find something to inspire and challenge you.
9.1 Explore Our Recipe Database
Our recipe database is filled with delicious and easy-to-follow recipes for all skill levels. Whether you’re looking for a quick weeknight dinner or a show-stopping dessert, we’ve got you covered.
9.2 Learn New Techniques
Our tutorials cover a wide range of culinary techniques, from basic knife skills to advanced pastry techniques. Learn how to master the art of cooking with our step-by-step guides.
9.3 Stay Up-to-Date with Culinary Trends
Our articles keep you informed about the latest culinary trends, ingredients, and techniques. Stay ahead of the curve and impress your friends and family with your culinary knowledge.
9.4 Connect with Our Community
Join our community of food lovers and share your own recipes, tips, and experiences. Connect with like-minded individuals and learn from each other.
9.5 Expert Guidance
Our team of experienced chefs and food experts are here to provide you with guidance and support. Whether you have a question about a recipe or need help with a cooking technique, we’re here to help.
10. Call to Action
Ready to take your egg dyeing skills to the next level? Visit FOODS.EDU.VN today to discover more creative techniques, delicious recipes, and expert tips. Don’t miss out on the opportunity to elevate your culinary skills and impress your friends and family. For more information, visit us at 1946 Campus Dr, Hyde Park, NY 12538, United States, or contact us via Whatsapp at +1 845-452-9600. Visit foods.edu.vn today and embark on a culinary adventure.