Dyeing eggs for Easter with food coloring is a delightful activity, and at FOODS.EDU.VN, we’re excited to show you how to create vibrant, colorful Easter eggs using simple household ingredients. This Easter egg dyeing guide will unlock a spectrum of colors, from pastel shades to deep jewel tones, using food coloring, vinegar, and water. Discover Easter egg decoration ideas, explore natural dyes for Easter eggs, and learn creative egg-dyeing techniques all in one place.
1. Essential Supplies for Easter Egg Dyeing
To embark on your Easter egg dyeing adventure, gather the following essential supplies. Having everything on hand before you start ensures a smooth and enjoyable process, allowing you to focus on the fun of creating beautiful, colorful eggs.
| Supply | Description |
|---|---|
| Eggs | White or brown eggs, either raw or hard-boiled, depending on your preference. Hard-boiling is recommended, especially when dyeing with children, for safety and ease. |
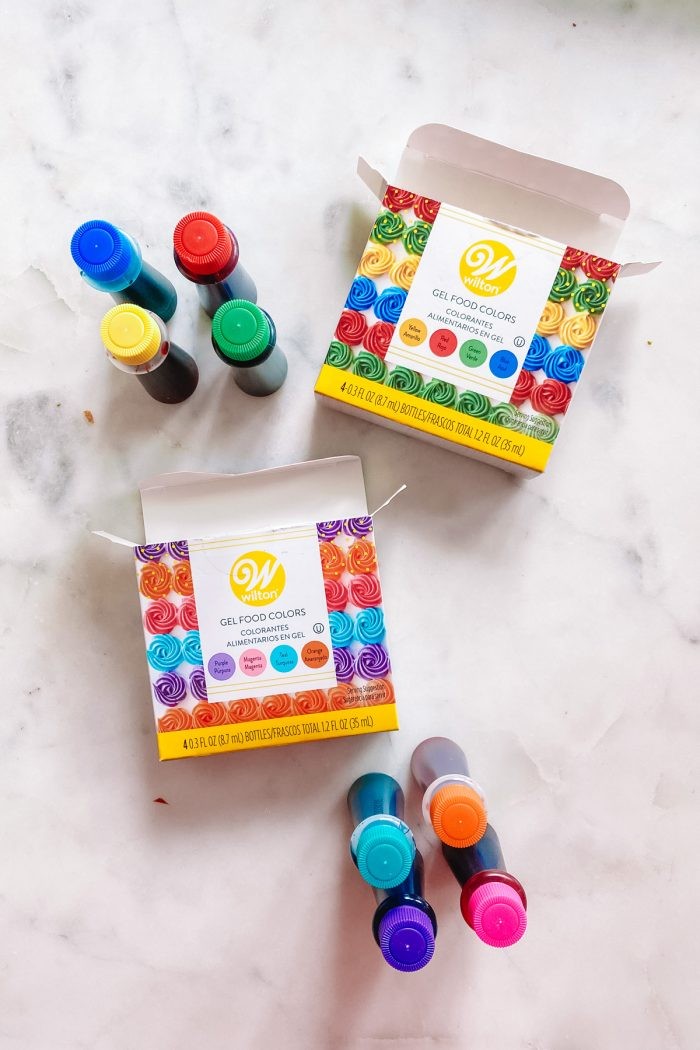
| Food Coloring | Liquid or gel food coloring in a variety of colors. Wilton food coloring gels are highly recommended for their vibrancy and ease of use. |
| White Vinegar | Essential for helping the dye adhere to the eggshells. You’ll need 1 teaspoon per dye color. |
| Hot Water | To dissolve the food coloring and vinegar mixture. About 1/2 cup per dye color. |
| Glasses or Bowls | One for each dye color you plan to create. Clear glasses allow you to see the color developing. |
| Slotted Spoon/Whisk | For gently placing eggs into the dye and removing them without damaging the shells. |
| Drying Rack | A cooling rack or an upside-down egg carton can be used to dry the eggs evenly. |


2. Choosing the Right Food Coloring for Easter Eggs
Selecting the right type of food coloring is crucial for achieving vibrant and consistent results when dyeing Easter eggs. Not all food colorings are created equal, and understanding the differences can significantly impact the outcome of your egg dyeing project. Let’s explore the best options available:
2.1 Liquid Food Coloring:
- Pros: Widely available in most grocery stores and comes in the standard colors of blue, red, yellow, and green.
- Cons: The color range is limited to standard colors.
- Tips: Perfect for creating classic Easter egg colors and can be mixed to create a variety of shades.
2.2 Gel Food Coloring (Wilton):
- Pros: Offers a much wider range of colors, including vibrant neon shades. The colors are more concentrated, resulting in richer, deeper hues on your Easter eggs.
- Cons: May require online purchase if not available locally.
- Tips: Recommended for creating a diverse palette of colors. Gel food coloring dissolves well in the water and vinegar mixture, ensuring an even and consistent dye.
2.3 Food Coloring to Avoid:
- Small Tube Gel Food Coloring: Avoid gel food colorings that come in small tubes as they may not dissolve properly in the water and vinegar mixture. This can result in streaky or uneven coloring on your Easter eggs.
2.4 Natural Food Coloring
For a chemical-free approach, natural food colorings can also be used to create softer hues.
- Beet Juice: Provides a pink to red color.
- Spinach Juice: Offers a green tint.
- Turmeric: Creates a yellow shade.
- Red Cabbage: Results in blue eggs.
- Onion Skins: Dyes eggs a golden-brown color.
These natural dyes are a gentle alternative, perfect for those seeking organic Easter egg dyes. For a deeper understanding of these alternatives, FOODS.EDU.VN offers a comprehensive guide to organic Easter egg dyes and their applications.
3. Preparing Eggs for Dyeing: Hard Boiling Techniques
Hard boiling eggs correctly is crucial for successful Easter egg dyeing. Proper preparation prevents cracking and ensures the eggs are safe to handle and eat after dyeing. Follow these steps for perfect hard-boiled eggs every time:
- Place Eggs in a Saucepan: Gently place a dozen eggs at the bottom of a large saucepan in a single layer. Avoid overcrowding to prevent cracking.
- Add Water: Cover the eggs with cool water, ensuring the water level is about an inch above the eggs.
- Bring to a Boil: Place the saucepan over medium heat and bring the water to a rolling boil.
- Cover and Remove from Heat: Once boiling, cover the saucepan with a lid and remove it from the heat.
- Let Sit: Allow the eggs to sit in the hot water for 10-12 minutes. This ensures the yolks are fully cooked.
- Cool Down: After 10-12 minutes, carefully drain the hot water and rinse the eggs under cool running water. Alternatively, you can soak the eggs in a bowl of ice water to quickly cool them down and stop the cooking process.
3.1 Vinegar Rinse
Dipping the eggs in a diluted vinegar “rinse” before dyeing can help the dye adhere better and more evenly. Simply mix 1 tablespoon of white vinegar with 1 cup of water and dip each egg in the solution before dyeing.
3.2 Tips for Dyeing
- Eggs are natural, and not all of them will dye perfectly regardless. Some may have variations in color, while others dye smoothly. Embrace the unique look of each egg for a charming, handcrafted result.
4. Step-by-Step Guide: How to Dye Easter Eggs with Food Coloring
Follow these simple steps to create beautifully dyed Easter eggs with food coloring:
- Prepare the Dye Solution: In a cup or bowl, combine 1/2 cup of hot water with 1 teaspoon of white vinegar.
- Add Food Coloring: Add the desired amount of food coloring to the water and vinegar mixture. Refer to our color guide below for specific formulas and color combinations.
- Stir Well: Thoroughly stir the mixture until the food coloring is completely dissolved and evenly distributed.
- Dye the Eggs: Gently place an egg into the dye solution using a slotted spoon or whisk.
- Soak: Leave the egg in the dye for the amount of time specified in the color formula. This can range from a few seconds for pastel shades to several minutes for deeper, more vibrant colors.
- Remove and Dry: Remove the egg from the dye solution and place it on a drying rack or upside-down egg carton to dry completely.
4.1 Tips for Success
- Use one dye bath to dye a few eggs, and then add additional food coloring to create new colors without starting from scratch.
- Vary the soaking times and color combinations to create even more of a color spectrum.
5. Color Formulas: Over 40 Vibrant Shades
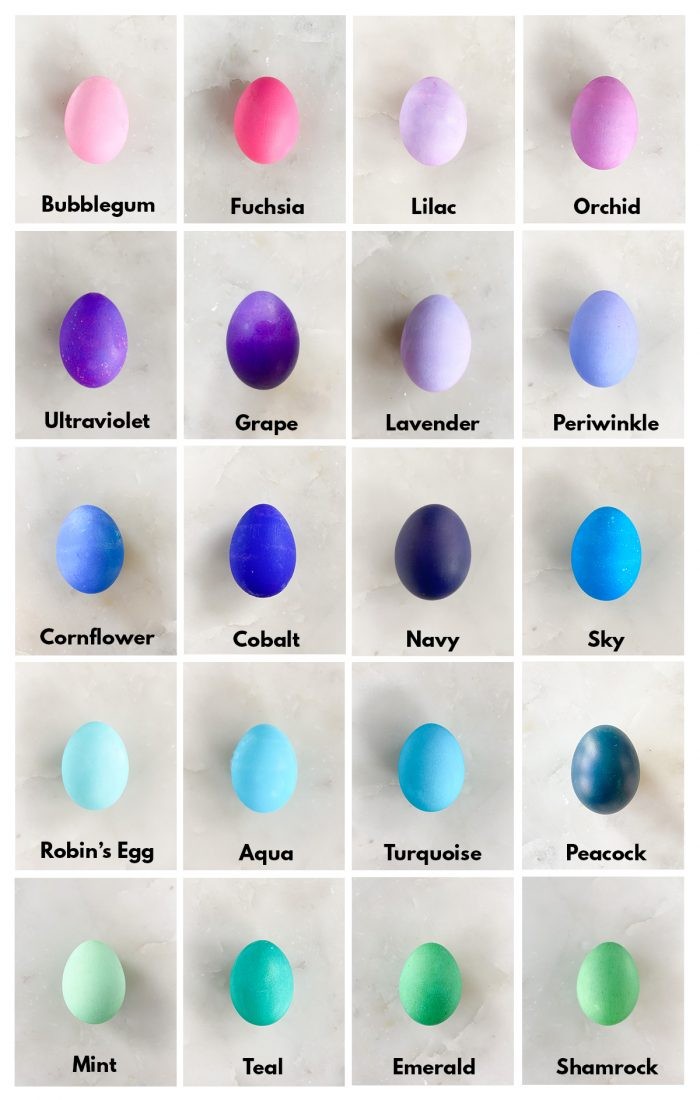
Unlock a rainbow of colors with these easy-to-follow formulas. Experiment with different combinations and soaking times to achieve your desired shades. Whether you’re aiming for soft pastels or bold jewel tones, these formulas will guide you in creating stunning Easter eggs.
5.1 Pinks & Purples Easter Eggs
| Color | Formula | Time |
|---|---|---|
| Bubblegum | 5 drops pink | 30 seconds |
| Fuchsia | 5 drops pink | 3 minutes |
| Lilac | 5 drops pink + 5 drops purple | 30 seconds |
| Orchid | 5 drops pink + 5 drops purple | 3 minutes |
| Ultraviolet | 5 drops purple | 3 minutes |
| Grape | 10 drops purple | 5 minutes |
| Lavender | 5 drops purple | 30 seconds |
5.2 Blue Easter Eggs
| Color | Formula | Time |
|---|---|---|
| Periwinkle | 5 drops blue + 5 drops purple | 30 seconds |
| Cornflower | 5 drops blue + 5 drops purple | 3 minutes |
| Cobalt | 5 drops blue + 5 drops purple | 5 minutes |
| Navy | 5 drops blue + 5 drops purple (Brown Egg) | 5 minutes |
| Sky | 5 drops blue | 3 minutes |
| Robin’s Egg | 5 drops teal | 30 seconds |
| Aqua | 5 drops blue | 30 seconds |
| Turquoise | 5 drops teal | 3 minutes |
| Peacock | 5 drops blue | 5 minutes (Brown Egg) |
5.3 Green Easter Eggs
| Color | Formula | Time |
|---|---|---|
| Mint | 5 drops teal + 3 drops green | 30 seconds |
| Teal | 5 drops teal + 3 drops green | 3 minutes |
| Emerald | 10 drops teal + 10 drops green | 3 minutes |
| Shamrock | 5 drops teal + 10 drops green | 3 minutes |
5.4 Green & Yellow Easter Egg Dye
| Color | Formula | Time |
|---|---|---|
| Evergreen | 5 drops teal (Brown Egg) | 5 minutes |
| Olive | 10 drops green (Brown Egg) | 5 minutes |
| Chartreuse | 5 drops green | 3 minutes |
| Celery | 5 drops green | 30 seconds |
| Butter | 10 drops yellow + 3 drops green | 30 seconds |
| Sunshine | 10 drops yellow + 3 drops green | 3 minutes |
| Daffodil | 5 drops yellow | 30 seconds |
| Marigold | 5 drops yellow | 3 minutes |
5.5 Orange Easter Egg Dye
| Color | Formula | Time |
|---|---|---|
| Peach | 5 drops orange | 30 seconds |
| Creamsicle | 5 drops orange | 3 minutes |
| Tangerine | 5 drops orange + 5 drops yellow | 3 minutes |
| Mustard | 10 drops yellow + 3 drops green (Brown Egg) | 5 minutes |
| Salmon | 10 drops yellow + 5 drops red | 30 seconds |
| Coral | 10 drops orange + 5 drops red | 3 minutes |
| Rust | 10 drops orange + 5 drops red (Brown Egg) | 5 minutes |
5.6 Red & Pink Easter Egg Dye
| Color | Formula | Time |
|---|---|---|
| Watermelon | 5 drops red | 30 seconds |
| Candy Apple | 10 drops red + 5 drops yellow | 5 minutes |
| Neon | 5 drops red + 5 drops pink | 3 minutes |
| Berry | 5 drops pink (Brown Egg) | 3 minutes |
| Wine | 5 drops pink + 5 drops purple (Brown Egg) | 5 minutes |
6. Dyeing Eggs: Brown vs. White
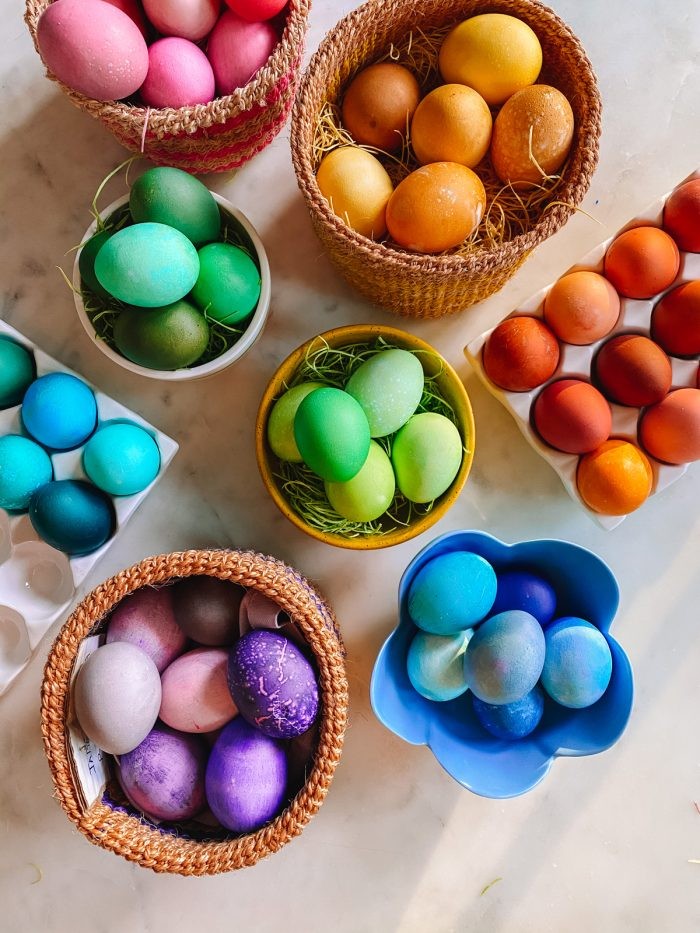
While white eggs provide a blank canvas for bright and vibrant colors, brown eggs offer a unique palette of deeper, jewel-toned shades. Both types of eggs can be dyed successfully, but it’s important to understand how the base color affects the final result.
6.1 Dyeing Brown Eggs
Brown eggs tend to have much more varied hues, meaning the formulas may vary in the results they produce, depending on the shade the egg started. Be sure to frequently check the egg as the dye hue is developing.
6.2 Embracing Imperfection
Remember, eggs are natural, and not all of them will dye perfectly regardless. Some may have variations in color, while others dye smoothly. Embrace the unique look of each egg for a charming, handcrafted result.
7. Tips for Drying Eggs Evenly After Dyeing
Drying Easter eggs evenly can be tricky. If any part of the egg sits in its dye, the color will not dry evenly. Try these ideas for drying eggs to prevent uneven coloring:
7.1 Gently Patting Down with a Rag:
Sacrifice a towel or two to a rainbow of dye. It does remove a bit of the color, but for the most part, the color stays quite vibrant, and it is a quick and efficient way to dry them.
7.2 Cooling Rack:
Set your eggs on a cooling rack. You do run the risk of a grid pattern on one side of your egg.
7.3 Toothpick “Stand”:
Stick a bunch of toothpicks in a piece of styrofoam and place your eggs in between the toothpicks to hold them up while they’re drying.
7.4 Upside Down Egg Carton:
Flip your egg carton upside down and dry your eggs in the spaces in the carton. They may not dry very evenly.
8. Creative Easter Egg Decorating Ideas Beyond Dyeing
While dyeing is a classic method, explore other creative ways to decorate Easter eggs and add a personal touch to your creations. From painting intricate designs to adding glitter and embellishments, the possibilities are endless. Let your imagination run wild and create truly unique Easter eggs that reflect your style and creativity. Here are some ideas to get you started:
- Painting: Use acrylic paints or paint markers to create intricate designs, patterns, or scenes on your Easter eggs.
- Glitter: Add sparkle and shine to your Easter eggs by applying glitter with craft glue.
- Temporary Tattoos: Apply temporary tattoos for unique patterns.
- Sprinkles: Roll eggs in glue and then sprinkles for a festive look.
- Washi Tape: Decorate eggs with colorful washi tape for geometric designs.
- Decoupage: Apply paper cutouts with Mod Podge for a collage effect.
9. Beyond Decoration: Recipes & Display Ideas
Once your eggs are dyed, they’re more than just pretty decorations. Explore delicious recipes using hard-boiled eggs and creative ways to display your colorful creations.
9.1 Creative Ways to Display Your Dyed Eggs
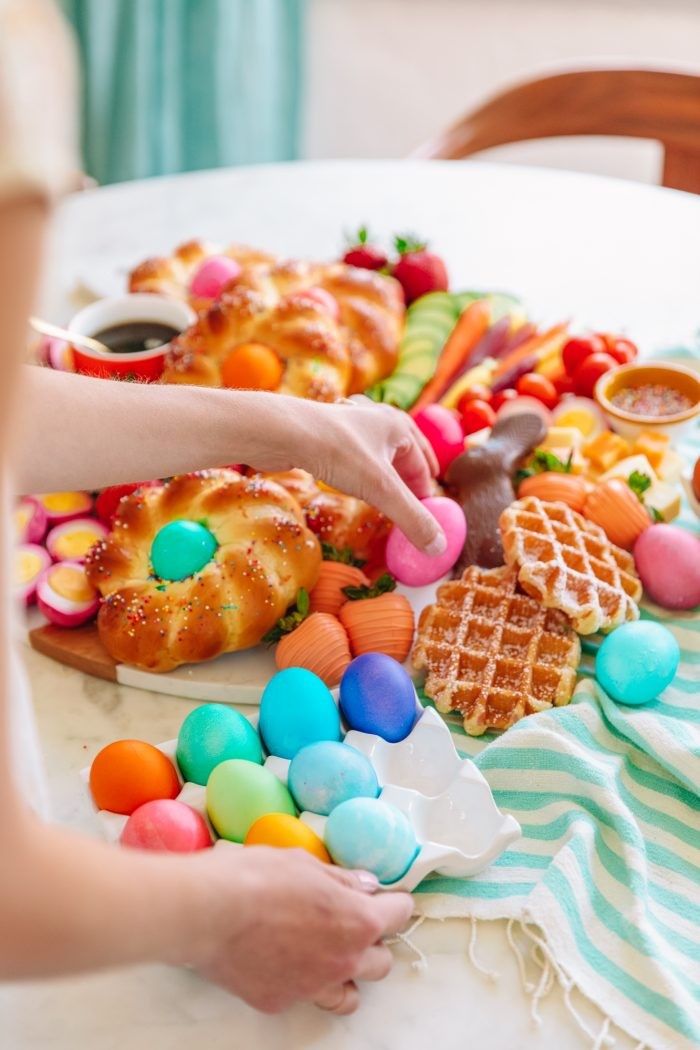
- Easter Brunch Board: Incorporate dyed eggs into an Easter brunch board, complete with Italian Easter Breads.
- Centerpiece: Create an Easter centerpiece by arranging dyed eggs in a decorative bowl or basket.
- Egg Hunt: Hide the dyed eggs for an Easter egg hunt.
- Garland: String the eggs together to create an Easter garland.
- Table Settings: Use the eggs as part of your Easter table settings.
9.2 Recipes Using Hard-Boiled Eggs
| Recipe | Description |
|---|---|
| Classic Deviled Eggs | A simple yet elegant appetizer made with hard-boiled eggs, mayonnaise, mustard, and spices. |
| Egg Salad Sandwich | A comforting and classic sandwich filling made with mashed hard-boiled eggs, mayonnaise, celery, and onion. |
| Cobb Salad | A hearty salad with hard-boiled eggs, avocado, bacon, chicken, and blue cheese. |
| Nicoise Salad | A French salad with hard-boiled eggs, tomatoes, olives, anchovies, and tuna. |
| Scotch Eggs | Hard-boiled eggs wrapped in sausage meat, coated in breadcrumbs, and deep-fried or baked. |
10. Safety Tips for Handling and Consuming Dyed Eggs
Safety is paramount when handling and consuming dyed Easter eggs. Follow these guidelines to ensure a safe and enjoyable experience for everyone:
- Use Food-Safe Dyes: Always use food-safe dyes specifically designed for coloring eggs. Avoid using non-toxic craft dyes, as they may not be safe for consumption.
- Handle Eggs Carefully: Handle eggs gently to prevent cracking, which can allow bacteria to enter. Discard any cracked eggs immediately.
- Refrigerate Promptly: Refrigerate hard-boiled eggs within two hours of cooking. Dyed eggs should also be refrigerated promptly after dyeing.
- Consume Within One Week: Consume hard-boiled eggs within one week of cooking. Discard any eggs that have been unrefrigerated for more than two hours.
- Wash Hands Thoroughly: Wash your hands thoroughly with soap and water before and after handling eggs.
- Supervise Children: Supervise children closely when dyeing eggs to prevent accidental ingestion of dye or cracked eggshells.
11. Frequently Asked Questions (FAQs) About Dyeing Easter Eggs
Here are some frequently asked questions about dyeing Easter eggs with food coloring:
11.1 Can I dye brown eggs?
Yes, you can dye brown eggs, but the colors will be deeper, jewel tones.
11.2 What kind of food coloring should I use?
Liquid food coloring or gel food coloring (Wilton) works best. Avoid gel food colorings that come in small tubes.
11.3 How long should I leave the eggs in the dye?
The amount of time depends on the color you want to achieve. Refer to our color guide above for specific formulas and soaking times.
11.4 How do I dry the eggs evenly?
Use a cooling rack, toothpick “stand,” or gently pat them down with a rag.
11.5 Can I eat the dyed eggs?
Yes, if you use food-safe dyes and handle the eggs safely.
11.6 What can I do with the dyed eggs?
Incorporate them into an Easter brunch board, create a centerpiece, or hide them for an Easter egg hunt.
11.7 How do I prevent the eggs from cracking while boiling?
Avoid overcrowding the saucepan, use cool water, and bring the water to a boil slowly.
11.8 Can I use vinegar instead of white vinegar?
White vinegar works best, but you can use apple cider vinegar as a substitute.
11.9 How do I store the dyed eggs?
Refrigerate them promptly and consume them within one week.
11.10 What if the dye is not sticking to the eggs?
Try dipping the eggs in a diluted vinegar rinse before dyeing.
12. Expert Tips and Tricks for Stunning Easter Eggs
Elevate your Easter egg dyeing game with these expert tips and tricks. From achieving vibrant colors to creating unique patterns, these insights will help you create truly stunning Easter eggs that will impress everyone.
- Achieving Vibrant Colors:
- Use High-Quality Food Coloring: Invest in high-quality food coloring, such as gel food coloring, for more concentrated and vibrant colors.
- Increase Dye Concentration: Add more food coloring to the dye bath to intensify the color.
- Extend Soaking Time: Leave the eggs in the dye for a longer period to allow the color to fully absorb.
- Creating Unique Patterns:
- Rubber Bands: Wrap rubber bands around the eggs before dyeing to create striped patterns.
- Wax Resist: Use a wax crayon or wax resist to draw designs on the eggs before dyeing. The wax will prevent the dye from coloring those areas.
- Leaf Imprints: Press fresh leaves against the eggs before dyeing to create natural leaf imprints.
- Troubleshooting Common Issues:
- Uneven Coloring: Ensure the eggs are fully submerged in the dye and rotate them occasionally for even coloring.
- Faded Colors: Use a vinegar rinse before dyeing to help the dye adhere better and prevent fading.
- Cracked Eggs: Handle eggs gently to prevent cracking and discard any cracked eggs immediately.
13. The History and Significance of Easter Egg Dyeing
The tradition of dyeing Easter eggs dates back centuries and is rich in symbolism and cultural significance. Understanding the history and meaning behind this beloved custom can add a deeper appreciation to your Easter celebrations.
- Ancient Origins: The practice of decorating eggs predates Christianity and can be traced back to ancient cultures, including the Egyptians, Persians, and Romans, who associated eggs with fertility, rebirth, and new life.
- Christian Symbolism: In Christianity, the egg symbolizes the resurrection of Jesus Christ. The hard shell represents the sealed tomb, and the cracking of the shell symbolizes Jesus emerging from the tomb, signifying new life and hope.
- Early Dyeing Methods: Early Christians dyed eggs red to represent the blood of Christ shed on the cross. Over time, other colors and decorative techniques were introduced, each carrying its own symbolic meaning.
- Cultural Variations: Easter egg dyeing traditions vary across different cultures and countries. Some cultures use natural dyes derived from plants and vegetables, while others employ intricate patterns and designs.
14. Explore More at FOODS.EDU.VN
Ready to take your culinary skills to the next level? FOODS.EDU.VN is your ultimate resource for all things food-related. From detailed ingredient guides to expert cooking techniques and mouthwatering recipes, we’ve got everything you need to become a confident and creative cook.
At FOODS.EDU.VN, we believe that cooking should be an enjoyable and rewarding experience for everyone. Whether you’re a seasoned chef or a beginner in the kitchen, our website offers a wealth of information and inspiration to help you expand your culinary horizons.
Visit FOODS.EDU.VN today and discover a world of culinary possibilities. Unlock your cooking potential and embark on a delicious journey with us!
15. Call to Action
Ready to create your own vibrant Easter eggs? Visit FOODS.EDU.VN for more detailed guides, expert tips, and creative ideas to elevate your Easter celebrations. Discover a world of culinary knowledge and inspiration at your fingertips. Don’t miss out – start your Easter egg dyeing adventure today.
Address: 1946 Campus Dr, Hyde Park, NY 12538, United States
Whatsapp: +1 845-452-9600
Website: foods.edu.vn
