Dye eggs with vinegar and food coloring using this guide from FOODS.EDU.VN and create a delightful Easter tradition with vivid, eye-catching designs. Forget store-bought kits; our simple method ensures vibrant hues every time. Explore innovative egg dyeing techniques and discover how to elevate your Easter egg decorating game with our guide.
1. Unlocking the Secrets of Egg Dyeing with Vinegar and Food Coloring
Egg dyeing, particularly for Easter, has been a cherished tradition across cultures for centuries. Beyond the simple act of coloring, it represents renewal, spring, and festive gatherings. While pre-packaged kits offer convenience, learning How To Dye Eggs With Vinegar And Food Coloring opens a world of creativity and control over the final product. This method is not only accessible and affordable, but also allows for personalized color palettes and unique designs. Here at FOODS.EDU.VN, we believe in empowering you with the knowledge to create memorable culinary experiences.
1.1. A Brief History of Egg Dyeing
The practice of egg dyeing dates back to ancient civilizations, with evidence found in early Mesopotamian and Egyptian cultures. Eggs were often dyed using natural substances such as plant extracts, berries, and minerals, reflecting a deep connection to the earth and its bounty. The symbolism of eggs as a representation of new life and rebirth made them a fitting centerpiece for spring festivals and celebrations.
1.2. The Significance of Vinegar in Egg Dyeing
Vinegar, specifically white vinegar, plays a pivotal role in the egg dyeing process. Its acidity helps to etch the eggshell, creating a slightly porous surface that allows the food coloring to adhere more effectively. This results in richer, more vibrant colors that are less likely to fade or wash off. Without vinegar, the dye may not penetrate the shell properly, leading to pale or uneven results. Vinegar also helps to ensure that the dye sets quickly, minimizing smudging and allowing for crisp, clean designs.
1.3. The Magic of Food Coloring
Food coloring provides the vibrant hues that transform plain eggs into works of art. Available in a wide array of colors, food coloring offers endless possibilities for creative expression. Liquid food coloring is generally preferred for egg dyeing due to its ease of use and consistent results. Gel food coloring can also be used, but it may require more thorough mixing to ensure even distribution. Whether you prefer classic shades or bold, contemporary colors, food coloring allows you to personalize your Easter eggs to match your unique style.
1.4. Safety First: Choosing Food-Safe Dyes
When dyeing eggs, especially those intended for consumption, it’s crucial to use food-safe dyes. This ensures that the eggs remain safe to eat and prevents any potential health risks. Look for food coloring that is specifically labeled as edible and approved for use in food products. Avoid using non-food-grade dyes or paints, as these may contain harmful chemicals that can leach into the egg.
1.5. Why DIY Egg Dyeing is Superior
While pre-packaged egg dyeing kits offer convenience, making your own dye with vinegar and food coloring offers several advantages. Firstly, it’s often more cost-effective, as you likely already have these ingredients in your pantry. Secondly, it allows for greater control over the colors and intensity of the dye. You can experiment with different combinations to create custom shades that perfectly match your vision. Finally, DIY egg dyeing is a fun and engaging activity that can be enjoyed by people of all ages.
2. Gathering Your Arsenal: Essential Supplies for Egg Dyeing
Before you embark on your egg dyeing adventure, it’s essential to gather all the necessary supplies. Having everything within reach will streamline the process and ensure a smooth, enjoyable experience. Here’s a comprehensive checklist of the items you’ll need:
2.1. The Foundation: Eggs
The star of the show, of course, is the eggs. You can use either white or brown eggs, depending on your desired outcome. White eggs will produce brighter, more vibrant colors, while brown eggs will result in more muted, earthy tones. Consider using fresh eggs for the best results.
2.2. The Transforming Agent: White Vinegar
As mentioned earlier, white vinegar is crucial for helping the dye adhere to the eggshell. Ensure you have a bottle of plain white vinegar on hand.
2.3. The Color Palette: Food Coloring
Choose a variety of liquid food coloring in your favorite colors. You can also purchase primary colors (red, yellow, blue) and mix them to create custom shades.
2.4. The Vessels: Cups or Bowls
You’ll need separate cups or bowls for each color of dye. Clear glass or plastic containers are ideal as they allow you to see the color of the dye without having to dip an egg in.
2.5. The Heating Element: Boiling Water
Boiling water is used to dissolve the food coloring and vinegar, creating the dye solution. A kettle or saucepan will work perfectly.
2.6. The Dipping Tools: Spoons or Tongs
Spoons or tongs are used to carefully lower the eggs into the dye and remove them without damaging the shells.
2.7. The Drying Station: Egg Carton or Wire Rack
An empty egg carton or wire rack is used to dry the dyed eggs. This allows air to circulate around the eggs, preventing them from sticking to the surface and ensuring even drying.
2.8. The Protective Barrier: Tablecloth or Newspaper
Protect your work surface from dye stains by covering it with a tablecloth or newspaper.
2.9. The Clean-Up Crew: Paper Towels
Keep a roll of paper towels handy to wipe up spills and dry your hands.
2.10. Optional Extras: Gloves, Apron, Decorations
To protect your hands from dye stains, consider wearing gloves. An apron will also help to keep your clothes clean. You can also gather additional decorations such as stickers, glitter, or paint to further embellish your eggs.
3. The Alchemy of Color: Mixing and Matching Food Coloring
One of the most exciting aspects of dyeing eggs with food coloring is the ability to create custom colors. By understanding the principles of color mixing, you can unlock a world of possibilities and achieve unique, personalized shades.
3.1. The Primary Colors: Red, Yellow, and Blue
The foundation of all colors lies in the primary colors: red, yellow, and blue. These colors cannot be created by mixing other colors together.
3.2. The Secondary Colors: Orange, Green, and Purple
Secondary colors are created by mixing two primary colors together:
- Red + Yellow = Orange
- Yellow + Blue = Green
- Red + Blue = Purple
3.3. Tertiary Colors: Blending Primary and Secondary Hues
Tertiary colors are created by mixing a primary color with a neighboring secondary color:
- Red + Orange = Red-Orange
- Yellow + Orange = Yellow-Orange
- Yellow + Green = Yellow-Green
- Blue + Green = Blue-Green
- Blue + Purple = Blue-Purple
- Red + Purple = Red-Purple
3.4. Achieving Pastel Shades: Dilution is Key
To create pastel shades, simply add a small amount of food coloring to a large amount of water. You can also add a drop of white food coloring to further lighten the color.
3.5. Intensifying Colors: More is More
To achieve more intense colors, add more food coloring to the dye solution. You can also let the eggs sit in the dye for a longer period of time.
3.6. Experimentation is Encouraged
Don’t be afraid to experiment with different color combinations and proportions. The possibilities are endless, and you may discover some unexpected and beautiful shades.
3.7. Color Mixing Chart
| Primary Color | Secondary Color | Resulting Color |
|---|---|---|
| Red | Yellow | Orange |
| Yellow | Blue | Green |
| Red | Blue | Purple |
| Red | Orange | Red-Orange |
| Yellow | Orange | Yellow-Orange |
| Yellow | Green | Yellow-Green |
| Blue | Green | Blue-Green |
| Blue | Purple | Blue-Purple |
| Red | Purple | Red-Purple |
4. The Step-by-Step Guide: Dyeing Eggs with Vinegar and Food Coloring
Now that you’ve gathered your supplies and mastered the art of color mixing, it’s time to dive into the egg dyeing process. Follow these step-by-step instructions for stunning results:
4.1. Hard-Boiling the Eggs: The Foundation of Success
Place the eggs in a saucepan and cover them with cold water. Ensure there’s about an inch of water covering the tops of the eggs. Bring the water to a boil, then remove the pan from the heat, cover it, and let it sit for 12 to 15 minutes. Drain the water and cool the eggs by running them under cold water. This will prevent the yolks from turning green and ensure that the eggs are fully cooked.
4.2. Preparing the Dye Baths: A Colorful Concoction
In separate cups or bowls, combine 1/2 cup of boiling water, 1 teaspoon of white vinegar, and 10-20 drops of food coloring. Stir well to ensure that the food coloring is fully dissolved. Adjust the amount of food coloring to achieve your desired color intensity.
4.3. Dyeing the Eggs: Submerge and Observe
Gently lower the hard-boiled eggs into the dye baths using a spoon or tongs. Make sure the eggs are fully submerged. Let the eggs sit in the dye for 5-10 minutes, or longer for more vibrant colors. Check the eggs periodically to monitor the color development.
4.4. Drying the Eggs: Patience is a Virtue
Remove the eggs from the dye baths and place them on an egg carton or wire rack to dry. Allow the eggs to dry completely before handling them. This will prevent smudging and ensure that the color sets properly.
4.5. Adding the Final Touches: Optional Embellishments
Once the eggs are dry, you can add additional decorations such as stickers, glitter, or paint. Get creative and personalize your eggs to reflect your unique style.
5. Advanced Techniques: Elevating Your Egg Dyeing Game
Once you’ve mastered the basics of egg dyeing, you can explore more advanced techniques to create truly stunning and unique designs.
5.1. Marbling Magic: A Swirling Spectacle
To create a marbled effect, add a few drops of vegetable oil to the dye bath. The oil will create a swirling pattern on the surface of the dye. Gently roll the egg in the dye, allowing the oil to adhere to the shell. The resulting effect is a beautiful, marbled design.
5.2. Ombre Elegance: A Gradient of Color
To create an ombre effect, gradually dip the egg into the dye, increasing the depth of submersion with each dip. This will create a gradient of color, with the bottom of the egg being the darkest and the top being the lightest.
5.3. Tie-Dye Temptation: A Retro Revival
Wrap the egg in rubber bands or string before dyeing. The areas covered by the rubber bands or string will resist the dye, creating a tie-dye effect.
5.4. Wax Resist Wonders: A Protective Shield
Use a wax crayon to draw designs on the egg before dyeing. The wax will resist the dye, leaving the design white. You can also dye the egg multiple times, using different colors and wax designs to create intricate patterns.
5.5. Natural Dyeing Delights: Earth-Toned Elegance
Explore the world of natural dyes using ingredients such as onion skins, beets, and turmeric. These natural dyes will create beautiful, earthy tones.
5.6. Decoupage Dreams: A Paper-Based Paradise
Apply small pieces of decorative paper to the egg using decoupage glue. This will create a unique and personalized design.
5.7. Glitter Glamour: A Sparkling Sensation
Sprinkle glitter onto the wet dye for a sparkling effect. You can also use glue to create glitter designs on the dried eggs.
6. Troubleshooting Tips: Overcoming Common Egg Dyeing Challenges
Even with the best preparation, you may encounter some challenges during the egg dyeing process. Here are some troubleshooting tips to help you overcome common issues:
6.1. Uneven Color: Achieving Consistent Coverage
If the color is uneven, make sure the egg is fully submerged in the dye. You can also try gently rotating the egg in the dye to ensure even coverage.
6.2. Fading Color: Maximizing Vibrancy
If the color is fading, add more food coloring to the dye bath. You can also let the eggs sit in the dye for a longer period of time.
6.3. Cracked Eggs: Preventing Shell Breakage
To prevent eggs from cracking, avoid boiling them too vigorously. You can also add a teaspoon of salt to the water to help strengthen the shells.
6.4. Dye Stains: Minimizing Mess
To minimize dye stains, wear gloves and an apron. Protect your work surface with a tablecloth or newspaper. Wipe up spills immediately with a paper towel.
6.5. Sticky Eggs: Ensuring Smooth Drying
To prevent eggs from sticking to the drying surface, use an egg carton or wire rack. This will allow air to circulate around the eggs, preventing them from sticking.
7. Creative Ideas: Inspiring Egg Dyeing Designs
Need some inspiration for your egg dyeing designs? Here are some creative ideas to get you started:
7.1. Polka Dot Paradise: A Classic Pattern
Use a cotton swab or the eraser end of a pencil to create polka dots on the eggs.
7.2. Striped Sensations: A Linear Look
Use tape or rubber bands to create stripes on the eggs.
7.3. Floral Fantasies: A Botanical Beauty
Use small paintbrushes to paint floral designs on the eggs.
7.4. Geometric Gems: A Modern Marvel
Use stencils or freehand to create geometric designs on the eggs.
7.5. Monogram Magic: A Personalized Touch
Use stencils or freehand to paint monograms on the eggs.
7.6. Animal Antics: A Whimsical World
Use paint or markers to create animal faces on the eggs.
7.7. Character Creations: A Pop Culture Phenomenon
Use paint or markers to create characters from your favorite movies, TV shows, or books.
8. The Culinary Connection: Enjoying Your Dyed Eggs
Once you’ve finished dyeing your eggs, you can enjoy them in a variety of ways. Here are some culinary ideas:
8.1. Deviled Delights: A Classic Appetizer
Transform your dyed eggs into deviled eggs, a classic appetizer that is perfect for parties and gatherings.
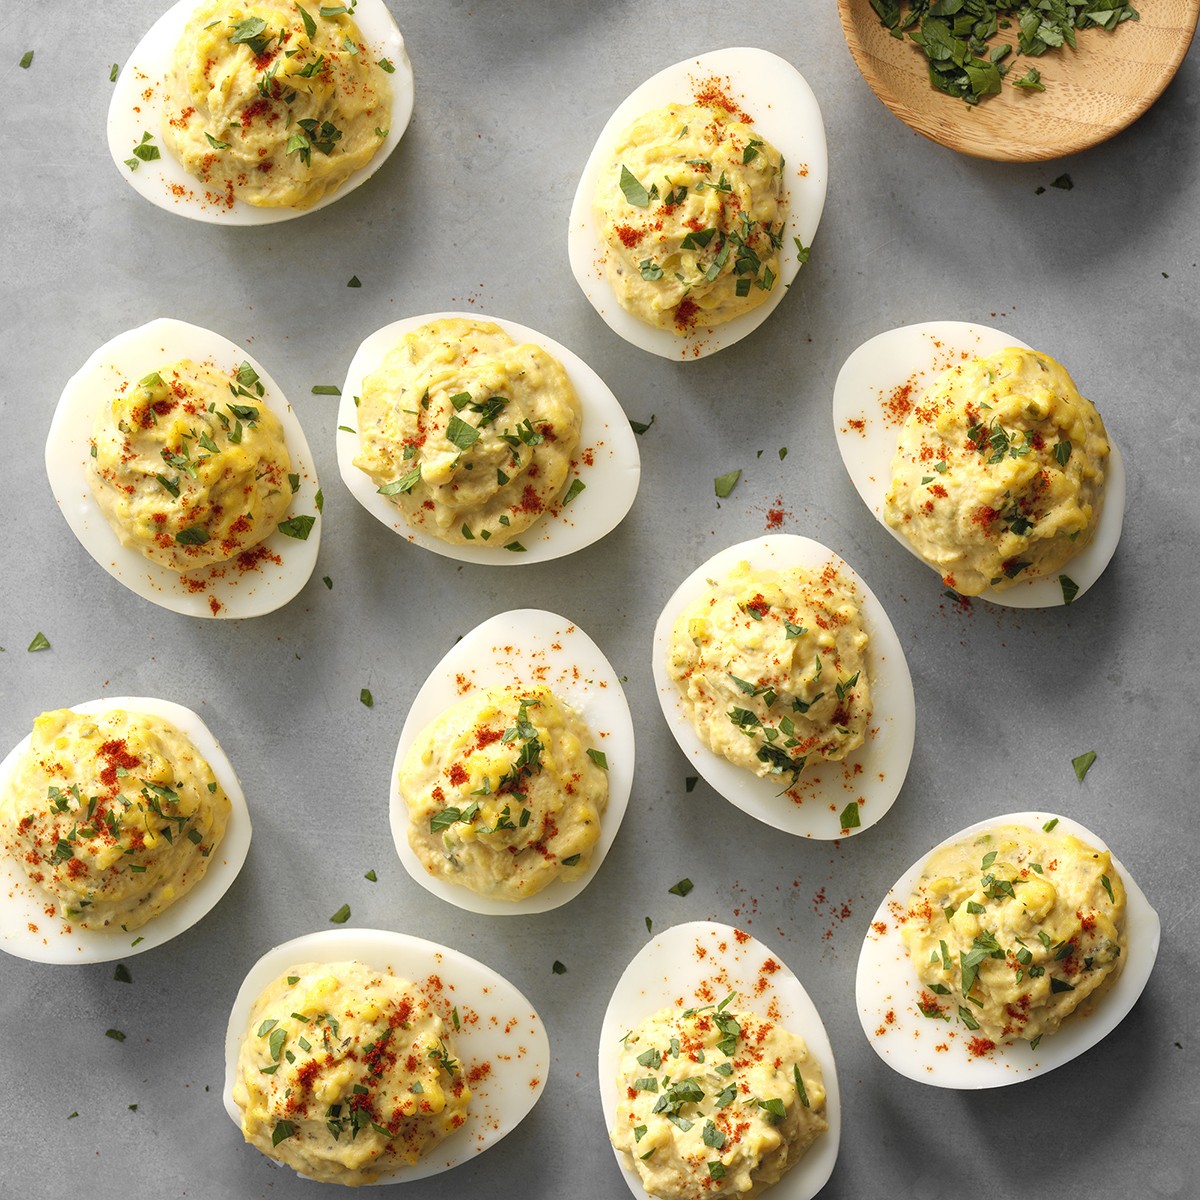 Deviled eggs with herbs
8.2. Egg Salad Extravaganza: A Versatile Spread
Use your dyed eggs to make egg salad, a versatile spread that can be enjoyed on sandwiches, crackers, or salads.
8.3. Salad Sensations: A Protein-Packed Addition
Add your dyed eggs to salads for a protein-packed and visually appealing addition.
8.4. Pickled Perfection: A Tangy Treat
Pickle your dyed eggs for a tangy and flavorful treat that can be enjoyed as a snack or side dish.
8.5. Egg-cellent Garnishes: A Decorative Detail
Use your dyed eggs as a garnish for soups, stews, and other dishes.
9. Storage Secrets: Preserving Your Egg Masterpieces
To ensure that your dyed eggs stay fresh and safe to eat, it’s important to store them properly. Here are some storage tips:
9.1. Refrigeration Required: Keeping Eggs Cool
Store your dyed eggs in the refrigerator at a temperature of 40°F (4°C) or below.
9.2. Time is of the Essence: Consuming Promptly
Consume your dyed eggs within one week of dyeing them.
9.3. Shell Integrity: Inspecting for Cracks
Discard any eggs with cracked shells, as these may be contaminated with bacteria.
9.4. Proper Packaging: Preventing Contamination
Store your dyed eggs in a clean container to prevent contamination.
9.5. Temperature Control: Avoiding Perishable Conditions
Avoid leaving your dyed eggs at room temperature for more than two hours.
10. Answering Your Queries: Frequently Asked Questions (FAQs)
Here are some frequently asked questions about dyeing eggs with vinegar and food coloring:
10.1. Can I use brown eggs?
Yes, you can use brown eggs, but the colors will be more muted.
10.2. Can I use gel food coloring?
Yes, you can use gel food coloring, but it may require more thorough mixing.
10.3. Can I reuse the dye?
No, it’s not recommended to reuse the dye, as it may be contaminated with bacteria.
10.4. How long do the eggs last?
Dyed eggs will last for about one week in the refrigerator.
10.5. Are the dyes safe to eat?
Yes, if you use food-safe dyes.
10.6. Can I dye the eggs without vinegar?
Vinegar helps the dye adhere to the eggshell.
10.7. What do I do if an egg cracks?
Discard any cracked eggs.
10.8. How do I get the colors to be more vibrant?
Use more food coloring or let the eggs sit in the dye longer.
10.9. How do I prevent the eggs from cracking?
Avoid boiling the eggs too vigorously and add salt to the water.
10.10. How do I store the eggs?
Store the eggs in the refrigerator in a clean container.
Dive Deeper into Culinary Arts with FOODS.EDU.VN
We’ve explored the vibrant world of egg dyeing with vinegar and food coloring, from the historical roots of this colorful tradition to advanced techniques for creating stunning designs. At FOODS.EDU.VN, we’re passionate about providing you with the knowledge and inspiration to excel in all your culinary endeavors.
More to Discover
- Detailed Recipes: Learn to make deviled eggs.
- Ingredient Guides: Learn about vinegar.
- Technique Tutorials: We teach everything from hard boiling to marbling.
Stay Connected
- Address: 1946 Campus Dr, Hyde Park, NY 12538, United States
- WhatsApp: +1 845-452-9600
- Website: FOODS.EDU.VN
Ready to Elevate Your Culinary Skills?
Don’t stop here! FOODS.EDU.VN offers a wealth of information, from basic cooking techniques to advanced culinary arts. Whether you’re looking to perfect your Easter egg dyeing skills or explore new cuisines, our website is your ultimate resource. Visit foods.edu.vn today and unlock a world of culinary possibilities.