Embark on a delightful gluten-free sourdough adventure with What The Fork Food Blog, your trusted resource for amazing recipes and expert guidance. Unlock the secrets to creating a vibrant, bubbly starter and crafting delicious, wholesome bread with our comprehensive guide, designed to make gluten-free sourdough baking accessible and enjoyable for everyone. Delve deeper into the world of gluten-free flours, starter care, and baking techniques, with easy-to-follow advice and recipes that celebrate the incredible possibilities of gluten-free sourdough.
1. Discovering the Magic of Sourdough with What The Fork Food Blog
Sourdough baking, a time-honored tradition, is now wonderfully accessible to those following a gluten-free lifestyle thanks to pioneers like What The Fork Food Blog. At its heart, sourdough is a symphony of flour, water, and time, orchestrated by wild yeasts and beneficial bacteria. This natural fermentation process not only gives sourdough its distinctive tangy flavor but also unlocks a treasure trove of health benefits, making it a delightful and nutritious choice for everyone.
1.1. The Essence of Sourdough Starter
At the very foundation of every magnificent loaf of sourdough lies the starter – a dynamic culture of flour and water teeming with life. This isn’t just an ingredient; it’s a living entity that requires care and attention. As it ferments, it develops a unique community of wild yeasts and bacteria, each contributing to the bread’s complex flavor profile and airy texture. What The Fork Food Blog expertly guides you through the nurturing of your starter, turning it into a reliable workhorse for all your gluten-free baking endeavors.
1.2. Why Choose Gluten-Free Sourdough?
For those avoiding gluten, sourdough bread offers a delicious and nutritious alternative to conventional bread. The fermentation process breaks down some of the complex carbohydrates in the flour, potentially making it easier to digest. Furthermore, sourdough fermentation unlocks nutrients and enhances their bioavailability, meaning your body can absorb them more efficiently. With What The Fork Food Blog, discover how to create gluten-free sourdough that is not only safe for your dietary needs but also bursting with flavor and goodness.
1.3. Unveiling Five Essential User Search Intentions
When exploring gluten-free sourdough, users typically have these key intentions:
- Understanding the Basics: Grasping the fundamentals of gluten-free sourdough, including what it is and why it’s a worthwhile alternative.
- Mastering the Starter: Learning how to create and maintain a thriving gluten-free sourdough starter from scratch.
- Troubleshooting Challenges: Identifying and resolving common issues encountered during the sourdough process.
- Exploring Recipes: Discovering a variety of delicious and reliable gluten-free sourdough bread recipes.
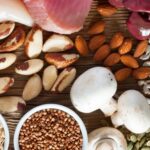
- Optimizing Health Benefits: Understanding the nutritional advantages of gluten-free sourdough and how it fits into a balanced diet.
2. Crafting Your Gluten-Free Sourdough Starter: A Journey with What The Fork Food Blog
Creating your own gluten-free sourdough starter is an exciting and rewarding culinary project. What The Fork Food Blog simplifies the process, offering clear, step-by-step instructions to help you cultivate a lively and dependable starter, ensuring a successful baking journey.
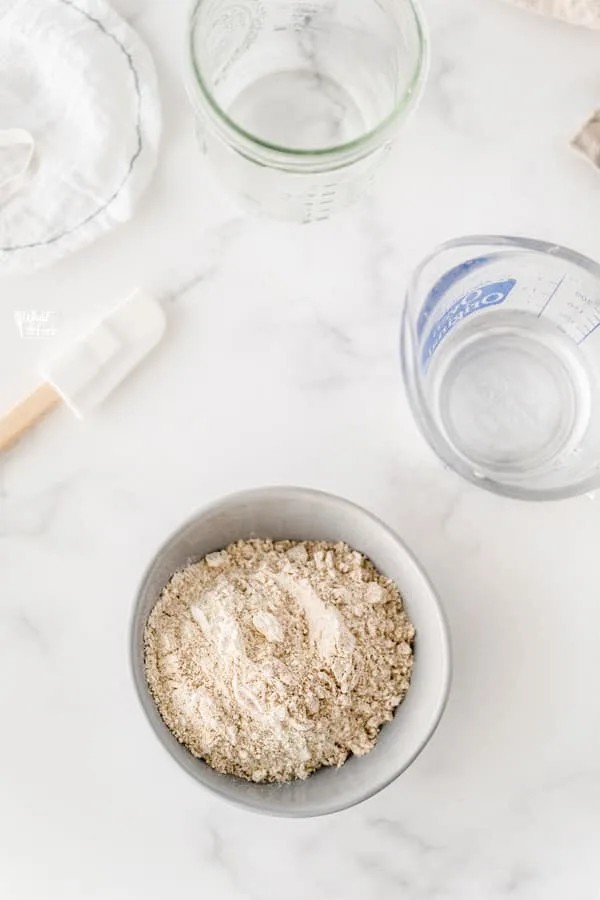
2.1. Gathering Your Essential Ingredients
You only need two simple ingredients to begin your gluten-free sourdough adventure:
- Gluten-Free Flour: The type of flour you select will greatly influence the flavor and texture of your starter and, consequently, your bread. What The Fork Food Blog highly recommends experimenting with different gluten-free flours to discover your perfect match.
- Water: Opt for bottled or filtered water. Tap water often contains chlorine and other chemicals that can inhibit the growth of beneficial bacteria and wild yeasts.
2.2. Assembling Your Toolkit
Having the right equipment on hand will make the process of creating and maintaining your starter much easier:
- Glass Jar: A wide-mouth mason jar or a Weck jar works perfectly, providing ample space for your starter to grow.
- Digital Kitchen Scale: Accurate measurements are vital in sourdough baking. A digital scale ensures you achieve the correct flour-to-water ratio.
- Non-Metallic Mixing Utensil: A silicone spatula or wooden spoon is ideal for stirring your starter. Avoid metal utensils, as they can react with the starter.
2.3. Step-by-Step Starter Creation Guide
What The Fork Food Blog provides this straightforward guide to help you create a robust gluten-free sourdough starter:
- Day 1: In your clean glass jar, combine 25 grams of gluten-free flour with 25 grams of water. Stir until well mixed, ensuring no dry clumps remain.
- Day 2: Simply observe. You might see a few tiny bubbles, but don’t worry if nothing seems to be happening just yet.
- Days 3-6: Stir your starter. Discard all but 25 grams of the mixture. Add 25 grams of gluten-free flour and 25 grams of water to the remaining starter. Stir well, ensuring everything is thoroughly combined.
- Days 7-10: Repeat the process. Discard all but 25 grams of the starter. Add 50 grams of gluten-free flour and 50 grams of water. Stir well to combine.
- Days 11-14: Continue the feeding schedule. Discard all but 25 grams of the starter, then add 75 grams of gluten-free flour and 75 grams of water. Stir thoroughly.
- After Day 14: By now, your starter should be showing clear signs of activity – doubling in size, filled with bubbles, and having a slightly tangy aroma. If it is, you can begin using it in your gluten-free sourdough recipes. Alternatively, you can store it in the refrigerator, feeding it once a week to maintain its vitality.
2.4. Unlock Exclusive Expert Tips
- Embrace Experimentation: What The Fork Food Blog encourages you to try different gluten-free flours to discover your preferred flavor and texture.
- Maintain Cleanliness: Always use clean utensils and a clean jar to prevent unwanted bacteria from contaminating your starter.
- Patience is Key: Creating a sourdough starter requires patience. Don’t get discouraged if it takes longer than expected.
3. Selecting the Perfect Gluten-Free Flour: Guidance from What The Fork Food Blog
The type of gluten-free flour you choose significantly impacts the taste and texture of your sourdough. What The Fork Food Blog offers valuable insights into various gluten-free flours, helping you make an informed decision.
3.1. Recommended Gluten-Free Flours
- Bob’s Red Mill 1:1 Gluten-Free Baking Flour: A popular and reliable choice for beginners.
- Sorghum Flour: A nutritious whole-grain option with a slightly sweet flavor.
- Brown Rice Flour: A versatile flour that provides a slightly nutty flavor.
- Buckwheat Flour: Despite its name, buckwheat is gluten-free and adds a distinctive earthy flavor to your sourdough.
- Teff Flour: An ancient grain that lends a slightly molasses-like flavor.
- Oat Flour: Use certified gluten-free oat flour to ensure it’s safe for those with celiac disease.
3.2. Flours to Avoid
- White Rice Flour: Best used in combination with other flours due to its lack of flavor and nutritional value.
- Starches: While starches can be added to gluten-free flour blends, they shouldn’t be used as the sole flour for your starter.
- Nut Flours: Nut flours are high in fat and can inhibit the fermentation process.
4. Troubleshooting Your Gluten-Free Sourdough Starter: Expertise from What The Fork Food Blog
Even with the best guidance, challenges can arise during the sourdough process. What The Fork Food Blog is here to help you troubleshoot common issues and achieve sourdough success.
4.1. Addressing Common Starter Problems
- Mold: If you spot mold on your starter, discard it immediately and begin again with a fresh batch.
- “Hooch” (Liquid on Top): This harmless liquid is a byproduct of fermentation and indicates that your starter is hungry. You can either stir it back in or pour it off before feeding.
- Slow Activity: If your starter isn’t doubling in size or showing signs of activity, it may need a warmer environment or a different type of flour.
4.2. Frequently Asked Questions (FAQs)
- Can sourdough starter go bad? Yes, but with proper care, it can last indefinitely.
- How long does it take for a sourdough starter to mature? It can take anywhere from one to two weeks, depending on the environment and flour.
- How do you know when the sourdough starter is ready? A mature starter will double in size, have a bubbly texture, and a pleasant tangy aroma.
- What is a ripe sourdough starter? It’s a starter at its peak activity, ready for baking.
- Do I have to discard? Discarding is essential to maintain the correct ratio of flour, water, and microorganisms in your starter.
5. Baking with Your Gluten-Free Sourdough Starter: Recipes and Inspiration from What The Fork Food Blog
Once your starter is active and bubbly, it’s time to start baking! What The Fork Food Blog provides a range of delicious gluten-free sourdough recipes to inspire your baking journey.
5.1. Gluten-Free Sourdough Bread Recipe
This basic recipe serves as a foundation for creating a variety of gluten-free sourdough breads:
Ingredients:
- 150g active gluten-free sourdough starter
- 300g gluten-free flour blend
- 250g warm water
- 8g salt
Instructions:
- In a large bowl, combine the starter, flour, and water. Mix until a shaggy dough forms.
- Let the dough rest for 30 minutes (autolyse).
- Add the salt and knead the dough for 5-7 minutes.
- Place the dough in a lightly oiled bowl, cover, and let it rise for 4-6 hours, folding every hour.
- Shape the dough into a round or oblong loaf and place it in a lined banneton basket.
- Cover and refrigerate overnight.
- Preheat your oven to 450°F (232°C) with a Dutch oven inside.
- Carefully remove the Dutch oven, place the dough inside, score the top, and cover with the lid.
- Bake for 20 minutes with the lid on, then remove the lid and bake for another 25-30 minutes, or until golden brown.
- Let the bread cool completely before slicing and enjoying.
5.2. Delicious Recipe Variations
- Gluten-Free Sourdough Pizza Crust: Use your starter to create a flavorful and crispy pizza crust.
- Gluten-Free Sourdough Pancakes: Add a tangy twist to your breakfast with sourdough pancakes.
- Gluten-Free Sourdough Chocolate Cake: Indulge in a decadent chocolate cake with the unique flavor of sourdough. You can find the easy gluten-free sourdough chocolate cake recipe on What The Fork Food Blog.
6. Health Benefits of Gluten-Free Sourdough: Insights from What The Fork Food Blog
Gluten-free sourdough is not only delicious but also offers several potential health benefits, as highlighted by What The Fork Food Blog.
6.1. Enhanced Digestibility
The fermentation process in sourdough bread breaks down gluten and complex carbohydrates, potentially making it easier to digest, particularly for those with gluten sensitivities.
6.2. Improved Nutrient Availability
Sourdough fermentation can increase the bioavailability of certain nutrients, such as minerals, allowing your body to absorb them more efficiently.
6.3. Lower Glycemic Index
Some studies suggest that sourdough bread may have a lower glycemic index compared to other types of bread, which can help regulate blood sugar levels. According to a study published in the “Journal of Agricultural and Food Chemistry,” sourdough fermentation can reduce the glycemic index of bread due to the breakdown of carbohydrates by lactic acid bacteria.
6.4. Probiotic Potential
While the baking process kills most of the live bacteria in sourdough bread, some beneficial compounds produced during fermentation may still have a positive impact on gut health.
7. Mastering the Art of Sourdough Baking: Advanced Techniques from What The Fork Food Blog
For seasoned bakers looking to refine their gluten-free sourdough skills, What The Fork Food Blog offers advanced techniques and insights.
7.1. Understanding Hydration Levels
Hydration, the ratio of water to flour in your dough, is a crucial factor in sourdough baking. Experimenting with different hydration levels can significantly impact the texture and crumb of your bread. High-hydration doughs (75-85%) tend to produce open, airy crumbs, while lower-hydration doughs (65-70%) result in tighter, denser crumbs. Adjusting hydration levels allows you to fine-tune the characteristics of your bread to match your preferences.
7.2. Optimizing Fermentation Time
The length of fermentation significantly affects the flavor and texture of your sourdough. A longer fermentation period enhances the bread’s tangy flavor and allows for better gluten development. However, over-fermentation can lead to a flat, sour loaf. What The Fork Food Blog suggests monitoring your dough closely and adjusting the fermentation time based on your kitchen temperature and the activity of your starter.
7.3. The Importance of Scoring
Scoring the surface of your sourdough loaf before baking is not just for aesthetics; it also serves a practical purpose. Scoring allows the bread to expand properly in the oven, preventing it from bursting at weak points. The depth and angle of your score can influence the shape and appearance of your finished loaf. Experiment with different scoring patterns to create visually stunning and perfectly risen bread.
7.4. Exploring Different Baking Methods
What The Fork Food Blog encourages you to explore various baking methods to achieve unique results. Baking in a Dutch oven creates a steamy environment that promotes a crisp crust and an open crumb. Alternatively, baking on a preheated baking stone with a tray of water in the oven can achieve a similar effect. Experiment with different baking temperatures and times to fine-tune your technique.
8. Sustainable Sourdough Baking: Tips from What The Fork Food Blog
Sourdough baking can be a sustainable practice, minimizing food waste and utilizing natural ingredients. What The Fork Food Blog shares tips on how to make your sourdough baking more eco-friendly.
8.1. Utilizing Sourdough Discard
Instead of discarding the excess starter during feedings, incorporate it into other recipes. Sourdough discard can be used to make crackers, pancakes, waffles, and even pizza dough. This reduces food waste and adds a unique tangy flavor to your creations. What The Fork Food Blog offers a collection of delicious sourdough discard recipes to inspire you.
8.2. Composting Food Waste
Composting food scraps, including discarded starter and bread crusts, is an excellent way to reduce your environmental impact. Compost enriches the soil and reduces the need for chemical fertilizers. What The Fork Food Blog recommends researching local composting programs or starting your own backyard compost bin.
8.3. Supporting Local and Sustainable Flour Producers
Whenever possible, source your gluten-free flours from local and sustainable producers. This supports local economies and reduces the environmental impact of transportation. Look for flours that are grown using organic and sustainable farming practices.
8.4. Reducing Packaging Waste
Opt for flours and other ingredients that are packaged in eco-friendly materials, such as paper or glass. Consider buying in bulk to reduce packaging waste. What The Fork Food Blog suggests exploring local zero-waste stores for sustainable ingredient options.
9. Elevating Your Gluten-Free Sourdough: Flavor Enhancements from What The Fork Food Blog
Unlock a world of flavor possibilities by experimenting with different additions to your gluten-free sourdough. What The Fork Food Blog inspires you to get creative and personalize your loaves.
9.1. Incorporating Herbs and Spices
Adding herbs and spices to your dough can create a symphony of flavors. Rosemary, thyme, garlic powder, and onion powder are excellent additions to savory sourdough loaves. Cinnamon, nutmeg, and cardamom can enhance sweet sourdough creations. What The Fork Food Blog recommends experimenting with different combinations to discover your favorites.
9.2. Adding Seeds and Nuts
Seeds and nuts add texture, flavor, and nutritional value to your sourdough. Sunflower seeds, pumpkin seeds, flax seeds, and walnuts are all excellent choices. Toasting the seeds and nuts before adding them to the dough enhances their flavor and aroma. What The Fork Food Blog suggests experimenting with different ratios and combinations to create unique loaves.
9.3. Infusing with Dried Fruits
Dried fruits, such as cranberries, raisins, and apricots, add sweetness and chewiness to your sourdough. Soaking the dried fruits in warm water or juice before adding them to the dough prevents them from drawing moisture from the dough. What The Fork Food Blog recommends experimenting with different dried fruits and complementary spices, such as cinnamon or cardamom.
9.4. Exploring Cheese and Vegetable Additions
Cheese and vegetables can transform your sourdough into a savory delight. Cheddar cheese, Parmesan cheese, and roasted vegetables, such as onions, peppers, and zucchini, are all excellent additions. What The Fork Food Blog suggests experimenting with different cheese and vegetable combinations to create unique and flavorful loaves.
10. Gluten-Free Sourdough Around the World: Global Inspirations from What The Fork Food Blog
Discover the diverse world of sourdough baking with global-inspired recipes from What The Fork Food Blog.
10.1. Italian-Inspired Sourdough Focaccia
Focaccia is a classic Italian flatbread that can be easily adapted to gluten-free sourdough. What The Fork Food Blog provides a recipe for a flavorful focaccia topped with olive oil, rosemary, and sea salt. Experiment with different toppings, such as tomatoes, olives, and onions, to create your own unique variations.
10.2. Irish-Inspired Sourdough Soda Bread
Soda bread is a traditional Irish bread that uses baking soda instead of yeast for leavening. What The Fork Food Blog offers a gluten-free sourdough version that combines the tang of sourdough with the simplicity of soda bread. Add raisins, caraway seeds, or orange zest to create different flavor profiles.
10.3. French-Inspired Sourdough Baguettes
Baguettes are a classic French bread that requires a specific technique to achieve their characteristic crust and crumb. What The Fork Food Blog provides a gluten-free sourdough recipe that captures the essence of a traditional baguette. Experiment with different flours and hydration levels to fine-tune your technique.
10.4. Asian-Inspired Sourdough Buns
Buns are a popular bread in many Asian countries. What The Fork Food Blog offers a gluten-free sourdough version that can be used for sweet or savory fillings. Experiment with different fillings, such as red bean paste, custard, or barbecued pork, to create your own unique buns.
Gluten-free sourdough baking is an adventure, and What The Fork Food Blog is your reliable guide. From creating your starter to mastering techniques and exploring global flavors, embrace the journey and savor the delicious results.
For more inspiration and in-depth knowledge, visit FOODS.EDU.VN, where you can explore a world of culinary expertise. Our team is committed to helping you every step of the way on your gluten-free sourdough baking journey. Do you have any questions or need assistance? Feel free to contact us at 1946 Campus Dr, Hyde Park, NY 12538, United States, via WhatsApp at +1 845-452-9600, or visit our website at foods.edu.vn for more information and support.